I’m definitely not the first person to stencil or paint drapes and I got inspiration for this in blogland, I’m sure and there are many tutorials with the click of a Google search. One in particular that caught my eye was Carmel’s stenciled drapes, so pretty! And my friend, Beth, did a fabulous trellis pattern on her stenciled drapes, which I love. So, when I decided to tackle stenciling 3 pairs of drapes for my bedroom, I knew it might be quite the chore. The first 2 took me the longest, I was trying to be really careful and finally just decided that I could go a little faster and they would look just as good.

This is not a project for an OCD person, so if that is you, you may want to reconsider doing it. You have to embrace the imperfection of stenciling on fabric with paint. It’s not going to be perfect, but I gave up perfection many years ago (a non-lofty goal if you ask me), so I am OK with the flaws and mistakes along the way. As long as the finished product looks great and works the way I planned, then I’m OK with imperfection.
So, this project took me about 1 1/2 hours per panel for the first one and as it went along, I got it down to about 1 hour per panel, so really no more than about 8-9 hours total in this whole project, from stenciling the drapes and hemming them, to putting up the rods and hanging them. I had some family members question my sanity when they found out I was stenciling not one pair of panels, but 3. But, they will probably agree with me now, that it was quite worth the time and effort spent on them.
Because I think they look like a million bucks (give or take a few thousand!). ![]()
My stencil, the Ikat Samarkand came from Cutting Edge Stencils. Big thanks to Cutting Edge for sending me this stencil to try out, they are a former sponsor of mine.
It took 12 passes of the stencil to cover one drapery panel. Just so you know. Now I’ll show you how I did it.
I began my first panel over at my parents house right before Christmas. Lauren was home and she helped me with this one, but then the rest I did at my house in the laundry room. You need a large area to spread this out, so plan for that.
Here’s what you need:
Panels
Paint
Foam roller
Tape (yes, I prefer FrogTape!)
Stencil of your choice (unless you are one of those women who makes her own stencil, in that case, I hate you!) 🙂

These are Ikea Ritva panels, 96” long for $24.99 a pair. I needed 3 pair, so total of $75 for 3 windows is about the most cost effective thing you can do for window treatments. I know that a designer might wrinkle up a nose at my frugal stenciled drapes, but that doesn’t matter to me. I’m very proud of how they turned out. Many are using drop cloths, but really, you can’t go wrong with these Ikea panels. They are a nice weight, linen like fabric and ready to hang.

I ironed each of my panels before I starting stenciling.

And I got out the yellow FrogTape to begin with and finished up with the green. You have to tape down these stencils really well and even then the middle will pop up a bit, it’s almost impossible to keep them completely flat. But that’s OK, they will turn out fine anyway. In fact, just a warning, when you are working with stencils, they tend to get stretched out a bit as you are using them, like a floppy pair of jeans that’s been worn a few days. But, it all works out in the end and you won’t notice a few little areas that might be “off”, like when you are matching up the match points from spot to spot, they won’t all be perfectly matched.

The biggest trepidation comes at this point when I actually poured out the paint in a pie tin and got ready to roll it on. For my paint, I just went to Sherwin Williams and ordered up a quart of their sample paints at $6. The color I used is Santorini Blue, but it wasn’t quite dark enough, so I took it back and had some black added. I was going for a navy hue, or at least a deep blue. Now many tutorials will say to add fabric medium to your paint. I was going to do that, I even bought a bottle, but forgot to take it to my mom’s house when I started, so I just left it out. Some I read said it didn’t make any difference. Yes, your fabric will feel a little crunchy with the paint on there, but I don’t go around petting my drapes that are hanging up anyway. So, I didn’t do the fabric medium. I think it’s perfectly fine without it.
I started in the top middle and measured to the middle and that’s where I put my first stencil. I worked my way down the panel, moving the stencil 4 times in the middle, then moved it over, lining up the stencil and overlapping where I’d already painted, worked my way down the right side and then the left side, until done. 12 passes total.
")
It’s really scary when you first start rolling it on that bright white fabric. But, then the stencil is peeled back and you can see the handiwork left behind. Oh, I’m loving it!

So, as I said, the stencil had to get moved 12 times for each panel, but it really does go pretty fast once you get started. I would recommend only doing one panel per day, because the paint starts getting really gunked up on the stencil after rolling over it 12 times and you have to take the stencil outside (in the cold and rain in my case) and hose that thing off, in between. If you don’t hose it off, it will dry and be really gunked up, so that’s my suggestion. One panel per day, hose it off in between.

There’s mom in the background in the kitchen as I was working on the first one. Lauren is taking pics of me in action. Roll and roll, pick up the stencil, reposition and keep going. The great thing about these big stencils is that they overlap and you line up what you’ve just done with the new spot and keep rolling. It’s not hard, just time consuming. If you are concerned about having perfectly crisp outlines, you may have to give up that notion. Mine are far from perfectly crisp, but really this Ikat is very forgiving and doesn’t have to be perfectly crisp.

Be sure and roll off excess paint before you begin. I had a piece of cardboard and every time I dipped in the paint, I rolled off the excess. Keep rolling until the fabric looks as dark as you want it.

Like this! Rolling on fabric will give almost a hand painted look, which I really loved. It will be darker and lighter in different areas and I was perfectly fine with that. It’s hard to keep your fabric all nice and flat at all times, that’s why it’s important to find a spot where you can lay them out.

Back to my laundry room, I brought in the sawhorses that we used and laid an old door on top. I covered the door with an old sheet to absorb any excess paint. Again, it’s hard to keep that sheet underneath from wrinkling up, so a big sheet of cardboard would be even better. Start in the middle and work down, then move sideways and down. You really don’t have to worry about overlapping on an area that has just been painted. The paint dries very fast once you roll it on and it will be dry in no time flat.

Remember, you are rolling off excess paint!

One by one, those panels will all be painted and then before you know it, all 6 are done! Yippee! It did take me 6 days, at about an hour at a time. And I rinsed off my stencil between each one. Not all the paint will come off, so after you are finished with all of them, you can go back and clean the stencil with a product like Goof Off.

Keep going, you’ll have lots of bits of dried paint on the stencil by this time, but the end is in sight.

I was so happy to get to the last panel.

Here’s an example of the shadings. Some areas are lighter and some darker and that gives it a nice hand painted look.

Oh, and you may have a few blunders too, like this paint splotch. This didn’t even show up after I came down the side, but there are many little spots on my drapes that no one will ever notice now that they are hung. The overall look is what you are after, hanging on the rods.

Once the panels were stenciled and dried, I got hemming tape. This stuff works great too. Got this at Joann’s.

I got out the ironing board (which doesn’t see much action these days) and got to hemming all my panels. I decided to hang the panels from the rods first and then pin them where I wanted them, just touching the floor. I pinned them and turned them under, ironing a crease in place. These drapes aren’t lined for this price and you can see a little of the paint came through the other side, but it’s not bad at all.

Then I took the hemming tape and placed it right under that edge, placing a damp cloth on top and adding the hot steamy iron to it. Move all the way across and your hem will be in place. Easy peasy!

I did this method to all 6 panels and they were then ready to hang back up and fluff.

Here’s my lesson on hanging drapes high and wide.
This is one of the best things I’ve learned over the years and it really does fool the eye into making your windows seem so much larger and more dramatic. I hung the rods as close to the ceiling as I could get and then measured out about 12 to 14 inches or so. This window had to be modified a bit because the right side runs into the wall, but just try to get both sides even or close to even. I usually try to have the leading edge of the panel hit the outside trim molding on the window on either side and that way the window itself doesn’t lose any light. You’ll still get plenty of light in and your panels will just frame the windows.

These panels from Ikea have a built in shirring on the back, so that’s how I hung these. It also has a rod pocket so you can choose the method you want to use. I loved the shirring and it gives a built in pleated look to the panels.

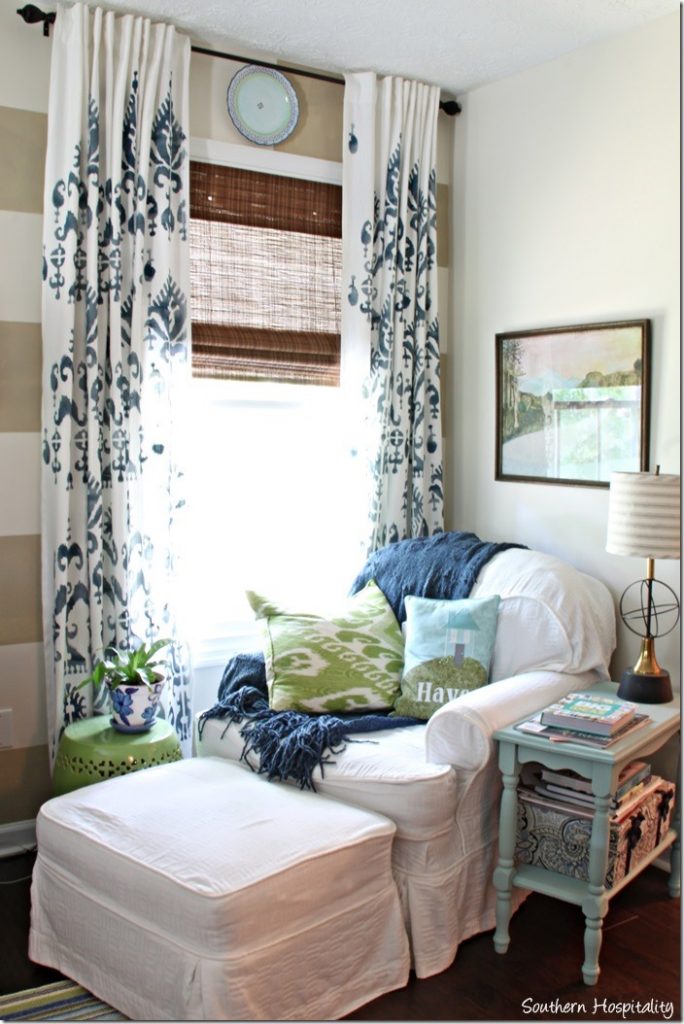
And that’s how my windows went from THIS…..

To THIS! Fabric has that uncanny way of softening up any windows and adding such personality to the room. I’m a big believer in using them in most every room of the house and I love them paired with bamboo shades.
Your can see my whole bedroom reveal post here!
![]()
Note: This post is sponsored by FrogTape. I’m a brand ambassador for FrogTape and use their products to do projects around my house. I would be doing these projects anyway, but need to tell you that I am compensated for my time to share these projects.
Joining Beth’s Tutorials and Tips party this week!


Hi Rhoda,
I was wondering how you wash these curtains. Does the paint hold up to machine washing or do you have to dry clean them?
HI, Margaret, I don’t wash my curtains, never have. They get dusty not dirty, so a good vacuuming or tossing in the dryer should do the trick.
They are so so gorgeous! LOVE that pattern!
omg I love these curtains soooo much! Where did you get that stencil (and can I borrow it?! lol)??? I just made an ottoman (out of a pallet!) and used ikat fabric for it…I am obsessed with the ikat! You can see it here if you want http://domesticsuperhero.com/2012/10/18/diy-tufted-ikat-ottoman-from-upcycled-pallet/ Can you let me know where you found that great stencil? I am also in the ATL (Alpharetta) area!
Hi, Allyson, thanks for stopping by. Nice to meet you! The stencil link is right up in my post, from Cutting Edge Stencils. Look at the paragraph right before the list of supplies.
Just wondering why you didn’t use fabric paint instead of wall paint.
I just used regular wall paint, because I don’t think fabric paint makes much difference from what I’ve heard. I could get the color I wanted. I don’t think fabric paint matters unless you’re going to wash something and I don’t wash my drapes in the washing machine.
You are amazing… love these panels!
Gorgeous! I love this look very much. It’s like classy and shabby chic had a baby. I like the fact there are tiny imperfections with each one, to me it’s a sign of being handmade with love. I’m going to do a smaller project similar with a good quality burlap and use my vintage chic French inspired stencils I think! Yours turned out beautiful and really tied the room together. Great tutorial! Well done
You know ,I loved those curtains when you did those back then and they turned out so pretty , and I still love them. I loved your bedroom , it was so airy and comfortable .very pretty room
THank you, Carole, it was a great bedroom for me!
Your curtains turned out fantastically! I love them! I’ve been wanting to do this on pillow cases. Do you think that fabric would work or be too thin? Thanks so much. Pinned 🙂
HI, Cindy, I think it would work fine on pillowcases, just go slow and don’t use too much paint.
This is a great project! I love the way they turned out. I have stenciled pillows but never anything this large. Well done. Makes me want to get creative! Thanks for sharing, Rhoda!