I’ve noticed over the years when I was doing consultations and visiting homes, that there are a few things that jump out at me when I look at a space and these 5 tips will make your space even better. Things that could be improved upon with just a little work and effort will bring your room to life. These are ways to enhance your room and make it better. So, let’s get started with the first one.
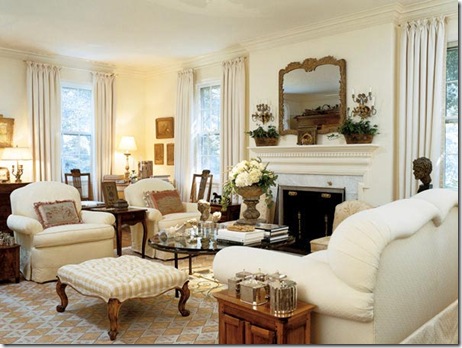
(Southern Accents: Photo: Antoine Bootz, Designer: Bobbi Smith)
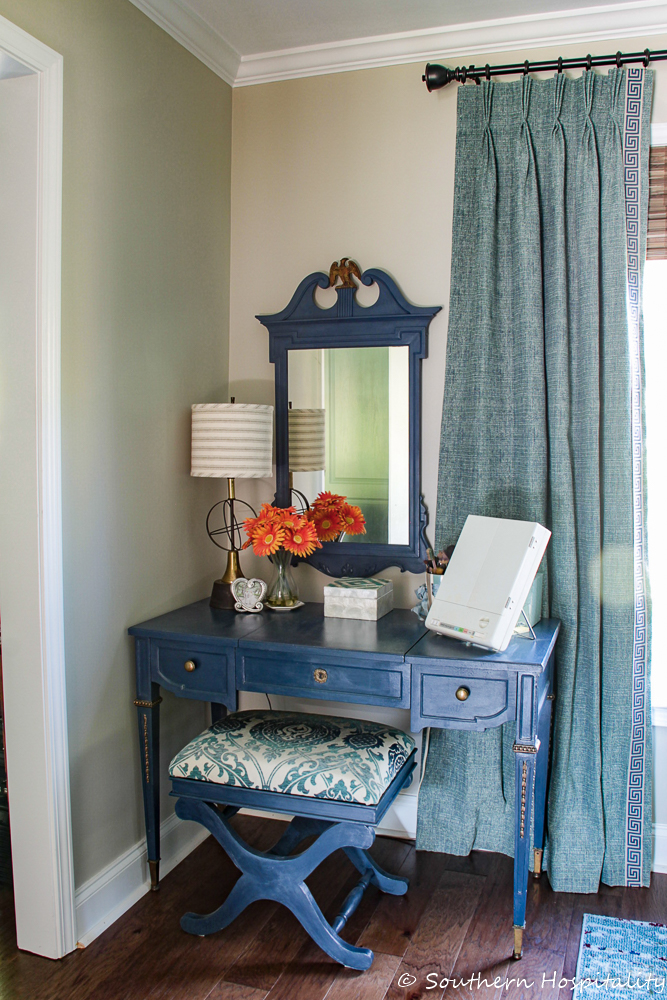
Here’s a shot of our master bedroom with the drapes hung almost to the crown molding.
1. Hang your drapes as high as you can.
One thing I learned a few years ago when I started having drapes made and hanging them up was this, hang them as high as you can and wider than the window. All the way to the crown molding. Picture #1 is a good example of how it looks to hang your drapes all the way up to the crown. Also notice that the window panel skims the outside of the window frame and doesn’t block the window itself. If you hang ‘em high and take them out wider than the windows, it really gives the illusion of much bigger windows and lets in a lot of light. You don’t want to block that beautiful light. I’ve done this in my house on all the windows and it really works! Gives those windows much more presence and importance.
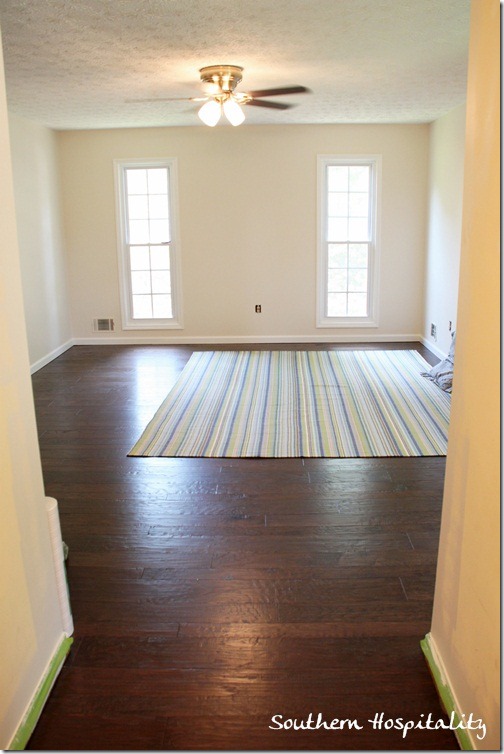
Here’s my old house for example. See how narrow the windows are?
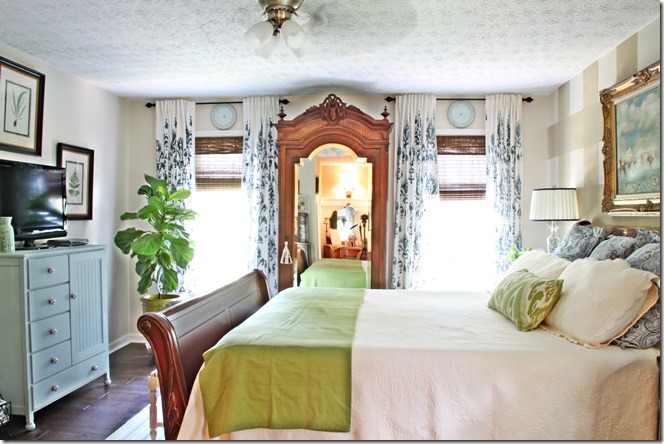
Same windows! I just took the drapes all the way to the ceiling and hung them wider than the windows for a much better look. It completely fools the eye into thinking the windows are bigger than they really are.
(Coastal Living: Photo Deborah Whitlaw Llewellyn)
2. Hang your artwork lower than you might think.
There’s nothing worse than walking in a home and seeing art hung WAY up high, so you’re looking up to see it. Artwork should be hung at eye level and I know that everyone’s eye level is different, but I usually err on the low side instead of the high side when it comes to placing artwork on a wall. The above pic shows how bringing the art down with the seating group really works well. It feels like part of the grouping and not like it’s floating above. When hanging art over something like a console table or sofa, I think the rule of thumb is about 5-6” above the item that it’s hanging over. This seems to work well and keeps the grouping cohesive.
(Cottage Living: Photo Tria Giovan)
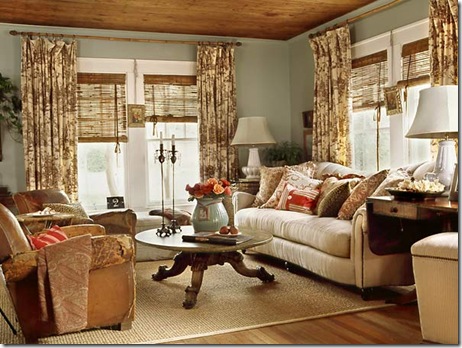
3. Mix the room with textures.
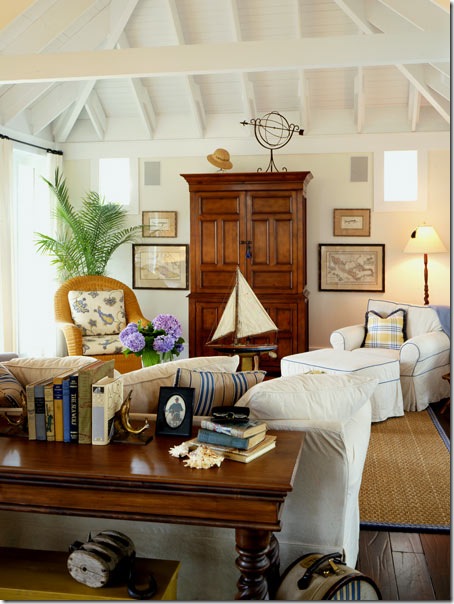
What makes a beautiful room? Mixing up the texture is a great way to add lots of interest to your room. If you have a room that’s all soft fabrics, then everything will look and feel the same and you won’t have that energy of different textures around the room that makes a beautiful room work. There are all sorts of ways to add texture. See the above pic, with the soft fabric on the sofa, lots of colorful pillows, and a seagrass rug and bamboo blinds? Mixing up that texture really makes the room pretty and inviting. This is one of my favorite inspiration pics. I just love the feel of this room. Notice how the drapery panels are hung almost all the way to the ceiling in this room too. Think about mixing up furniture pieces too: glass, iron, wood, there’s room for all of these things in the same room. In my living room, I added a glass and iron coffee table in with the 3 wood side tables to mix it up. You can have too much of a good thing sometimes, so get out of the matchy-matchy mentality.
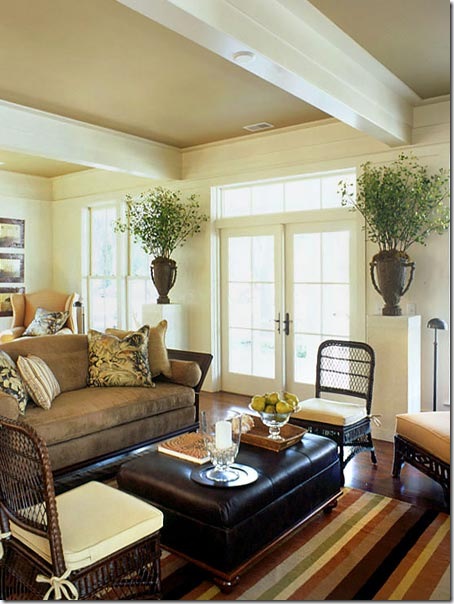
The pic below is also a great example of mixing up textures, with the soft fabric on the sofa, pillows that bring in other texture and pattern, the leather ottoman, and rattan chairs. The striped rug feels casual with a cotton look to it and mixes well with all the other elements in the room. Even the large urns with plants add some extra texture to the room. So, don’t forget to mix up the textures in your room to make it more exciting!
(Coastal Living: Harry Taylor)
(Coastal Living: Photo: Deborah Whitlaw Llewellyn, Stylist: Tracey Rapisardi, Designer: Lisa Knowlton)
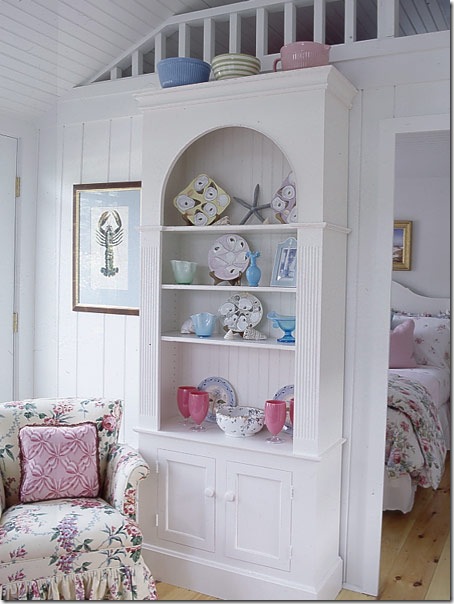
4. Group your accessories in 3’s or 5’s.
This has been the advice from designers for many years and it just seems to work. Something about those groupings just are visually more appealing and it makes for a nice feel and look to a room. So,think about that when you are putting together a vignette on a table, sideboard, or bookcase. I don’t always follow this rule, but it does work. Notice above on top of the bookcase, the designer has grouped 3 pottery pieces. This would not have worked as well with 2 or 4, but 3 is the magic number. You can see that for the most part, the other groupings are also in 3’s or 5’s (some with 2 like items acting as one). Also, vary the heights of your items so they are not all lined up in a row. You want the eye to travel up and down the grouping and side to side.
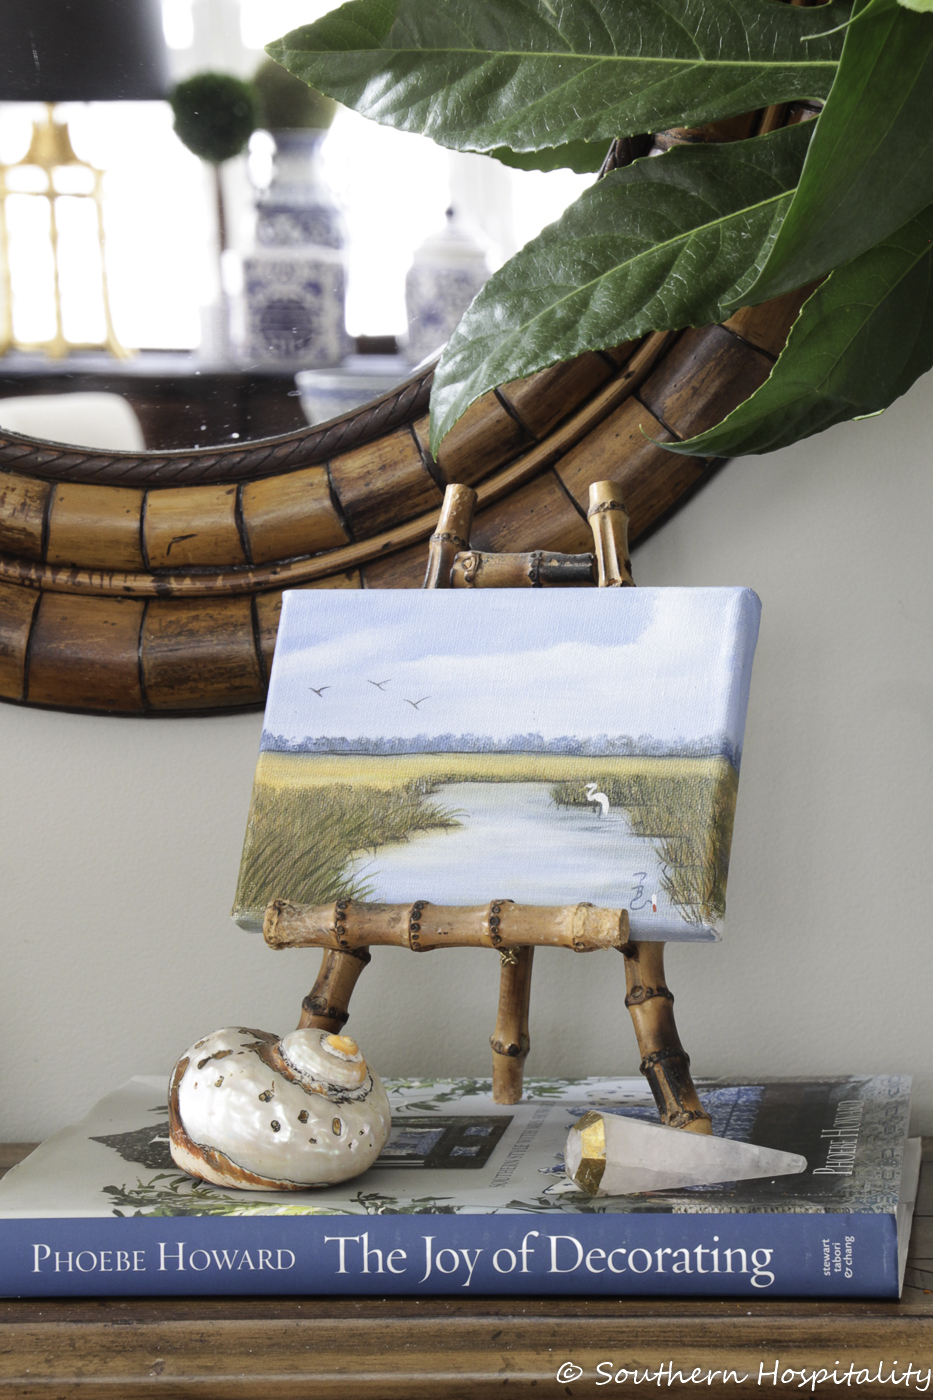
Also, one thing I’ve been working on in my own home is using larger accessories instead of many smaller ones. That is a much better look too and things don’t look as cluttered. I’m not a minimalist, as I’ve often said, but those bigger pieces are much more visually appealing.
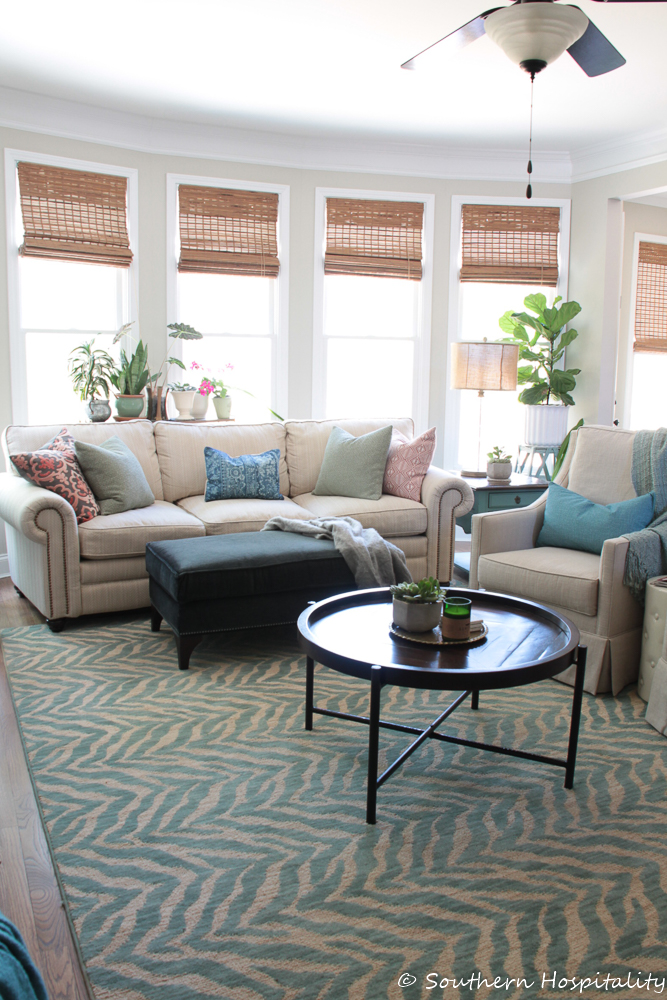
As you can see in our family room, the front feet of the furniture sits on the rug to anchor the rug.
5. Get the right size rug. Make sure your rugs big enough for the front feet of furniture to sit on.
I’ve seen this one a lot, as many people just don’t know how to choose a rug size to work in their room. I most always will choose a rug to fit a furniture grouping and have that grouping around the rug (as shown above). You can see the chair and sofa are on the edge of the rug, as is the ottoman in front of the fireplace, so the rug grounds the furniture seating area. A too small rug will just look lost and one that is floating way out in the middle of the room just looks out of place. The rule of thumb that I’ve found works is to have the front feet or legs of your furniture sit on top of the rug and it’s fine for the back legs to be off the rug. It’s just visually a good look.
I hope these 5 little tips help you to make your room better. These are just a few observations that I’ve had over the years in my own home and I think by paying attention to the details, your room can look so much better. It’s not any harder or more expensive to change these small things, but they can have a tremendous impact to the final look of your space.


Love your blog! Thank you for the wonderful tips! I am moving into a new apartment in 2 months and have saved a copy of this post to remember when I am decorating! I can’t wait to decorate now!
All great tips & I'm in love with that 3rd room. It's been one of my favorites for a while.
Great post! Thanks for the tips Rhoda!
~Kim
These seem so basic and yet make such a huge difference. Great post and so well explained and the pics you showed are great examples and inspiration. Hugs, Marty
Thank you for the decorating tips, especially the one about hanging curtains!!! I really appreciate the illustrations…it helps me
visualize what you mean.
Warm regards,
Wendy
Great tips, Rhoda! I was often castigated on RMS for hanging art at eye height next to the loveseat in my bedroom. But it just always felt right to be able to see it when seated… so thanks for validating my style! lol
xoxo,
Mary
Terrific tips — I especially take note of hanging the draperies as high as possible — hanging them lower lends to a room looking “squatty”. I didn’t hang mine wide in this house or I would have entirely lost my walls!
Let me invite you to come see what I’ve finally done in my house this past year. I’ve posted the process of my living room and dining room.
Jenny
I can’t wait for the party! I am getting all my Easter and spring stuff out now!!
I am picky when it comes to rugs, so we hardly use them, the one in our living room took forever to find because I wanted just the right size, in just the right texture!
Thank you for sharing all these wonderful tips! I will looking around the house to see where I can improve.
Great tips Rhoda! I’ll start fluffing for spring so i can participate in your party on the 18th!
If there is any benefit to being short, it is that I never hang things too high. Especially mirrors. 🙂
I do need to work on my curtains, I could make some changes and hang them higher.
Thanks!
Picture number one is so me…I love that room. I so agree with these tips. I have never understood why one would hang their pics/art so close to the ceiling. I wonder how that started?
Also I need that coffee table in pic number 3 for our new familyroom…love it !! I wish I could make your pics bigger to really get a good gawk in (lol) !!!
I can’t wait to fluff for Spring…I won’t start until the end of this month..I keep my “green” up. Then for the month of April I will do my Easter/Spring thing, last year with Easter so early it threw me for a loop….
Cute button Rhoda,
Kathy 🙂
Thank you for the tips! This is perfect timing as we are about to redo our bedroom and I need to get new curtain rods and I plan to hang them closer to the ceiling now and also make sure I buy more fabric to make the curtains!
Great tips!!! I appreciate them!
This is a great post – I’ve got the major things in my home, now I’m just trying to “cozy” it up. thanks.
Laurel
Thanks for your tips… I’m interested in which granite you decided on…I found your blog while
shopping for ideas on counter tops..I too have white cabinets and have brought home 2 of the same samples for my kitchen…it is sooo
hard to visualize it in my kitchen..
also, thanks for all the pictures..they are very helpful!
Missy in Meridian 🙂
Great tips! I knew some of them, but also got some new ides! Thanks so much!!
A sping fluffinig par-tay sounds like fun!!
Hugs!
Susan
Great ideas and wonderful inspiration! We are trying so hard to make our house into a home and your blog offers such wonderful inspriation for me.
The spring fluffing party sounds like fun!
Have a wonderful Wednesday,
Jennifer
Missy, I think it was you asking about the granite I decided on. I posted that a couple posts back on Sat., I think it was, but I'll just tell you that Napoli came out the winner. It will be about a month before it's all done, but I can't wait.
So glad you all are liking these tips. They are just some basics to keep in mind, but really do make a lot of sense & can change the look of a room.
Rhoda,
You always have such great ideas, and these 5 (with pictures) are definitely winners. Thank you so much for sharing tips we can use. Linda
Great post, thanks for sharing these tips! I just recently found your blog and am really loving it! Thanks for all of your inspiration =)