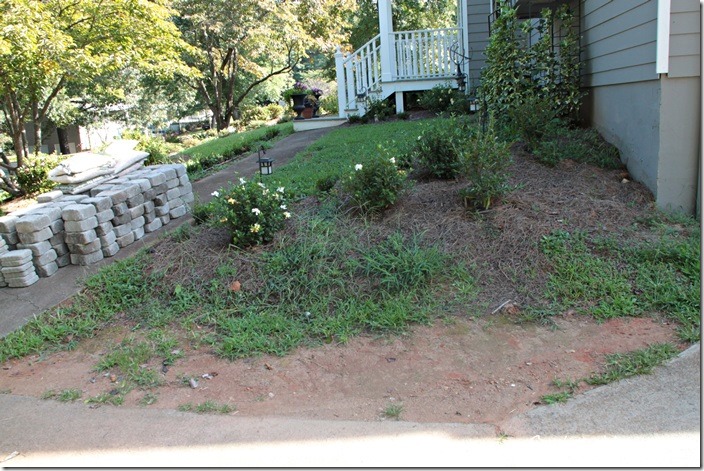
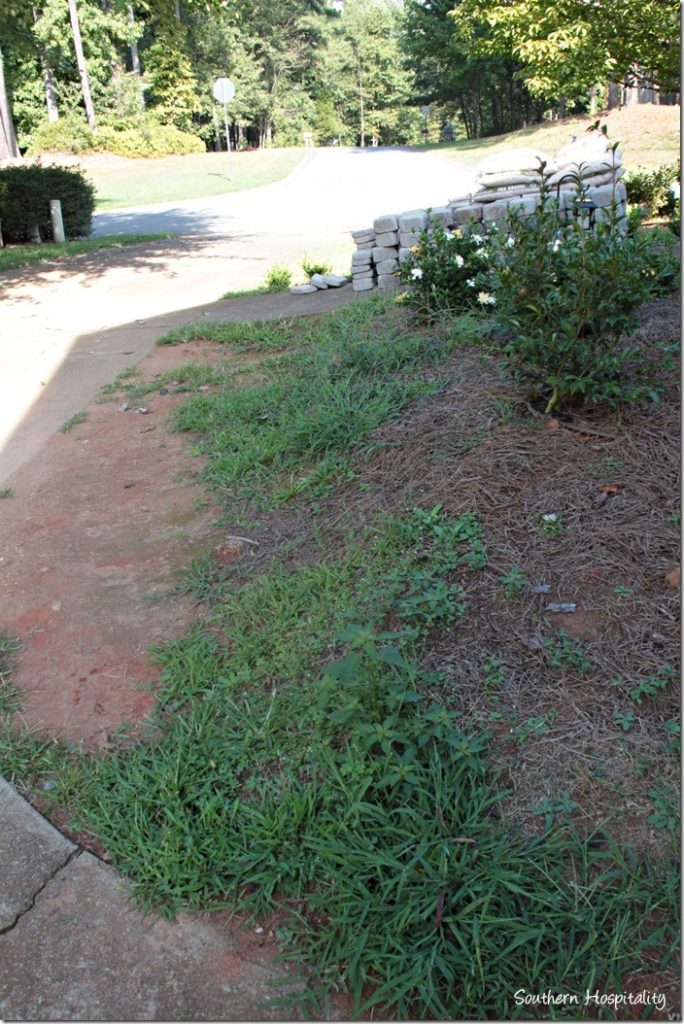
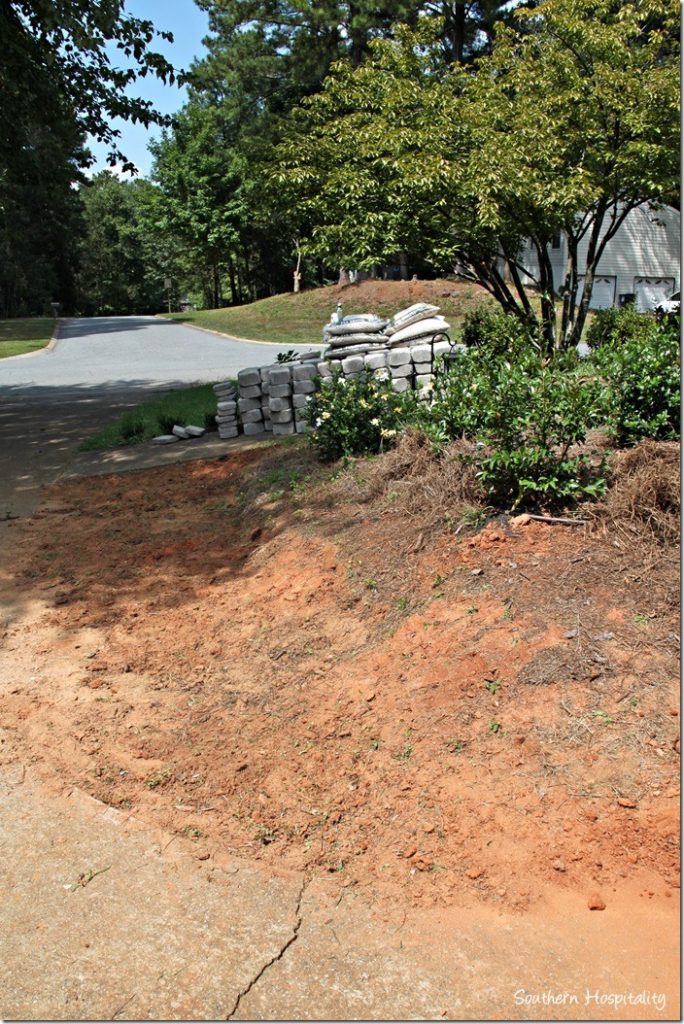
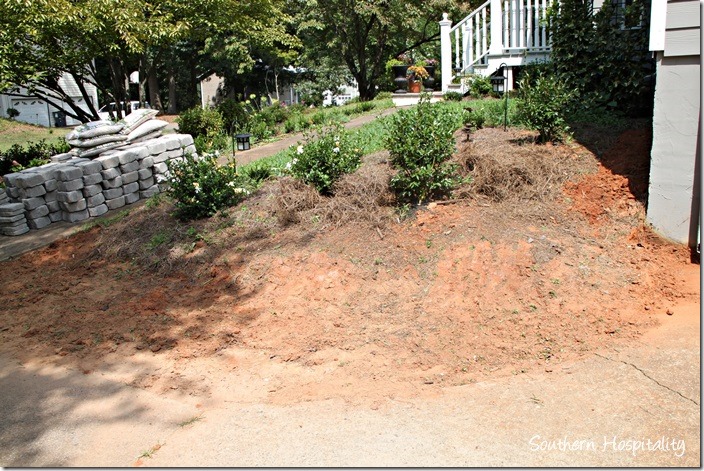
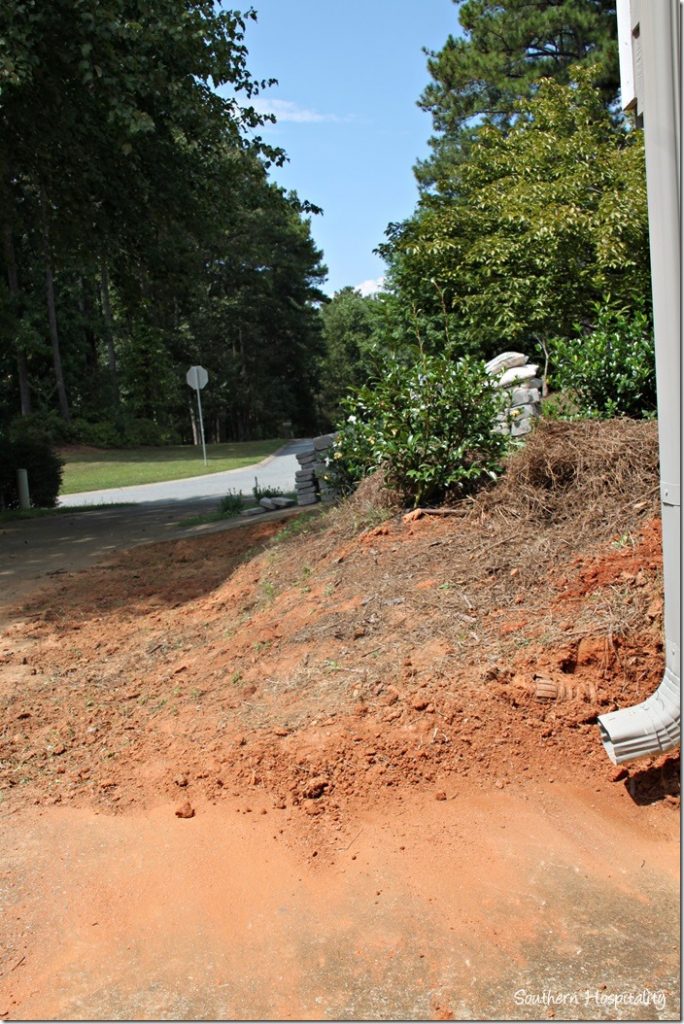
I so remember driving up to my house 2 and 1/2 years ago when we first looked at it. The yard, with its sad and pitiful lack of landscape and the little front stoop that had no curb appeal at all was the first thing I took in. It was a pathetic first impression, but I knew once I got the house that I could improve upon that curb appeal. I could see it in my head. I knew my house needed a proper portico (or porch!), landscaping, lights and more and all of that would take time. The sloped yard going up my sidewalk was in dire need of help. It sort of meandered down a slight hill, stopping in an unsightly way by the driveway. A pile of dirt with nothing attractive about it. On top of that, coming out of the 2 garages takes a bit of maneuvering to back up a couple of times and then move forward . Rolling the tires across the dirt was part of that and I knew that I needed to keep that area flat and make sure that whatever I did that a bit of rolling tires couldn’t hurt it any.
Let me remind you where I started……
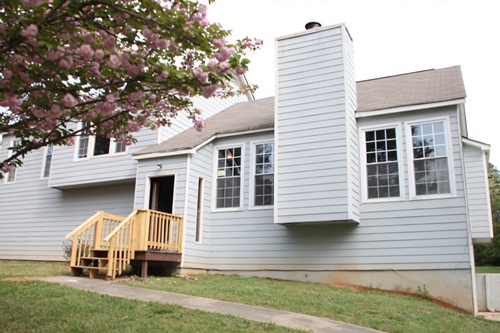
The true BEFORE. Before anything was done, the first day we looked at the house.
Soak that pic in for just a minute. Can you even believe the difference?
That thought had been in my mind for 2 years now. A retaining wall was needed to corral this little bank of dirt, giving it some desperately needed curb appeal and improving the looks of this area. Making things pretty and useful is always on my mind when I figure out a solution and I knew exactly what I’d do when the time came.
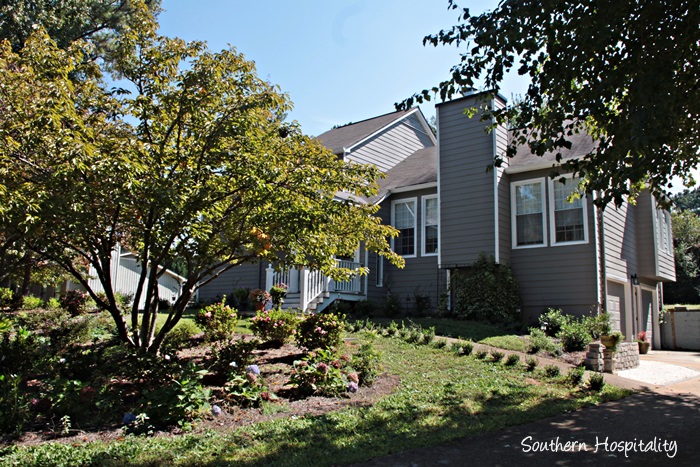
And the time came! I’ve so enjoyed working with Lowes these past 3 years, shopping there for practical solutions to my home problems. They have beautiful stacking landscape stones, which I had worked with before when I built a cute retaining wall when I lived in Birmingham. I knew this was the same direction I wanted to go here at my new house and that a retaining wall of stacked stones would not only be beautiful, but practical too.
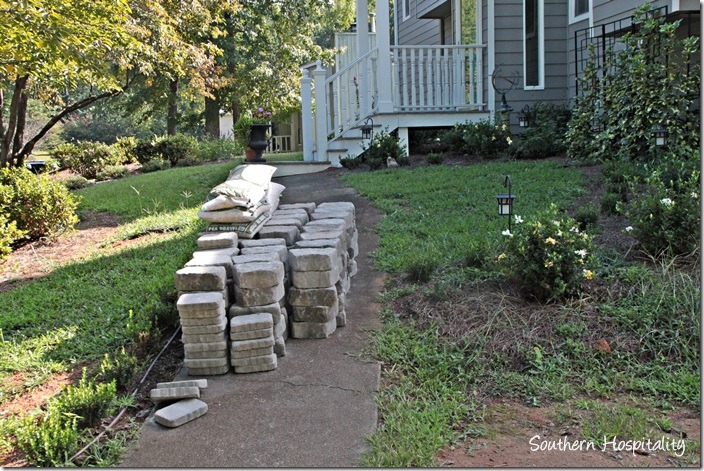
This sadness needed help in the worst way! A sloping bank with grass and weeds growing sporadically and bare dirt isn’t my idea of pretty.
First things first, we hauled home the stones after trying to figure out how many to get. Lowes has pamphlets of these stones with a guideline on how to figure, but we still ended up taking back 38. I used 92 large stones for my wall.
Just in case you are interested, these are the Allen & Roth Bertram stacking stones (large ones). The cap stones are Allen & Roth Luxra and they come in 2 sizes. Both are gray in color, which look great with my house. And I happened to catch a 20% off sale, so that helped a lot. The whole project came in right at $250, which is great for something this impactful.
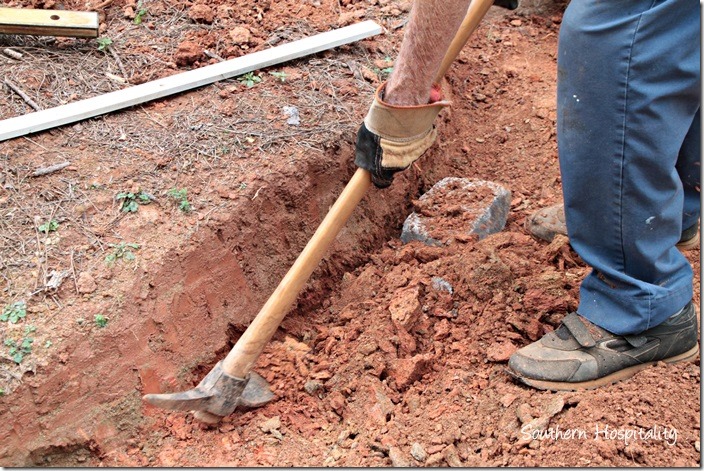
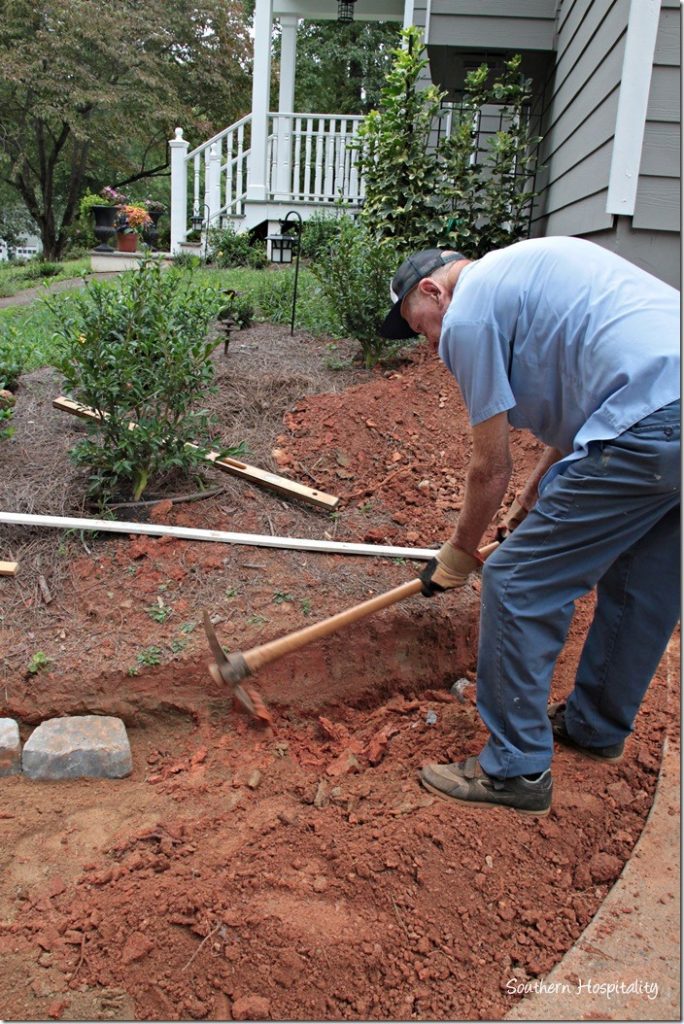
The first thing I did was get out there and dig up the grass with a pick ax. Now, working with my dad is rewarding and challenging all at the same time, so let me tell you a little about this process so you can understand how it goes. He’s smart, but stubborn and has his own way of doing things. I’m sure he feels the same way about moi. 🙂 We still butt heads many times on these projects and usually I have to argue my point of view a few times before he comes around. It usually has to do with aesthetics and how I want something to look. He’s not always onboard with my design ideas and I’m never on board with his “it will look just fine, you’ll never know the difference” point of view.
Needless to say, we don’t always agree on how to do these projects. But, we manage to get them done and they turn out fantastic if I do say so myself. I’ve had a few folks over on my Facebook page feel a little sorry for my dad, working at his age and doing these projects with me. Let me assure you, he is still very capable physically and mentally for figuring these things out and I know it gives him joy to help me and to be useful still. He is proud as punch when we finish one of these projects! And he doesn’t want me lifting anything, using a pick ax or most anything else. He thinks he can do it all, but I will not let him. I knew that I was going to round this wall out and dig the bank out before he got over there, so when he brought over his tools and left them in my garage, I told him that I’d go ahead and start digging. They were going to the mountain house for a week and he wouldn’t be around for awhile anyway. Besides, it was still hot.
Here’s the conversation that followed. For your enjoyment.
Me: I’m going to go ahead and dig out that bank and get it ready, since a lot of that dirt will have to come out.
Dad: No, you need to wait for me to come back before you do anything. You don’t know how to do it.
Me: Yes, I do know how to do it. I know how I want the wall to be shaped and all that dirt is going to have to come out, so yes I’m going to get that done and then when you get over here, we’ll be ready to go.
Dad: Then, I’ll just take my pick home.
Me: NO, you will not take your pick home!
See what I deal with! He’s such a character. He really thinks I don’t know how to do anything without him and he doesn’t want me swinging a pick ax. But, I’m quite capable and didn’t want HIM doing it either. He’s still the best dad in the world and I wouldn’t trade him for any other. I’m very grateful he’s willing to help me with these projects.
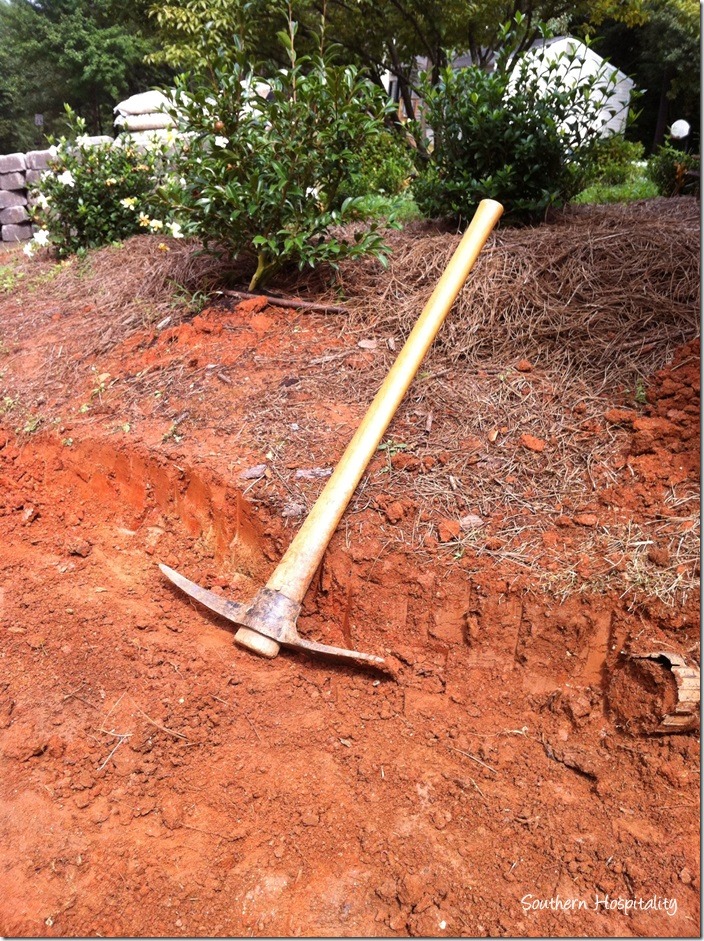
So, slowly but surely, I worked on the bank and dug out the dirt, throwing it up on the hill behind. We would use that dirt later to fill in behind the wall. It was super hot when I was doing this, so I worked about 30 to 45 minutes at a time at least 4 days getting it done.
I used that pick ax and then shoveled the dirt out.
It rained overnight one of those days and that made it easier to dig. You can see that red clay we have here in Georgia. It can be hard as a rock at times too. I ran into an old black plastic drain pipe and when dad came back over he smashed it with the pick ax and made it flat with the dirt wall so it wouldn’t get in the way.
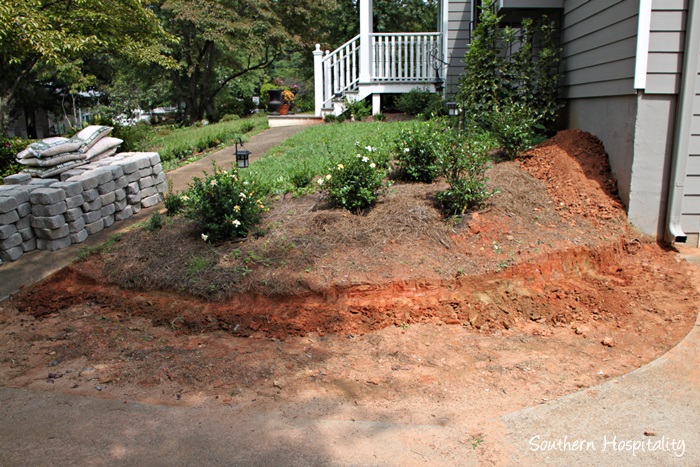
Bank mostly dug out.
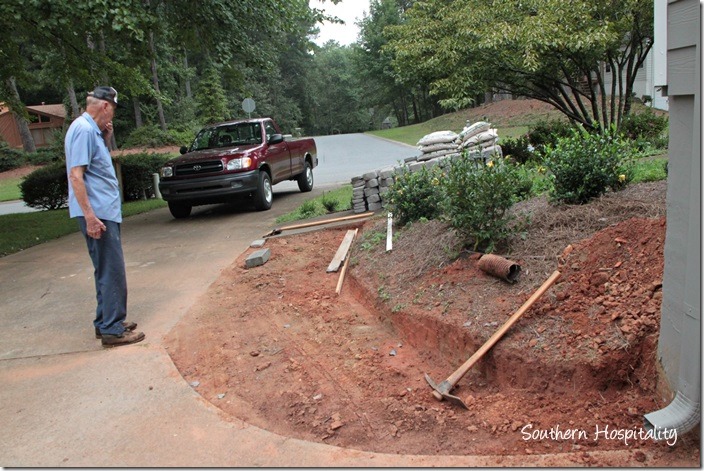
And here’s the bank after I rounded it the way I wanted it to look. I curved it from the corner of the house around to the sidewalk. That curve is just the way I envisioned it. Here’s dad looking at my handiwork for the first time when he got back over there. I said, “see, I dug out the bank”. I see you did, he said. Of course, he had other ideas of how it should curve, but I said, this is what I want, just like this.
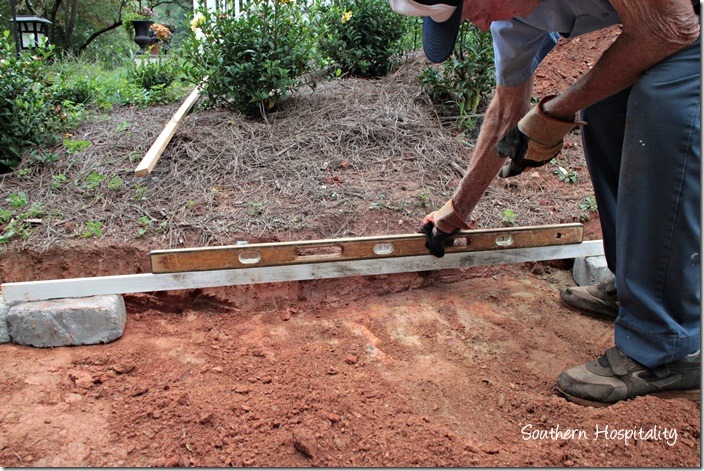
We leveled out the base a little bit more and tried to get that area flat for the first row of stones to go in. It just takes patience to get this sort of thing done. Dig and smooth to get a flat surface. If a middle-aged woman and her 87 year old dad can do it, so can you. It’s a great project to try at home!
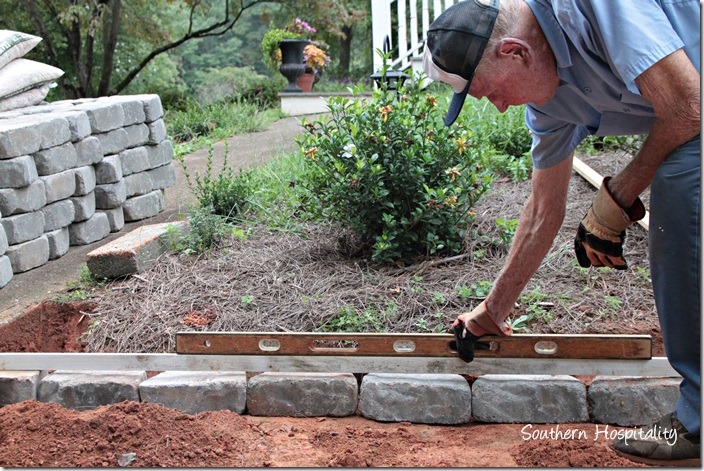
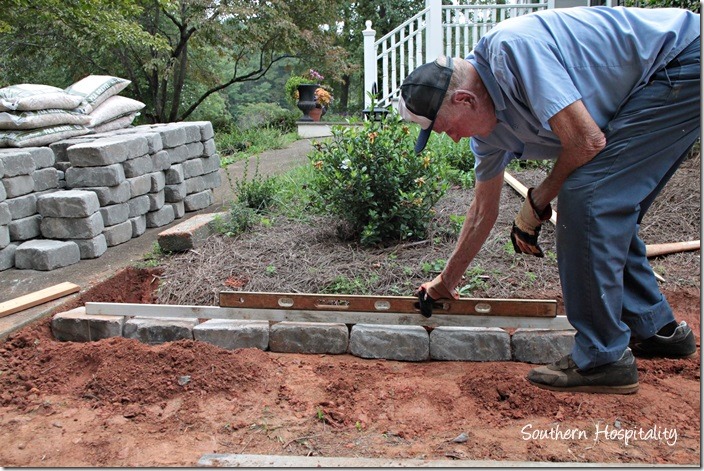
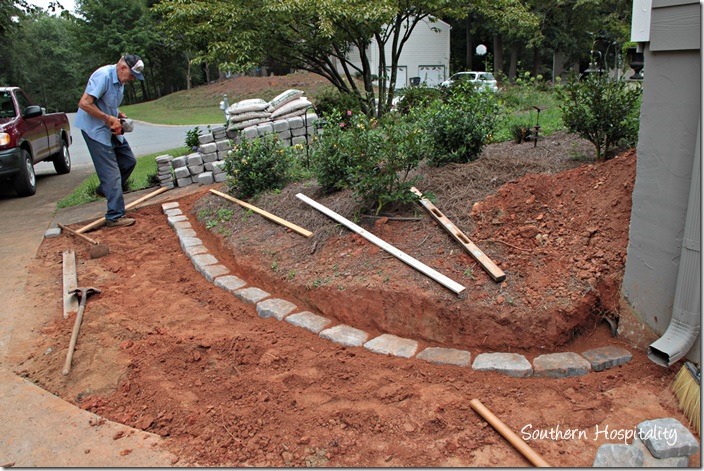
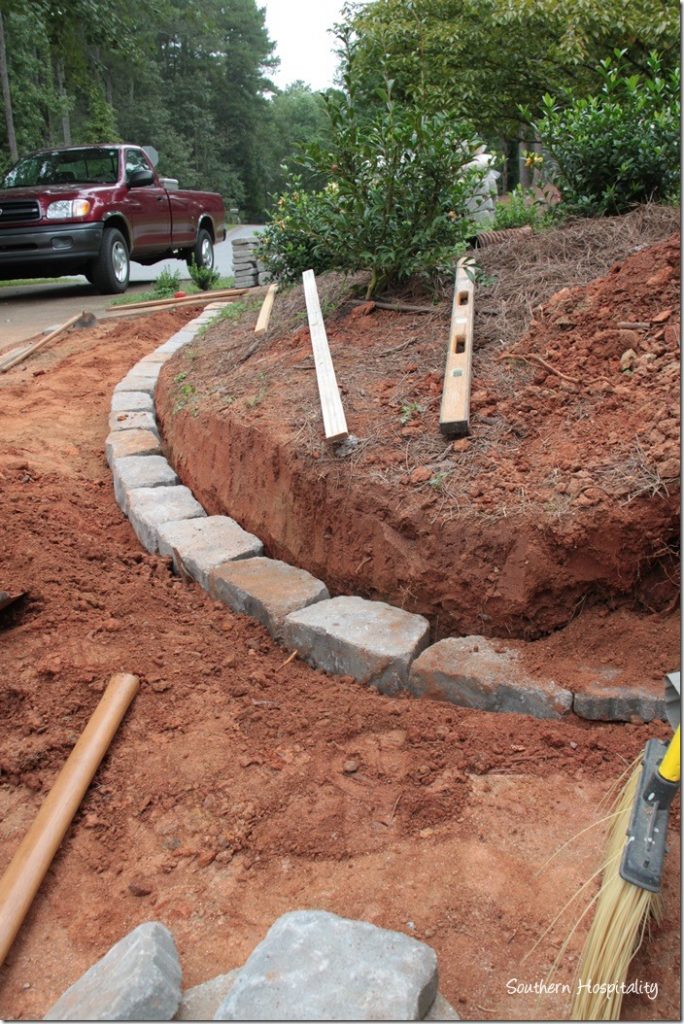
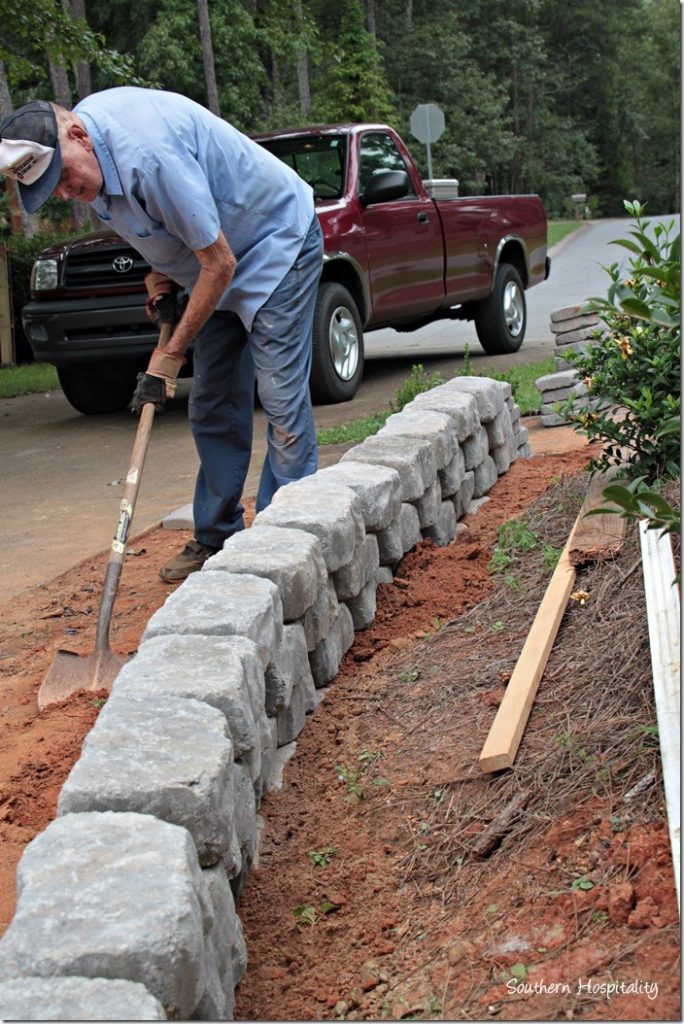
We started over by the sidewalk with the first stone and then laid a board and long level across them, getting them as flat and level as we could in the dirt.
We laid stones and kept moving around the curve until it was all filled in. If a stone was rocking a bit, we added in some dirt on the side that needed it to help it lay flat.
At the end of the row, we would add another stone a few feet away, connecting them with the level to keep things on track. So far, so good! We were pretty level all the way around.
Rounding the curve, dad leveled it out a little more straightening the bank and making sure the stones would fit in there right. We both worked the pick and moving the stones in place.
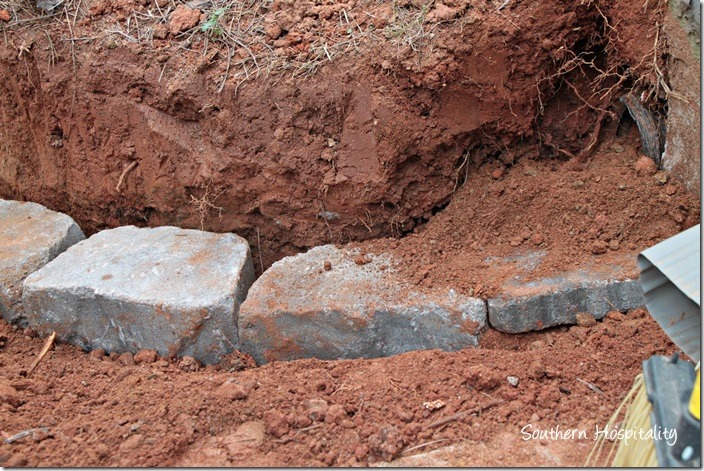
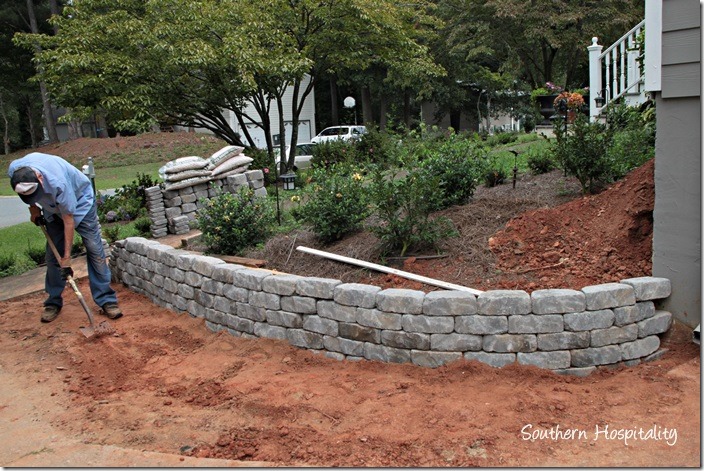
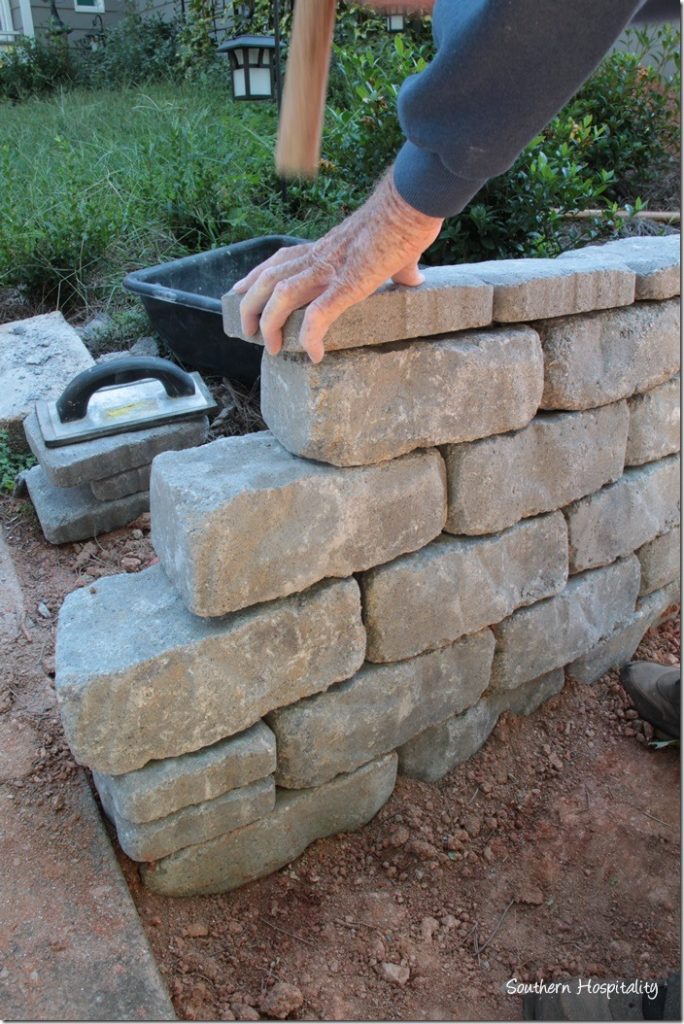
One row in. We then added dirt behind the row and then staggered the next row. You want to stagger each row so that the seams overlap and that keeps the wall nice and stable.
We thought adding dirt behind would keep it stable too. The dirt should pack in behind the wall and it should definitely stay there. We don’t think draining water will be a problem, since there are cracks in the wall and water can come through.
We added dirt, packed it down between the seams and then I swept off the dirt with a broom getting ready for the next row.
Here you can see the back side of the wall.
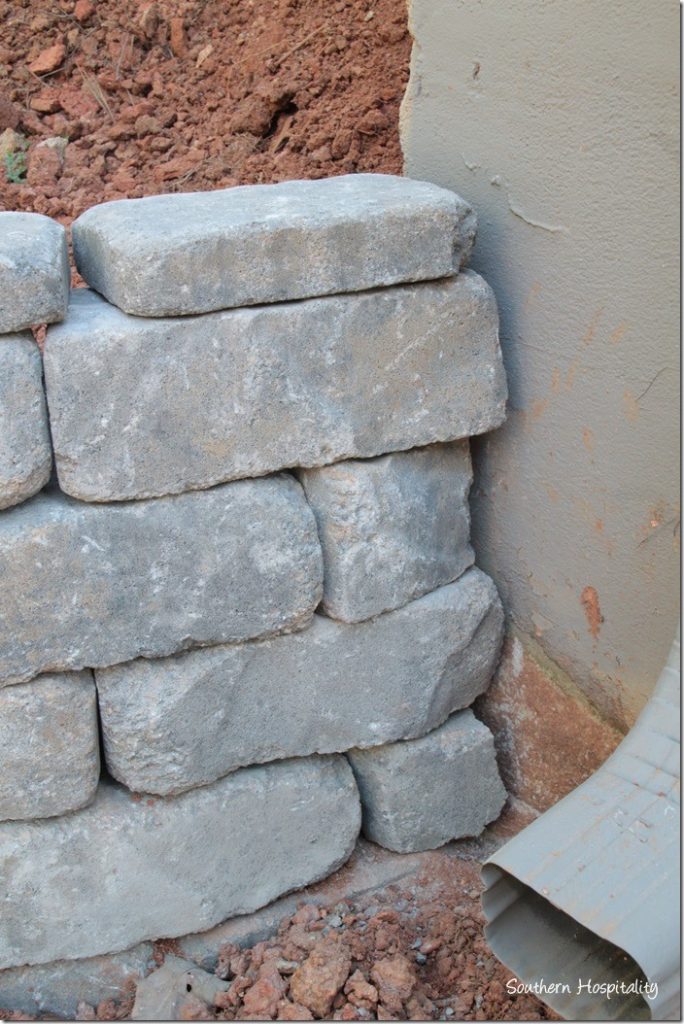
It only took about an hour to stack up all 5 rows. We stacked 5 rows total and then added a flatter cap stone on top. You can see over by the house there are 2 rows (2nd and next to bottom row) that need 1/2 blocks in there. We weren’t sure how we were going to cut those rocks and they don’t sell them already cut. I decided to try to hammer one in two and it worked. Wearing my safety glasses, I took my hammer and started chipping away at one of the stones until it started crumbling underneath. I gave it a nice whack with the hammer and 2 big chunks came off. Those chunks fit in the bottom hole (which we mortared in) and then I hammered down the other big piece until it fit in the hole.
Here you can see the blocks I hammered in two and added in the missing pieces. It worked out fine and we kept on moving. I think my dad was secretly happy I figured out how to do that part. I had it done when he came back over to start again. I added on a flat cap stone to the top and we decided to mortar in those pieces for extra stability and to keep them in place.
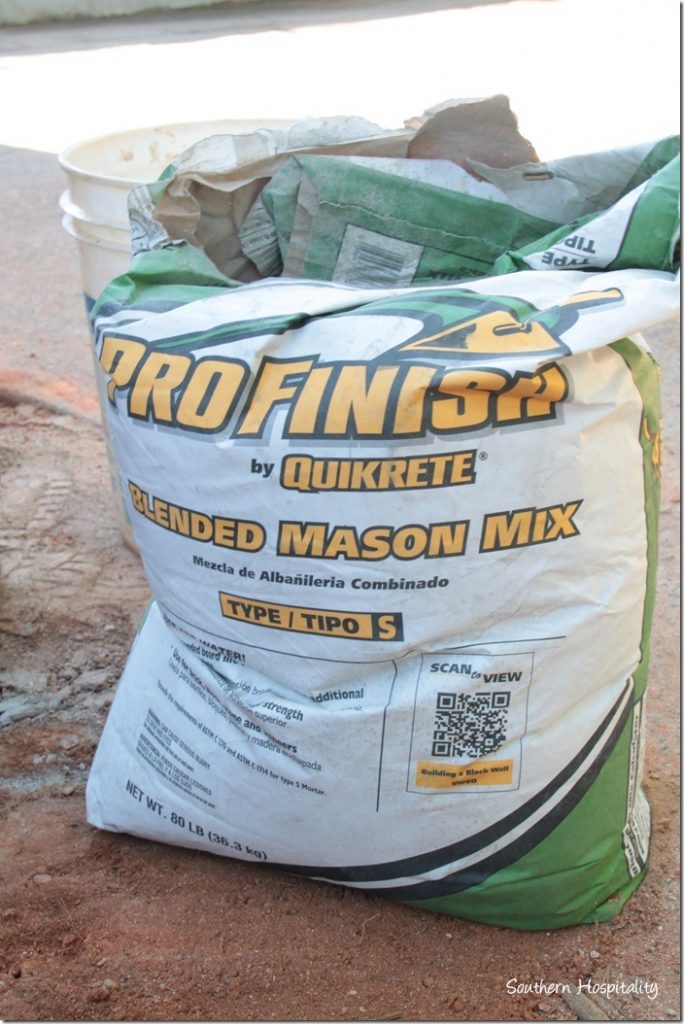
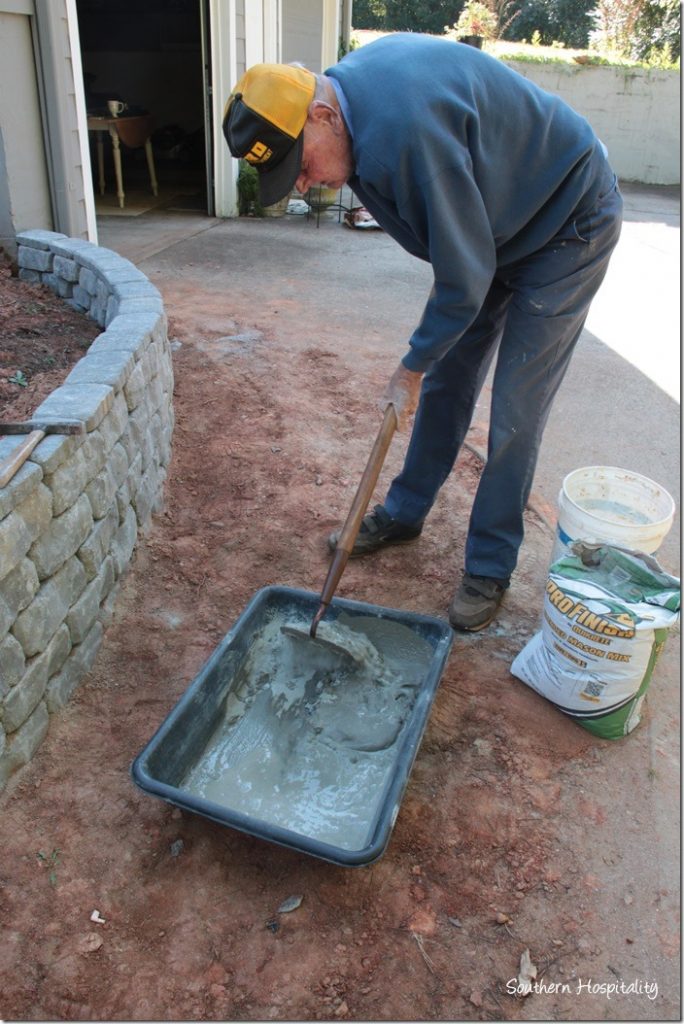
I got the heavy duty masonry mix and we mixed it up with water.
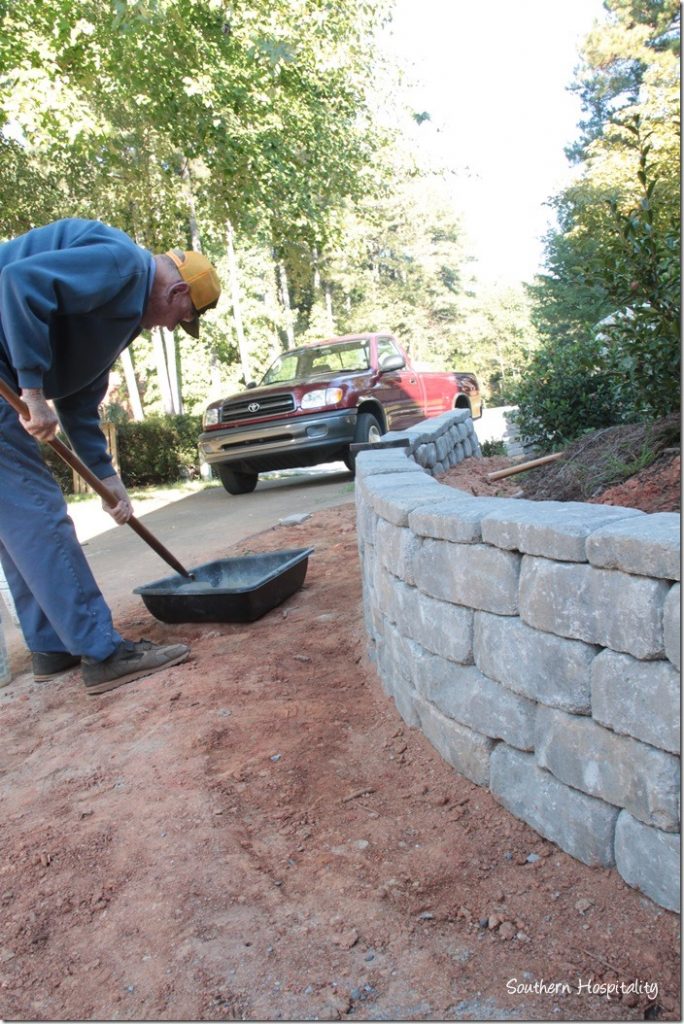
Dad has done this before so he was all about mixing the mortar, reminding me that this isn’t his first rodeo in mixing mortar. He’s so cute.
Ready to mortar in that top row.
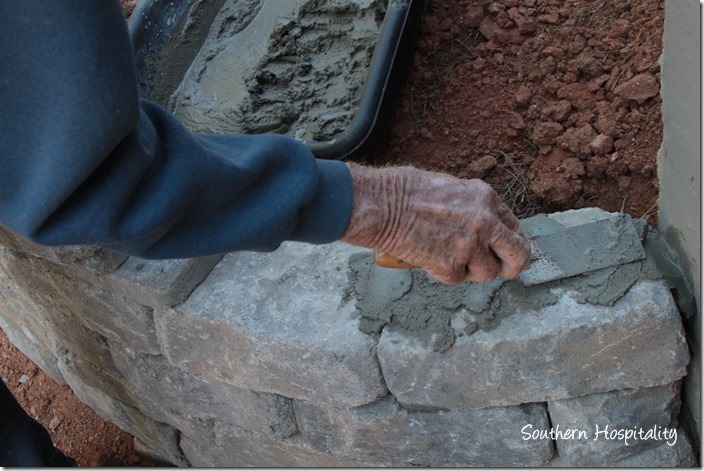
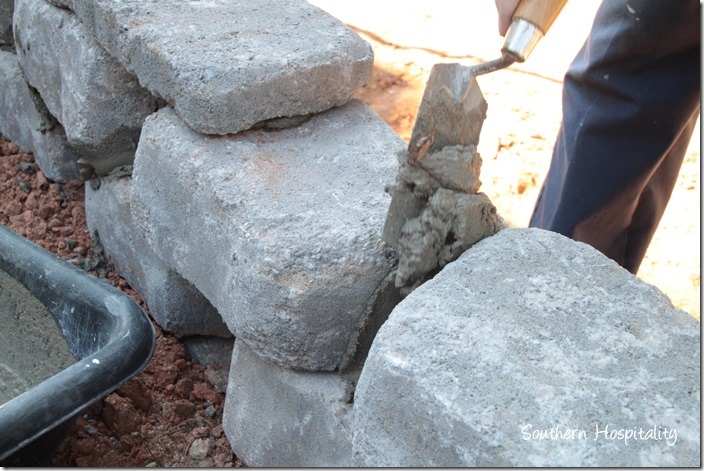
We started by the garage side and added in mortar underneath and between the cracks of the top row of big stones. This will just help it all be more stable.
We added mortar on the backside and it doesn’t show from the front at all and we only did that top row. We moved all the way around the wall, adding mortar under the flat cap stones and the cracks all the way around.
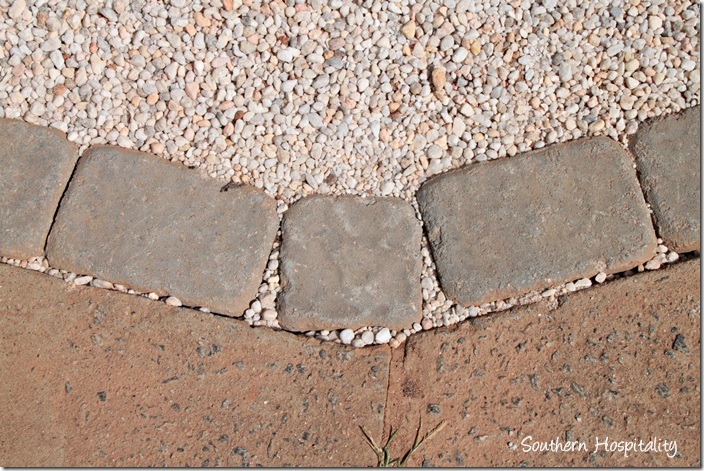
Last piece in place and you can see how I finished out the edge next to the sidewalk. I wanted it stepped down, so this is how I did it. I really needed a 1/2 block on that 2nd row from the bottom, but Lowes did have these 1/2 size cap stone pieces, so I just used 2 of those in that spot and I’m fine with it.
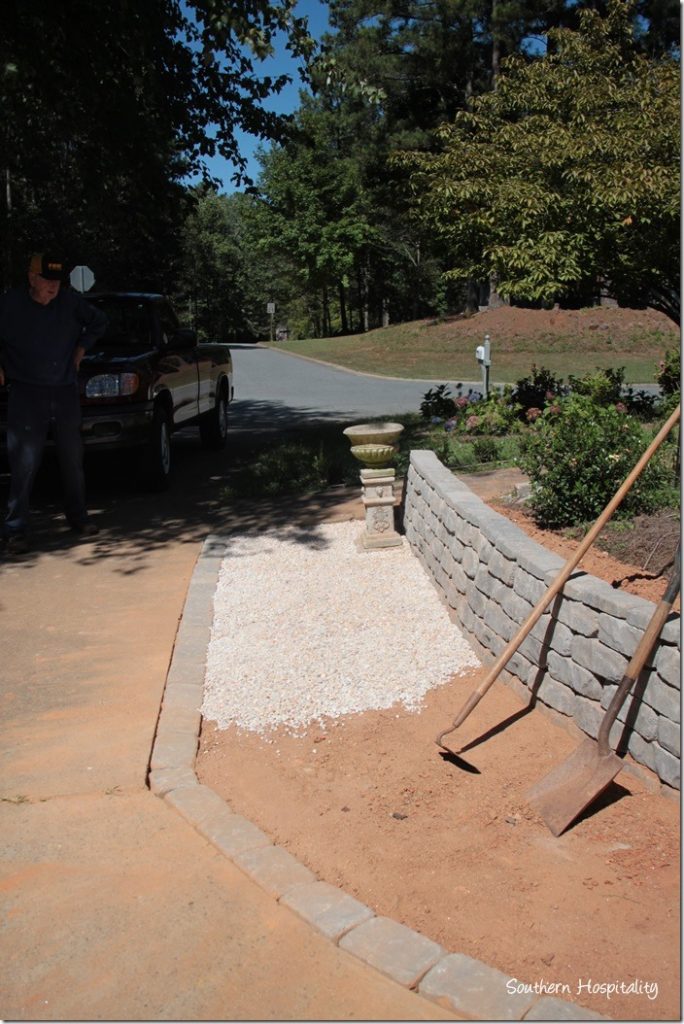
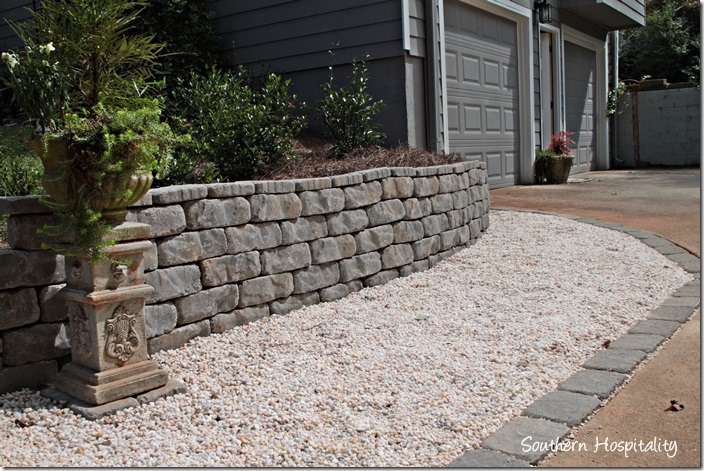
I didn’t get pics of the next part, which was digging down that area next to the driveway and adding more of those flat pavers edging the driveway, but they are sitting down in the dirt with about 1/3 of them exposed on top. This is the area where our tires roll into, so these pavers should be able to take that. I wanted to dress it up and since I’m adding pea gravel, these pavers will keep the pea gravel in place.
I dug them down so they only stick up about a 1/4 inch above the driveway. We used the pick ax to loosen up the dirt and then I used a hoe to scrape it down flat so the pavers fit nice and flat on the dirt. I used 12 bags of pea gravel, just for reference. I opened them up one bag at at time and spread them with my hands, using my garden gloves to smooth it all out and get it even.
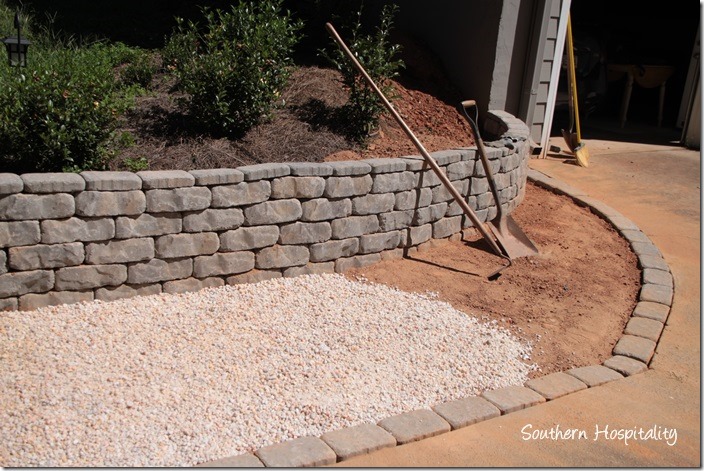
And here’s the curve of the sidewalk. I used all bigger pavers except on that curved area, I used a 1/2 size and kept going with the large ones. I love how this turned out.
I added in pea gravel to all the cracks to finish it off. The pavers worked perfect against the driveway.
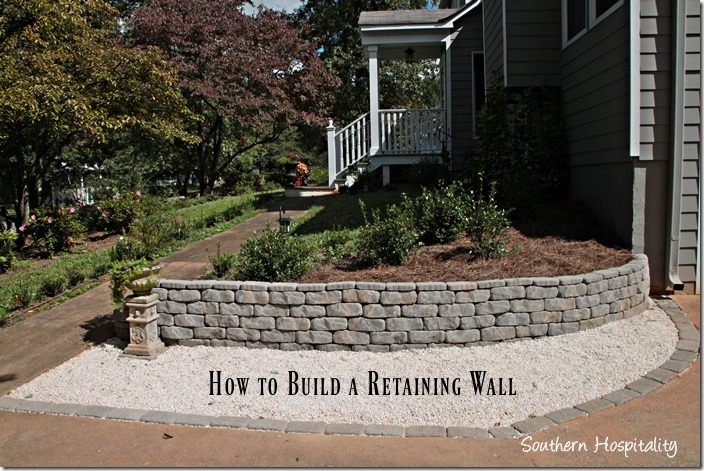
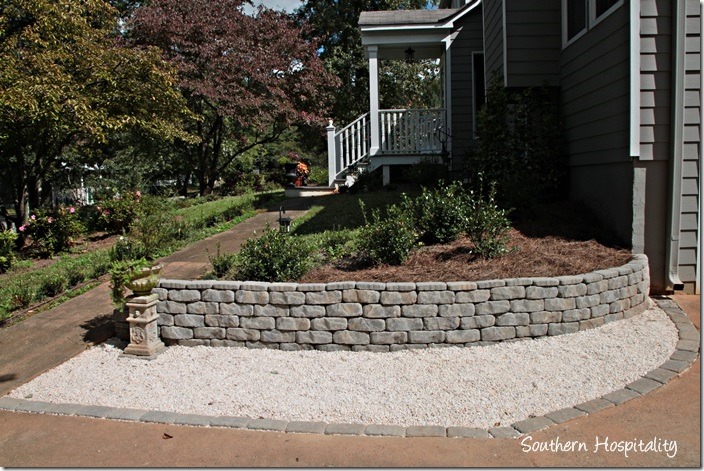
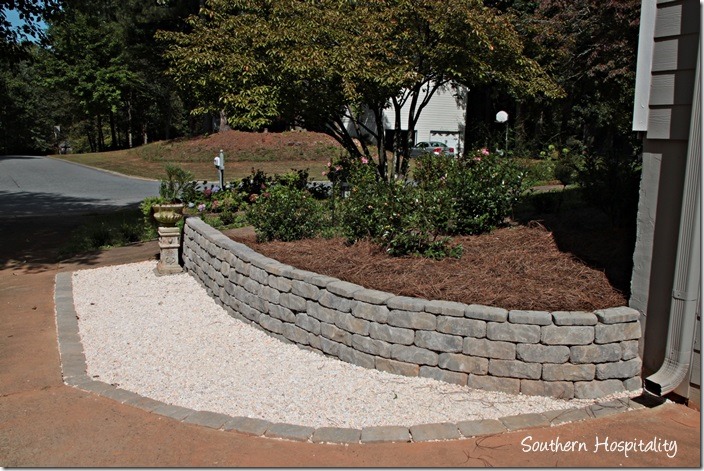
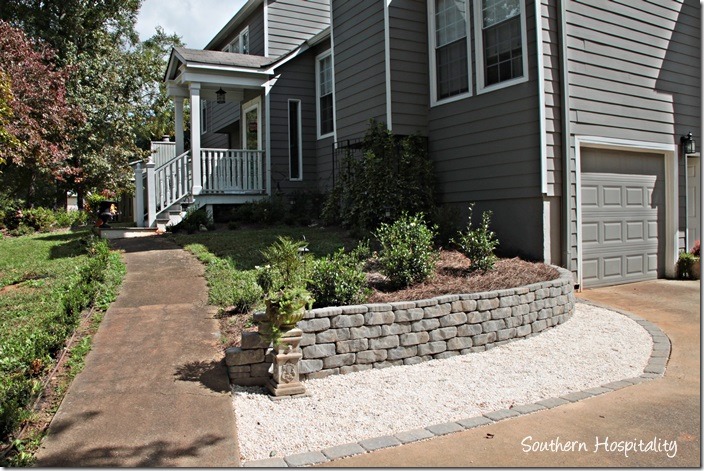
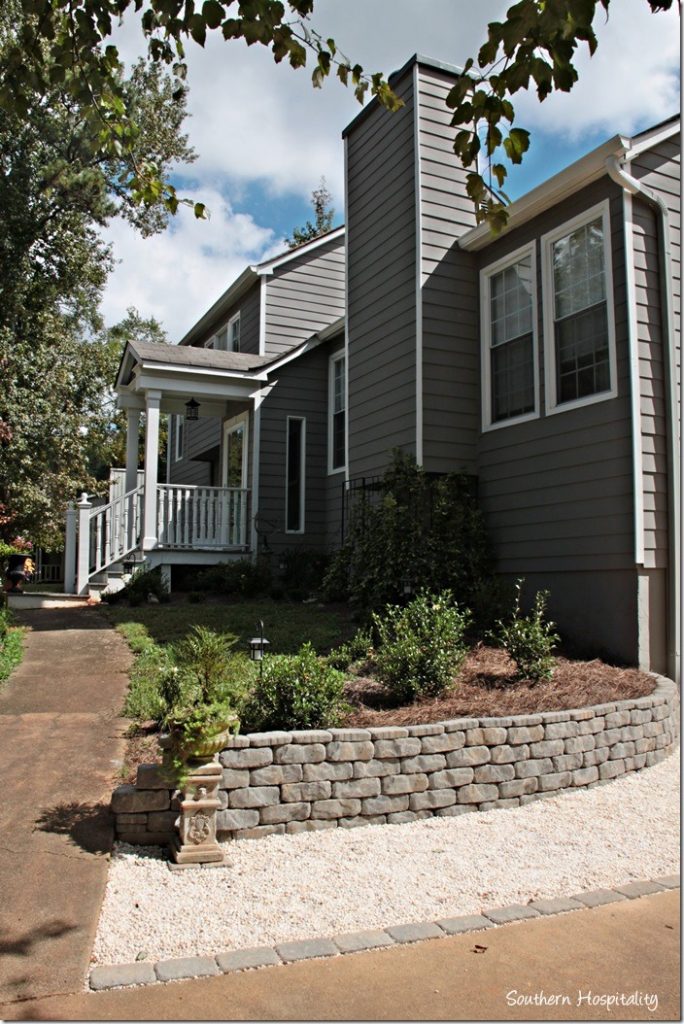
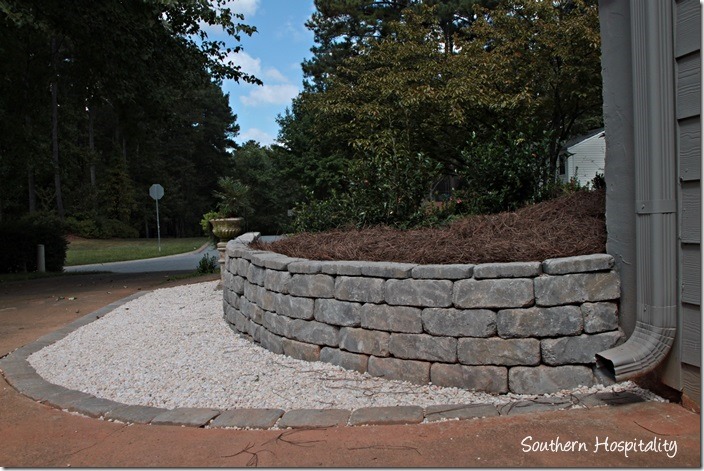
I can’t tell you how much I love this wall! It’s one of those things that has been on the list and 2 years later, it’s done. I still can’t get over how my front yard has changed.
I’m so proud of how this wall came out. Oh, one more thing to mention. The top pavers on the wall aren’t completely level. It’s impossible unless you are a real pro to get everything completely level, so when the last row went in, there were a couple of humps up top. Adding mortar evened it out a little, but there are still a couple of little waves. But I can certainly live with them.
End of wall by the sidewalk. I stepped down the stones on this end towards the sidewalk.
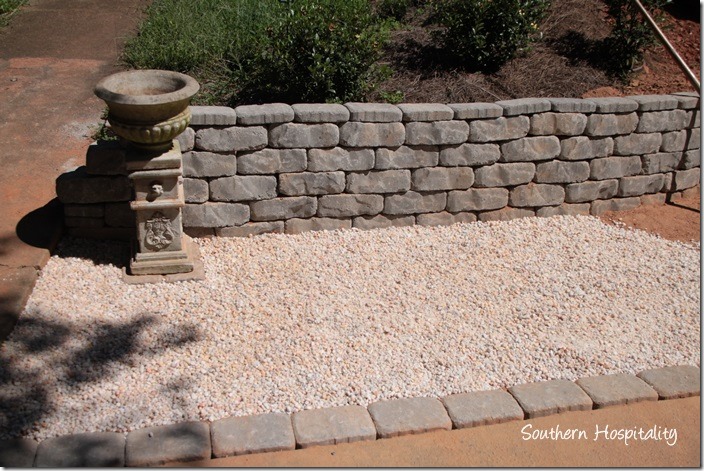
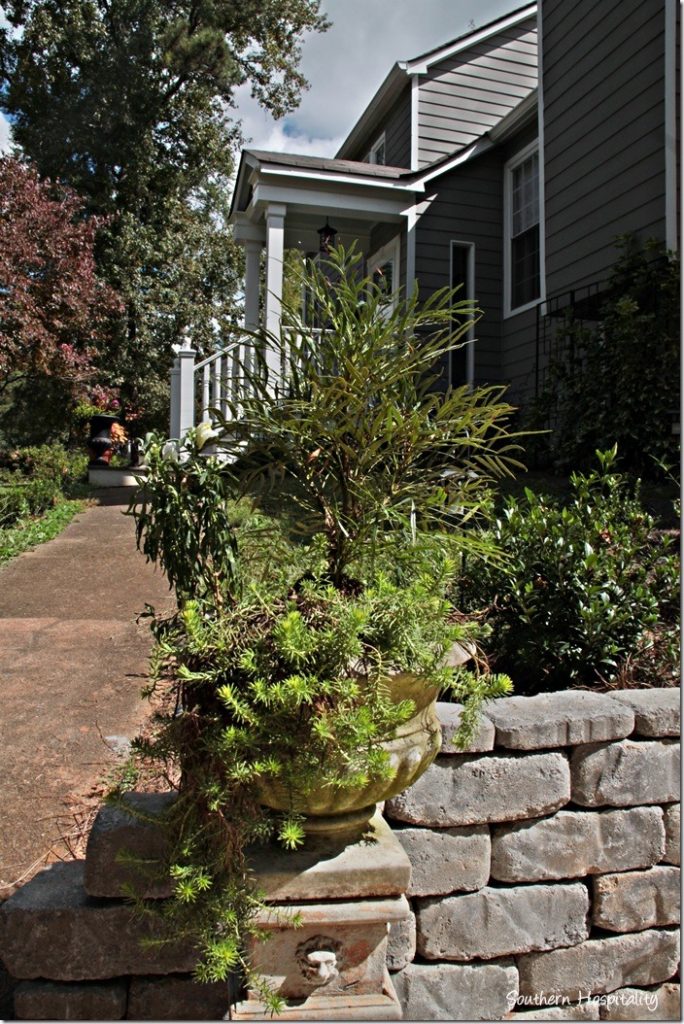
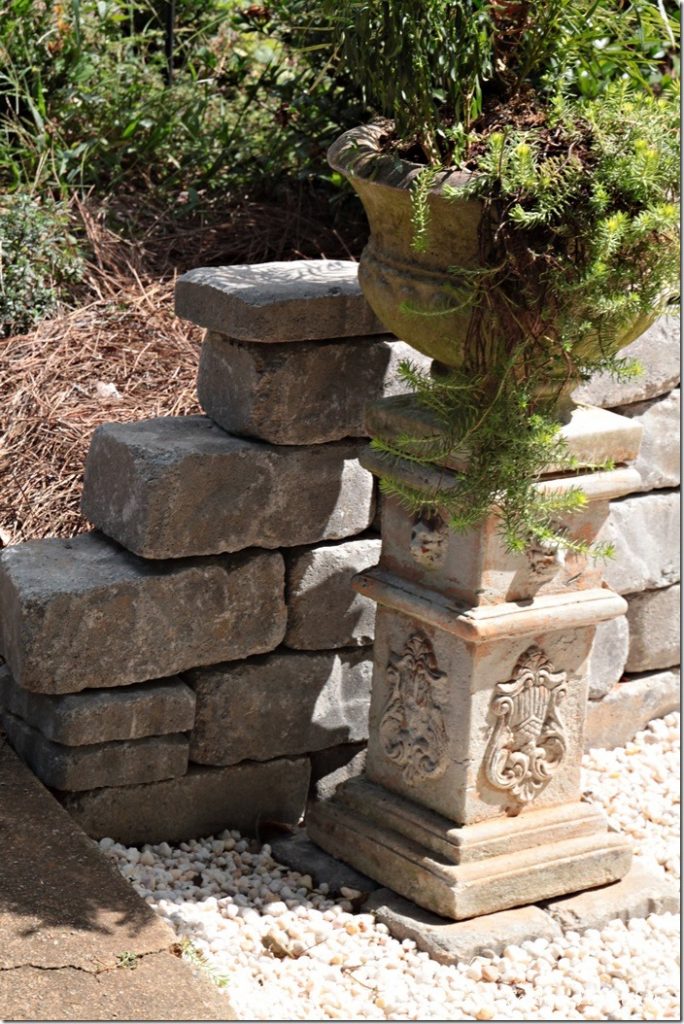
That concrete urn and column I’ve had for so many years and have moved them from house to house since I was in my very first house. I’m so glad I kept them!
The urn really anchors that corner. We set the column on 4 pavers, digging them in the dirt and leveling them. I’m debating on pressure washing my sidewalk and driveway. Some of it definitely needs cleaning, but my landscaper guy told me to leave it cause it blends in with the gray of the house. If I pressure wash it and make it look more white again, will that look funny? I’ll figure it out.
If this is not improved curb appeal, I don’t know what it! I’m so completely happy with how my house has turned out. Makes me smile so much! And it now has that cottage look I love.
Adding in the pea gravel will allow tires to roll across this area if needed, so I won’t be planting anything down here. I could plant some spilling plants above the wall and let it trail over, so that is something I’ll ponder.
I added pinestraw to cover up the bare red dirt and that really finishes it off for now.
I just love this new wall.
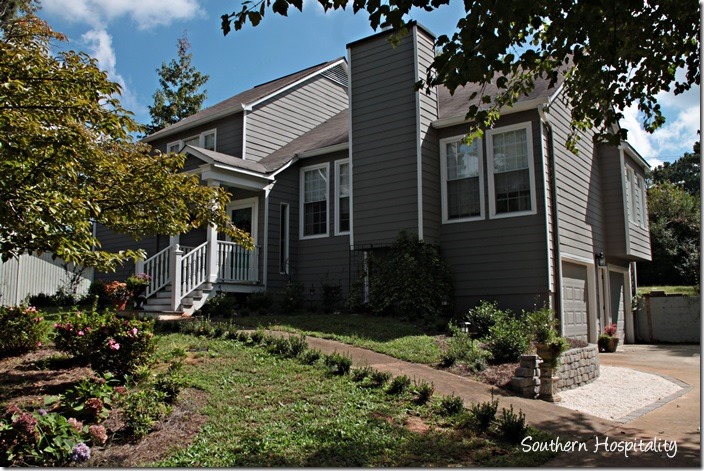
Here’s a quick Before and After visual of just how much the outside of my house and front yard has transformed. Amazing!

Again, Before. First day we looked at the house. Sad and nondescript. I wouldn’t have looked twice at this house normally. But, I did see potential in it.

And NOW. It’s pretty amazing when I look back at the pics. It’s been 2 years this month since I moved in my house and I am going to take time to do a recap this month of where I started from and where I am now. It’s been quite the journey and I’m so, so grateful for my house every single day! Thank you ALL so much for hanging with me on this home journey, I appreciate all of you so much for continuing to come back to my blog.


I had to laugh when you told about your disagreements with your wonderful Dad. He is exactly like my husband. He never thinks I can do “it” right. I often have to do what you did…wait until he’s not home to tackle a project. I always know he will be there to help if I need it.
You are such an inspiration Rhoda. I have loved following your blog since before your move. The transformation of this home is amazing. You have great vision and the skills to make your ideas come true. Thank you for sharing with us.
I just can’t get over you letting your 87 year old father build a retaining wall in hot weather. I would be so ashamed to do that.
Anne, did you even read the entire post? By the time my dad and I started the wall together, the temps were way down and lots cooler. It was HOT when I dug out the wall by myself though.
Wow. I thought God broke the mold when he made my dad but I guess there was enough clay for one more, your dad. My 92 yr old daddy is the same as your daddy. I completely understand him wanting to help & you complying, they want to help their “little girl.” (In their eyes). These type(men) are few & far between. How blessed you are to have your daddy and the vision to transform your home.
Truly enjoy your blog, Shelia
What a difference you have made in your home! The landscaping is as pretty as the photos and projects you show on the outside, and I just love hearing the stories of working with your parents.
I understand. 🙂
Your retaining wall is beautiful, it looks so professional and the concrete planter is just the right touch. Love everything you have done to your home and yard. Your Dad is so special and I bet he didn’t mind a bit working in the heat. He’s been doing it all his life. You two make a great team. Even with your little spats. Can’t wait to see whats next.
What an amazing transformation your house has undergone! I have done several of your DIY projects in my own house after learning how from you and your dad! I do have to say a big thanks for introducing me to Frog Tape..it’s been a lifesaver for all of my painting projects. And to Southern Living plants….they made a huge difference in my planting areas.
Yay, Carol, I’m so glad to hear that, thanks for sharing!
You and your Dad are a great team! You could hire out! :o) Seriously…..your courage in tackling these home projects have what have encouraged me! Thanks for sharing your journey! It’s been so fun to follow…..I think we all love something more when we have a hand in creating it! Your deserve to love your home and what you have achieved! God bless.
Rhoda Woman! That is an awesome wall and finishing touches! (I’ve missed you for several days…now I know why!) We did a retaining wall using landscape timbers and wish we had used stone. Need another beside our driveway and will use stones. Wonderful that your precious dad helps you…as long as he wants to help it is good for him. He sounds like my husband when we tackle a project….all about getting it done, never mind those important details, and boy, are we ladies into details! I’m saving this post for future reference. THANKS!
I have followed your journey since before you purchased your “dream home” — it is, after all, the creation of what you dreamed the house could become. You and your dad have done a masterful job. The work you have done to create this charming cottage style home is actually pretty unbelievable. You and your dad have done a masterful job. Although I haven’t commented before today ( I believe the nay sayer who felt you should be ashamed, got me realizing that my positive comment could count) I want you to know that I’ve been cheering you on from the Pacific Northwest every step of the way !!!
I identified with you so much when I read about the difficult personal time you went through. Deception happened to me at about the same age, turning things upside down. I kissed a few frogs until I finally met the one God had picked for me and how grateful I have been to Him for that. You are such a lovely, capable and strong woman and I love, too, seeing how you are letting God work such wonderful miracles in your life. You go Girl !!!!
Hi, Betsy, thank you so much for taking the time to leave me that wonderful heartfelt comment. I appreciate all of you so much and even though I don’t get as many comments as I used to, I read and enjoy every single one of them. That keeps me going and I love sharing with all of you. Thanks for sharing your journey too, happy to hear things turned out well.
Ditto, Betsy.
Fantastic. Job well done. Your dad is 87 and still young and strong. The reason is because he keep fit and fiddle w/projects like yours. You are an incredible team. I echo Betsy’s remarks. You and your family are remarable.
Rhoda, I love the wall! You and your dad did an awesome job. And disregard all the negative comments about having your dad help with projects. I think the worst thing we can do to our parents is to treat them as old. My parents always said “The funny thing is that in my mind, I am the same person as always, I don’t feel ‘old’.” And they were in their early 80’s when we had this conversation. You are doing the best by demonstrating he has so much worth and purpose in his life, and he is very much loved and needed by his family! And the fact that he argues you demonstrates that he has retained his self confidence. What could be more important in one’s latter years? Keep up the good work. I don’t post often but I follow you every day and still love my foyer you designed years ago! Hugs, Diane
Thank you, Diane! It’s always great to hear from you, I’m so glad you are still with me.
Fabulous job, as always. Love reading about the things you do to your house—your vision is enviable–and love hearing about your wonderful family.
Did you consider placing the column and urn upon the end of the wall instead of next to it?
Looking forward to your recap of the house renovation!
Thanks, Melanie, that column and urn would be way too tall to put on the wall. It would be way off balance. Thank you for stopping by!
You are so amazing, I am a new reader of your blog and I enjoy your posts so much. The retaining wall is just perfect, you and your dad do amazing work together.
It looks absolutely beautiful!!!! You guys weren’t kidding about Georgia red clay, were you? I still want to borrow your Dad for a few years.
I love your blogs!!! This one was a hoot. Your description of working with your dad is EXACTALLY like what I go through doing DIY projects with my husband! And I must say, you gave me courage! My 62-year-old husband is SO like him……stubborn, and set in his own vision of how the project should go. And, even though I know he’s a very strong, intelligent, and capable man, his history with back surgery dictates that there are manual tasks he should NOT be doing. SHEESH! Why are men so stubborn? I guess that’s how they show their love, though. God bless them.
I am definitely feeling some “wall-envy” now. Definitely have to incorporate one into my future landscaping plans. You guys created a thing of beauty! Thanks for sharing with all of us.
And – note to Anne: Rhoda has NOTHING to be ashamed of. Her daddy is living the life he loves. And he has a wise daughter. We should all be so lucky.
What a wonderful project for you and your Dad to do together – so sweet! And the retaining wall looks perfect – well done!!
xo. Leslie
Segreto Finishes
I just love how that wall turned out…it’s the perfect finishing touch to your front yard! And kudos to your Dad…you both did a terrific job! 😉
You did an outstanding job! My dad helped me so much with projects just like yours. We tried to protect each other also. I know you enjoy him so much. My dad has been gone 5 and 1/2 years and I would give anything to have one more conversation or hug with him. God bless your relationship. Great job!!
Wow! I saw your pictures on Instagam and have been waiting for this post. You did a great job as this wall looks fantastic! Another wonderful father-daughter project! Your banter with your dad sounds just like my dad with me!
If Houston had any hills, I would be forsure copying this a.s.a.p.
Alas, I will be just basking in happiness for this not only USEFUL,
but icing on the cake of your outdoor makeover. I love the grayscape,
can totally see the lovliness of holiday twinkling lights through your
windows reflecting blessings inside and out. Once more, classic living
personified and then shared. Love you.