Over the years, I’ve saved some money by framing a few prints myself and using some tried and true methods. First tip: buy a standard sized frame that is larger than your print size. And make sure you take advantage of the sales at Hobby Lobby or Michaels or even better, find some at a yardsale like I did. Case in point, I found these 2 white frames for $5 each at a yardsale this summer. They are white wood, just what I needed and are 16×20.
See the white mats that are already inside the frames, as well as the pretty little fillet too that gives them an extra nice look on the inside edge? The inside of this opening is 11 x 14, too big for my print, but all I had to do was get an 11×14 mat with an 8×10 opening from the 1/2 price sale at Hobby Lobby. They carry standard size mats in all different colors. 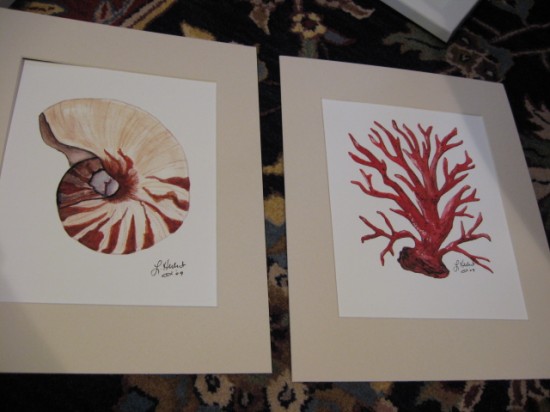
As soon as I saw the frames, I knew they would be perfect for what I had in mind. Framing some pretty shell prints that I had seen in this online store by Laryssa Herbert. She does beautiful work, so if you haven’t visited her shop, go on over. Reasonably priced too for prints. When these came in the mail, I really couldn’t tell that they were not original watercolors. Beautiful prints on very nice paper! So, I added those darker cream mats from Hobby Lobby. I decided NOT to go with the exact same white, since the prints have some variations of color, the darker cream really makes an impact with the prints. And, I like to mix things up. All I did was place the prints on the back of the mats and put a little clear packing tape on all 4 edges to hold them in place.
Then, I opened the frame and taped on the mat with prints already attached. 4 pieces of tape on all 4 sides.
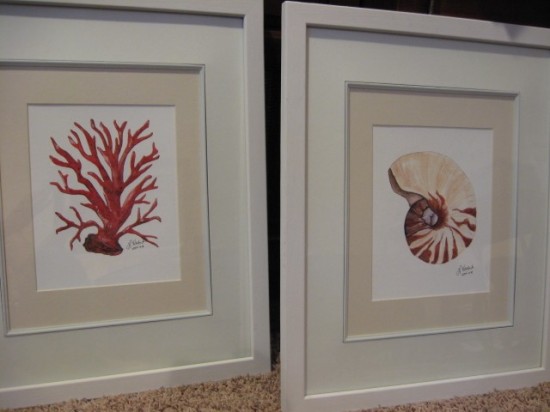
And this is how they turned out. You likey?? Me too! I think they turned out fabulous. So, I have a total of $13 in the frames and about $36 in the prints, so not bad at all. For around $50, I have two beautiful prints that I won’t see anywhere else.
And I love the simple lines and shades of the mats, frame and prints all together. Lovely!
Now, I’ll give you a little tip about hanging frames that I learned from my design friend here in town that I sometimes work with. Love this tip!
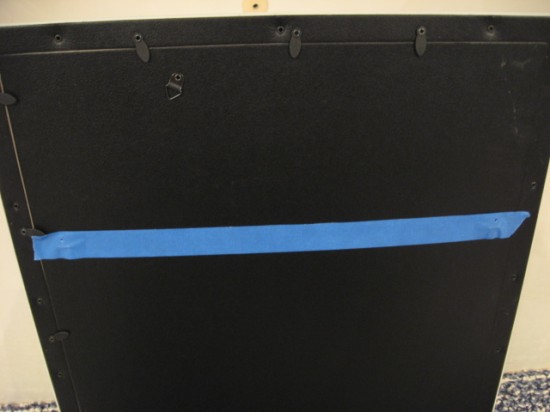
Take some masking tape and tape it across the back of your frame, OVER the hooks that you are going to be hanging on the wall. Punch a hole in the hook where your nail should go.
And it will look like this.
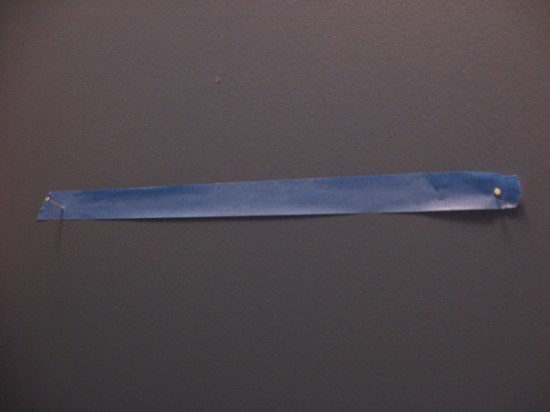
Hold your frame up to about eye level, where you want the frame to be (you might need an extra set of hands for this). Take off one side of the tape and place it on the wall once you see where the hooks should sit on the wall. Don’t worry about it being straight yet.
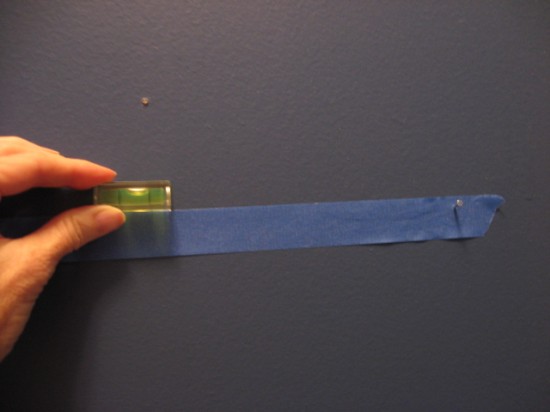
Once you get it on the wall in the right spot, then take a small level (or even better, use a laser level if you have one) and put it on top of the tape to make sure it’s reading level. This will make sure your hooks are even once you nail the nails in. Hammer the nails in place and rip off the tape. Then hang up your new artwork. It works like a charm!
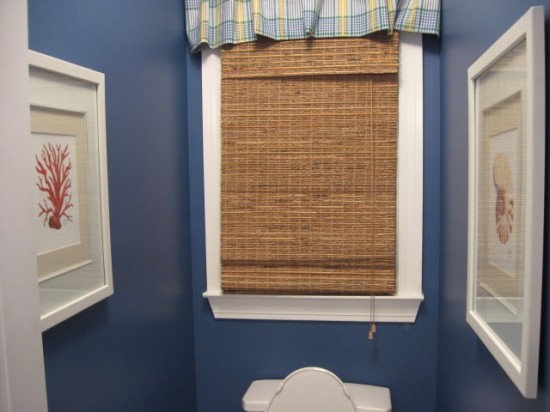
And here’s my new artwork in the master bath water closet. Doesn’t that sound all fancy like? Water closet. 🙂
I adore them!
And I love the color they add to this blue space. White frames are perfect in this bathroom, I’ve discovered.
I hope you enjoyed this little lesson in how to frame something inexpensively. I’ve done this little trick several times with my botanical prints that I have framed myself. This even works on prints that are odd-sized too. You would just need to get a mat cut for them instead of buying one off the shelf, but it’s the same principal.
I also love how much more important a print looks when you put it in a larger frame. And now you’ll know a simple trick for hanging frames easier too. Don’t you love that tape method? I know I do and will use it every time now.
Linked to Kimba’s DIY Day. Click on over for lots more DIY inspiration.


Those look gorgeous! I just love her prints, they are soooo pretty!
that’s a great marking tip. thanks!!
I really enjoyed looking around your blog! What great ideas!!
*Eliza’s blog*
THANK YOU for the hanging tip! I just left multiple holes from trying to hang a picture with those darn hangers on both sides! My husband won’t have to hear me asking where the spackling paste is anymore… 🙂