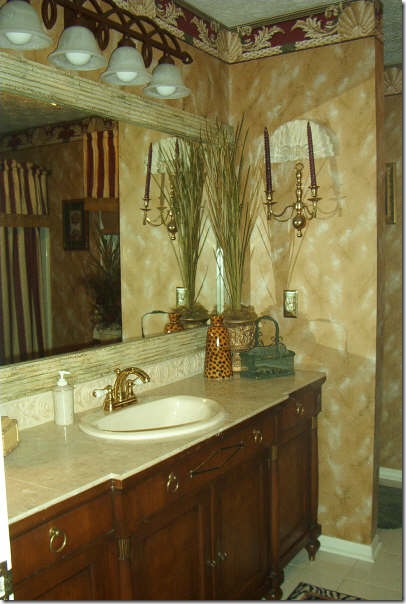
This is my old bathroom in Georgia. We put in the furniture piece complete with sink and marble tiles and it really turned out pretty. I loved this vanity, the feet, hardware and everything about it. That was back when wallpaper and borders were really in (hello 90’s), but I don’t miss either, however, and it was time to move on to Alabama and a new house.
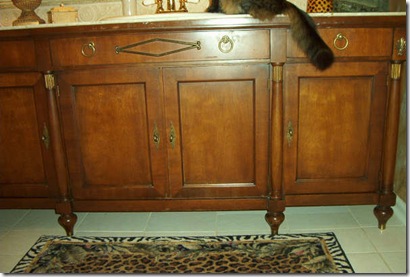
This was a classic dining room buffet in a former life, but worked out well for a new vanity in the bathroom. And yes, that is indeed a cat’s tail you see in the pic. My sweet kitty that I used to have loved drinking water out of the sink.
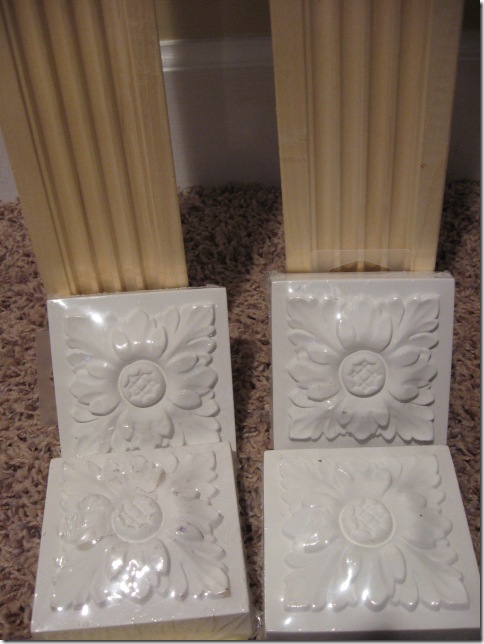
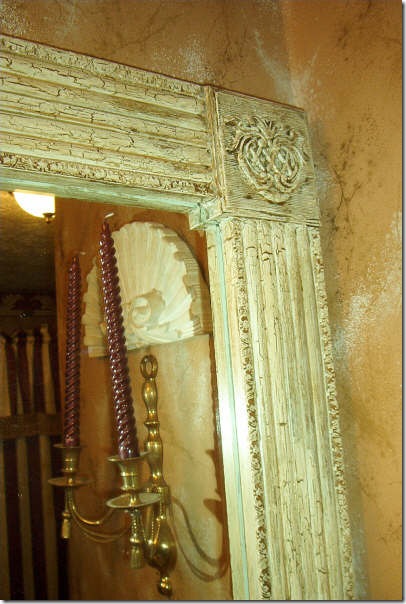
Now, here’s the part I really wanted to show you. This mirror was framed out using square blocks and fluted moldings and glued on with Liquid Nails. These were painted and glued on the mirror by me. And just to clarify, YES…they are glued directly on top of the mirror, not the wall. So, you don’t need extra space on either side of your mirror at all. No more crackle finish this time around, but I’ve got big plans for these……
And 2 naked bathroom mirrors just crying out for some bling. You’ve probably seen this done before, but it’s a great way to frame out a plain bath mirror without taking it down and starting over. You’ll see soon enough and I’ll show off both of them! I’m working on the first one now.


Hey!
I’m visiting your blog for the first time, and just love it! I’ve only been reading for 45 minutes!!! Wow! Wonderful ideas! Wish that you were closer to SC! I have a study that we’re getting ready to re-do! Found great chairs for 20 each at a thrift store. Only trouble is that they are ’80’s UGLY!! I am trying to figure out how to slip cover these babies! Also,trying to figure out what colrs to use! It’ll come!! Enjoy your day!
Hugs,
Susan
I AM going to try this one day….remember this project on GI! It really adds to the mirror. 🙂
So wallpaper and borders are out??? This is why I have to read you — so I know these things!!!
Hi Rhoda,
I have 3 huge bathroom mirrors that have needed something for some time and you’ve just given me the answer!! Thank you.
Have a wonderful week and I’ll share the photos with you when I get them done!
Blessings,
Sandy
I am wanting to do this in my bathrooms.
Rhoda, that’s a great idea to frame those plate glass mirrors. I still remember when you did your old one — beautiful bathroom!
I can’t wait to see what you do.
I’ve been thinking of doing this to my mirrors, but didn’t really know how… I’m hoping you have a step-by-step tutorial coming!
Rhoda,
Okay, now I’m really excited, knowing you did it on the mirror! I can’t wait to see how, so I can do it in all 3 bathrooms. I hate mirrors that aren’t framed.
Sheryl
What a great job! Looks so pretty!
Hellllo, old pal! (OOPS! I meant "LONG-TIME" pal!)~~~ Not only did I enjoy this, but am E-mailing my niece (who just bought a new home in So Cal) your blog address~~~ I had heard about this & seen it done, but THIS will reeeally "show/explain to her" just HOW to do it, so MANY THANKS!!! (And I went to your last blog here~~~ that's TERRIFFIC, too!)~ Hope 2009 is going well for you! Warmest, Linda
Can’t wait to ssee the finished product. My mirrors could use the same treatments.
Love what you did in the former house with the bathroom.
Yes, what do you do about the little plastic mirror holders?
Love it! I’d been thinking about how I would do it, and wonder how it looks from the side. One side of my mirror butts up against the wall, so the edge won’t show, but I’m concerned about how it will look from the other side. Can’t wait to see your step-by-step instructions.
Please hurry and show me more! I’m having to search your wonderful blog for more ideas to ready my home and back yard for a spring wedding for my bonus(step) son and his fiance and a lot of family! Help!
Can’t wait to do this quick but beautiful fix to a bathroom!
Love that idea, Rhoda! However, I have been banned from anything resembling super glue after my little glue incident. I think I might have to be pardoned to try a project like this though, I have those same big mirrors to jazz up!!!
Looks good. Can’t wait to see your next project.
This is great!!! I am so going to do this! Thanks for your great photos!
Hi Rhoda! Love your blog!! I really would like to give this project a try but have a question first! The mirror that I have in my bathroom has these little clip things that hold it onto the wall. Can I still do the moldings or will the clips prevent the molding from glueing well to the mirror, in other words, are the clips going to be in the way? Thanks for your help!!
I’ve been asking (begging) my husband to figure out a way to glue a frame around our huge plate-glass mirror in the bathroom. I’m so excited to see this post–I’m going to have him read it and try to do the same thing. Thanks, Rhoda! 🙂