W
hat a fabulous event we had with the Holiday House, in spite of the weather. Who would have imagined that the very day we had this planned, tropical storm Ida would come blowing through Birmingham? We still had a great turnout though and it was a very fun day. 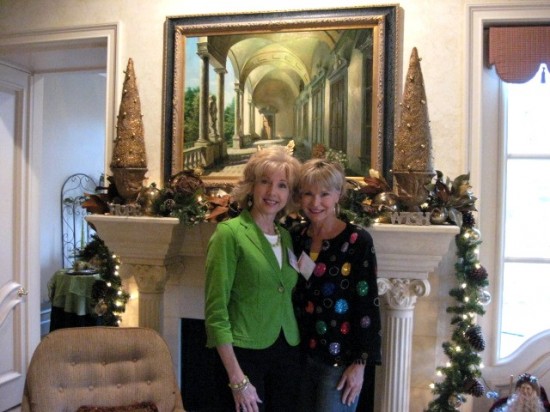
I wish you all could have been there in person. I’ll try to show how pretty it was, but it’s hard to capture everything in pics. This is the area that I did, so I’ll share that part today and then as I get pics loaded, we’ll move on to the other parts of this huge home. My area is a small den and kitchen area, known as the Bistro. It’s right off the HUGE main kitchen and tucked on the backside of the house. This is where the homeowners spend most of their time. This is me and my friend from church, Janice, who helped me get everything in here on decorating day. Thank you to my blog readers who came out for this, it was great seeing you all!
This is the bar area of the kitchen where I placed the small lime green and red tree, along with a white tureen filled with red balls, lime green moss and some pretty beads. I borrowed that Santa from someone, since it looked so great with my colors in here. We were swapping things back and forth and that was a lot of fun, but most everything in here, I brought from home.
This is looking towards the den area from the kitchen. You can see I placed my pretty paperwhites that I picked up recently on a cake stand and added some faux snow. I love the simplicity of putting things out like this and adding that snow. Instant Wintery feel! We’ll go back into the den in a minute, but first I’ll show you around the Bistro kitchen.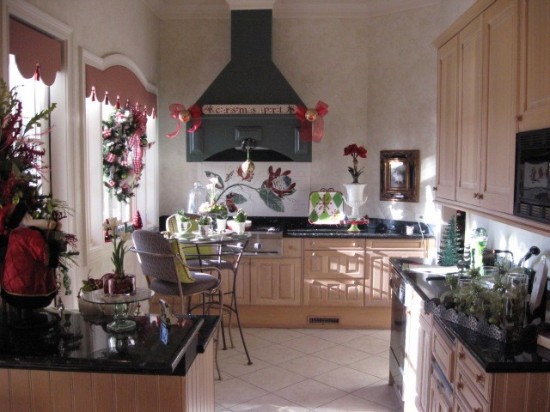
From the den, looking back at the kitchen area.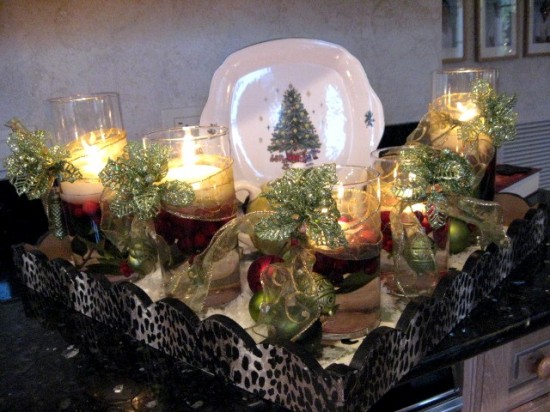
On the other countertop, I added this tray that I painted a long time ago, since it has a lot of green in it and layered some glass candlesticks that I filled with fresh greens and cranberries, added water and lit a floating candle. I just added the green teapot and Christmas plate for some fun. Again, added the fake snow and some Christmas balls.
These floating candles got a lot of attention and comments from everyone coming through and are so easy to do. I’ll do a post later on how to set these up and use them for a party. They are SO easy.
There’s a glasstop Bistro table in here and I added some pretty plates and Christmas coffee cups, with my linen yardsale green and white napkins tucked inside. I knew they would come in handy for something. Again, I used the other faux paperwhite on top of the Southern Living at Home pedestal with green moss, balls and pinecones tucked in, sitting on a plate with more Christmas balls and fake snow. Simple, but pretty, I thought.
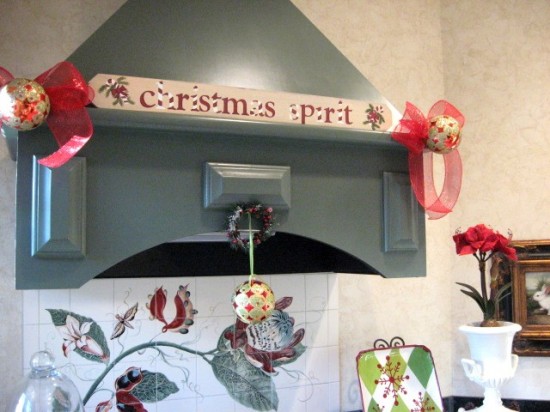
Over the stove hood, I added a pretty Christmas sign I have at my house, along with some sparkly balls and ribbon, with a small wreath and another sparkly ball hanging from the front.
Over on the left side of the stove, I placed my white cakeplate with big cloche on top. Some of you might remember I did something similar last year in my kitchen, adding some little ceramic people for a Winter scape under glass. You will see this at my house again this year. 🙂
This pretty wreath with the red and white checked ribbon was a loaner, since it went so well in my space. The Joyful Tidings greeting in the window is mine, as well as the red bottlebrush trees. I did add the lime green balls to the wreath to bring that color in too.
Another shot of the Bistro table.
To the right of the stove area, I added in my new whimsical cakeplate and platter that I found last year in the after Christmas 1/2 price sales. I love these pieces and hope to put them to good use this year. The faux amaryllis is the homeowners and I borrowed it to use in my big white urn, perfect on top of the cakeplate.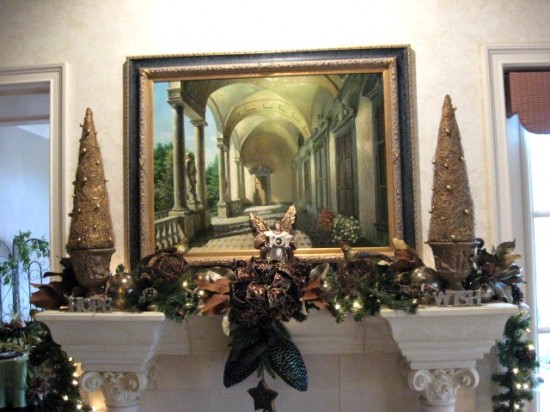
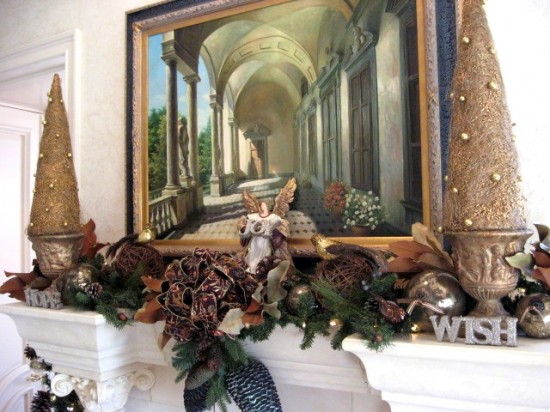
Moving back into the den, I went more understated in this room, with bronze, silver, and gold and very neutral. Look how well it all goes with the pretty painting over the mantel.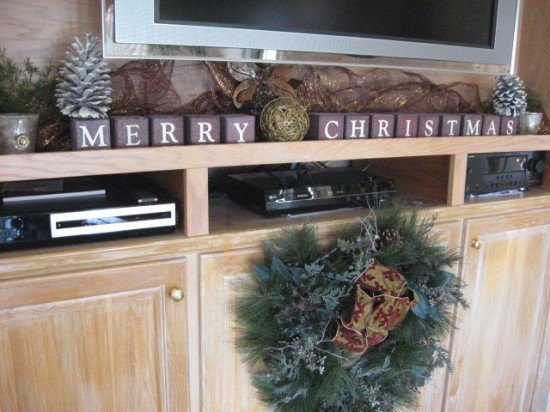
To the left of the mantel, is the big screen TV, so I added in Merry Christmas letters that I also found last year in the after Christmas sales. I love the simpleness of this too, with some pretty votives, pinecones, and simple pieces. The wreath underneath is mine too, found at Target a few years ago, and it totally looks real, but is not.
The mantel and coffee table. I added a pretty gold and black runner to the coffee table and used my large lantern with 3 battery powered candles, which I really love. Those are great and they flicker just like the real thing. I got mine last year at Michaels.
I added some fresh greens and a few silvery sparkly balls and pinecones to finish it off and tied a fancy bronze bow around it.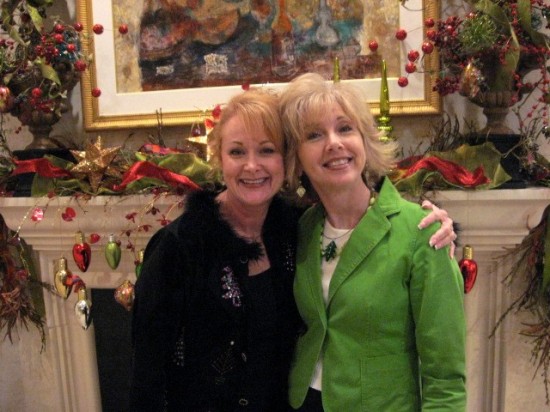
Me and my friend, Cindi, who is a designer with her own business. She did a fabulous area, which I’ll show you later on. We go to church together too and have had so much fun getting to know each other during this project.
That’s all for my space. Stay tuned for much, much more from this beautiful home. It will take me days to take you through it all, but I’ll keep posting until I show all of it. I won’t do it all in a row, but will sprinkle in the inspiration throughout the next few weeks, so we all don’t get burned out on Christmas too early! 🙂
After all, we still have Thanksgiving to celebrate first. And I love that Holiday too.


OH my what gorgeous colors you used… I love the lime green. Each room is just beautiful… I can’t wait to see more.. how fun it must have been….
Hugs;
Alaura
Rhoda, It looks fabulous. I look forward to you sharing some ideas/tips on some of your designs. Did you do the bow on that faux candle? I would love to know how to do that – I can never do bows but would so love to do them as beautifully as that bow. Diane
WOW!!! Your rooms are great! you are so creative! =)
Looking good Rhoda! So much fun even with the cruddy weather. Looks like I will be in the “ham (as my son calls it) on Friday the 20th…will let you know!
xx
Oh Rhoda, just beautiful my friend…love what you did…when are you coming out to my house lol..stunning…
Rhoda my friend, you did a beautiful job. You have such a God given talent. I am proud of you, and so blessed to know you.
So very pretty.
It amazes me when people have all of these Christmas decorations because it means you store it all year…somewhere.
I wouldn’t have a clue where to keep all of that…I guess when the kids move out there will be more storage in our home. That is one upside to them growing up…
What I love is that you put it to very good use.
What a beautiful room.
Becky K.
It’s gorgeous!!!
I’m so bummed that we missed it! But Chris was quite sick, so we were best to be quarantined…
You did an amazing job!!
The rooms look gorgeous, great job! And I love your green blazer, very festive and a great color on you!
Just beautiful and elegant!
Everything looks fabulous! I love the bistro table and it’s bright and happy decor. Thanks for the tour.
I totally thought the paperwhites were real til you mentioned they were FAUX!!!! And I am a floral designer working with all silk flowers:):) Your area looks fabulous! LOVE the little people under the cloche! Everything looks just wonderful. I love celebrating Thanksgiving too but wish it was earlier so I could decorate NOW!!!!!!! XO, Pinky
PS, did you get the 2 trees on the mantle in the den at Home Goods? I just saw some VERY similiar tonight at HG!!!!!
Hi Rhodie!
I have been having a really hard time lately being able to leave comments on your site.
🙁
BUT I got lucky this time so here I am…..
I LOVE your area girlfriend – so beautiful and so YOU. The whole home is gorgeous and what a fun idea to do! I wish I could have been there but thankfully you brought us with you and shared all of this festivity with us! Everything is so pretty!
xo,
Kim
Wow, Rhoda, everything you did looks so festive and pretty! You’re getting me in the Christmas spirit early! I especially love your floating candles. I think I may copy you for my Thanksgiving table! I’ll be sure to post pics and give you credit if I do! Thanks for the eye candy. I’ll be back for more!
This was very enjoyable…..looking foward to seeing the rest.
**What did you use for snow in the cloche?
Love the red and white cloche!
.: seriously, this is inspiring~~ Thank you~~ (^v^) :.