The laundry room is coming along and I will be finished this week with everything, way faster than I thought it would be. The last thing to be done is hang the light fixture that I ordered and it just went up last night. I’m so excited to share this space with all of you! It’s such a cute space that I dreamed up in my head and then executed step by step. Today I’m going to show you my thought process of how I decided what I was going to do in here.
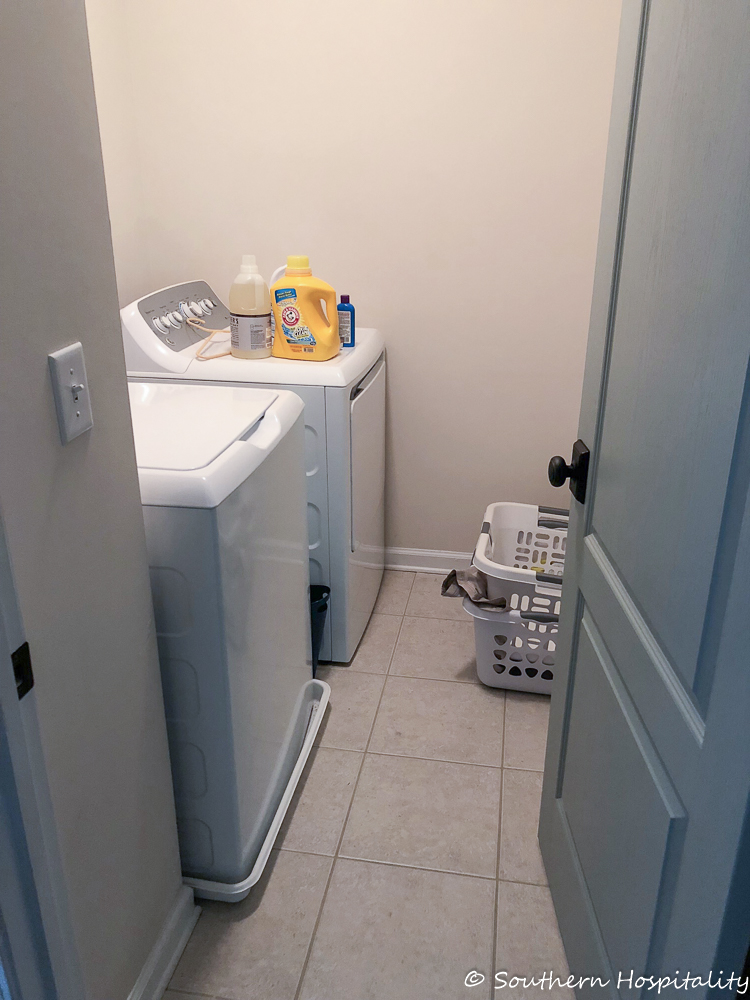
I shared my current boring beige laundry room with you back in October and shared some great small laundry inspiration pics that I loved. Some of them were larger than mine and some were just closets, but there was a lot of fun laundry rooms in that post and I talked about some of the ideas I was mulling over for my small space. I didn’t find anything that resembled what I wanted to do, but I went forward with my plans anyway and hoped it would all turn out like I envisioned.
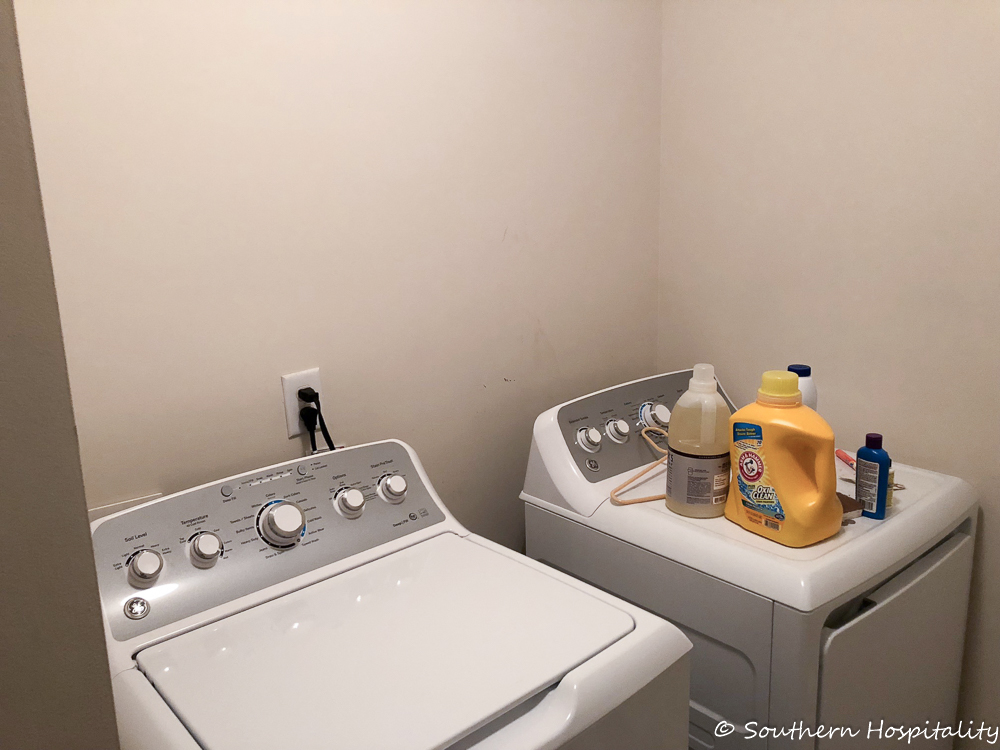
I knew I wanted a mix of wallpaper and paint, but it took me awhile to figure it all out. I also was planning to use my beadboard wallpaper as a wainscot treatment topped with trim boards all in white with a colorful wallpaper above. I planned to hang a cabinet over the washer and dryer and paint that wall and the wall coming in the door on the left all the same color.
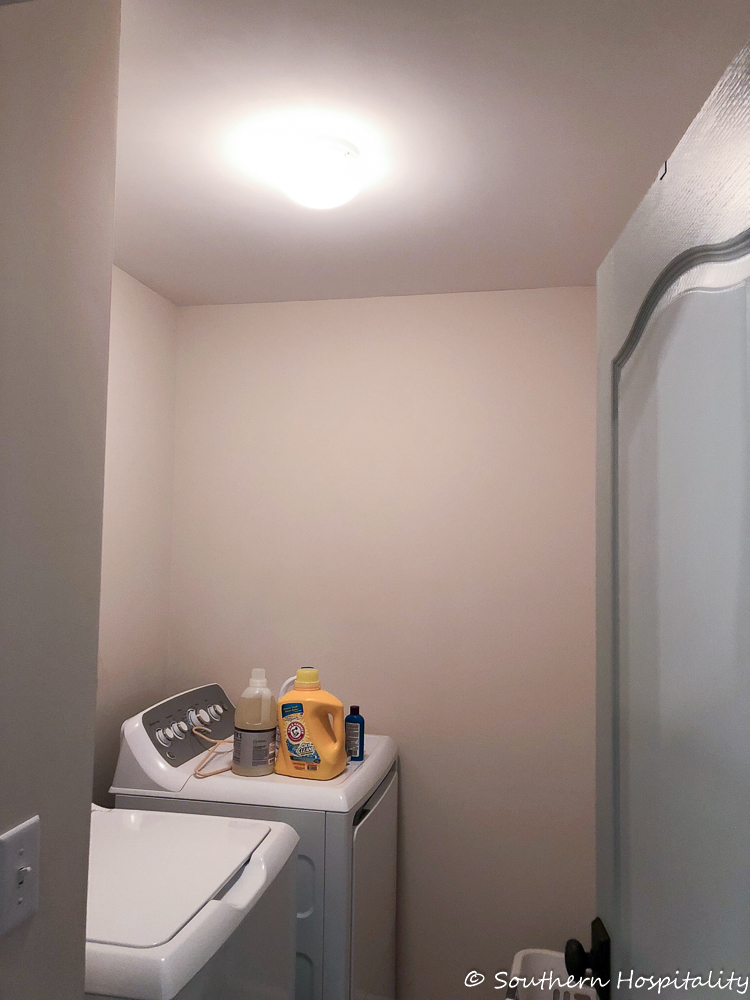
You can see how tiny this space is. I finally got it all figured out and started pulling all my design ideas together in my head, buying the wallpaper when it went on sale before Christmas and pulling paint colors out of the wallpaper.
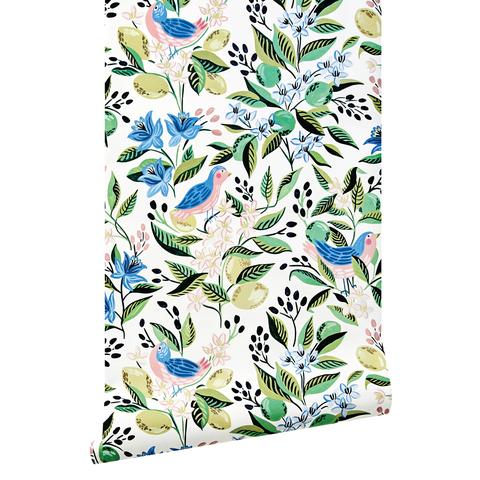
My entire laundry room plan hinged on this wallpaper by Caitlin Wilson Design. Called Citron Vert, it was such a colorful paper and I ordered a sample just to be sure I loved it. I did! I couldn’t find another one I liked better so even though this one was $215 a roll, I bought it and hung onto it for a couple months when they had a 15% off sale back before Christmas.
I pulled a deep blue and a pink shade from the wallpaper and ended up with Down Pour and Rosy Outlook from Sherwin Williams as my paint color choices. The rosy pink color would go on the ceiling. So picture white on one side, navy blue on the other, with the colorful floral wallpaper on top of the white tying it all together.
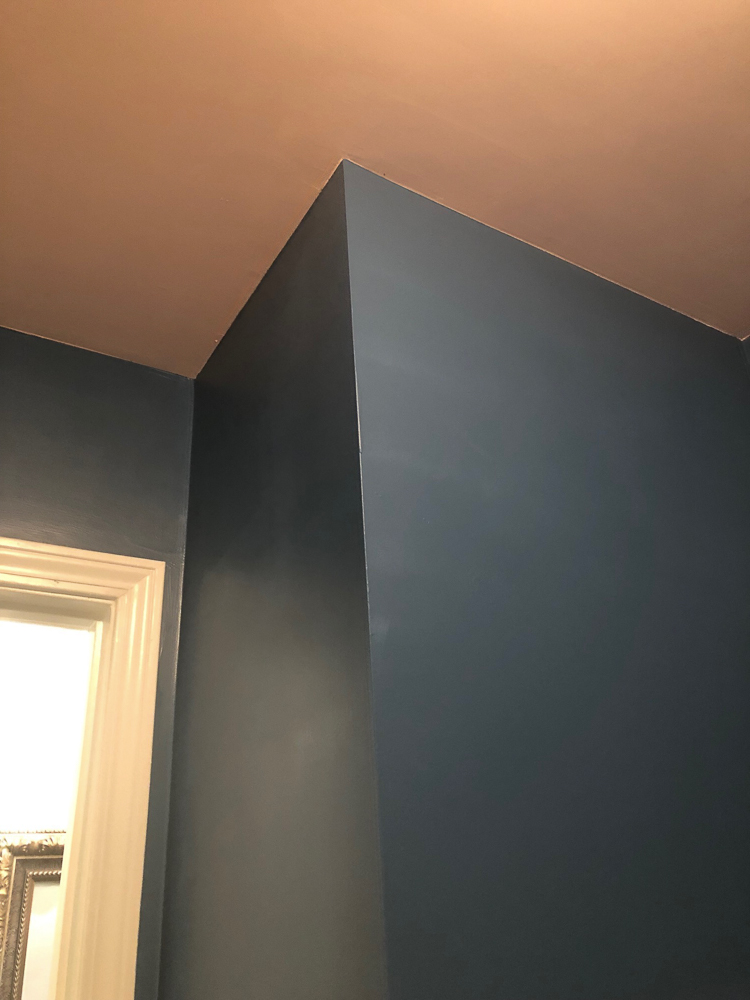
That’s what I’ve been busy doing the last week or so. I decided to paint the wall where the washer and dryer sits the deep blue shade, Down Pour. I first painted the ceiling that Rosy Outlook shade and it’s really pretty. I started with the pink ceiling, then the blue walls, then the beadboard wallpaper, then the floral wallpaper. I’d love to add crown molding in here, but that’s for another day if Mark wants to tackle that one with me.
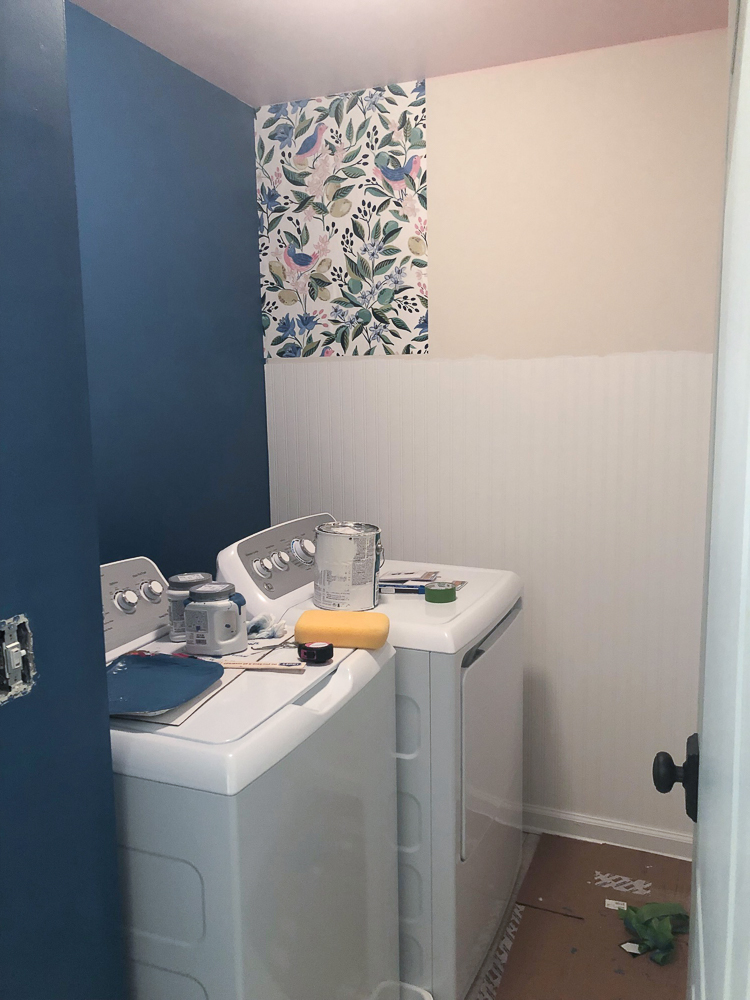
After the ceiling was painted, I painted that left wall and the small wall where the door is in Down Pour by Sherwin Williams. The next step was adding my beadboard wainscot, so I did that next on that straight ahead wall and the wall to the right. I couldn’t stand the wait, so put up a piece of my floral wallpaper just for fun so I could get an idea of how it was all going to look. I love it!
Here’s the Graham Brown beadboard wallpaper I use (affiliate link):
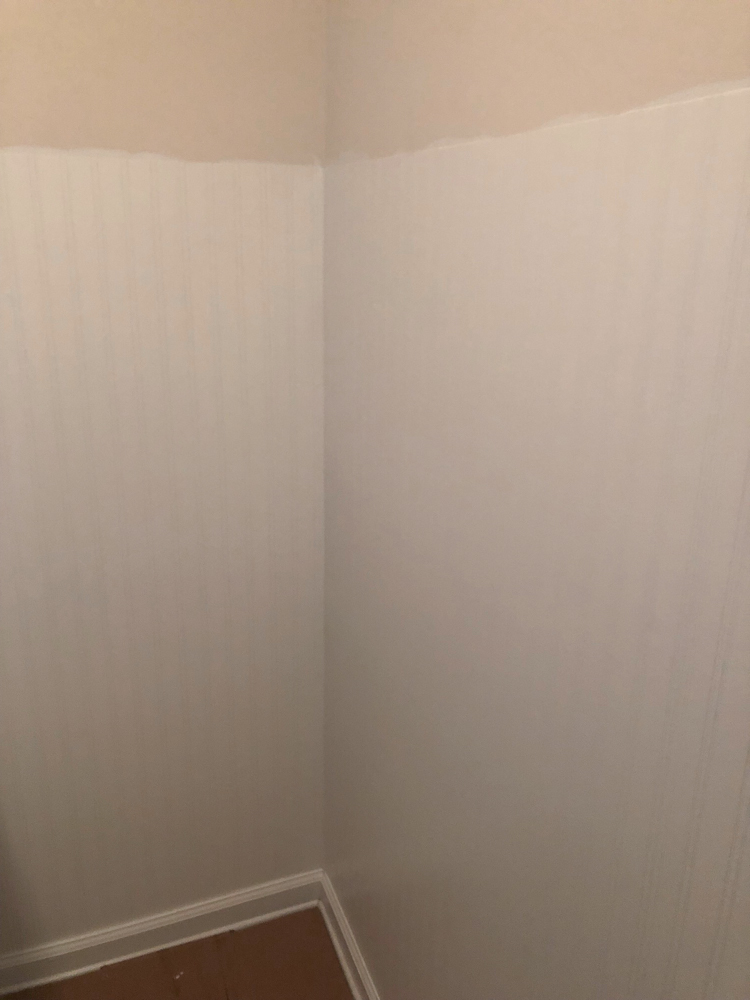
I’ve blogged about putting up this beadboard wallpaper before but I’ll mention again that it’s prepasted and from Graham Brown, which is out of the UK. They have distribution here in the US and the rolls are $30 each, plus shipping. I used to sell it in a little shop, but since that all slowed down the last few years, I stopped selling it, but many of you bought this wallpaper too and used it for years. I discovered it about 10 years ago. Lowes also has a beadboard wallpaper version. This space of mine took less than a whole roll.
Why I chose beadboard wallpaper instead of the real beadboard panels, some one asked me that? Ease of installation and cost. Less than one roll did my laundry space and real beadboard would have been more. Plus, if you put real beadboard sheets or panels on top of existing baseboard, it just doesn’t work, the panels would hang over the baseboards, so I wanted the ease of wallpaper in this small space and it sits right on top of the baseboards. Wallpapering in here was hard enough, but adding real sheets of beadboard would have been so tight and hard to install. I had to squeeze behind the dryer to get the beadboard up and it was very tight quarters. This project was mine so I did it the easy way! And I didn’t want to have to bug Mark too much, he did have to help with hanging the light and the cabinet.
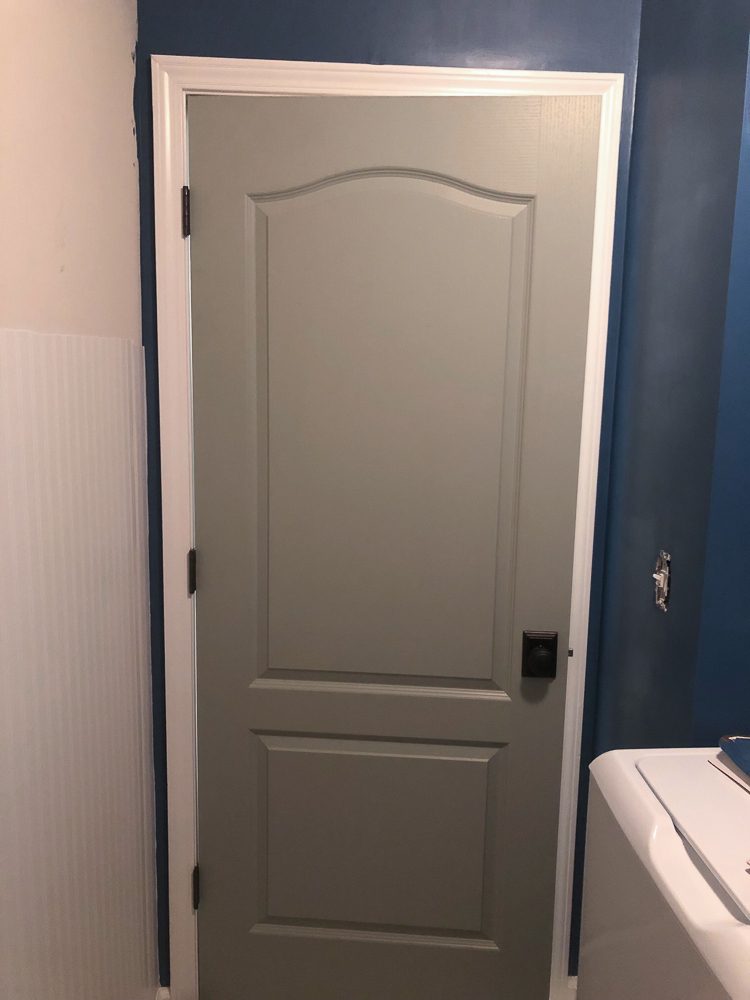
So, paint on one side and beadboard wainscot on the other side, topped with that beautiful wallpaper. That was my vision and I hoped it would come together like it had in my head.
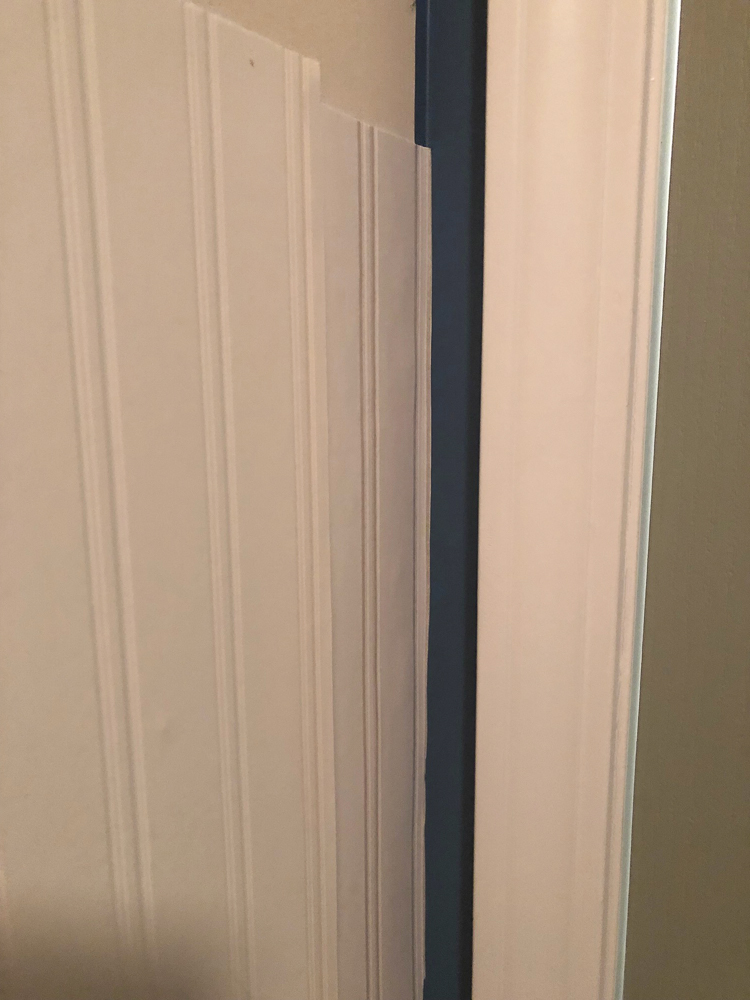
Just a peek at the beadboard wallpaper process and how I ended it in this corner behind the door and next to the navy paint. I had to cut a sliver of beadboard wallpaper for this corner.
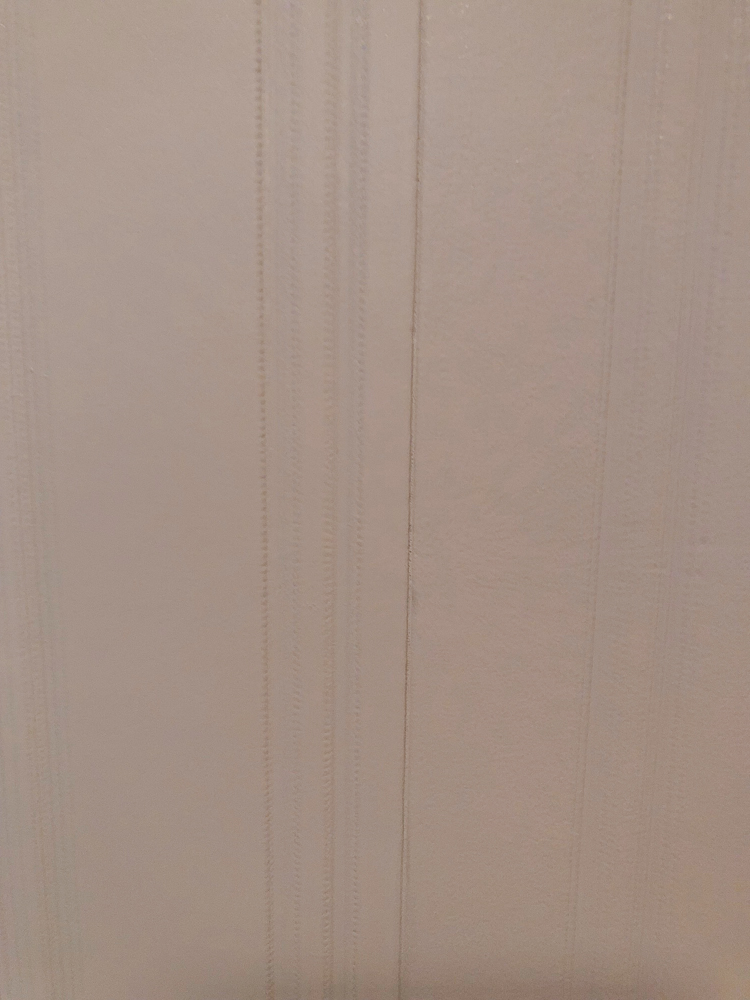
The beadboard got 2 coats of my white trim paint, a semi-gloss pure white rolled on. The seams in the beadboard disappear once painted. You can see them here but this is really close. Painting the beadboard wallpaper makes it look so real! It’s textured and has grooves so it does look real.
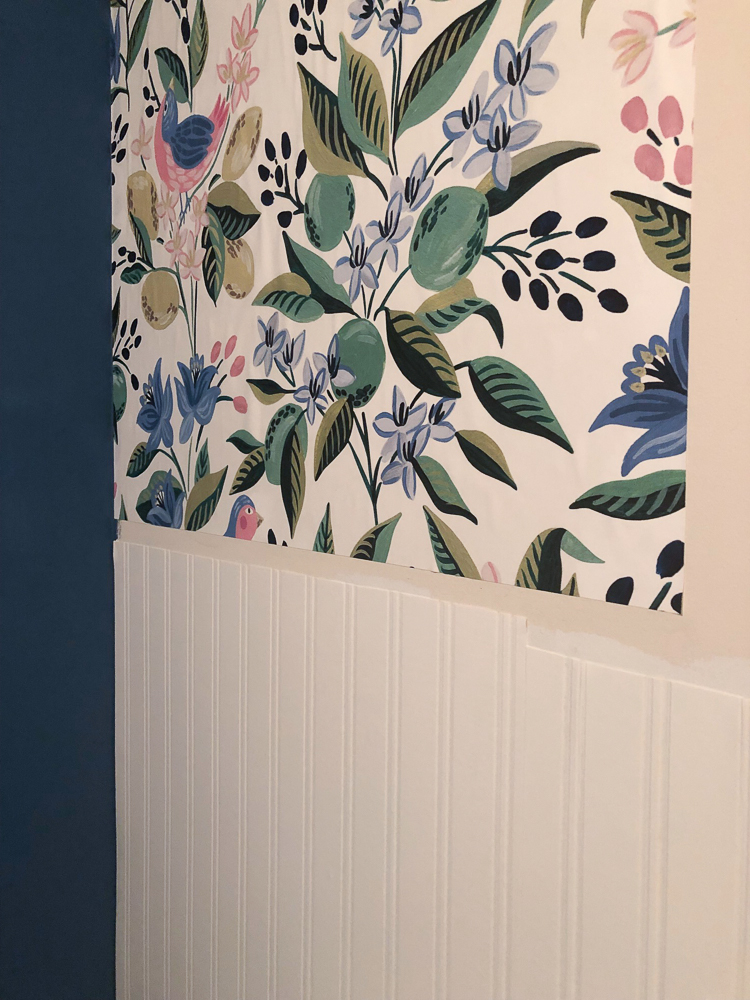
I decided I wanted the beadboard to go up about 5′ on the walls and the floral to show almost 3 feet (our ceilings on the second floor where the laundry is are 8′ tall), so I cut all my beadboard strips the same length and just wet them, installed them and moved around the room. This goes really fast, but you need to smooth out the paper as you go and make sure there are no big air bubbles left in the paper. I used a big sponge to smooth it all out and get off the excess glue that oozes out the top and sides. I knew I’d be putting 5 or 6″ molding across the paper so left a gap between the two. This all gets covered in the end.
I cut my floral paper in 33″ strips, not quite 3′. I matched the pattern and kept cutting them until I got all the way around the wall. I had plenty of the floral but not a huge amount left. The roll was a splurge at $185 a roll (with the 15% discount), but definitely worth it for the impact it has in the space. I’ll explain that process a little more below.
A note about this wallpaper. It was pricey and that made me nervous, but I was determined I could hang this wallpaper myself. I’ve done it before and figured I could do it again and it went SO smooth and was easy to install, so just a word of encouragement if you want to try it. The fact that I only used it above the wainscot definitely made it easier and if I was doing a full wall, I’d get a helper. Two people make it much easier.
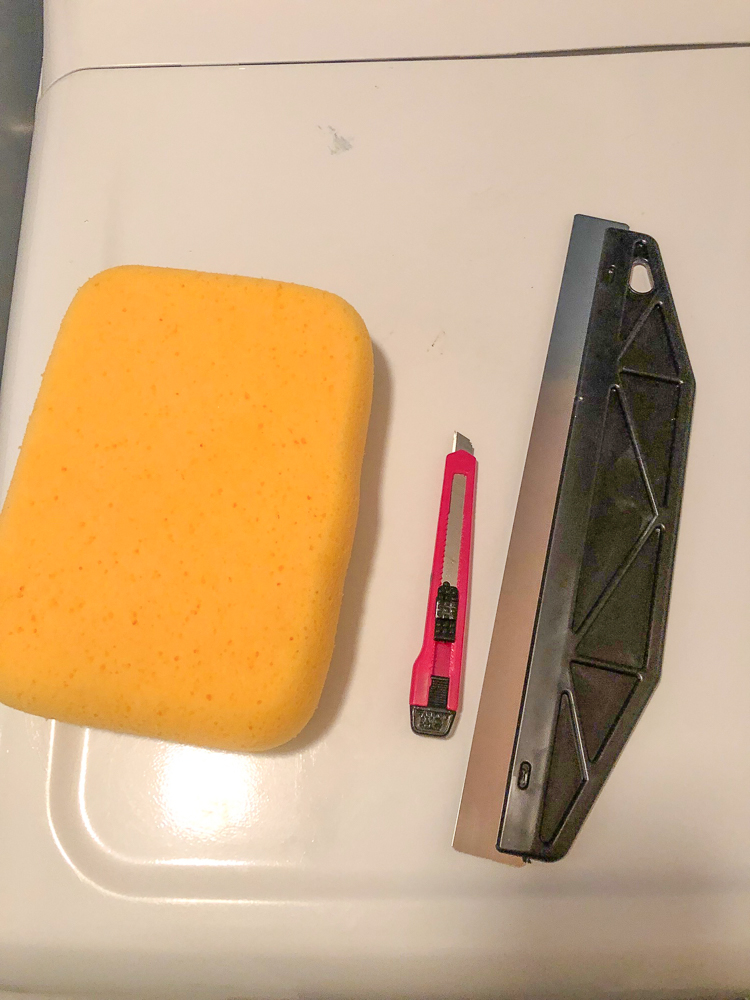
Tools Needed for Wallpaper
- Sponge for wiping down
- Utility knife with a sharp tip
- A straight edge tool to help cut across the top of the wallpaper against the ceiling.
- A square for cutting straight lines on the paper.
- Scissors to cut the paper on the roll.
My wallpaper was prepasted, which I was really happy about. All I had to do was soak each piece in the bathtub wetting it well and then letting it sit for 2 or 3 minutes (booking).
Once I had my beadboard wallpaper up at about a 5’height I installed all of that first, let it dry, painted it all 2 coats of white and then started with the floral paper.
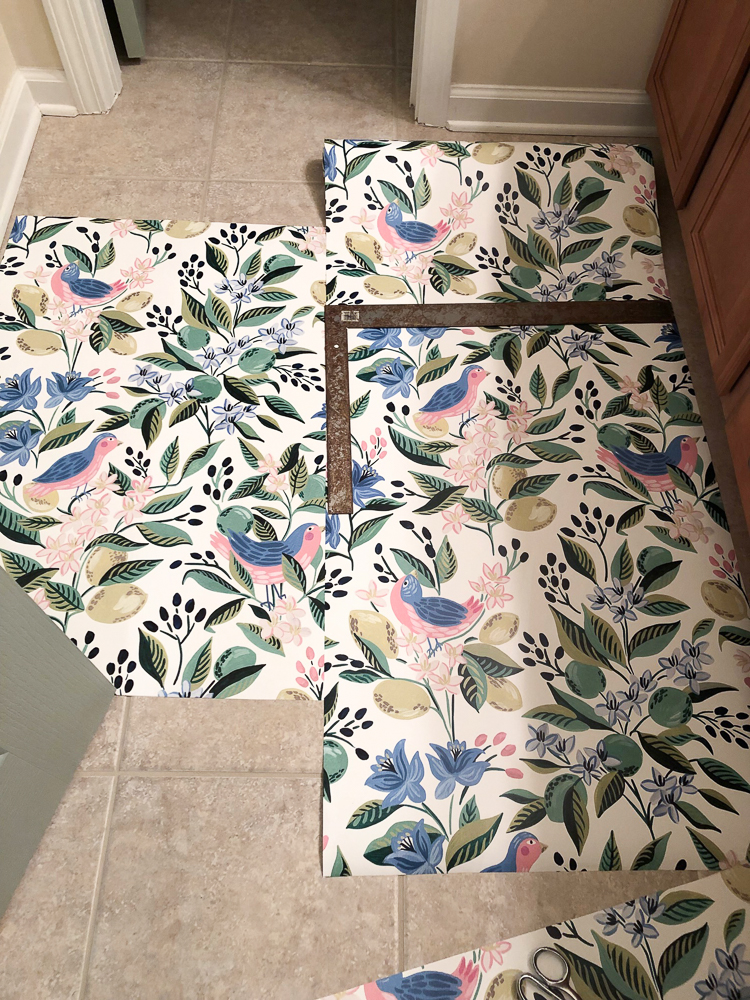
I laid out the floral paper, cutting my first piece at 33″ long. Then I laid it to the side, pulling more paper out and finding the repeat on the paper so that I could cut it properly. I left about an inch at the top of the next piece after matching the repeat, so that I could put the paper all the way to the ceiling, matching the repeat and then cutting off the little bit of excess paper with my utility knife for a clean edge on the ceiling.
You can see the square I used above to cut straight lines on the paper.
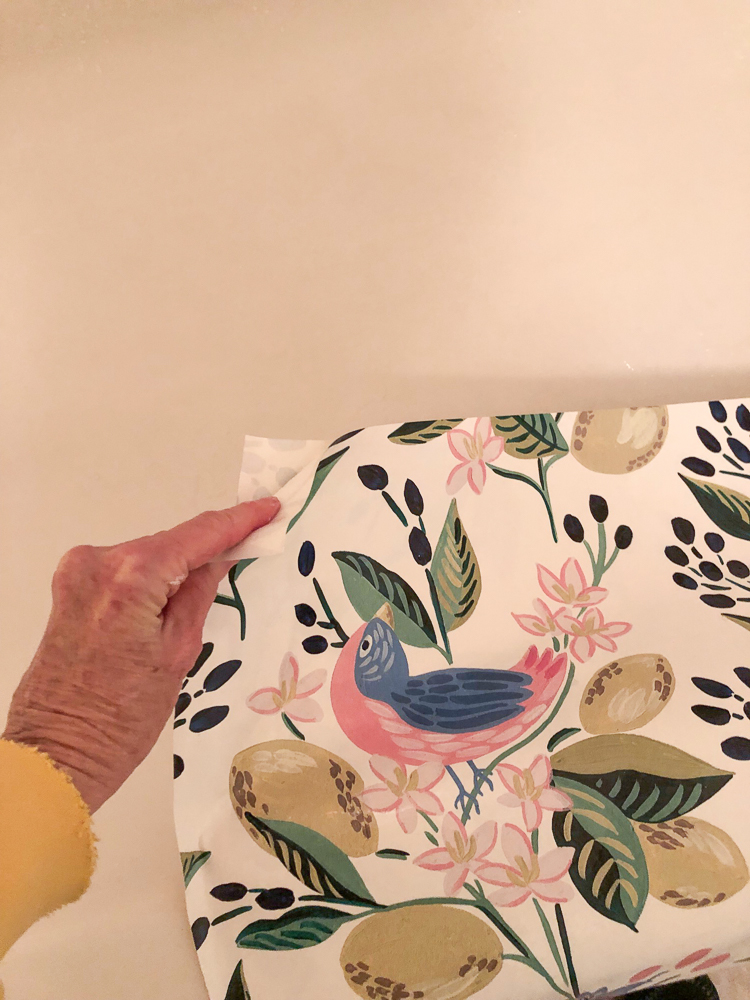
This paper was really easy to handle and I was very impressed with it. I had no issues at all with it stretching, tearing, or being hard to work with. I wet the back and booked it as the instructions recommended, which means folding the sheet front to back with the glue in the middle. This activates all the glue and gets it ready to go on the wall. Be careful and don’t crease the paper.
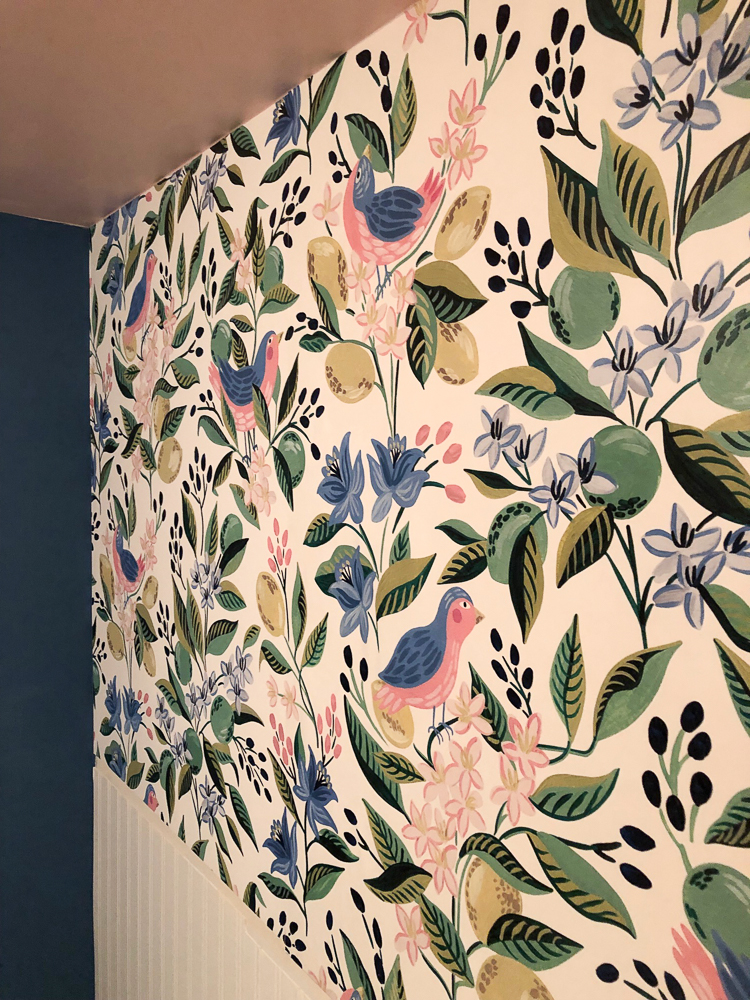
I continued on with the floral piece by piece, matching the repeat and cutting off the little excess on the top.
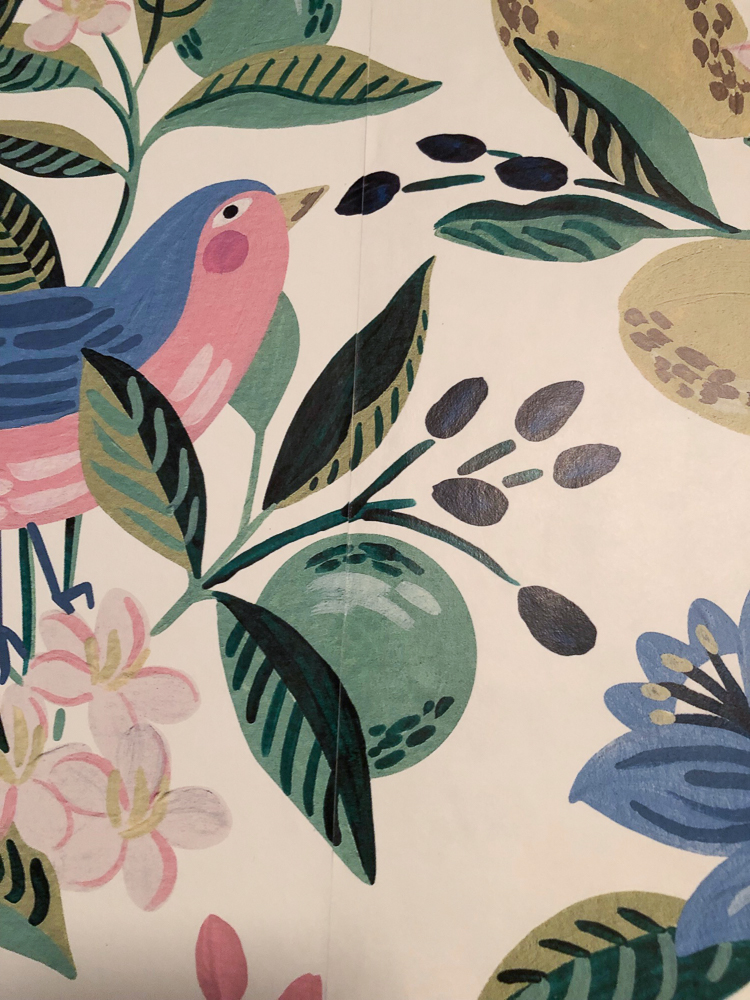
Here’s one of the seams. It looked so good up on the wall, I just love this wallpaper, it is going to create a garden effect in my laundry room. And those birds are just so cute!
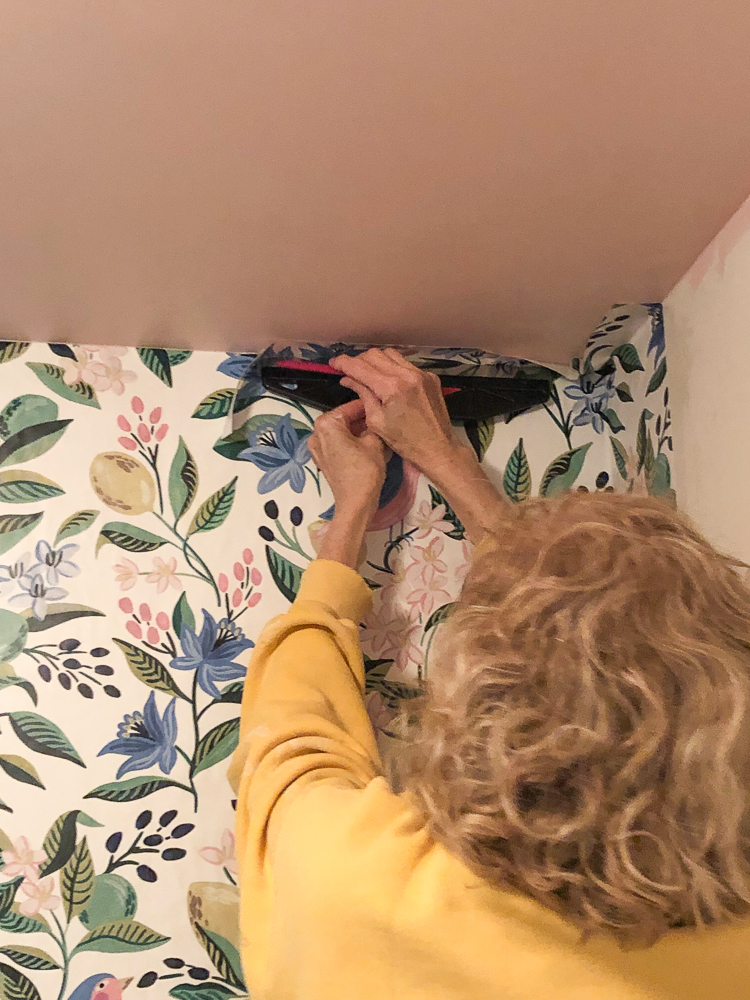
And here’s a demo on how after I matched the seam, I wiped down the paper, getting all the bubbles out and smoothed it all out. I went back and took that straight edge tool, pressed it to the ceiling and used the utility knife to cut away the excess piece of paper. I did that last after getting the paper exactly in place and smoothing it out.
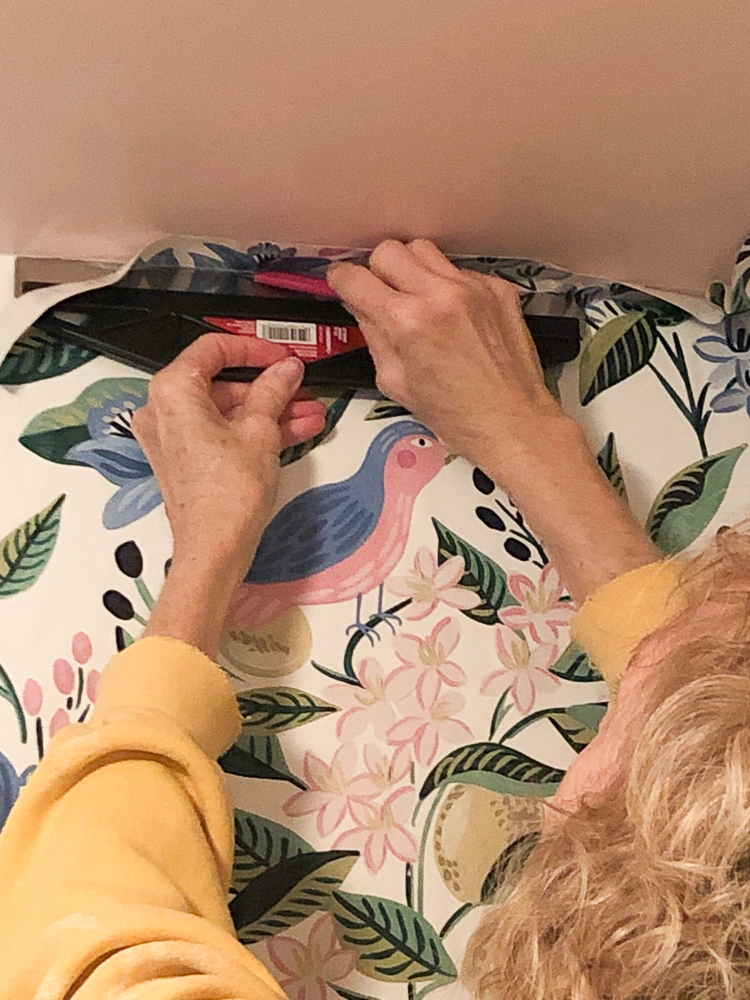
It worked like a charm and the paper just pulls away if you’ve cut it cleanly. In the corner, instead of hacking at the paper right in the corner, I cut up to the corner on either side with the utility knife and then used my scissors to cleanly cut straight across and then pushed that back into the corner where it fit perfectly.
You really want to be sure and not cut too much when you’re trimming, especially around doors and windows. That’s the part that I always found challenging. Not cutting too much away when you’re trimming so just go slow. I was glad I decided not to go around the doorway so that was less to deal with and my job went fast and stress free.
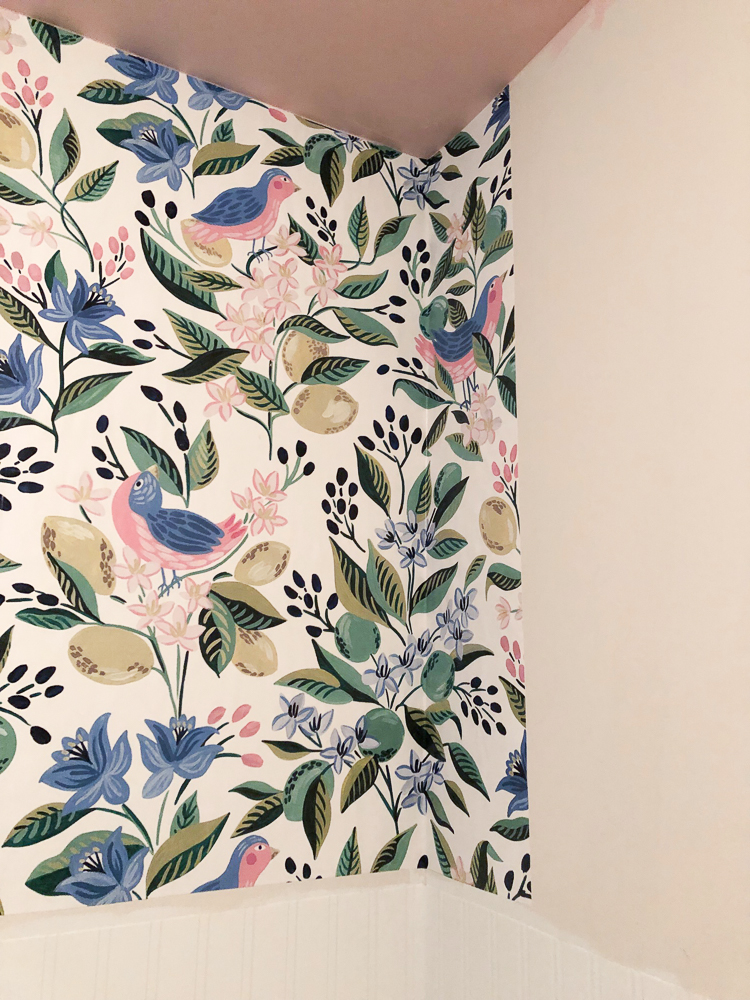
Wrapping around the corner, just take it slow and smooth it out as you go making sure the seams still match. Once you match the repeat, take your hand and press down in the corner, pulling the paper into the corner and smoothing it out towards the right side. You need to get it firmly into the corner so it sits smooth and then work the bubbles out to the right side. It doesn’t dry right away so you have plenty of time to move it slightly where you want it to stay. Cutting against the ceiling is easy with the right tools.
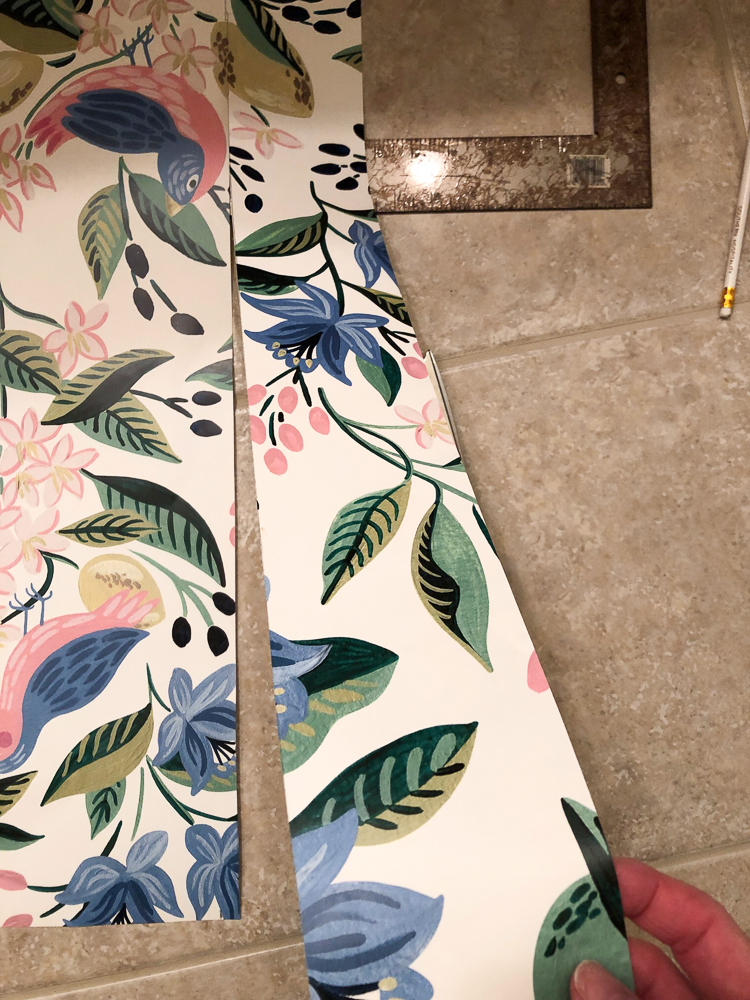
Once I had my first piece cut, I kept using the next one as a guide for the next and so on. I kept measuring, matching up the repeat and cutting with a square. You definitely want a square doing this job. Once you have your line marked, just place the square on the paper making sure it lines up with the edge and you’ll always get a straight line. I trimmed off the bottom of each piece after the match point was found and cut using my scissors. There was always excess on the bottom half that I didn’t need (about 5″ or so of waste between repeats), so I just used the square, drew a line and cut that off.
I used 6 strips of floral paper on the walls above the wainscot.
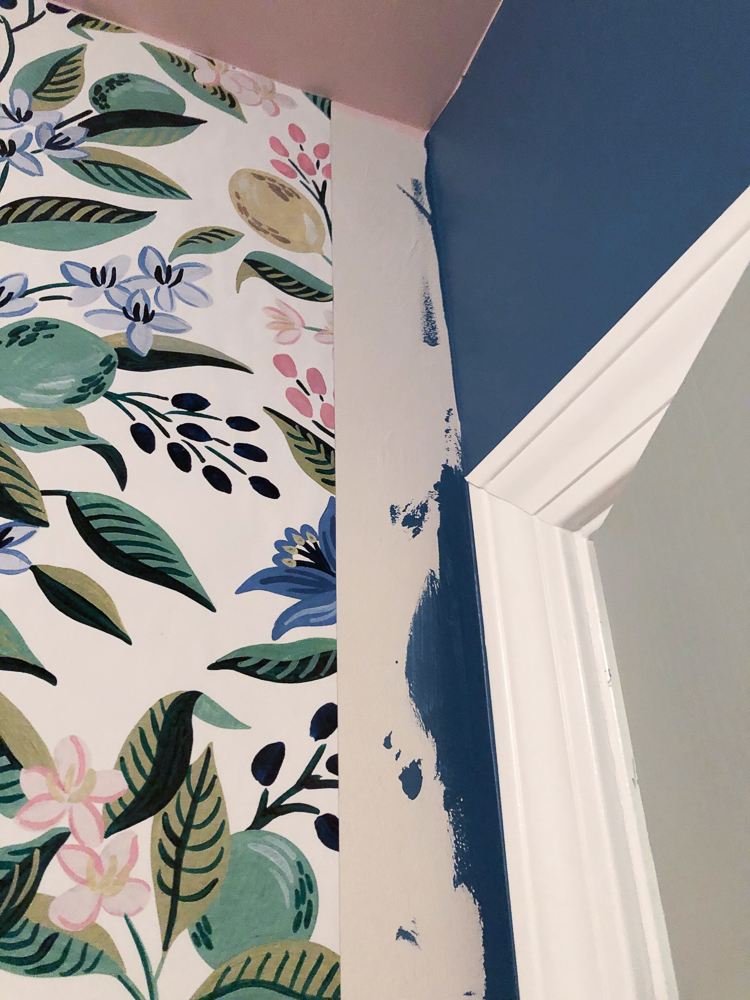
I got around to the far side of the wall and had one little section left to cover. So I cut one more piece, then held it up to the matching seam and marked a little extra to the right side, cutting that all off except for about 1/2″ that I trimmed off in the corner. I used that straight edge tool to press it into the corner and cut it the same way I did the ceiling and it butted up next to the blue paint with a clean line.
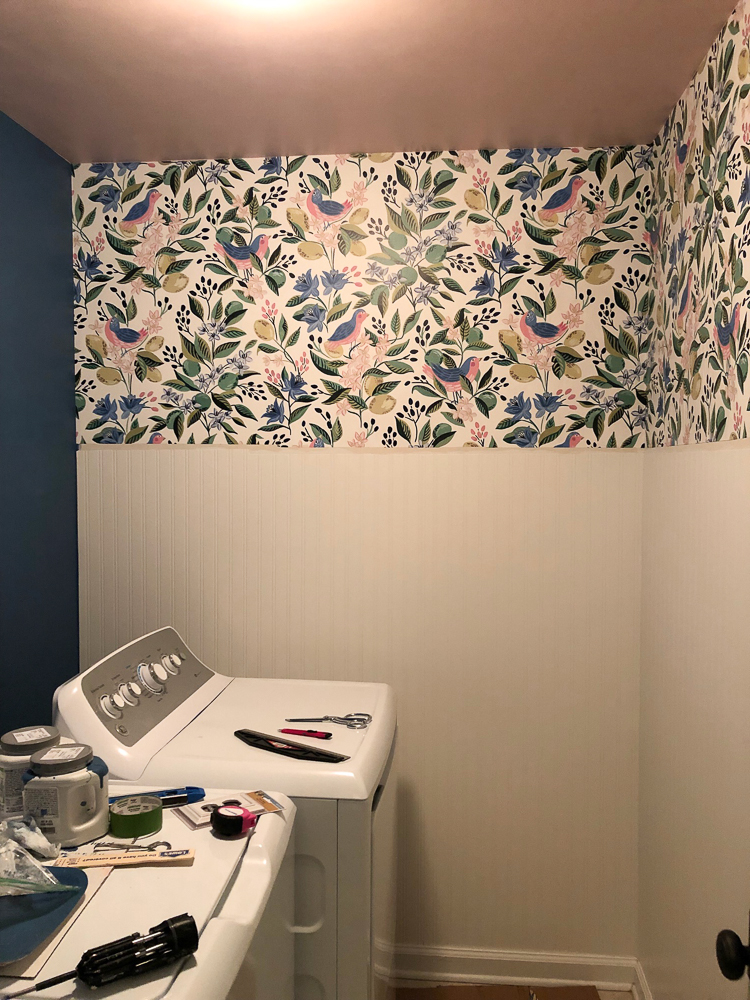
And here’s a look at the finish of the wallpaper. It is just what I wanted to make a dramatic statement in this space. The colors are so happy and pretty and these pics don’t even do it justice. I can’t wait to show you the finished space. It’s just what I envisioned and everything I hoped it would be.
I’ve got a new gold lantern light fixture going in that’s really going to make the room.
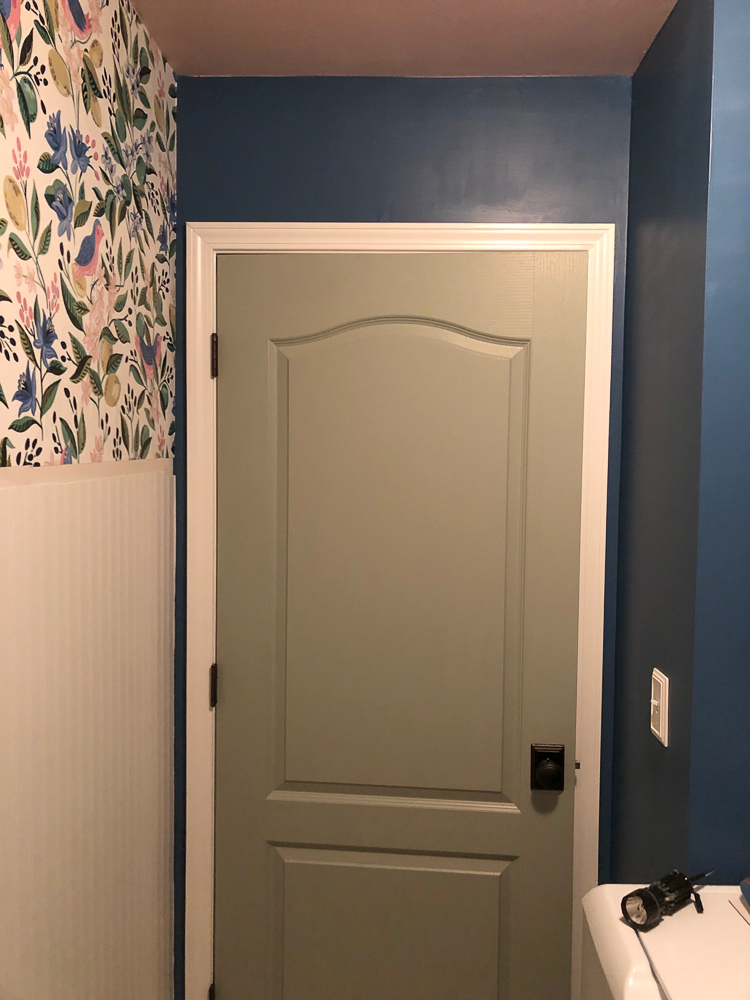
The corner by the door.
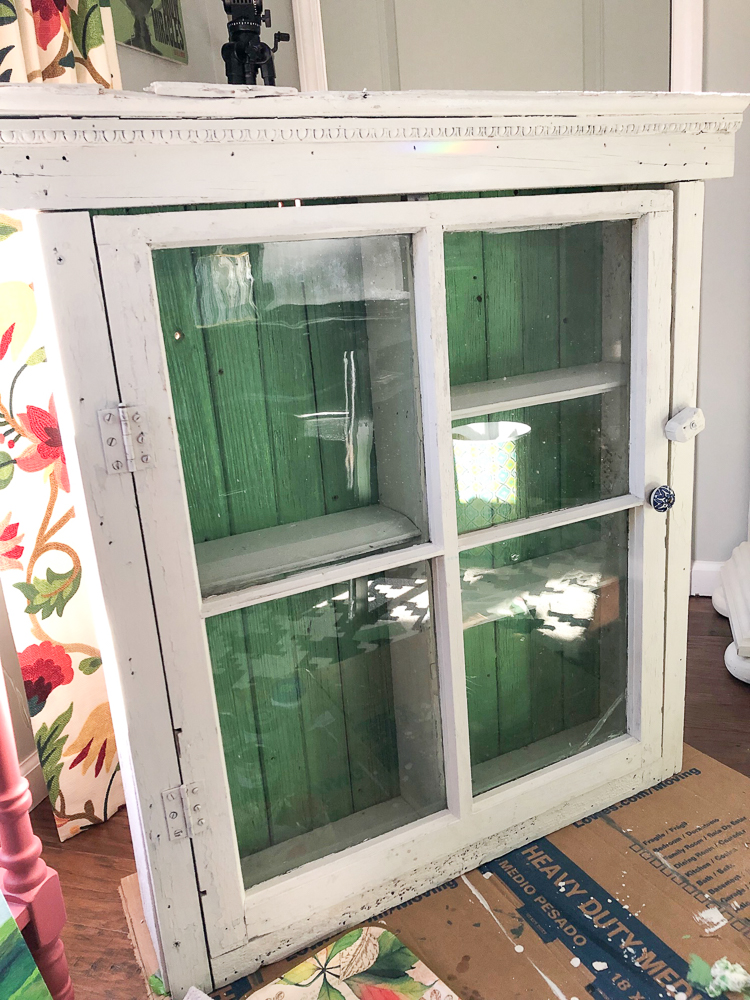
I talked about this on Instagram, but I haven’t told all of you that I’m going to use that chippy cabinet in the laundry room that used to be in my old bathroom. Remember this? I gave it a quick coat of fresh white paint to cover a little bit of the chippy and I painted the back planks in a pretty fresh green and I love it. I also picked up a new blue and white knob from Hobby Lobby that totally finishes it off. It’s going to be so cute in here on the wall above the washer dryer.

I’ve also got pretty brackets from Lowes and a stained wood shelf going on the back of the washer/dryer on the wall above which will give me some storage space too.
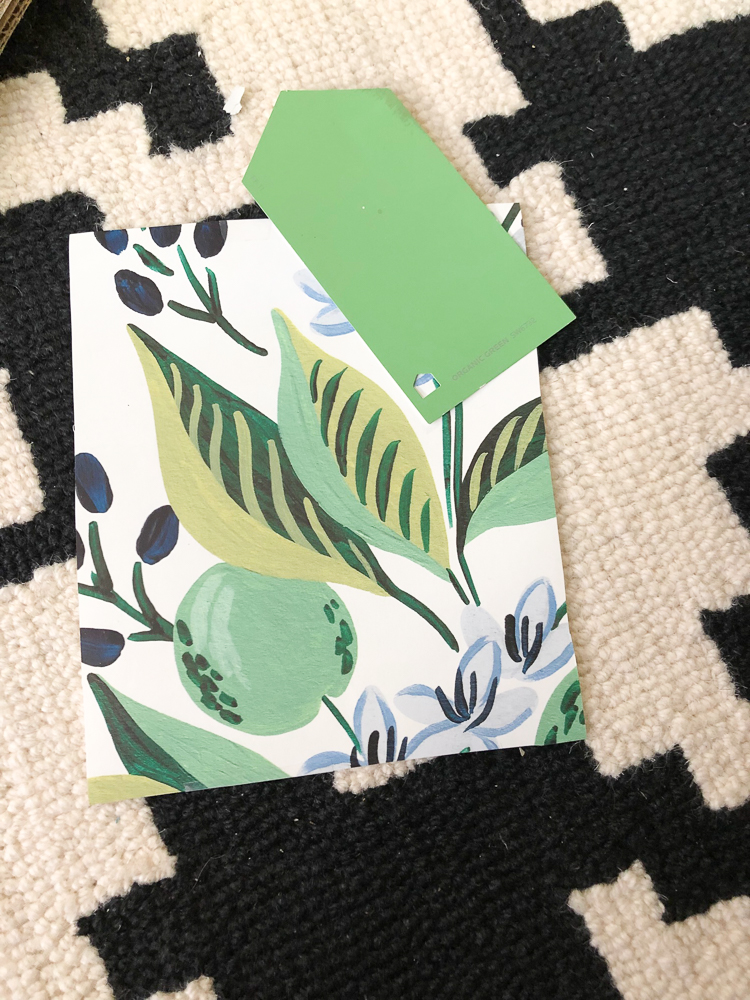
This green color on the back of the cabinet is Organic Green, an HGTV Sherwin Williams color I picked up at Lowes (just a sample pot). It’s going to be so lively on that navy wall.
I’m just thrilled with how this laundry space is coming together. Honestly, I couldn’t find much inspiration for small laundry rooms like mine when I was looking. At least in the style I like, with wallpaper and some vibrant colors. Most of what I saw in smaller laundry spaces were farmhouse inspired, which is not my style at all.
So, I came up with this plan and decided how I wanted it to look in there with part paint and part wainscot and wallpaper and it’s coming together exactly as I had hoped. I haven’t seen anyone else do this in a laundry space, so maybe I’ll start a trend!
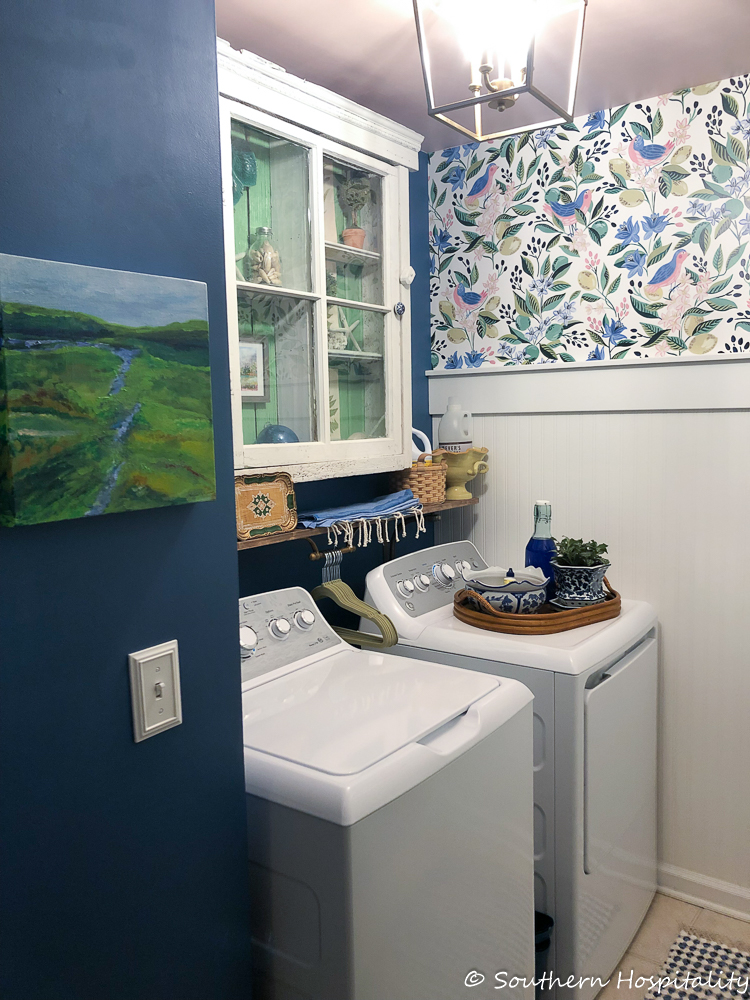
I can’t wait to share the final reveal with you next week! Hoping I get some decent pics since that room has no windows.


I loved following your progress on instagram stories for this project. Your room turned out so wonderfully. Isn’t it fun when your thoughts and hard work turn out just how you wanted it to?
Why use the wallpaper instead of real wood. Cost, ease of application? I’m thinking of redoing a bathroom with bead board and hadn’t really considered wallpaper. It looks great!
HI, Jan, yes for ease of installation mostly. Mark and I love the real thing and we’ve installed it in so many areas, but this little space was my project and because it’s so small and I was doing it on 2 walls, it made sense to just use the wallpaper that I’ve used so many times before. I can put it right on top of the baseboards where you can’t really do that with the wood or MDF beadboard paneling. It would stick out some and not sit flush with baseboards. This was the best solution for my small space and I didn’t want to have to bug Mark to help me with this. He still had to help some, but not as much as cutting real beadboard and nailing it in.
Wow…. that is amazing…. I love the paper and bead board. Can ‘t wait to see it finished
I can’t wait to see the final reveal! LOVE the wallpaper and your bright colors. I have a similar sized laundry room and have been thinking about what I want to do with it for YEARS! I’m inspired to finally get to work on it!
Very lovely! Thanks for the detailed instruction and inspiration you have given me!
I just had to post…yes the laundry room is just beautiful…my favorite colors and the wallpaper looks fab. BUT your curly hair looks so awesome from the back of the pictures where you are hanging the wallpaper…it struct me immediately when I saw the pic! LOL….
THank you, Kitty L, I’m getting so many compliments on my curly hair and those new products I started using are really helping, so I’ll be embracing my curls a lot more!
I was skeptical when I first saw the paper because it was so busy but it is gorgeous as usual! I loved your dining room grass cloth and now I love this as well! Such pretty colors. I have used the bead board wallpaper in the back of a bookcase and painted it and it looked awesome! You did a great job picking out all the colors..I love your style as I’m not a fan of Farmhouse either. Can’t wait to see your final pictures!
Your laundry room is lovely. You have worked so hard to put it together. Yes, your curly hair looks so pretty. Kitty is right! LOL. Loving the instagram stories. I cannot wait to see it all put together next week.
Wasn’t this a double roll of wallpaper? Helpful to know.
HI, Lynne, do you mean the floral? It probably is considered a double roll, that’s how they usually package it and market. But a roll is a roll and only goes so far. I only had two 3′ strips left on my roll after cutting. So with any project you have to figure out how much you need. I was only willing to buy one roll for this project, so made sure it stretched that far.
Thanks! The Kaitlin Wilson website lists it as a double roll. I guess you have to take your measurements and then check the wallpaper measurements.
I love your curly hair too! Your laundry room looks really cute- love the beadboard wallpaper!
Love the wallpaper and your paint colors are right on the mark. You did a great job in there. Who wouldn’t want to do laundry in there.
Wow! I love your colors and ideas… I have a half bath that is so boring! I’ve struggled with what I want to do but you have inspired me. I’m going to check out beadboard wallpaper! Love your mix and colors! Thank you!
Absolutely love that wallpaper pattern. I still want to make a Schumacher pillow cover like you have. I love those types of patterns.. Your color palette for this project is amazing. You have such vision and talent. Thanks for sharing and yes, you are an inspiration!❤
Your laundry room looks so beautiful! I can’t wait to fix mine up.
Love this look! Your use of color and beautiful, classic prints is spot on. I love the curtains you had in your previous home’s family room and i think they’re now in your office, too.
Can’t wait to see the finished room!
Such an elegant laundry room-I love it!
Rhoda, your Laundry Room is looking so cute! Just love your antique cabinet that you are using in there! You are really going to enjoy doing your laundry in such a beautiful room! Enjoy!
I really like the beadboard wallpaper! I did not know anything like this existed. I am impressed with your ability to do all of this work, and to do it so competently. I know you will have one lovely laundry room!
Hi Rhoda…love how your laundry room is coming along…can’t wait to see it all finished and accessorized! On a totally different subject, what is the make/model of the steamer that you recommended in your Insta-story. I meant to write it down but went back to find the story and it’s gone. I’m ready to retire my iron! TY!
HI, Maureen, I meant to share the steamer in my fashion post yesterday, but I’ll share it next week. I’m really impressed with how well it works, here you go:https://rstyle.me/n/dghbd9bme3f
I can see why you are over the moon with your color selections and patterns. Absolutely amazing!! I love everything you have done and know you will get much enjoyment out of this space. Very well done!!