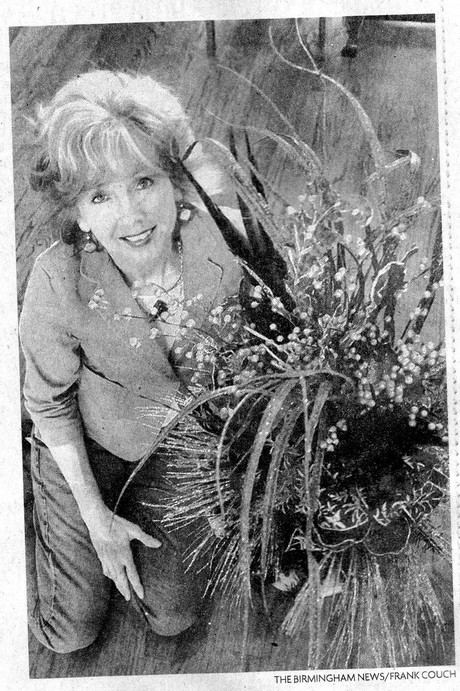
With a feature in the Birmingham News on Thanksgiving weekend for putting together a WOW tree topper, I’m scanning the pic (excuse the poor scan), but not the complete article and the pic wasn’t in color anyway. But, you will all get a first hand look at how to put a big tree topper together….all in living color. It’s really easy, I promise!
Here’s another shot at the tree up close.
And a good look at the entire large and sparkly tree topper. I’ve always admired these and just started doing this last year and it’s all in combining textures, sparkle and shapes to get a flowing topper that stands up and shouts, HELLO.
I had these bows made already (maybe I’ll do a bow tutorial too, if ya’ll would like to see that). I could have used another bow, but I don’t worry too much about the backside of the tree that is not seen. Here’s the breakdown:
- 3 Lime green leafy fronds with a little sparkle (from Hobby Lobby)
- Bows already made (2 or 3)
- 3 picks of faux greenery that has some different texture (already had)
- 3 pretty green feathers (found at Hobby Lobby)
- 3 bronze sparkly tapered fronds that curve out from the tree top (already had those)
- 3 gold berry pics (from Michaels)
- Around 8 sparkly gold pics with little ornaments attached, that’s the row you see around the bottom. (from Hobby Lobby)
I’m adding in a lot of close-ups so you can see all the elements in detail.
Note the green leafy fronds in the middle with a little sparkle.
Here you can see everything that I listed, in particular the pretty green feathers and the bronze glittery skinny fronds. These are great for adding some volume.
These gold glittery picks I found at Hobby Lobby and they have pretty balls attached too which add a lot of sparkle. This is the row that I added in below the bows, but really there is no right or wrong with this. You just have to play around with it all.
Here you can see the lime leafy fronds and the gold berry picks and the lime green feathers. Love those and I found them at Hobby Lobby.
Closeup of the bronze skinny fronds and the gold berries.
Those green picks are just plastic greenery (3 of them) that add some additional texture to all of this.
I attached the bows first right below the very top of the tree, then all I did was start adding height and texture with all the other pieces. You can stick these picks in and since they have long stems, they will pretty much stay where you place them.
Add in some wispy green picks, along with the feathers, gold berries, and those bronze long and skinny fronds really made the difference, I think. If you look at all the shots of the closeups, I think you can see how I arranged everything from the description of it all. There’s no right or wrong way to do this, just have fun with all the colors and textures until you get it looking the way you want it.
That’s it! Pretty easy, so I hope you’ll give it a try! Feel free to ask any questions on any of this if it’s clear as mud. 🙂
I’m adding this to Kimba’s DIY Day.


DIVINE!!!
That is a fantastic topper!
A beautiful tree and topper!!! You did an awesome job!
A bow tutorial (for tree and packages) would be great. I have had several people show me and sometimes I can actually make one, but never satisfied how they turn out.
Thanks!
Rhoda,
Absolutely lovely. I have a question: your topper in the newspaper picture looks “removeable.” have you attached the pieces to a foam base? If not, I can’t imagine how such a large number of pieces would stay on such a skinny tree top as mine. Perhaps your tree top is fuller?
Thanks,
Lori
Thanks all! I’m glad you enjoyed seeing it up close and personal.
I’ll do a bow tutorial on how I make them very soon! Might not be in time for this Christmas, but maybe you can refer back to it. I learned from a silk floral place in ATL about 25 years ago how to make bows & it has worked for me ever since. My sister bought a cheap bow maker and loves it too, so that might be even easier.
On the topper, NO it is not attached to foam or anything else, just like I said, it’s all stuck directly down into the top of the tree. All the stems are hidden with everything in the tree. My fake tree is in 3 parts and the top part is the very last piece that plugs in. I had not set up my tree yet when the newspaper came out, so I just got down that top part of the tree and sat it on a plastic bucket so that I could put it together, so that’s how it was photographed. I ended up just leaving it like that and when my tree was up, plopped the topper on there just like you see it, so I didn’t have to take it all apart again. You would be surprised how easy those long stems will slide into your tree and stay put.
HOpe that answers all your questions!
That is one of the most beautiful pieces I have ever seen. The photograph was professional quality too. Lovely.
Sandie
HI Rhoda, as a floral designer I have been doing this for years….I LOVE the look! I will send you a link to see mine if you would like to!:) I love the feathers in yours. Your tutorial was perfect, hope people will be able to try this. Merry Christmas!!!! XO, Pinky