Are you ready to have your minds blown?
This post will let you see how easy it is (with a little planning and elbow grease) to paint a white refrigerator in a stainless steel finish using paint. Yep, using paint! Just wait til you see this one from my friend, Lynn.
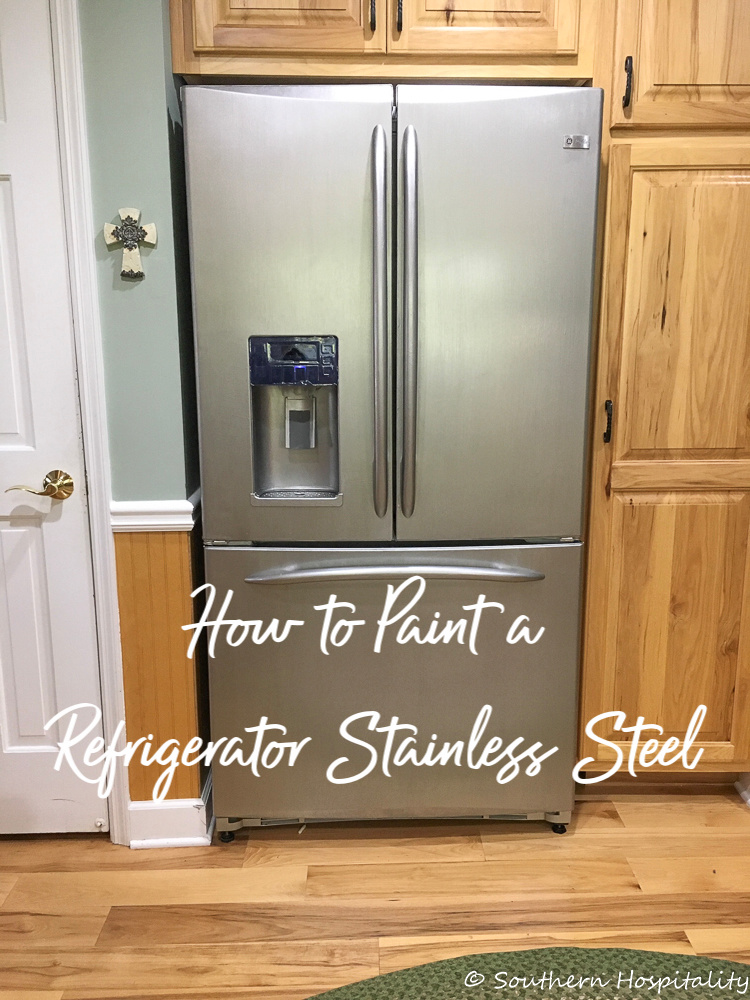
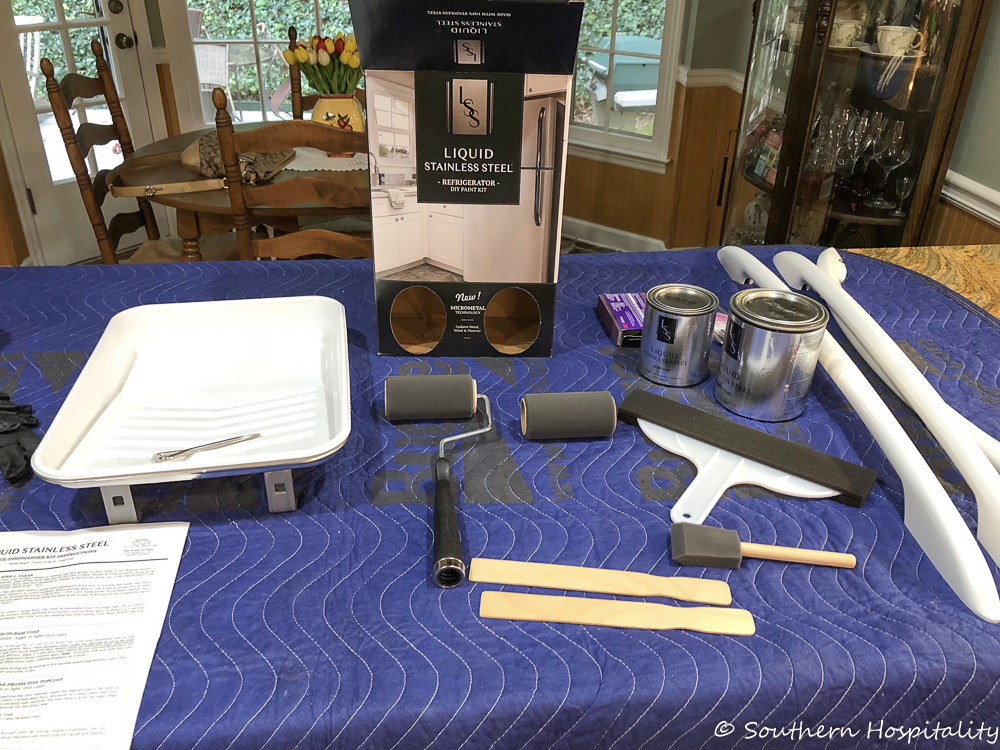
Lynn recently upgraded her kitchen appliances to all stainless steel, but since her white refrigerator was only 4 years old, she didn’t want to spend the money on a new stainless one. So, that’s where I came in. She texted me one day and told me she had found a product that could be used to paint a refrigerator to look like stainless steel. I was intrigued, but had my doubts. She sent me the link and asked me if I might want to write the company and see if they would send me a kit for us to use on her fridge and I could blog about it. OK, I was game for that! I did and they said sure and mailed a refrigerator painting kit out to me. They also have kits for stoves and dishwashers.
I’ll share the links from Amazon (affiliate links) with you below. It’s made by Giani and called Liquid Stainless Steel paint, so technically this post is sponsored by Giani. They sent me the refrigerator kit for Lynn to use and for me to share with you all.
It’s not super cheap, but at around $75 definitely saves money over buying a new appliance if you have the need for this. I am SO impressed with how Lynn’s project came out. She did this all herself, with me looking on the first day. It was a process, but she hung in there and got it finished with great results!
I’ll let Lynn share her story in her own words:
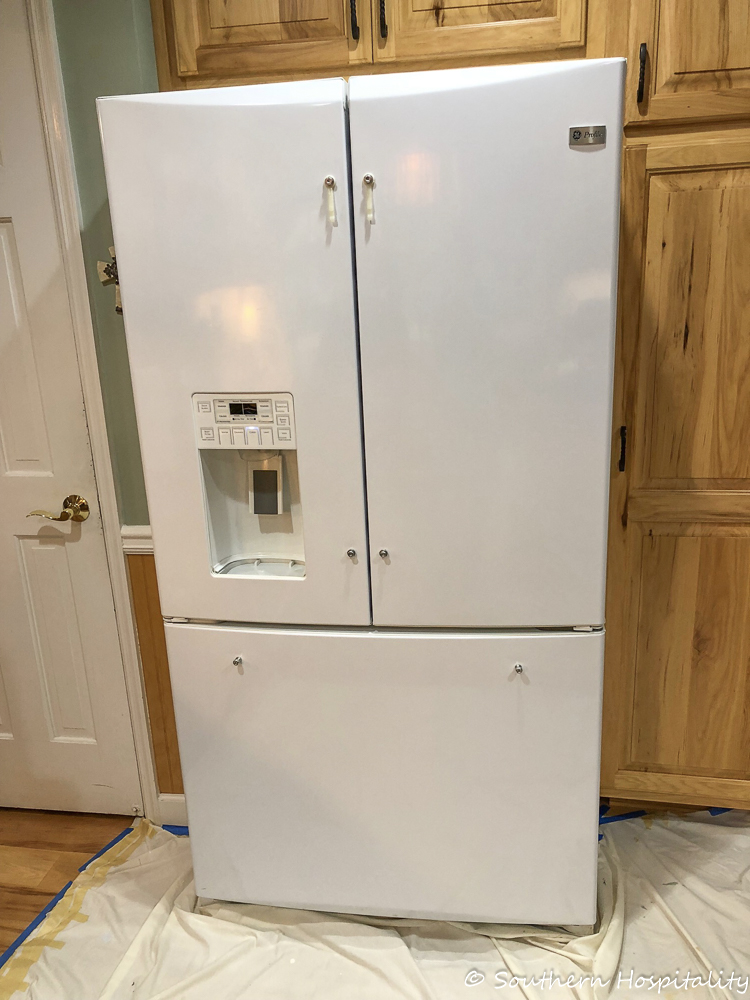
The three appliances in my kitchen, dishwasher, range and microwave were all 20+ years old and ready to be replaced. However, the fridge is only four years old and I could not bring myself to spend the extra $2k+ on a new refrigerator. So, I decided to try the paint route — what could I lose?
I was a bit apprehensive but this company has provided all the details needed to metamorphosize your white refrigerator into a “stainless steel” beauty! That said, this is a tedious and time consuming process. If you have little patience and no attention to detail find someone who can do it for you! It took 3+ days to complete the project a couple of hours at a time, waiting for the coats of paint to dry in-between (I used three coats of paint) in addition to the two top coats.
Seriously, the refrigerator is the hub of your kitchen and with people opening the door to search for the goodies they’re dreaming of magically appearing,you’re going to fight an uphill battle. So send the kids to Grandma’s for the weekend and keep the take-out menus handy!
If you feel your refrigerator needs extra cleaning, use a degreaser on the doors.
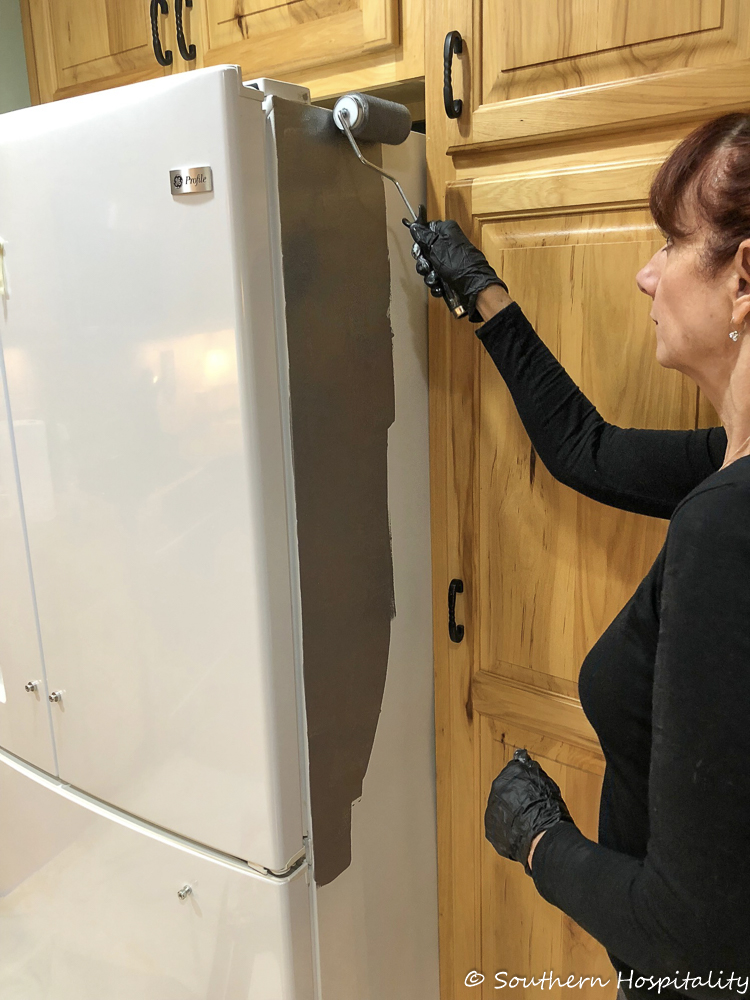
Rolling on the first coat. Lynn suggests taping off the Brand emblem on the fridge instead of rolling over it. She said it just got gunked up and she had to remove the paint. It is suggested to use thin coats.
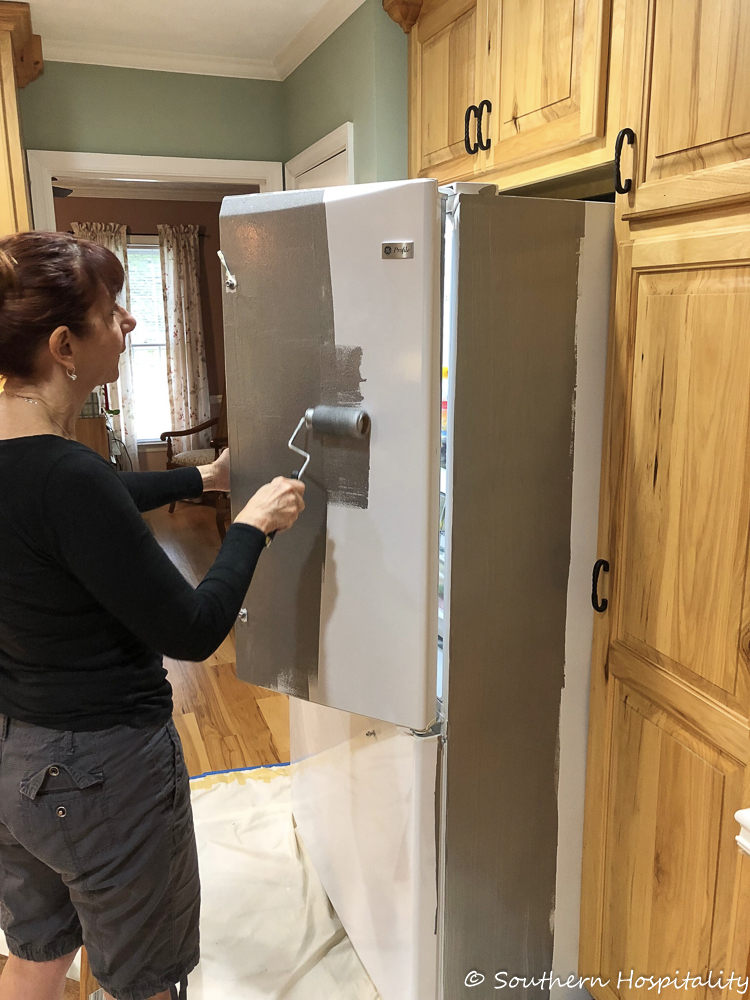
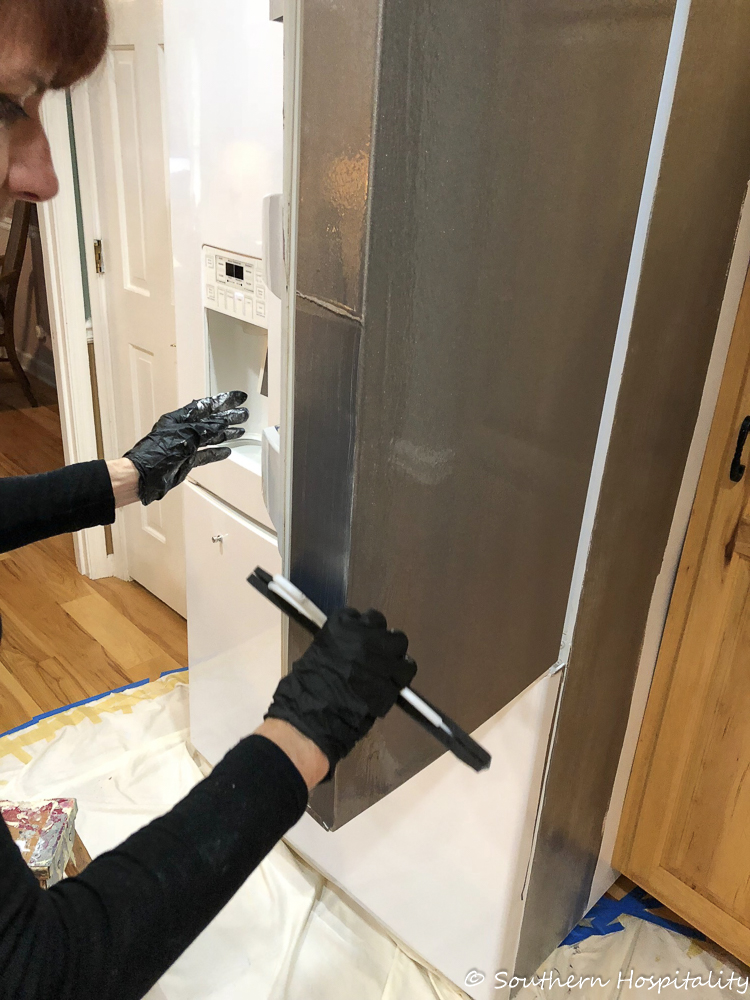
Using the foam squeegee to drag through the paint.
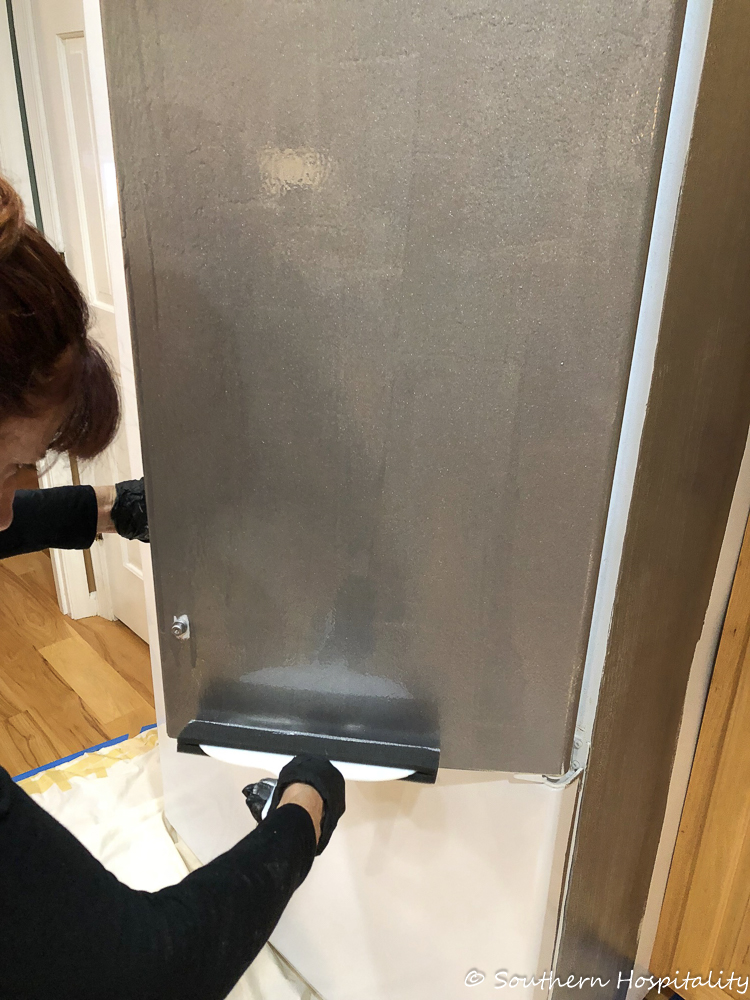
Upward motion and then downward motion.

Be sure to remove the paint and top coat after every swipe of the squeegee.
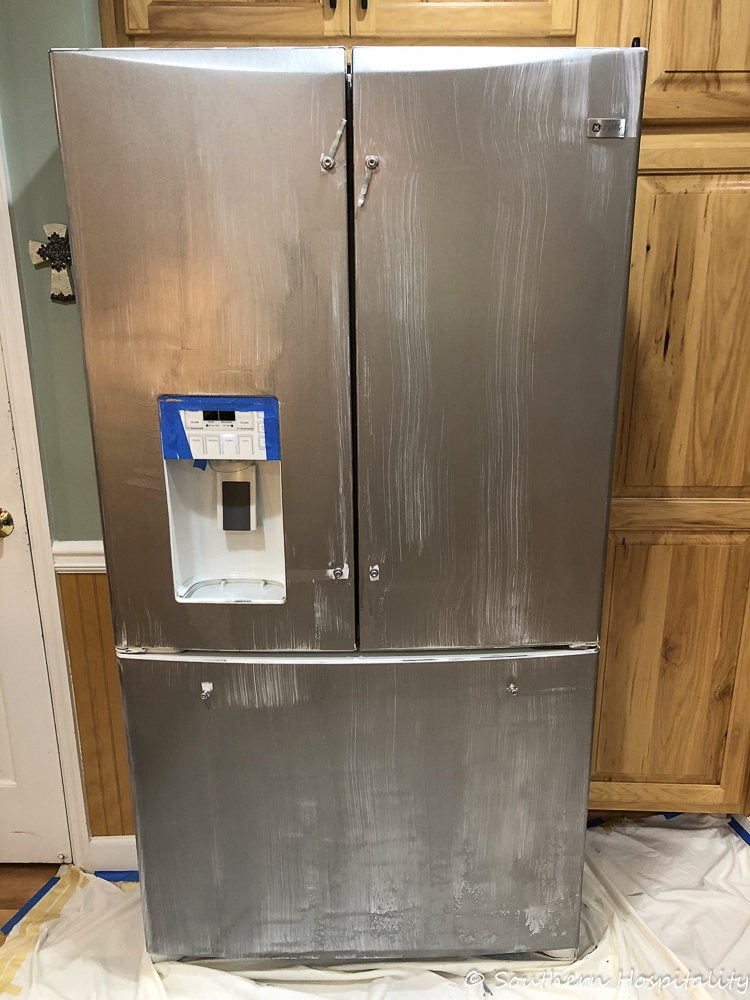
After one coat. Very streaky, but it gets better.
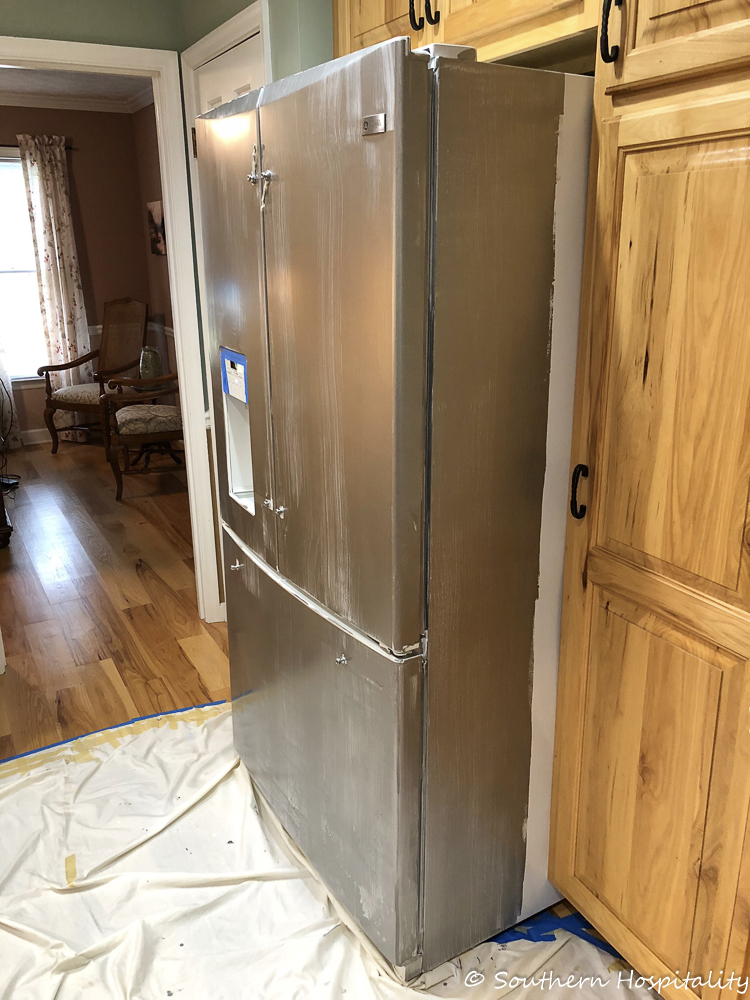
Notice that Lynn only painted in about a foot on either side of the fridge as her fridge is inset in the cabinets and that part won’t show. You can choose to do it all if you wish.
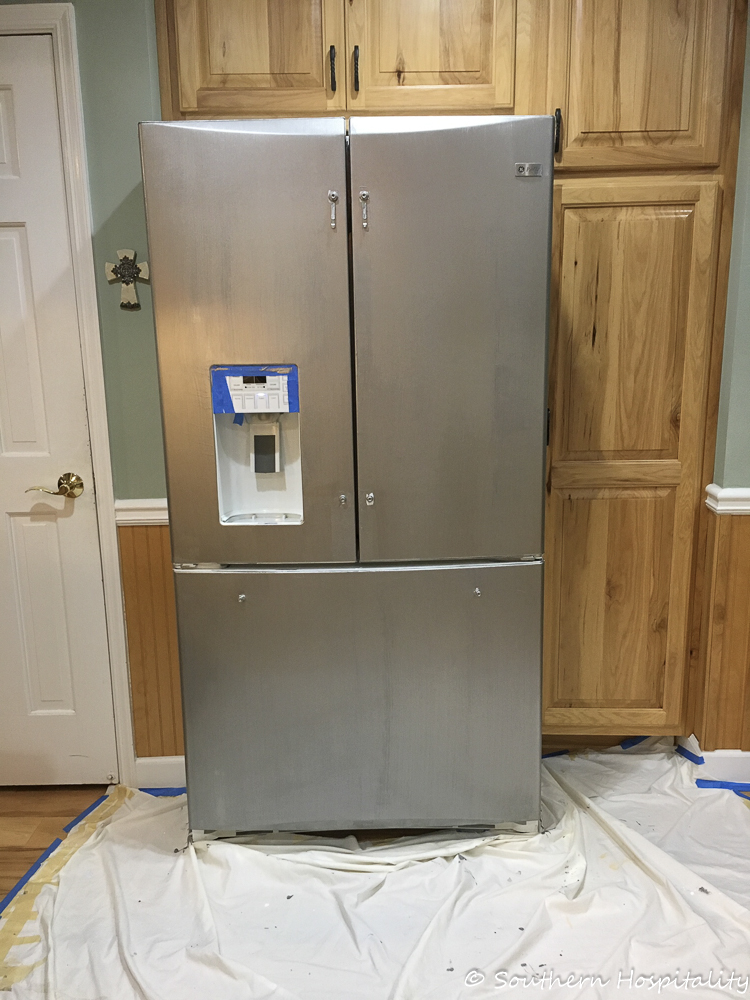
After two coats it has texture and you can start to see the grain of the paint.
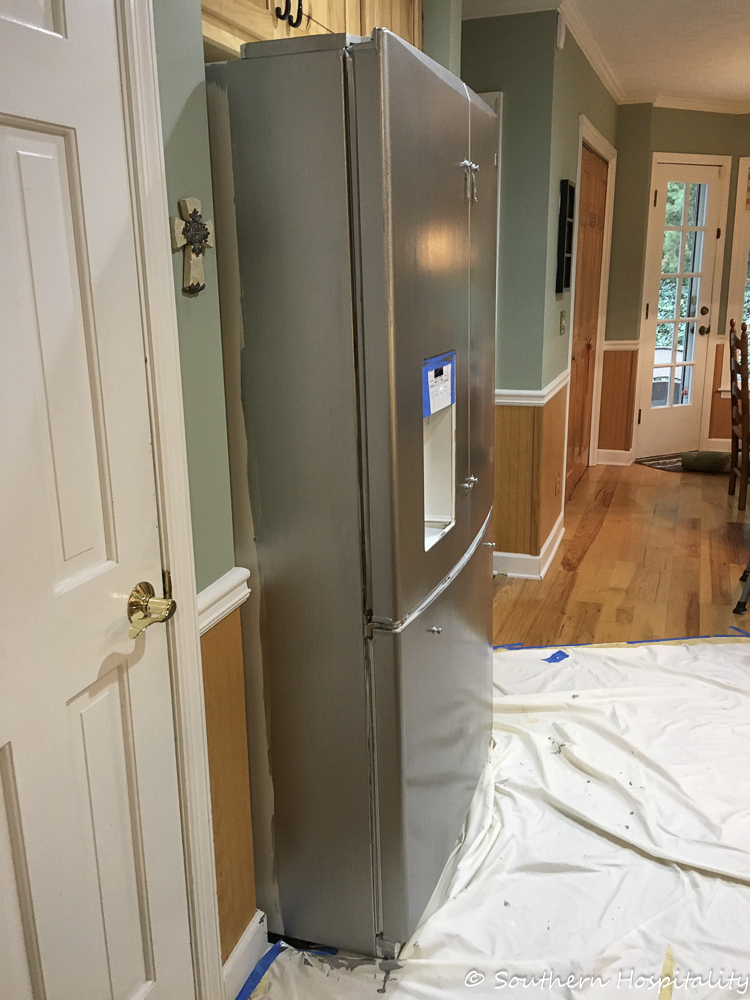
Final coat done.
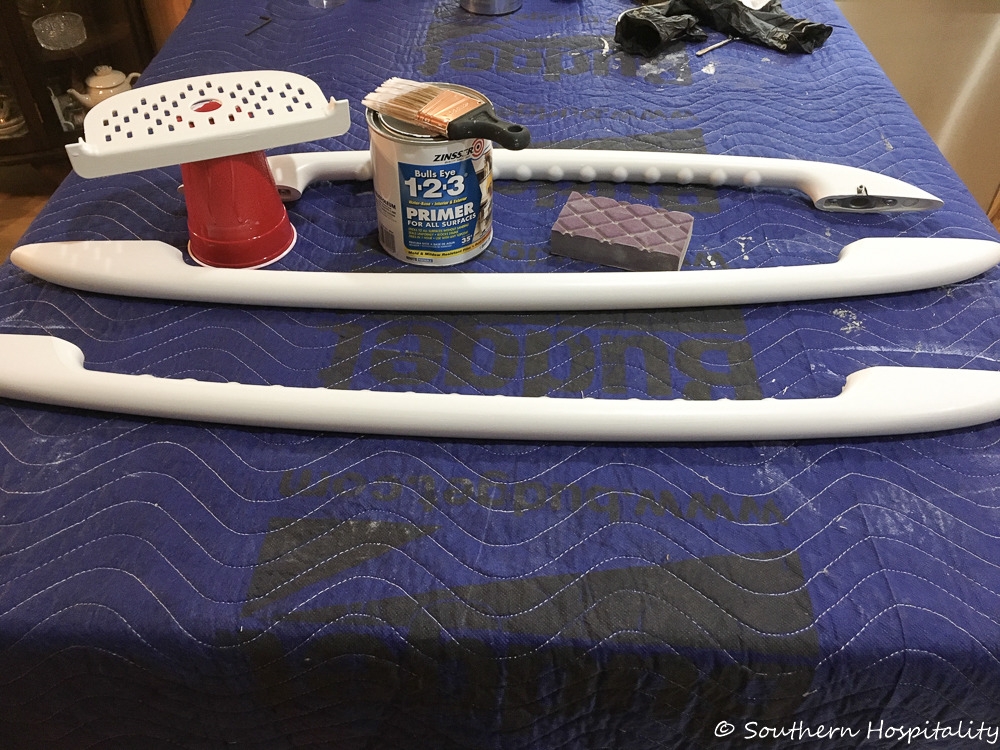
Handles were sanded and primed before the Stainless Steel paint was brushed on.
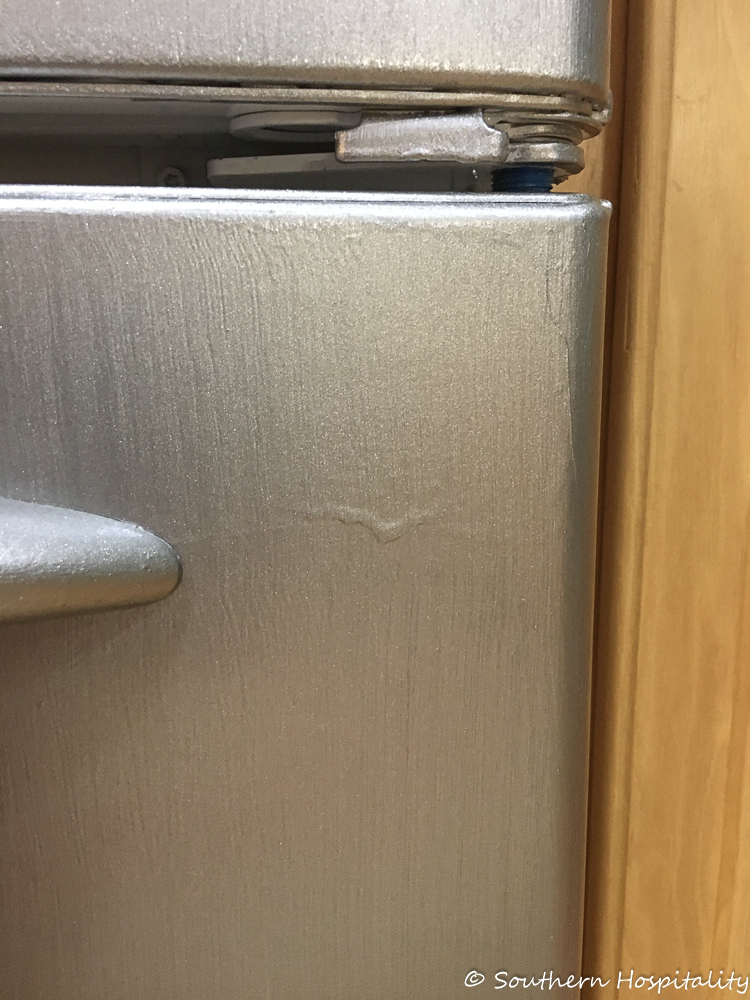
Just to be real, Lynn shared a couple of runs, so be sure to check for that as you are moving along.
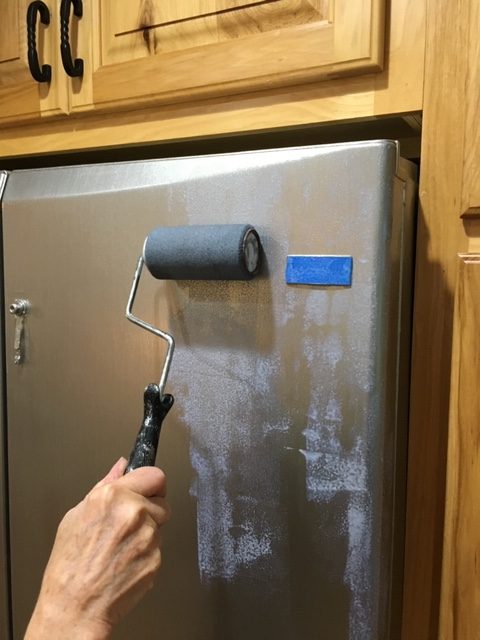
Clear Top coat rolling on.
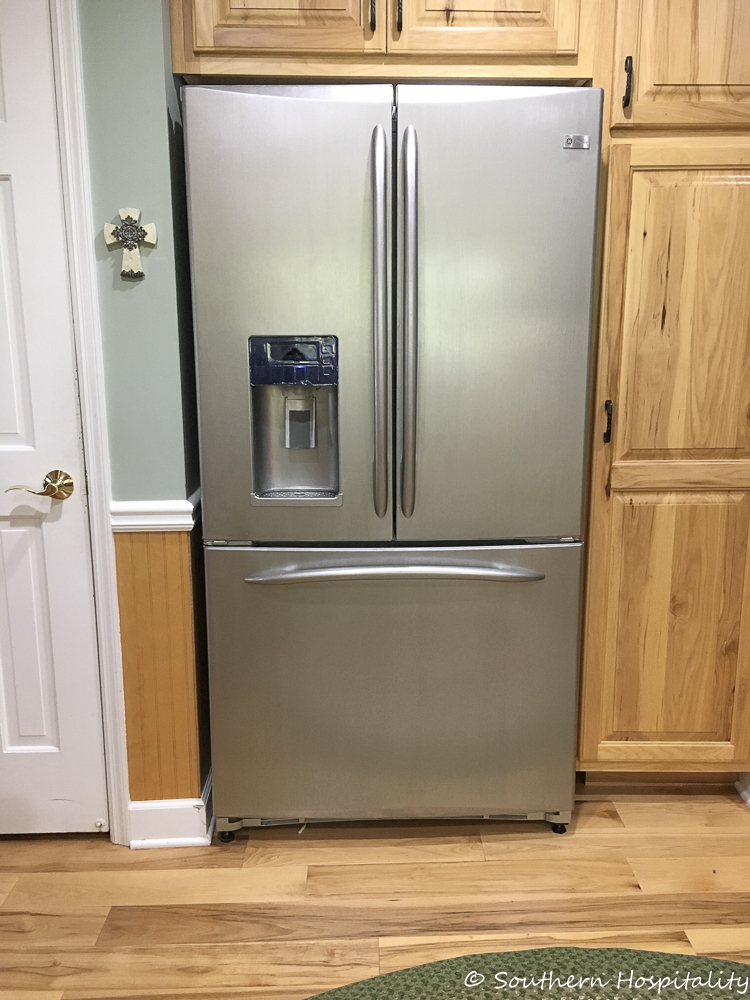
Tada! Here’s the finished fridge after 3 coats of Stainless Steel paint and 2 clear topcoats.
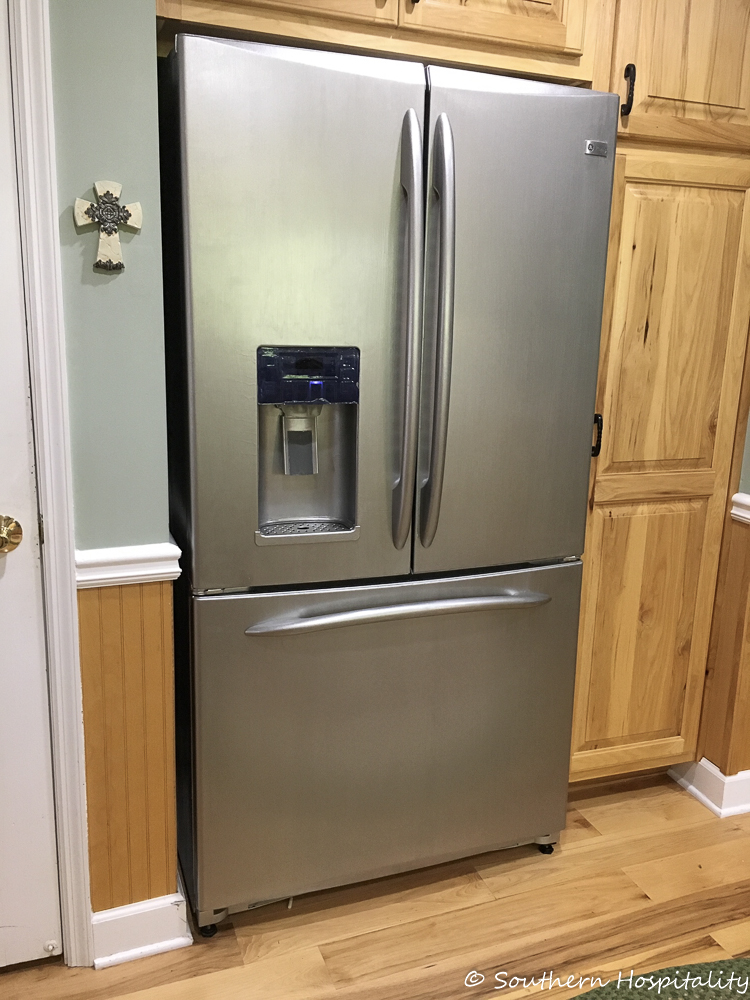
I think it looks amazing and could not believe the transformation. I had my doubts, but am a believer now!
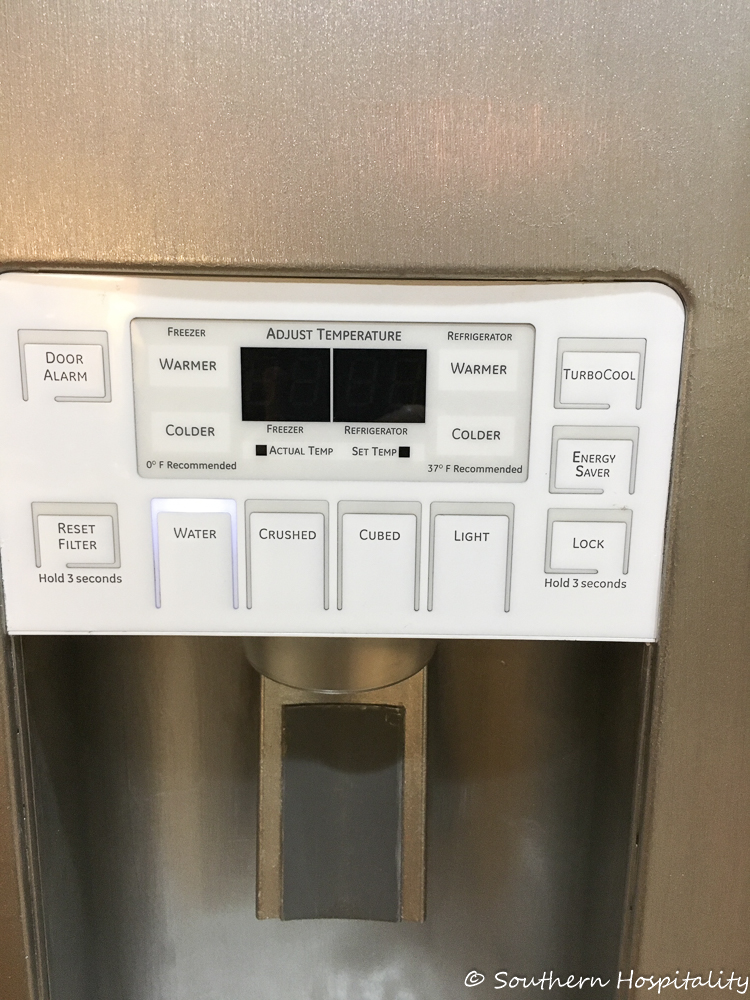
Lynn ordered an opaque gray window film to put on the dispenser panel.
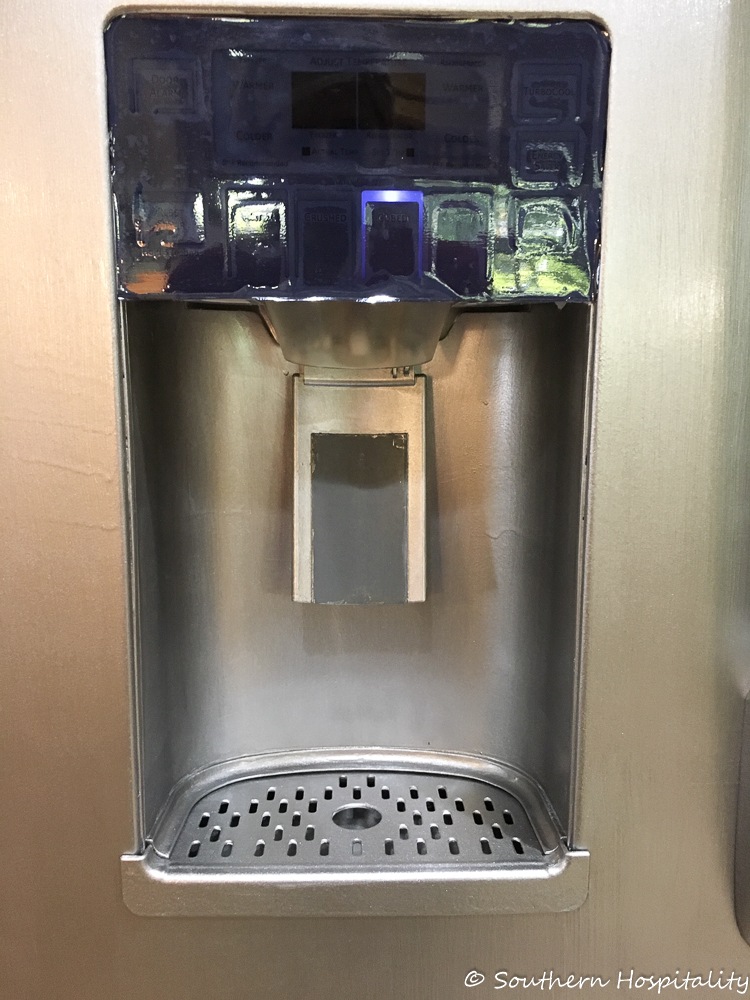
They can still see the writing behind, but it really does finish things off. I know Lynn learned a lot by taking on this project and she is really happy she did. I’ll share more of her thoughts below and tips for doing this yourself to get a durable finish!
The Liquid Stainless Steel directions are excellent as they provide you with a video. I highly recommend watching the video at least twice (we always miss something the first time around!) and then follow their instructions to the T.
- On the back of the box there’s a section titled: “Additional items you may need” — (1) fine sandpaper (2) painter’s tape (3) “Static cling film” which I bought on Amazon as you don’t need it until the painting is complete (4) Philips head screw driver, or some other instrument which will help remove the screws from the refrigerator handles. Be sure to get these items and a Water Based Primer to use on the handles and any other plastic parts. They recommend Zinsser Bulls Eye 1-2-3 — I bought a small can at Home Depot.
- Shake the can of stainless steel paint very well AND stir with the stick provided. There are actual particles of stainless steel in the paint and it’s imperative to mix thoroughly.
- Pour only what you need into your paint pan. Oh and buy those plastic inserts for the pan that make clean up a breeze because you toss them in the trash when finished.
- Very lightly coat the roller and use up and down motions — you DO NOT want any drip marks! This will only cause more work later — remember the sand paper? You use that to scrape off your mistakes!
- Cover an area and immediately use the foam squeegee first in an upward motion and then from the top down. This is the tool which provides the “faux” stainless steel look. You also have to remove the excess paint from the squeegee each time you use it, just scrape on the side of the paint pan. Check thoroughly for drips!!!! Use the little foam brush in a downward motion mimicking the squeegee to get rid of the drips.
- Once you complete the first coat you have to wait at least an hour for drying. Cover your painting tools with plastic wrap to prevent them from drying out, this will save you time from rinsing the paint out each time.
- Follow the same process for the top coats.
- I removed the handles, sanded and applied the primer. It was difficult using the roller on the handles so I applied the paint with the small foam brush which worked very well using two coats of paint and two coats of top coat.
The cool thing is even after applying three coats of paint there’s plenty left over for those missed areas and may not find until a friend comes to visit… easy to do with the small foam brush, just use the up and down motion process.
You will be amazed with the result! I am thrilled I took the time and did not spend an extra $2k on a new stainless steel refrigerator! As an update to this post, Lynn is getting ready to replace this refrigerator, since it is finally giving her some problems internally, but she got years of use by painting her old fridge!
**********************
Are you as amazed as I am with this project? I think Lynn did a fabulous job and I’m so glad I was able to get her a kit to use. As I mentioned, I was totally skeptical about this and really hoped that Lynn wouldn’t regret using this kit, but I’m a total believer now and think this is a great way to save a white refrigerator from being cast-off for a new one. This product may be available at your local home improvement store.
Would this be something you’d ever try yourself?
I’m happy to share projects on my blog that I feel anyone can do themselves and you know I’m all about saving money when we can!


That is cool…. Lynn did a great job.
What a great job…not sure I would be meticulous enough myself as it is such a big job. Rhoda can you ask your friend to update us with how this pain holds up with use?
Hi, Arlene, sure I’ll do that and she can let us know later.
Can you tell me how does the finish do with everyday cleaning?
HI, Shelia, she just finished painting it a couple of weeks ago so it might be awhile before she can tell how it’s holding up, but from what we read, you can clean it with soap and water.
It looks great and I would not hesitate to use it.
Wow,Lynn’s refrigerator looks amazing. My daughter needs to paint her refrigerator,this is a very informative blog. Thanks Lynn.
That looks great! I would be scared to death.
Well, that’s amazing! Looks good.
🙂 gwingal
The refrigerator looks fabulous and I’m very impressesd with the great job Lynn did on this fridge! I see that there’s a kit for stoves as well and I’m going to check on that. Thanks so much for a very informative and helpful post.
Holy hanna – that looks incredible!!! I am impressed!!
Rhoda, I had absolutely no idea this could be done and it looks fantastic!!! Thank you so much for sharing this awesome project!!
Oh my this looks great! A friend used this on her dishwasher, I was very skeptical also. I don’t know the brand of kit, it has held up very well and she has 4 kids.
But I think I’m the only person I know that actually *wants* all white appliances.
Wow. This is amazing. Such a great idea. Especially for those young homeowners or anyone on a budget. Great share.
Isn’t it though? I am so pleased for Lynn how this turned out. I really had my doubts but it turned out great.
I would absolutely give this a try! I owned a condo with a refrigerator that had a stainless steel front but the sides were black. It was not built in or counter depth so on the side of the fridge that abutted the cabinet and counter beside the stove all that black was very visible. If we still owned that condo I would be ordering this kit!
Just wondering if Lynn or you know… This fridge appears to have a flat/smooth finish; but mine has the “pebbly” no smudge type. Will this product work with the textured finish; and, ifso, how’s the appearance of the finished podduct? TKUVM
I’m not sure if Lynn will see this, but I’d read the fine print on their website and see if it covers that. I would probably go ahead and do it even with the pebbly texture, as it could only improve the color anyway if you’re going for stainless.
I can’t see that lasting. Just my opinion and way too labor intensive. For me, I would sell the white unit and buy a stainless. Or use the fridge elsewhere. Many folks need a second one. I am curious how it holds up. Painting kitchen cabinets too..they chip.
Interesting idea though. Thanks for sharing.