There’s been a lot of screaming all over blogland when recently, it was announced that Picnik photo editing is closing down in April. Lots of bloggers have been using Picnik for a few years and have enjoyed the ease of use and all the fun bells and whistles that this online photo editing software provided. I have used them many times myself and really liked some of the special effects.
So what are the alternatives? I am not an expert on all of the alternatives out there, but there are a few. Kate wrote a post about options and so did Susan, so there are certainly plenty to choose from out there that are free.
So, I’ll give you my option. For most of my photo editing, I have been using Photoscape for a few years now. It’s a free download and once you have it on your computer, you don’t have to be online to use it. I really like that part! I’ll talk more about how important pics are in blogging when I get more into my blogging story, but photos and editing have become a huge part of my blog.
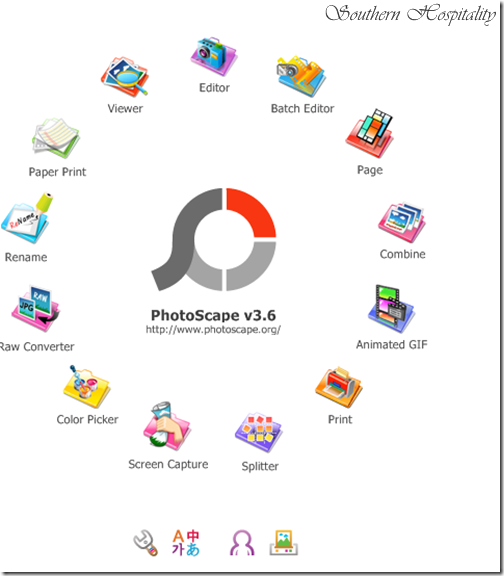
Here are all the categories available when it opens up for use. I use Editor and Batch Editor the most. I have no idea what Splitter and Screen Capture does, but this program does a lot. It does combine photos too, but I don’t like just the straight across or straight down combining. I do still use Picasa for collages of photos, Picasa does those really nice. I’ll take you on a tour of how I use Photoscape.
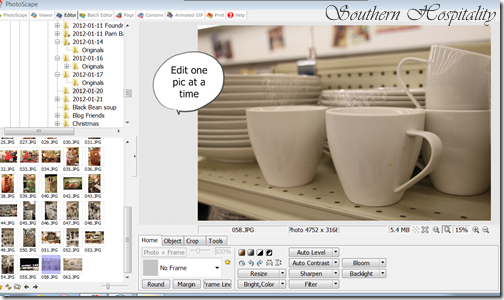
You open up the Editor and it brings up all your photos on your computer, so just find the file that has the photos you want to work on. You click on one pic at a time to edit individually. I usually rename my photos inside my computer files before I bring them into Photoscape to make it easier to see the ones I want to edit. When you use the Batch editor, Photoscape saves all your work in a new Output folder, so they are easy to find if you use the Batch feature for resizing and watermarking a group of photos. If you save one at a time, it will keep them in the same folder, but you can see the ones that are resized by hovering over them.
Under the Home tab, you can see all the things this program can do, from Bright, Resize, Sharpen, Filter, Bloom, Backlight. Under the Bright tab, there are all sorts of things you can do there, from Color Enhance, to White Balance, and brightening photos several degrees. I use that all the time and if I have photos that are too blue or too yellow, I will play with the White Balance to try to get it as white-white as possible. You can choose a spot in your photo that has white and click on that and it will automatically whiten your photos. 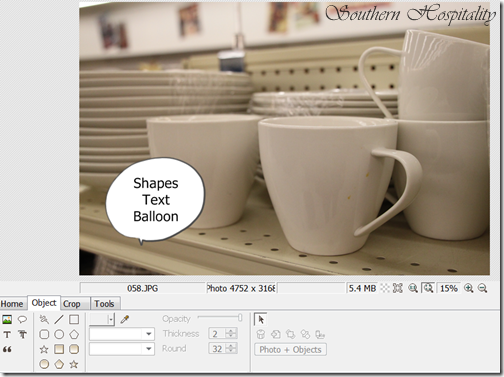
Under the Object tab are all sorts of shapes you can draw. You can use these for lots of features. Add in color or make them opaque, add Text inside the shapes, lots of things to do with these. You can draw lines and arrows too. And this is where Text is added with the large T to individual photos. Choose from many different fonts and you can probably even add more fonts to use, I haven’t tried to bring any in yet. When I do batch edits, I automatically add my watermark on my photos like you see on these. You can choose where you want the watermark to be and the size, color, etc. You can see I added this one in the top right corner.
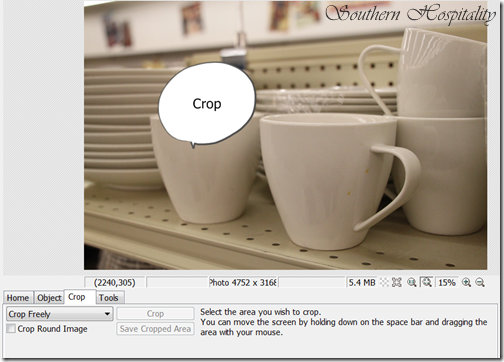
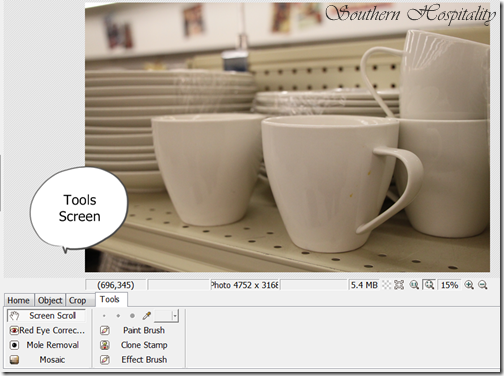
Under the Crop tab, you can obviously freely crop your pic and save it.
Under Tools, you see Red Eye Correction, Mole Removal, Mosiac, Paint Brush, Clone Stamp, and Filter Brush. I’ve used the Clone stamp to add in something in a pic that was missing or to cover up a vent or something by painting over it with the wall color. You click on a correct spot in the photo and then to cover up a blemish or spot, click over it with the Clone stamp. I haven’t used all the other features here, but they are there waiting!
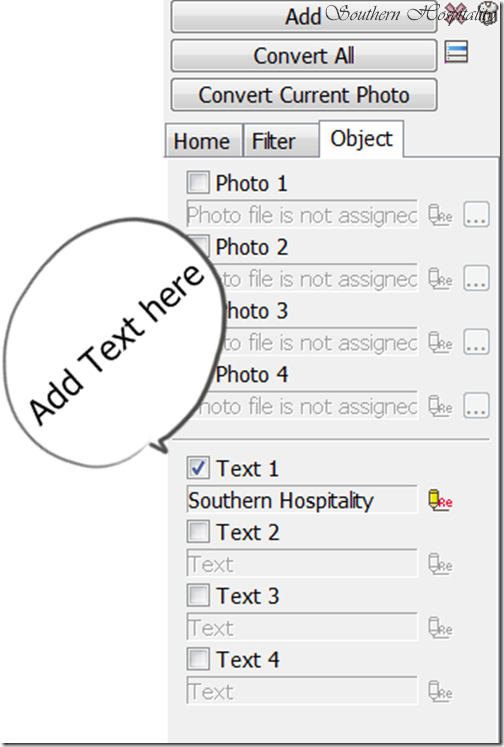
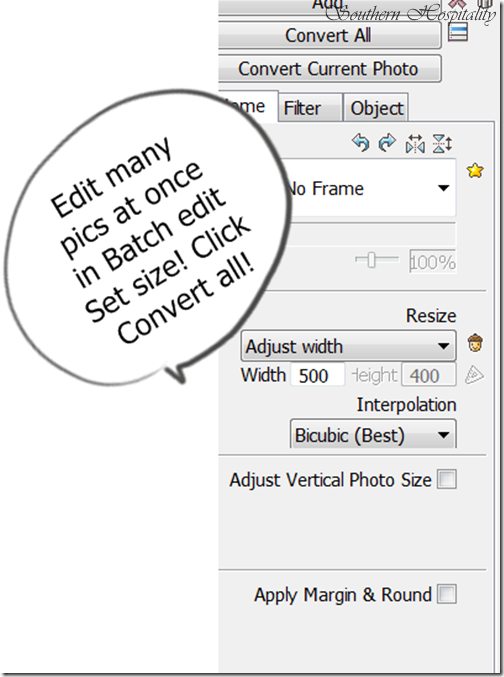
Under Batch Edit, you will see this screen on the right side of the page. This is where you can choose Text to add. Click that box, and then click on the yellow pencil and it will bring up the box that allows you to add text. Choose your Font, Size, and Color, where you want it placed and it will add text automatically to all the photos you are Batch editing.
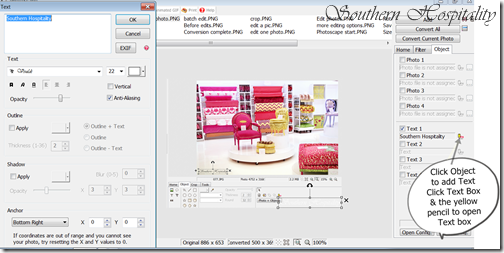
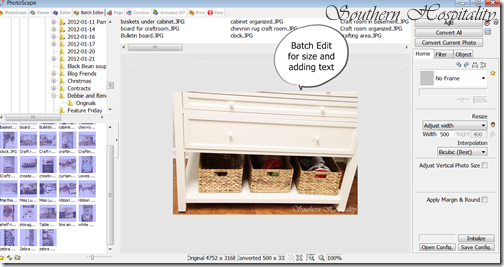
Here’s the whole screen you will see in Batch Edit for adding Text (box on the left). I usually edit each pic individually for Color, Contrast, straightening, etc. and then drag them into Batch Edit to resize and add my watermark as a group.
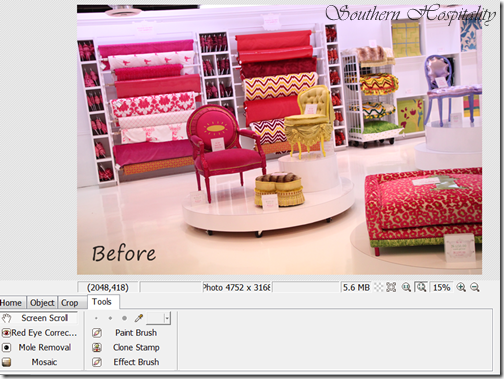
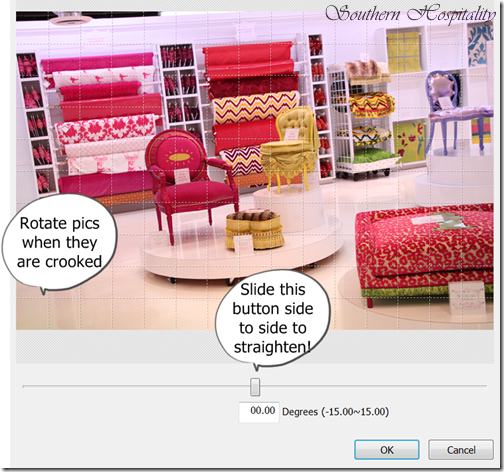
Here’s a Before pic. You can see it’s a little pinky in color, so I want to brighten and whiten it with the Brightening tool and White Balance.
It’s also a little crooked so under the Home tab, I click on the curved arrow that brings up this handy-dandy slider (Rotate Arbitrary), right next to Rotate 90º L and Rl. Click the arrow to open and I can move that slide tab back and forth to straighten the photo. It’s amazing how much better photos look when you straighten them. See the grid that comes up on the photos? This helps you line up the lines inside your photo with the lines on the grid to make a photo straighter. Slide it to straighten and click OK.
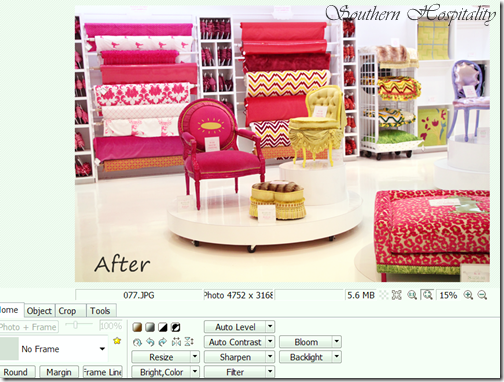
And here is the photo after Brightening, White Balance, and Straightening have been applied. Much better, don’t you think?
For Batch edits on resize and adding Text, set that number where you want it (my blog holds 500 width pics), then click Convert All.
It works like a charm for resizing a whole bunch of pics at a time.
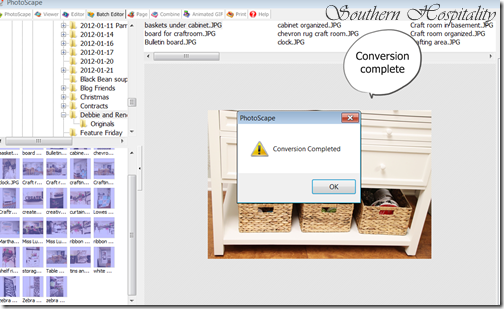
And the conversion is complete. It will resize and add text to as many pics as you want all at one time. This is my time saver!
I tried out Kate’s trick with the opaque band with text across the bottom and it works great too. You can do all sorts of things with those shapes.
So, that is my little tutorial on Photoscape and how I use it for my photo editing. It has worked well for me for a few years, so I will probably stick with it for the most part.
If you are looking for a photo editing alternative to Picnik, I would highly recommend Photoscape. Give it a try and let me know what you think!
Coming up next week for my 5 year blogging anniversary, I’ve got a whole week of giveaways lined up for you, starting Sunday afternoon! There are all sorts of fun things coming up for grabs, from jewelry, original artwork, bedding, sheets, and so much more, so I hope you’ll be here with me in the next few days and take advantage of all the great products that will be available to win. I have had an absolute blast the last 5 years with this blog and all of YOU have been a huge part of the fun for me, so thank you all SO much for your support and for coming by to visit day after day. All of that has been a huge blessing in my life!




Totally tweeting and pinning this. I didn’t use Picnik but am loving the idea of not having to figure out actions in photoshop just yet (procrastination much?) and batch editing in a simple program. Going to check this out.
Bernadette
Wonderful tips for Photoscape. I have been using it for a little over a year and I am always pleased with the results. I did not know how to straighten pic on it so I was thrilled to find out it has that feature. The one feature that I use on almost every photo is the backlight. Maybe it is how I am taking the pictures but this always improves my shots.
Thanks tons for the info,
Traci
PS I am looking forward to the next installment of your blogging story.
I had trouble finding the slide that levels the picture you are editing. I finally found it on my screen on the arrow labeled “rotate arbitary”. I figured I was not the only one that might have trouble so I wanted to pass that along.
Traci
Hey, Traci, that little swirly arrow is hard to spot, so I added that in too. Thanks!
Wow, thanks for sharing! Great advice for blogland newbies, such as myself.
I have used Photoscape for a long time and love it …. great post.
Thank you so much for sharing this! I will definitely be looking into this!
Allyson
http://cupcakescandycanes.blogspot.com
Perfect, Rhoda! Thanks so much for sharing this. And free?! Even better. 🙂
I always learn something while visiting….great tutorial Rhoda, thanks !!!
Have a great Sunday….
All the best,
Kathy 🙂
THANK YOU, THANK YOU!! I have been panicking because I use picnik everyday for my business, photoshop is nice but takes too long to figure out……….I am so glad I found your post!!!
Great tips! I’ve been using Photoscape ever since I started my blog a year and half ago and find it very easy to use.
oooh, thanks, Rhoda! I’ve been resizing and watermarking one at a time, takes forever!!! This will definitely be added to my “to learn” list.
Thanks for telling us about this, Rhoda! I currently use Adobe Photoshop but I find it difficult to add/do certain things. What you are showing here looks a lot easier and may even offer more. I’ll have to play around with it.
Thank you so much! I have been blogging for about 4 years, but am realizing that I must take better pictures. I have Paint on my computer but it really isn’t very good. I downloaded the free program and am looking forward to trying it this week. I love your blog.
Blessings,
Melodye
I’ve been using Photoscape for awhile. But I didn’t know about resizing batches. So I will check into this aspect that you’ve just taught me. (Thanks!) I always bring my collages/banners here to add text. And I have added fonts to the lineup here.
Brenda
Thanks for the info, Rhoda. I am headed over there now.
🙂 Sherry
Rhonda,
This is an appreciated and timely post for me. Thank you for the concise pictures of each step.
Hi Rhoda,
I’m so far behind in my bloggy reading…so glad I didn’t miss this post. I’ve always wanted to know more about Photoscape…great info, great tutorial!
XO
Does this work with a Mac?
I have heard from the Mac folks that it does NOT work with Macs. Sorry about that!
Rhoda….I was SO EXCITED to see this featured on Susans blog that I almost jumped out of my skin. I am a new blogger of about 12 weeks and like all new bloggers have gone the ropes to try and figure things out. One thing my husband did for me from the get go was download a free program for me to try and edit my photos. You guessed it…Photoscape. But I know only how to do a few things. I cannot THANKYOU enough for this tutorial. Wow I will now be able to use the batch editor etc. etc. that I didn’t know how to use. I so appreciate your detailed tutorial and I’m going to download and print it so I can read it at the same time I’m trying to learn it on my computer. I am so grateful for you and for Susan for featuring you because that is how I found you. I have got to let her know. What a blessing.
Thanks again,
Nann