It was 3 years ago right after we moved in this house, that I decided to tackle this project that I originally posted about here. In fact, click on that post from last year for all the details on how I did mine. If you have those light oak railings and banister on your staircase, you might want to do this too. It was a really easy project!
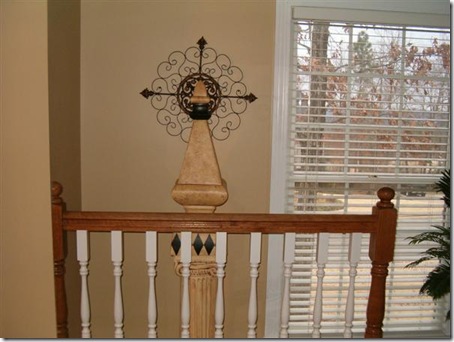
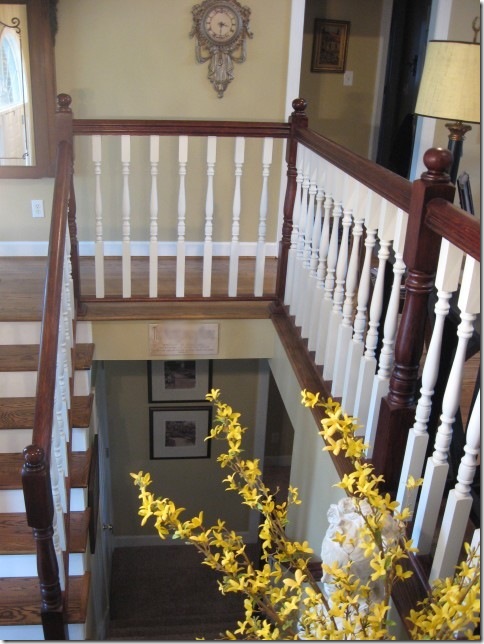
These top 2 pics are the Befores and you can see the dramatic difference that stain makes below. The beauty of Polyshades is that it’s stain and poly all in one. I did NOT sand, prime or do any prep to my railings, I simply brushed on the Polyshades to darken and deepen the color of the stain and I’ve been really happy with the outcome.
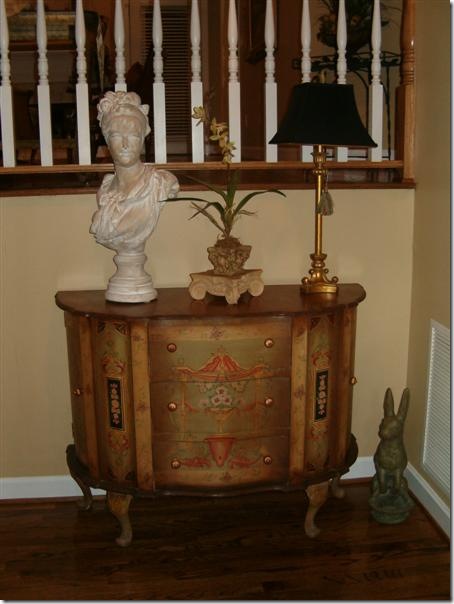
My foyer table has come a long way too. See how light the oak railing is in the above pic?
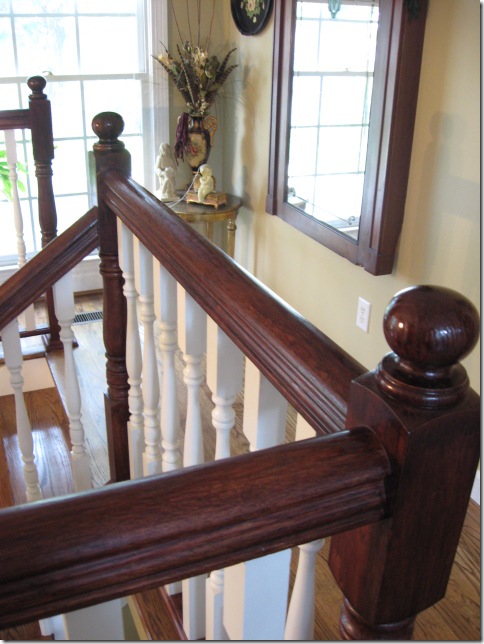
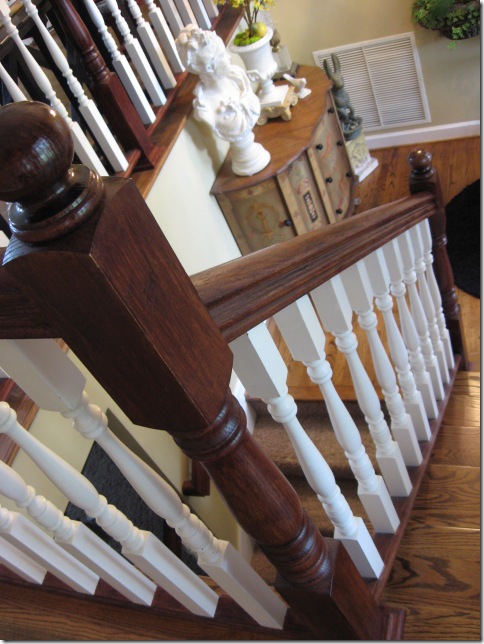
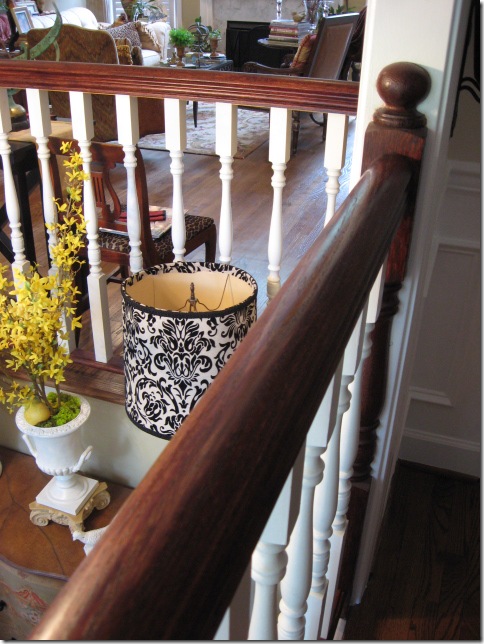
This is After: Polyshades Bombay Mahogany applied.
I was looking for contrast with the floors, so I’m fine with the 2 different tones of wood.
This color blends very well with my older vintage pieces of furniture in the living room too.
And I love the darker, richer depth of the stain now. I’m so glad I did this one! So, I’m digging this project up again, because I met a new blogger recently who was inspired by my post last year to do the same thing at her house.
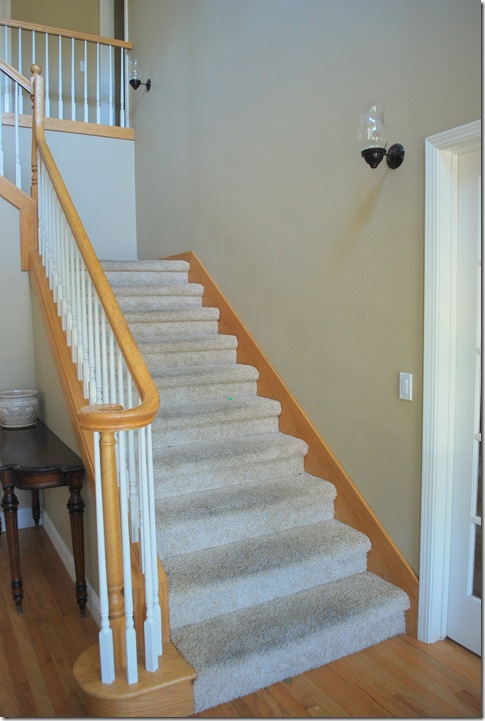
(Kate’s foyer, BEFORE)
Kate at Centsational Girl, mentioned that my project had inspired her to do something with her plain oak railings in her house too, so she has just finished this project and I thought this would be a great opportunity to introduce Kate to those of you who have not yet met her. Kate lives in CA, has fantastic taste and a wonderful DIY blog that you will totally enjoy. So, click over to her railing project too. You will love her entire blog and be hooked like I am!
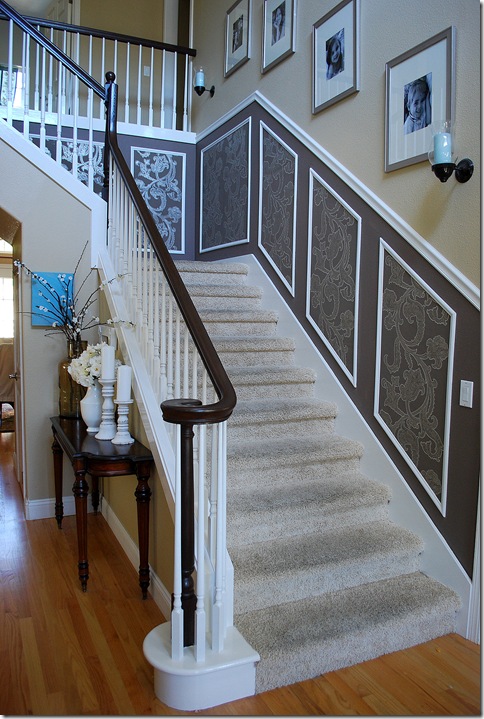
And, AFTER
Check out what Kate has been up to with wallpaper and moldings too. What a change! I just love it all. Notice how she painted the bottom of the staircase molding white too. Click over to Kate’s blog for all the details. She will tell you all about how she did it and the color stain she used. Now, I want to go back and make mine even darker!
Hope ya’ll will also be inspired if you have those light oak railings. This is a great way to get an instant update for just a little elbow grease.


Seeing both yours and Kate's dark handrail against a lighter hardwood floor has really calmed down the constant anxiety I've been feeling since we decided on a hardwood color. We want light hardwoods (like yours) and our handrail is stained darker (somewhere between yours and Kate's). Love your blog! 🙂 Keep up the great inspiration!
So, I took your advice and bought this stain b/c I hate my oak railings. I tested a spot and it is very sticky. It’s only been 2 hours so maybe I need to let it dry like the label says??
How long did yours take to dry and was it sticky? And one of my dilemas is the backside of the railing. It’s screwed to the wall and it’s pretty tight between the rail and the wall.
What are your thoughts, if you have a second???
Thanks,
Reid
I was just curious if after time the stain rubs off and if you have to re-apply? I’m just curious because I’d rather go through the extra step of sanding if it would ensure the color staying on the wood and not my kids hands or whatever else.
Hi Rhoda, I’ve been reading your blog for a few weeks now…it’s so much fun and so many ideas! I read your DIY about staining an oak bannister. I’ve never restained anything and I’d love to send you a picture of a piece that I’m considering doing to get your opinion. Could you please email me back with a way to send you a pic? I don’t know alot about blogging and this was the only way I could figure out to contact you. Thanks so much!!
Hello Rhoda,
Awesome job on the banister. It looks amazing. I too have been inspired by your DIY project and plan on doing the same to my dated oak banister. I had a couple of questions though before delving into this project. First, just to be clear, you did not do any sanding or prepping of the banister at all??? Also, did you use satin Polyshade or gloss. I bought Bombay Mahogany Gloss and am now afraid it may end up looking too glossy. Also, how has this banister held up since the project completion? I purchased all the items to remove the varnish, stain and then varnish. However, if your banister has held up (no chipping, cracking, wearing etc) I would be willing to skip that process. Thanks so much for any information.
Amazing job! I’m glad I found your blog! Like some other posters, I’m wondering if you wouldn’t mind on commenting on how the finish has held up over the past couple years, particularly in spots that get a lot of touching and hand traffic. With kids, I’m a bit concerned that the staining right over my old varnish wouldn’t last long, and then I’d be stuck doing it again in a year or two.
Stacy and Michelle, I used Satin Bombay Mahogany on my railings. And nope, no sanding or prep at all. I just brushed it on. My railings were not shiny to begin with, so if you do have a bit of shine, I would suggest at least going over them with Liquid Sander, which you can find in a bottle at the home stores.
Michelle, after 4 years, my railings look exactly the same as Day 1. No chipping or rubbing off at all, I promise. You can still see the wood grain through the finish, it’s just darker.
Can I confirm that you used the polystain over the existing stain without sanding or removing the poly? Our contractor put in red oak newel posts and bannister and it is too brown, want a more mahogany look. thanks
Does anyone know that name of the finish in the last picture (the walnut/ebony finish)…
How long did it take the sticky feeling to dry? Oh, did you put a Poly over it too? Its beautiful
HI,Jen, they actually dried within a couple of days, no sticky left. And no, the Polyshades has poly built in, no need to add more.
Thanks Rhoda! I finished and its all dry! I have one problem.. it is VERY cherry in color. Can I go over it today with the darker shade to give it more of a wrought iron color. Also goofed and stained the spindles. OOPS. I stopped half through and finished rest in white. Do I have to sand down the three I did before painting them white or just prime first. Thanks JEN
Hi, Jennifer, glad you tried it too! yes, that mahogany shade is very cherry & I found that too. I tried mixing in the Dark Walnut to darken it, but it didn’t get as dark as I wanted, but I was fine with it, it def. looked better than the blonde wood. You can try going over it with the darker shade and see if you can darken it, but I found the best coverage was the Bombay mahagony shade. Give it a shot and see though. I do think if you mixed in some darker Ebony/dark brown stain into the Bombay Mahagony before you start, it would achieve a darker color. If I had experimented a bit more, I think it would have worked too.
Your blog post imspired me to do the same to my oak!! I copied your shade and went for it! It’s drying now! Thank you
I have oak floors and did the same thing with my railings. I have dark mahogany railings and ivory posts…We have just added new railings upstairs and the wood is bare. I am having an awful time getting the stain as dark as the existing rails Even though I bought very dark stain, it is coming much too light. Any tips?
I’m not sure what to tell you on bare wood. Try adding a wood conditioner, as that should open up the wood pores and let the stain in better.
Love this! Do you happen to know the name of the paint for the walls?
HI, Donna, yes that is my old house and the wall color was Whole Wheat by Sherwin Williams.
Hello!!! This is exactly what I want to do to my railing!!!!! How is your banister holding up? Do you happen to have a link to the exact stain you used. Any help would be greatly appreciated! Thank you!!!!
Hi, Nicole, this project was at my old house over 5 years ago. I used Polyshades Bombay Mahogany and mixed in the darker walnut with it. You should experiment with the colors until you get what you want.
Looks wonderful!
Just curious, about to do this to a new to us home and curious how the polyshades staining has held up over the years with no prep?
Found your blog through Pinterest ?
Just kidding. I see from other comments that in 4 years you had no wear but aren’t at that home anymore! Thanks for keeping up with your comments for years!!!