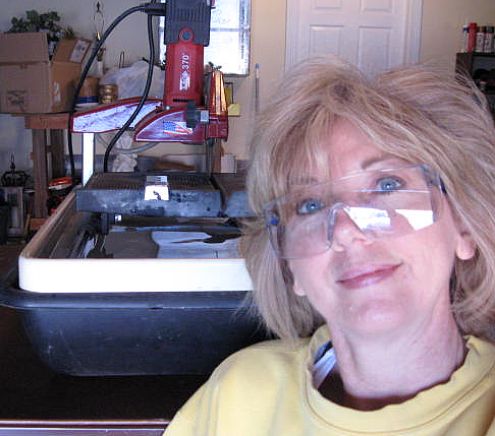
The glamorous life of a DIY diva! What we do in the name of blogging. This is my best friend at the moment, the wetsaw.
Are you ready for the how-to’s on the subway tile installation?
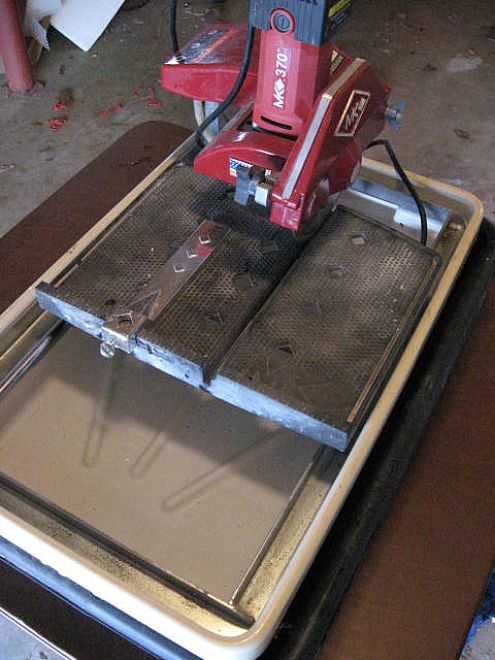
This is my dad’s wetsaw, which I borrowed last time I was home in Atlanta. I knew that I would need this nifty tool once I got started on this project and it truly is a lifesaver if you are doing a major tile project. If you don’t have access to one of these, borrow or rent one! It will make your life SO much easier. It sounds intimidating, but really it cuts like butter and works like a charm. Just keep your fingers clear and you’ll be fine. Let IT do the work for you.
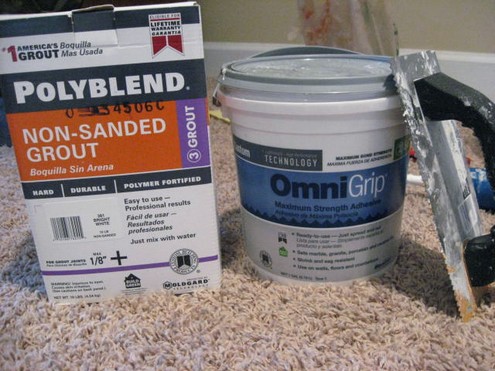
These are the main things you’ll need too: Adhesive to set the tiles, along with the notched trowel and colored grout for finishing the tile (I used Bright White non-sanded grout). I will go back and do a sealer on the grout later, even though it will not get a lot of water and shouldn’t get very dirty at all. I didn’t take a pic of the grout float, but it’s just a rubber applicator that pushes the grout into the seams and is about the same size as the notched trowel on the right.
I did a couple of short little videos on taking down the top row of tiles, along with that faux marble backsplash that was there. This will give you an idea of how things got started:
DIY Tile Project I from Rhoda on Vimeo.
DIY Tile Project II from Rhoda on Vimeo.
Here, you can see what I started with and the existing tile that was already there. We have 4×4″ square tiles in the shower area and this white subway tile ties in perfectly with it. I simply butted up the new tile to the border that runs down the wall here to the right in this pic.
And took down that first row of tiles, which is where my decorative border tiles started. See this finished one below for the visual.

The far right vertical row was already there and that’s what I butted the new tiles up to. Make sense? Then, I filled in a small bit of tile all the way to the floor and grouted it all. OK, back to the Befores.
I’ll have to tell you that I really got inspired to do this after seeing this subway tiling all over blogland. As I mentioned before, my friend, Centsational Girl Kate, did some subway tile in her master bathroom, as did Penny from Comforts of Home . And the ever-popular John and Sherry from Young House Love, just completed a beautiful DIY subway tile project in their own bathroom too. Check out ALL these links for some major ooohing and ahhhing.
So, all of those beautiful inspiration pics were all I needed to get the ball rolling in our masterbath. To beautify and update, that was the goal. And it was totally achieved. 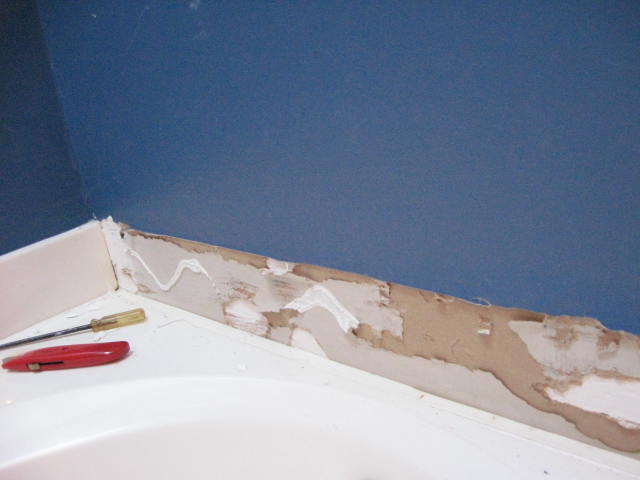
The first step was removing the old faux marble backsplash from around the tub. There were 3 pieces that had to be torn out. I used a screwdriver and box cutter to cut away the grout line and loosen it up so that I could pry it away from the wall. This took some work, but I finally got all of these removed without TOO much damage. 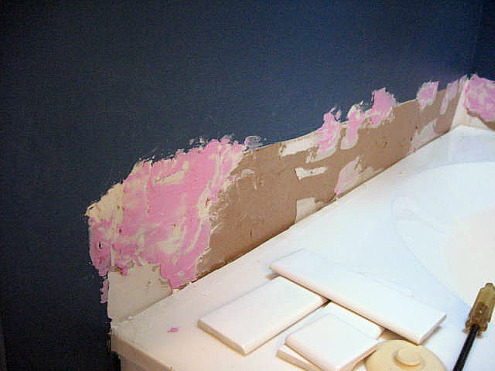
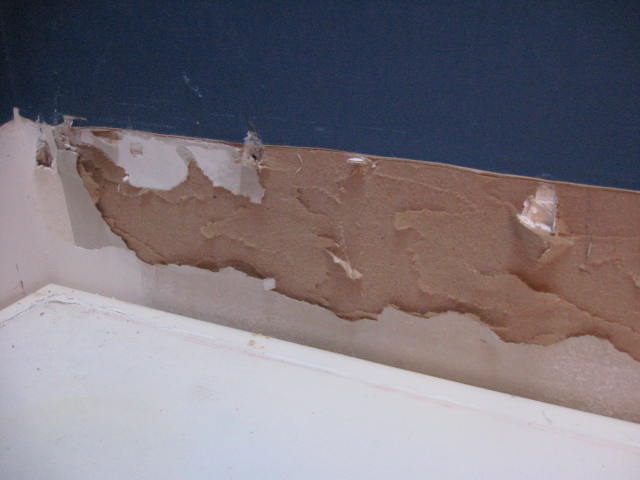
Part of the sheetrock will probably pull away when these are removed and a couple small holes were punched with the pressure of the screw driver, but I just sanded down the area and added back some plaster patch (the pink stuff dries white when completely dry). There was only one spot that was really crumbly, but I managed to patch it up and make it smooth and flat again.
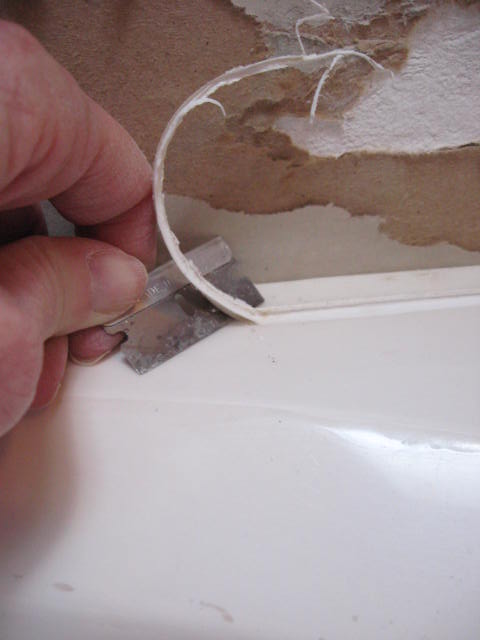
A small razor blade will get up the excess caulk that held in the marble backsplash, from the edge of the tub. This is also good for any excess grout that may dry on the tile or tub. These razor blades won’t hurt anything as long as you hold them at an angle and scrape.
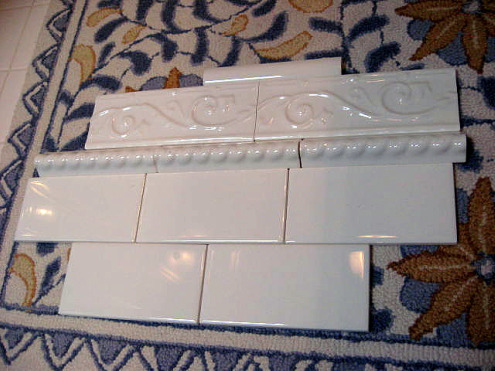
I decided on my tile layout before I got started. I suggest you do a dry run and measure your space to see how your tiles will line up, especially vertically. You want to know ahead of time how much space you’ll have to fill in.
Once I tested out the border tile and the decorative tile with the subway rows I would add, I found that I had about an inch and 1/2 gap that would need to be filled. Luckily, I had brought home one of those rope tiles just to try it out and it fit perfectly in that extra space, so I decided to add in an extra row of those to fill in the gap. And it worked like a charm. Much better than having to cut my subway tiles in half to fit in there. I did add a small little trim tile at the top too, just to set off the decorative tile a bit. 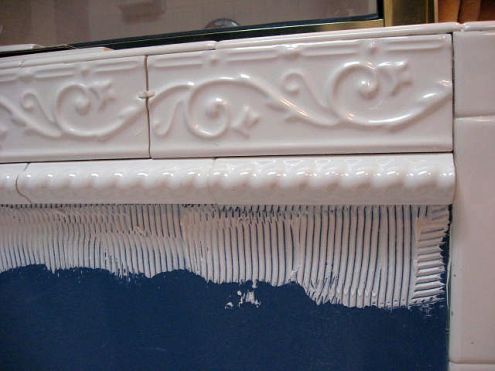
I took off the old row of tiles from the top of this ledge and that is where my decorative tiles would start. I began at the top and worked my way down, but when I turned the corner, I decided that working backwards would be better and I began the next wall by laying out the subway tile flush with the bathtub and worked my way UP from there. As long as you keep your rows going straight, even when turning the corner, lining up the tiles, you shouldn’t have any problems with your rows.
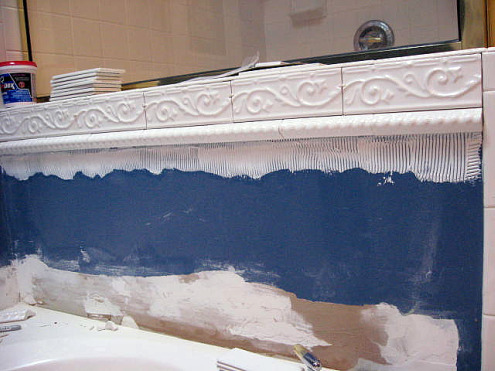
It’s really like putting together a puzzle and sort of fun when you start going. The most time consuming part is cutting the corner pieces. Other that that, setting the full size tile pieces goes really fast. I started out using some small tile spacers, but then gave it up, when I found that I could just eyeball the tiles and space them just a bit apart. I didn’t want big gaps anyway and it was just easier for me not to use the spacers, but if it makes you feel better, then use them. I spread just enough adhesive for a row of tile. You don’t want to add too much at a time, as it starts drying pretty fast. 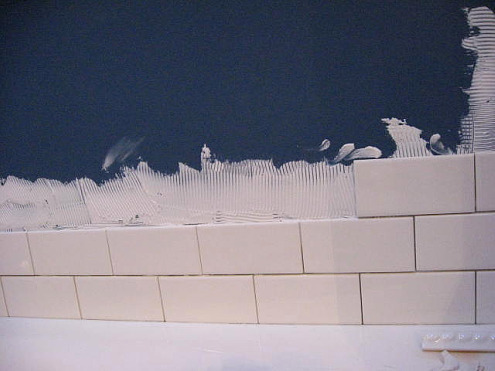
The notches in the trowel help to keep an even application with the adhesive. I had no problems getting it on even and pressing the tiles in place. It creates almost a suction, once you place the tiles and press them around a little bit. They didn’t slide at all, once in place. 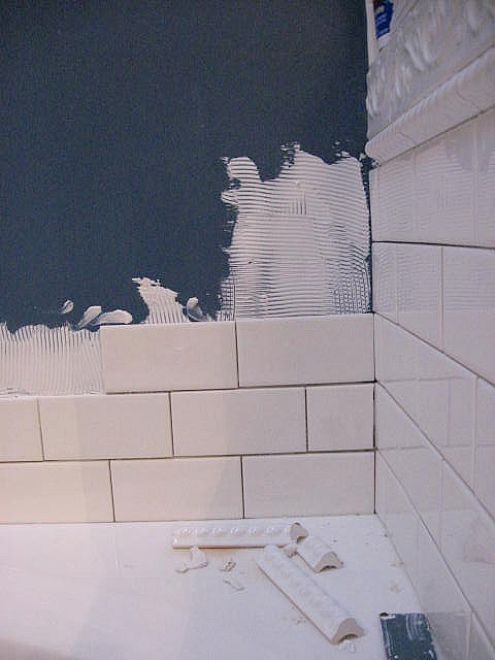
So, I just worked my way from the right over to the left wall, one row at a time. I did one section each day and completed the tile portion in 3 days. But, I only worked on it about and hour or and hour and 1/2 each time, so it really wasn’t that long.
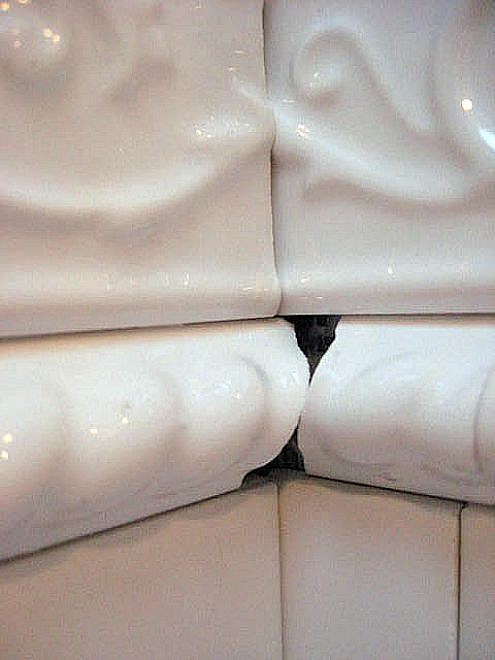
Here’s one of the corners before grouting. You can see there’s a pretty big gap in there, but I just filled it in with white caulk first and then grouted on top of that. I thought it looked just fine when I was through with it. It can be pretty stressful trying to figure this out, but I just did the best I could with it and didn’t try to make it too perfect. I’m sure the pros know just how to cut those corners, but that was the challenging part for me.
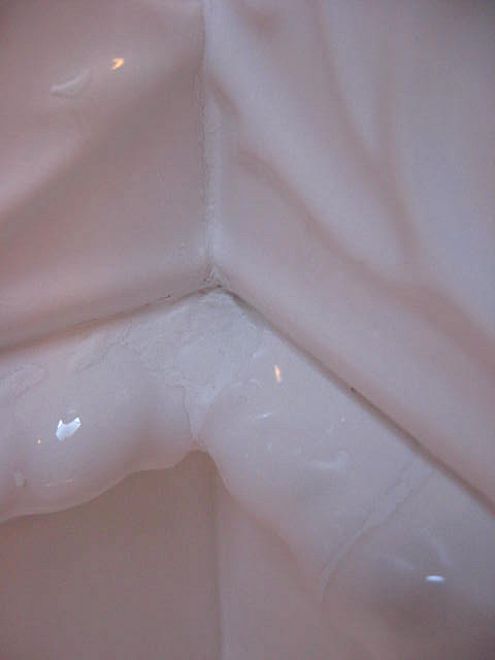
Grout is your best friend! It’s a messy job and I totally did not get any pics of the grouting process, but you’ll have to trust me on that one. It’s pretty easy once you get the grout mixed to the right consistency. It should be like toothpaste, not too runny. You’ll get it all over the tiles and will need to keep a couple of buckets handy with clean rags and water. Once the grout is in place, you can start wiping it all down in about 10 mins. being careful not to wipe the grout out of the seams. I didn’t have any problems with grouting. Just keep wiping and you’ll get all the residue off the tiles. I used non-sanded grout, which is recommended for smaller seams. If you do floor tile with larger seams, you’d probably want to go with sanded.
To me, the worst part of any project is the clean up. If I had a clean-up person, I’d be all smiles. I hate that part! But, you have to wash out the rags and buckets and get all the grout out of there, so it’s best to do that outside and not down your kitchen sink. Luckily, it’s warmed up a little bit here and I didn’t freeze to death. 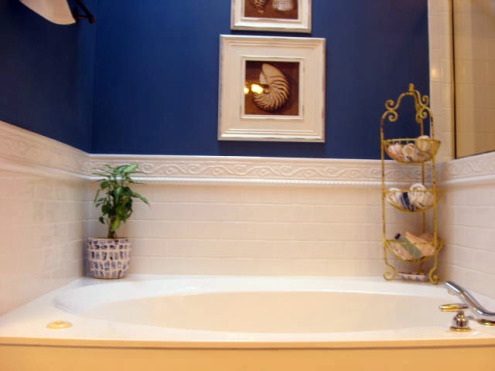
So, there you have it! I hope you got some ideas and see how easy it is to do a project like this. You just have to think it out and do some planning ahead and you can do it too.
YES, you can!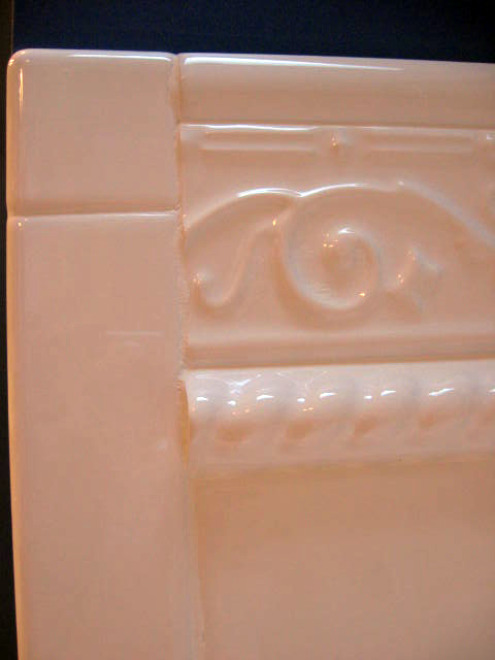
I did have one near disaster that I’ll tell you about that nearly created a slap myself in the head moment. 🙂 I came all around from the right to the left side. When I got to the last wall, I continued the tiles all the way over to the edge of the bathtub and stopped them. I totally forgot that I would need to have them meet the edge of the wall trim tiles that weren’t in place yet. So, I had already done all my rows when I started adding the edge tiles that lined the wall here by the tub.
Then, it dawned on me that I had a gap of about 3 inches. I had to think fast! Luckily, the adhesive was not completely set and I was able to move all my rows over to the left to meet the edge tiles on the wall. I had to move all 5 rows of tiles over in a hurry! I didn’t want to cut extra pieces right there next to the wall, so I cut my extra pieces in the corner of the tub. I knew that would be a better look that trying to fill in my screw-up. I got them all moved (remember that old game where you moved the squares up and down, right and left to make a picture or saying?) Yep, it was just like that only they all moved to the left.
Just in case you’d like to know how cost effective this is, I’ll give you a breakdown on cost:
Tiles (subway tiles are 22 cents each at Home Depot) Lowes has them too. The decorative tiles add more to the cost, but are SO worth it.
Adhesive
Notch trowel
Grout
Grout Float
Approx. Total: $170
Not a bad project at all for the money! I would do it again in a minute.
Thanks for stopping by and I hope this gives some of you the courage to try this yourself. If you have a kitchen backsplash to tile, that would be the perfect place to try it out.
It really isn’t hard!
I had the best time soaking in the tub last night with the jets going, admiring the new tile and reading my new Beth Moore book. It was pure BLISS!
Disclaimer: This is my method, but this method may not be the ideal or the approved method in your state. I’ve seen plenty of tile jobs done this way. I don’t feel that water will be a problem in this tub area, as we didn’t have a problem with water splashing before this was done. I will add a bead of silicone white caulk in the seam where the tile meets the bathtub, to further insure that no water will get behind the tiles. If you are hesitant about tiling directly to the sheetrock, you can always add the concrete backerboard before you begin. I just opted not to do that.


Looks great Rhoda! And so cute to hear your voice after all these years! 🙂
I have almost the same “feature” tile on my kitchen backsplash! I posted about some frames I redid yesterday and thought of our old “decor board” days!
Kristi
I got an email from the same person who sent out aquarium tickets and the first weekend of March they have a Princess Diana exhibit in Atlanta – I put the details on my blog if you are interested. Two free tickets. Thought you might like to know. I’m trying to let all Georgia bloggers know. Pass the word.
Sandie
you are awesome!! I loved your two videos. thanks for breaking down the process, you’ve made it seem like something I could handle.
Rhoda! Oh, Most Marvelous One! This is awesome! It’s amazing that you did this yourself. I know you’re wonderful and all but oh this is fantastic! You did a great job and it’s so pretty!
Be a sweetie,
Shelia 😉
Great tutorial. I’ve done quite a bit of tiling and when I saw the photo of the last section and you said you were working right to left, I thought, “oh, I hope she measured the tiles out or she’s going to get to the front and have to cut the tile in the front.” Sound like someone who’s been there, done that? Yep! Great save!
Really beautiful job!
Great job! Way to go for not being afraid to try! I have tiled kitchen backsplashes and around bathtubs without backer board (in 3 different states and homes) and they all sold with no problem at all. You usually only need backer board if there is going to be extreme direct water contact as in a shower or bath/shower. New construction is a whole different story. New construction may require backer board. If so you put the backer board directly on top of drywall and then lay tile over that. Anyhoo, I’m acting like this is my tutorial! Beautiful job can’t wait to see what you’ll tackle next. Keep going!
Holy Smokes!!!! I am so impressed by how great that turned out, and more impressed by your willingness to take on these “big” projects. Until now, I dont think I ever would have had the guts to tile anything. Wow!
Thank you for this tutorial. I love your blog.
Rhoda — You are my hero! To be able to do this and teach us along the way is amazing. Thank you so much.
Girlfriend you make me smile !!!!!
Great job…..SUPER tutorial…..Peter is a lucky man 🙂
My hubby is gone away on business for a few days….I like to do a little something – something while he is gone….I don’t have anything big planned just a little painting… so the fireworks upon his return will be small LOL
Have a great day,
Kathy 🙂
Love it! You did a professional job!!
Rhoda what a transformation. You go girl! It looks phenomenal.
Wow, Rhoda! It looks fabulous. I’m so impressed by your DIY skills! 🙂
Oh my heavens, that looks beautiful!!! I loooove the white tile. I am convinced that somewhere in my house needs white subway tile! Thanks for the tutorial–it inspires me to do the same thing in my bathroom…Do I dare? 🙂
REALLY pretty! I saw this done years ago in a magazine and I LOVED it–still do! It looks great!
Hi Rhonda!
I follow your blog and think you have some great ideas! I have to agree with Sher on the wallboard though. Another code friendly alternative to concrete board is a mold resistant drywall, commonly referred to as greenboard. Another suggestion for future projects is the use of an additive to the grout that is a permanent sealer. It is a better long term way to address mildew and mold, and is easier than rolling or painting sealer onto the grout lines. No, I don’t do this for a living, but tiled four bathrooms in the past two years during renovation of my house!
ONE more hint!!! Do not grout the horizontal bottom row where the tile and the tub join. That should be filled with a latex caulk. This step prevents cracking as the house shifts and reacts to normal changes in temperature and as the grout cures. It will also be the spot that will be most vulnerable to water infiltration of the drywall.
Rhoda ! – You are a Renaissance Woman & I love it!!!!!
Thank you so much for posting this. I have been eyeing my bathroom for sometime now & I think you just might have me on the doing side fo the fence for this project.
Thanks for bloggin this – your a sweetheart!!!
Rhoda, that is AWESOME! i am totally planning to do subway tiles on the bottom half of both my bathrooms… sometime! it can be so elegant or so country or so.. whatever you want it to be!
thanks for all the tutorial… i’ll be coming back when i am ready for action!
Ohh…Rhonda you do good work! So Pretty!
When we bought our house last year we really put our stamp on it. Every wall in the house was painted and we tiled the Kitchen floor and completely redid the downstairs bathroom. I love to tell people that WE did it.
Well look at you go! I’m calling in reinforcements for my upcoming tile project (mostly because it also involves moving a cast iron clawfoot tub out of the way which is SO beyond my level of expertise. 😉