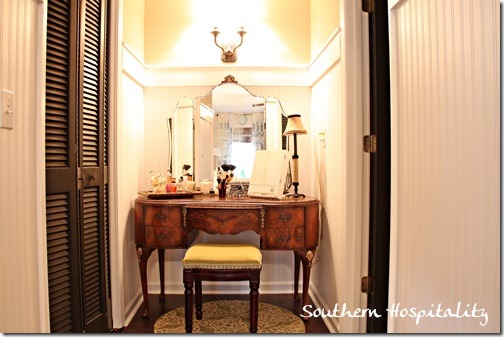
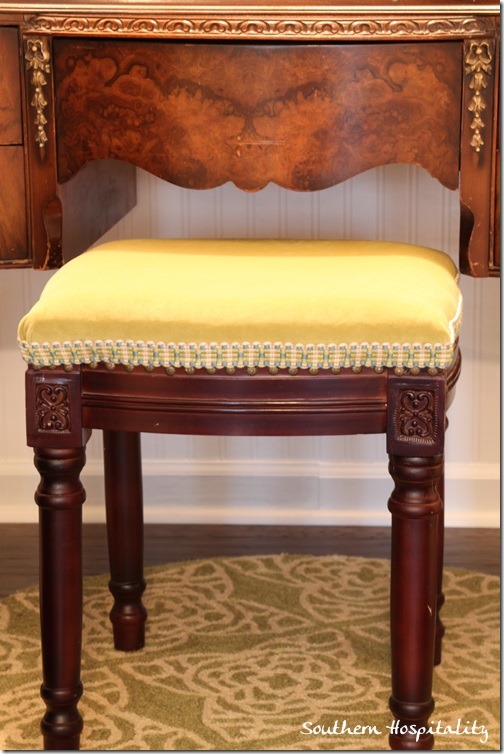
One more of my yardsale finds got an update last week. This cute vanity bench that I scored in Birmingham for $10 finally got some new fabric on it. This bench had stumped me forever, since I couldn’t figure out how to get the darn cushion off the top to staple new fabric on there. I finally gave up trying and just stapled the fabric around the base of the cushion and added some wide trim to hide the staples and that worked like a charm.
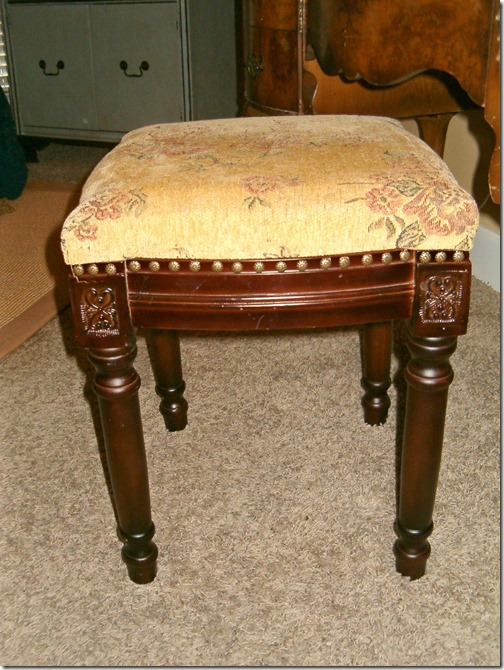
Here’s what it looked like when I brought it home and it’s been like this all this time. Not very pretty fabric, but it sort of went with my old colors, but definitely not with my new ones of blue and green. Time for a facelift! I just had to figure out a way to recover that cushion. Nothing I tried would get the seat off, so I had to resort to another method.
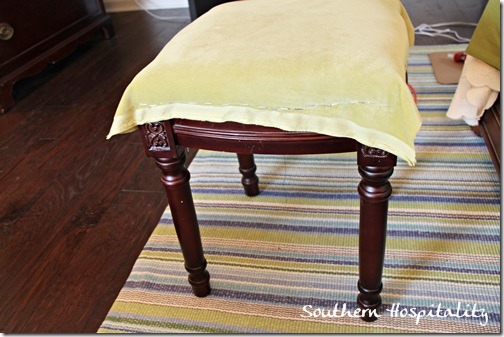
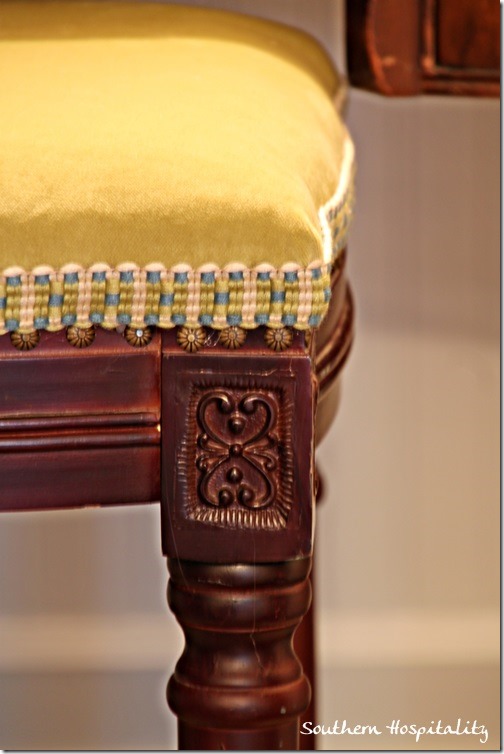
I had this pretty lime green velvet in my stash for years. It originally came from Ballard Designs and I picked up a few yards of it in their Atlanta store. Since I already had it, I worked with it and it blends in nicely with my greens and blues in my bedroom. I simply stapled it with an electric staple gun all the way around the perimeter of the bench, hitting wood along the way and securing the fabric in place. Then, I went back with my scissors and trimmed off the fabric so that it was just above the wood part of the bench under the cushion. The trim will cover up all the imperfections. Sorry, forgot to take a pic of that part!
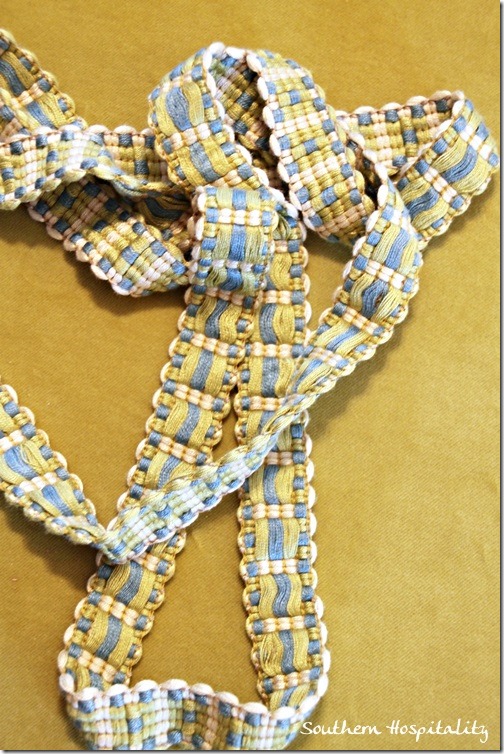
This cute 1” trim was perfect for my project and I got 2 yards of it. With my hot glue gun, I simply wrapped it around the base of the cushion and secured it all in place. All the ugly staples are covered and I’ve got a brand new looking bench.
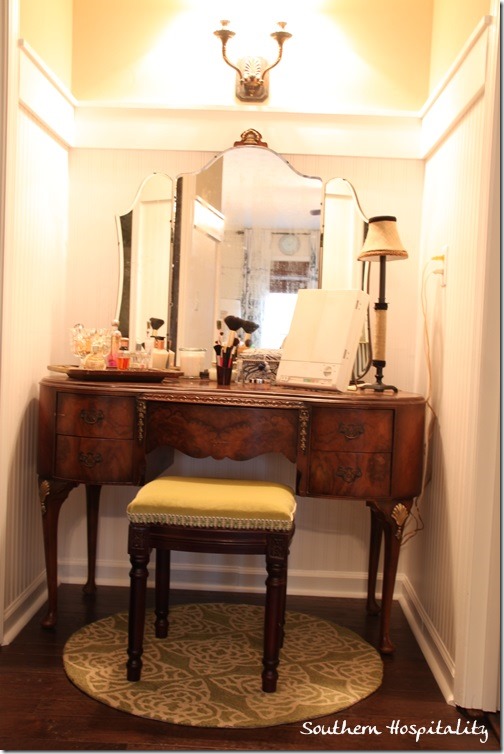
Much better than the old original gold fabric, don’t you think?
This little girlie spot is so perfect for my vanity and putting on my makeup. I just love it!
The freshly covered cushion really makes me happy too.
Amazing what a little fabric and new trim will do for an old piece.
Have you got a bench that needs a facelift? Got fabric and trim? For just a few dollars you can get a new look too!


I love what you did with the bench the fabric is so pretty and the edging is beautiful. Love that vanity also.
Cynthia
Wonderful transformation! The trim is PERFECT!!! (I didn’t notice the cords either and had to go back and look for them. Funny how we all perceive things differently!)
Rhoda, I love how it turned out and the fabric you chose! Beauitful!
Lovely Rhoda! Love the trim and fabric!
I bought that same velvet for Christmas stockings I made last December- it’s so pretty!! Your bench looks great!
That is a beautiful redo. Do you remember where you bought the trim? It really completes the space and the beautiful wood helps ground it.
HI, Teresa, I bought it at one of my fave fabric stores here in Marietta, Fabric and Fringe Warehouse.
You’re right. A little fabric and trim makes SUCH a huge difference sometimes, and this pretty little stool is certainly no exception. Nice job. Since we’ve moved, I had to sell my vanity. I miss it, but if it’s ok with you, I’ll visit this post now and then and pretend I’m sitting there. 🙂
Perfection, Rhoda! Sometimes you just have to go for it and make it work — and this is a winner!
xo Heidi
PS — hope you had a lovely Easter with your family! Would love to see you soon.
I remember when they had that green apple velvet. Loved it. I bought a monogrammed pillow in that shade from them.
It looks beautiful. Love the trim you put with it! It makes it fun.
Lovely makeover, I love lime and I like the braiding detail you added. I have so many of my mums things to makeover that my spare room is filled from top to bottom! I don’t know how you get the time to do all you do and keep your blog going, amazing!
Lee 🙂
Hi Rhoda!!!!!
I have to say it again…I LOVE YOUR PHOTO!!!!!!!!
I love the little stool and how you are going to use it. Your alcove is just beautiful with your elegant vanity and it’s new beautiful stool!!
Have a great week Rhoda!!
Pam
xox
Thank you! Thank you! Thank you! This post just resolved an issue I have had for 5 years! My husband’s great grandmom passed away and left her vanity and stool to my family….and yes, the stool has been without ANY material on it..I never knew how to “fix” it and now I do! I can’t wait to pick out the best material and trim….I love following your blog and can’t wait to get this project done!