I’ve been at it again. My love for beadboard wallpaper has not slowed down and I’ve finished up the masterbath water closet. Amazing what this stuff does to add architectural details to an otherwise bland and boring little space. I love the crisp whiteness against the blue walls. Instant appeal!
Here’s how it started.
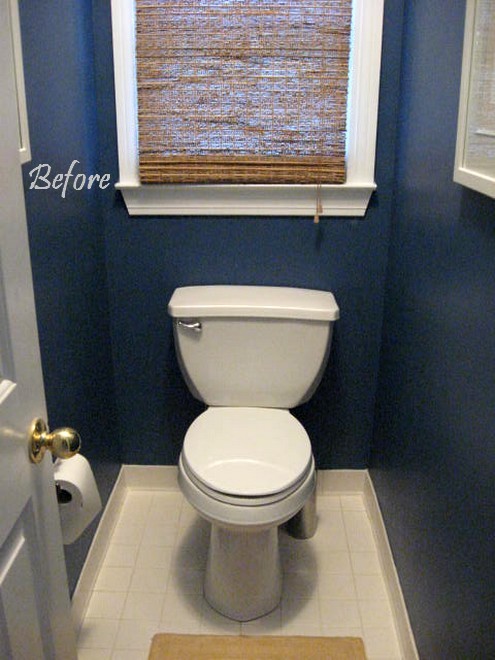
All blue, but not all that exciting.
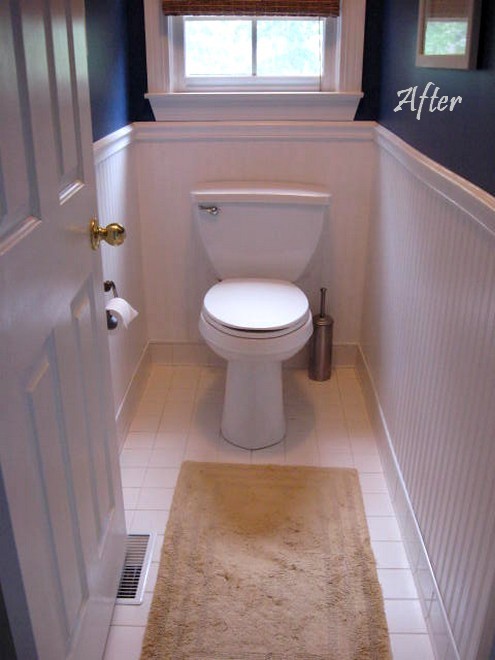
Withe the addition of chairrail and other molding, along with the beadboard wallpaper, much improvement don’t you think? I sure do!
Want to know how I did it all? Of course you do! This is one roll of my nifty beadboard wallpaper, that I now carry in my shop, so you can get your hands on it at the click of a button.
I hope you know that the Wall Doctor Graham Brown version is the very best type and the only one I would use. Some of the copycat versions are not at all the same. I saw one in person and it was really bad. This one looks like the real thing.
If you missed my earlier posts last year when I first discovered and started using this amazing stuff, click here to see the tutorial on my kitchen and bath cabinets. I added this on the ends and really took them up a notch.
And we had a beadboard wallpaper party, after many of my readers tried it out too. It’s been a hit now for going on a year, in case you haven’t heard about it before.
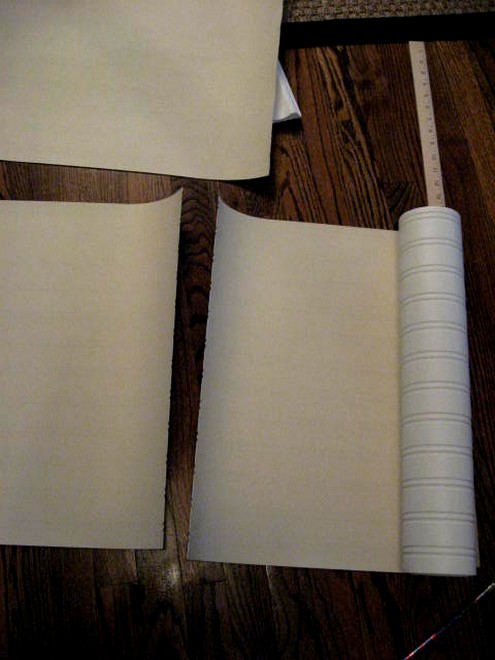
I decided to begin the chair rail right underneath the window trim that was already in place, so that set my line for the chair rail on either wall. I measured just under that, so I would have a line to stop the wallpaper and then have the chair rail cover it up. Much easier to put up the wallpaper and then put the chair rail molding right on top. So, I figured out how many sheets I would need to go all around this little space. 9 to be exact.
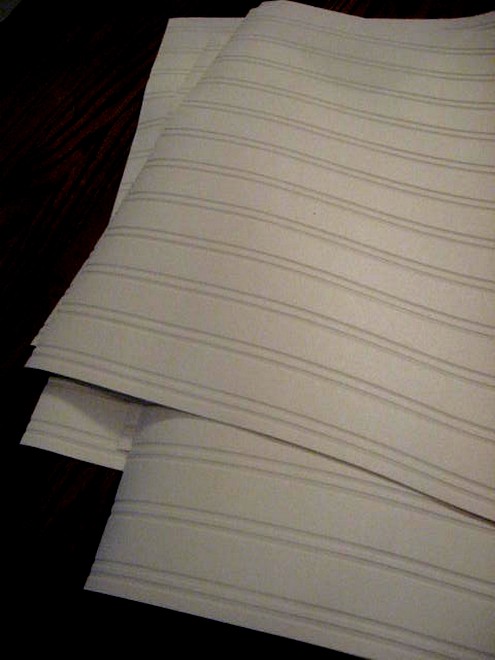
Here they all are cut and ready to go. I actually put these up one at a time with a lot of time in between. I would wet a piece, wait 5 minutes, put it on the wall, smooth it out and then go do something else. Next time I came in the room, I did another piece, until I made my way all around the room.
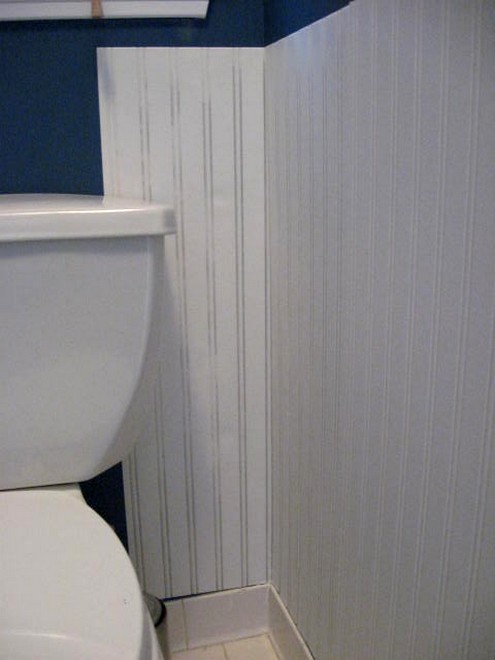
I didn’t worry too much about the bottom where it meets the tile wall baseboard. I had already figured out that I would add a simple small piece of molding there to cover that seam. That is one thing I’ve found in working with this paper. If you add molding around it, it totally looks like the real thing and I really think that’s one of the key secrets to making it look SO authentic.
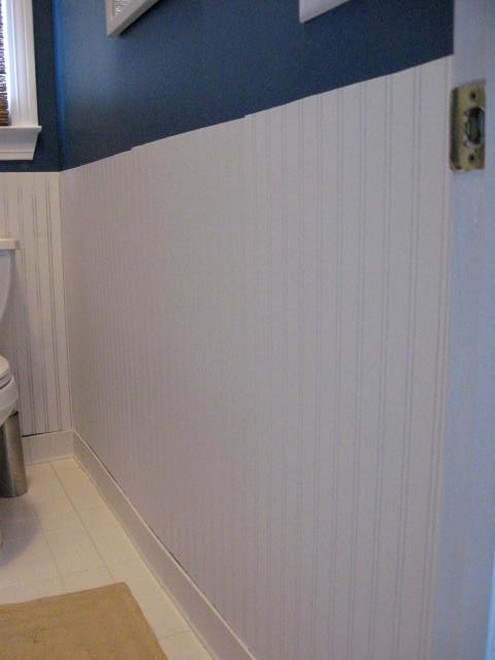
All the pieces are in place now and waiting for the chair rail to be installed.
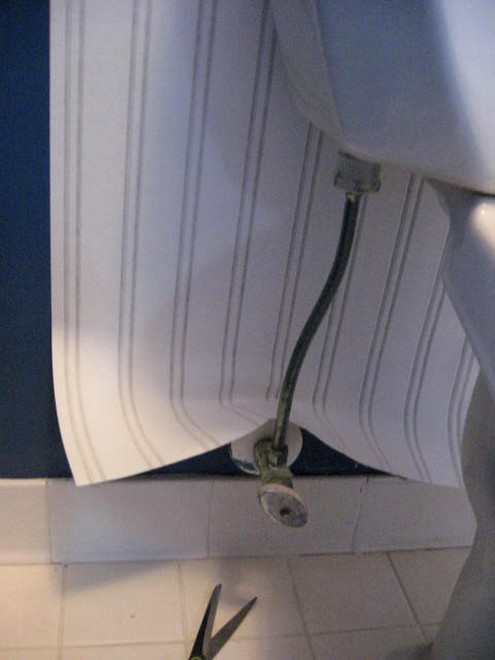
Here’s how I got behind the toilet. I can’t imagine having to put in real beadboard behind a toilet. It would not have worked in my case. I barely had room to slide this paper behind, much less a thick piece of real wood beadboard. So, you can see how time and cost effective this would be. Don’t get me wrong. I love the real thing too, but sometimes it’s just not practical. Here I just cut a slit in the paper to move it around the toilet line.
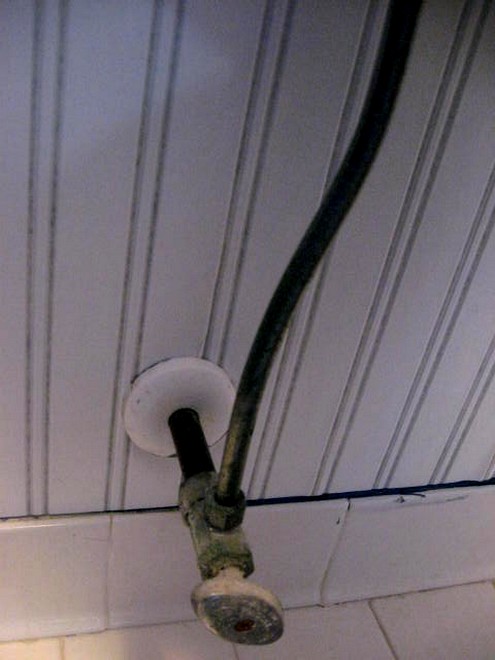
And here it is all smooth and in place.
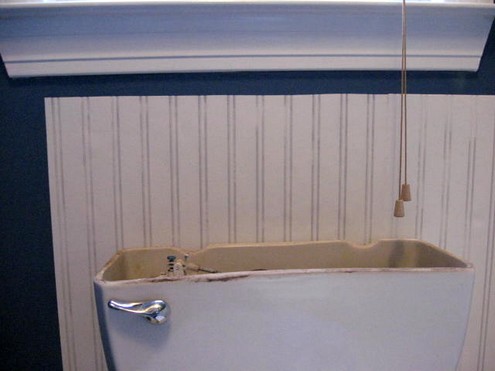
I did slide it behind the toilet without much problem. This paper is thick and easy to handle.
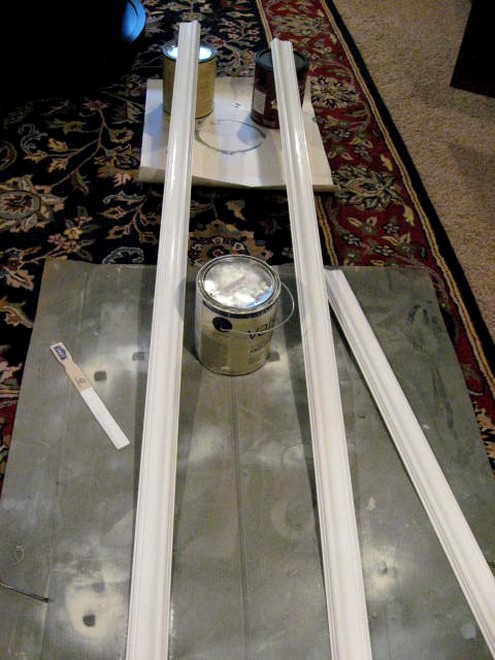
Now it’s time to get busy on the chair rail. I opted to go ahead and paint my already primed chair rail with 2 coats of my trim paint, just to save the hassle of painting next to my blue wall paint. Didn’t want to have to deal with that.
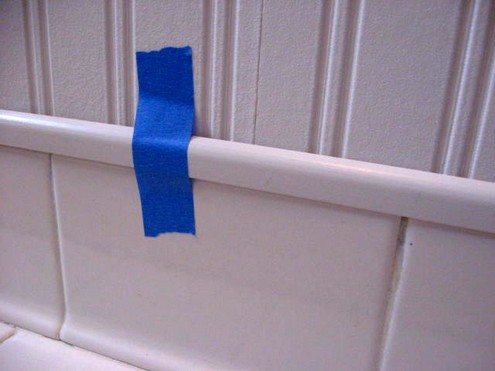
Here’s where I added a small trim molding (again, this is the lightweight foam stuff that can be cut with scissors). I glued it in place with wood glue. Really any sort of glue should work. Don’t tape on top of your wallpaper though like I did. I did have a little bit of it that pulled up with the blue tape. No major damage, but be more careful than I did.
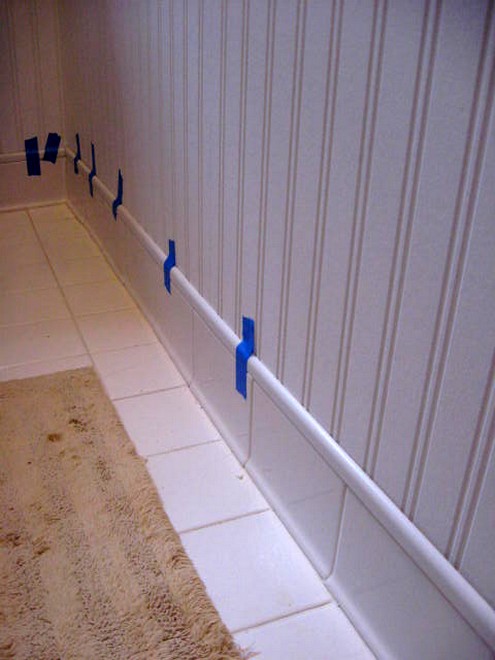
See how that cute little trim just finishes it off and sits nicely on top of my existing trim baseboard tile? It’s those small details that make the difference.
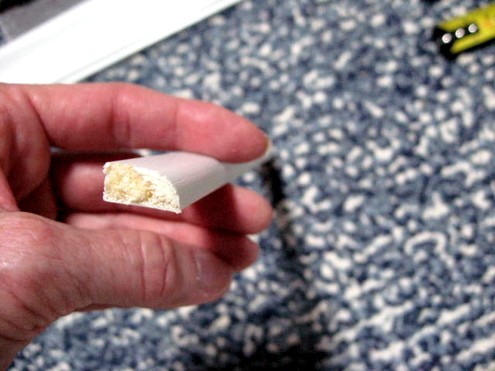
This is shoe molding, very small (about 1/2″ wide from Lowes) and it worked perfectly on top of my tile.
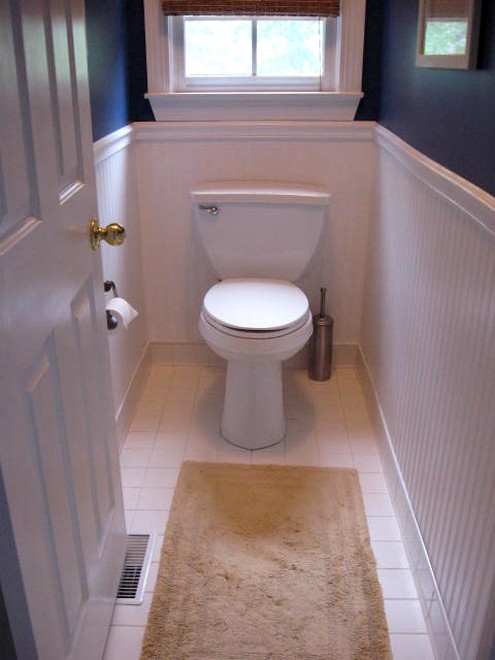
And again, here is is all finished and painted. I did one coat of my gloss trim paint on the wallpaper too. I definitely think you should always paint this wallpaper to further enhance it and make it look like the real thing. It’s made for painting!
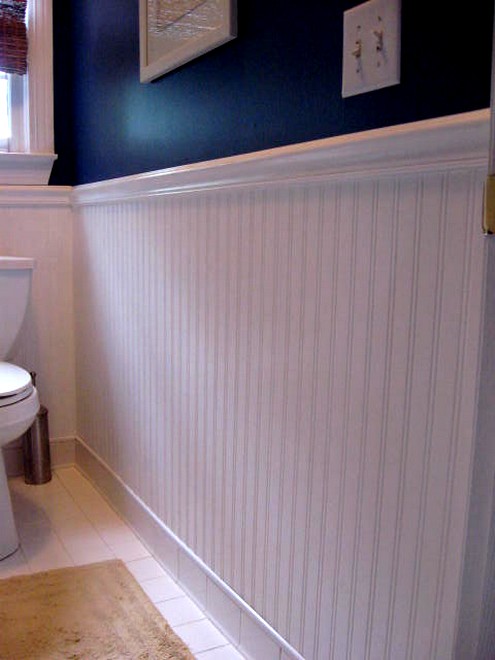
I love how it adds so much more interest in here now.
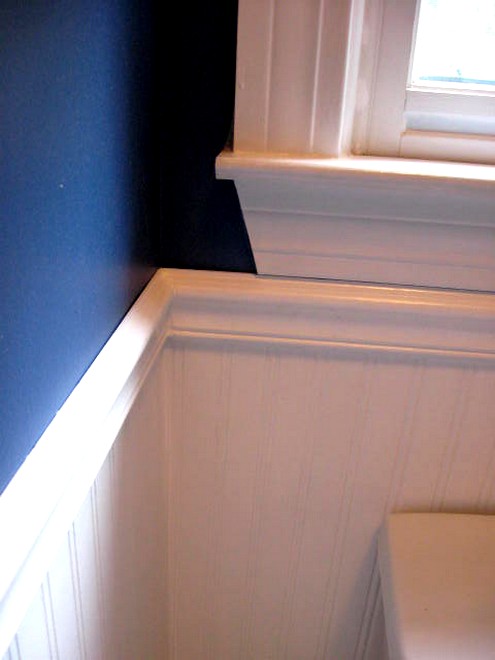
Mitered the corners with my simple hand miter box. It’s never perfect, since houses are sometimes off square and this was no exception. I did have to add some caulking in here, but after painting, it looks pretty darn good.
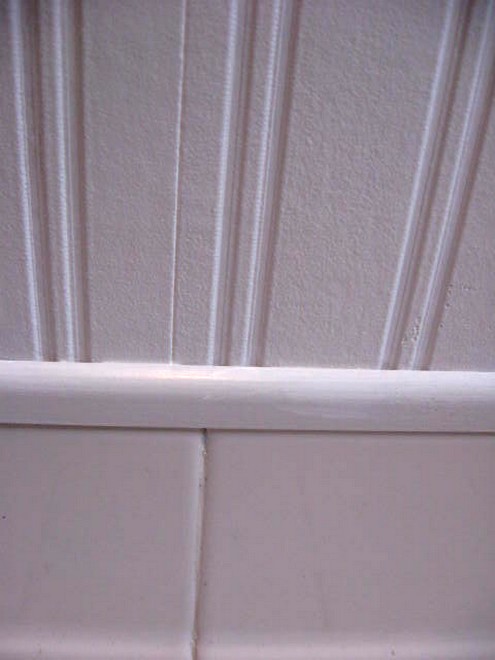
Close-up of the small trim molding and the wallpaper. Once you paint over the wallpaper, the paint fills in the seams for the most part, so they are hardly noticeable.
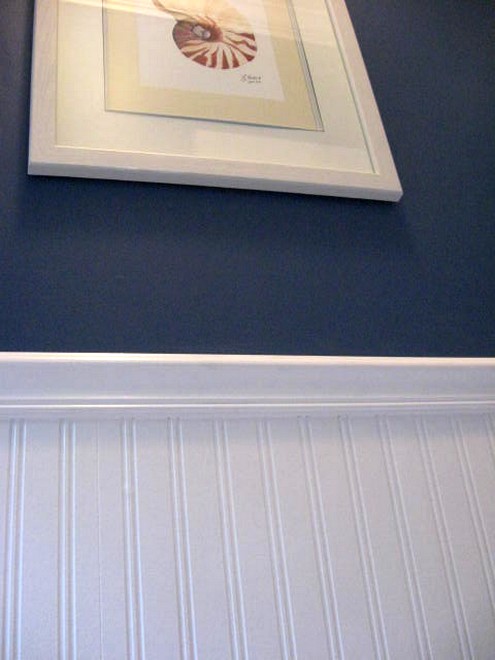
Love, love, yes I’m in love! 🙂
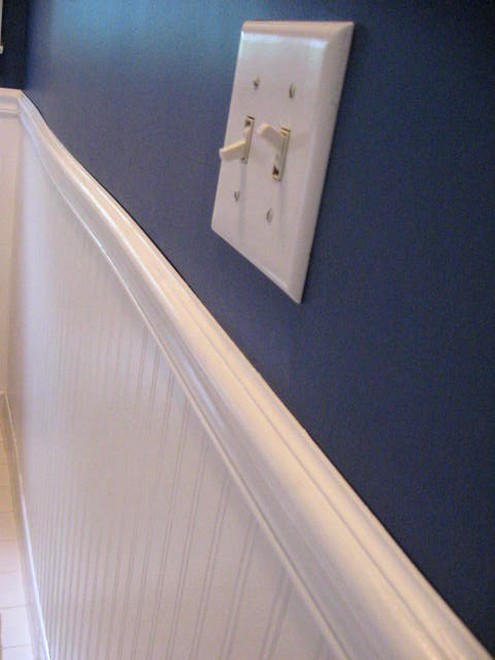
Now, here’s one thing I’ll show you. Houses and walls are not always straight or plumb. I was having a hard time getting this molding to lay flat and had to hammer in a bunch of extra nails in the center of this board. I thought the board was warped and was about to commence with some major whining out loud! Grrrrrrr!
But then I figured out that it’s the wall that’s not straight! So, those are some of the hazards of doing projects in less-than-perfect houses. It can show up in the strangest ways. Now, if I was a perfectionist, this might bother me, but since I got over that a long time ago, I can live with a little wave in my chair rail. Oh, and I finally picked up a nail set, which made my life much easier. That’s to punch in those finish nails and then caulk fills in the holes.
Project Cost:
Beadboard Wallpaper – $25
Chair Rail from Lowes (real wood): $20 for two 8′ pieces
Small foam molding ( two 8′ pcs. from Lowes) – $5
Total: $50
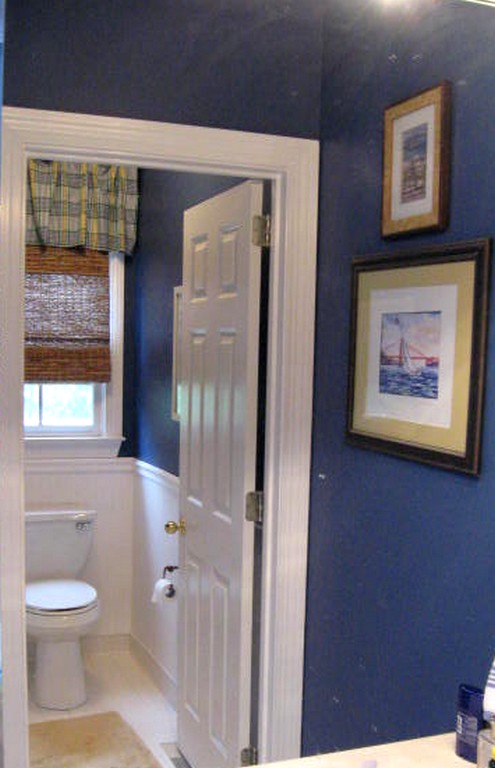
Looking in the dirty mirror from outside the room. It’s SO gratifying to do a project like this. It was really a fast one and I got it done in no time. The hubs thinks I’m still trying to cover up more of his blue, but I still say all that white just enhances that purdy blue! 🙂
Instant architectural detail, you gotta love that!
Added to Kimba’s DIY Day this week.
Happy Birthday to my sweet mama, who turns 82 today.
*******************************************
Telling Tales of Dusk book giveaway winner is:
#38: Nancy from Nancy’s Cottage Treasures. Congrats! Email me your mailing address and I’ll have Terri send you a copy of the book.
I loved Nancy’s comment:
Growing up in south Arkansas, on a tomato farm, well…I had my share of tomato samwiches. 🙂 I love poetry and used to write long, rambling, obscure poems that my Mother thought were grand. I was just melodramatic, lol. I appreciate the opportunity to enter this give-away. What a lovely book to spend time with on the front porch this summer….remembering the olden days when my life was simpler and slower. Thanks!


Very striking in your blue water closet area, Rhoda! I am with you…..the white beadboard wallpaper & molding sets the blue paint off beautifully enhancing the total look….another great job !!!!
Bonnie
This looks SO nice! What a difference!
Oh wow!! That looks gorgeous!!!!!!!
I’ve seen some wallpaper and even seen it used, but wasn’t impressed. I’m definitely going to have to try out the brand you recommend. It looks fah-bu-LOUS!
Hi Rhoda….
Things have been a little hectic here so I’ve not been around to blogland much…..oh my have you been busy !!! It looks wonderful !!!! Love how it came out, it looks like the real stuff…..and probably esier to wipe down….
All the best,
Kathy 🙂
I just love it! What a dramatic change. Gorgeous!
OH I LOVE IT!!!!!!!!!!!!!!!!!!!!
Thank you for the wonderful inspriation! My husband and I have almost completed our guest bath tranformation. It’s beautiful. I wish I could send you a picture. I can’t thank you enough for the tip about adding shoe molding. It adds a “grand” feeling to our builder basic molding. Okay, so maybe it wasn’t a tip, but thanks for the idea I could copy : )
Hi, love your bathroom transformation. I have a question about the beadboard wallpaper–how do you think it would work with textured walls? All the walls in our house have texture called “knockdown”. Is the wallpaper pretty thick or do you think texture would show through? Just wondering before I buy and try. Thanks in advance!
Hi,
I love your beadboard bathroom. I am also wondering if it will work on hand-sanded and primed textured walls. Is the paper thick enough so the texture won’t show through? Thanks!
I have an old house, bathroom needs lots of work, would this beadboard work around the tub area if you used the high gloss paint? Any suggestions? Thanks.
I had paint falling off the walls in large chunks in my bathroom. I didn’t think it would be possible to scrape and smooth the walls enough to make them look good again. I read your tutorial and ordered the beadboard wallpaper from you, and I ordered some wonderful molding called Hedwig small from Classic Ceilings. This molding has a lot of grooves in it, much like the rest of the woodwork in my old house and looks great as a chair rail. I scraped the peeling paint and primed, because the walls were green where the paint fell off. I put up the beadboard paper per your instructions. It was SO easy! Most of the seams ended up invisible, but the ones that didn’t I spackled. I DARE anyone to find the seams now! I then put up the trim (after some unpleasant time spent learning how to use a miter box) and caulked the nail holes and upper edges of the molding. Wow! I can’t believe how much of a difference it makes to caulk the seams and edges – especially if you have crooked and wavy old walls! I painted the wallpaper and trim with satin white. The room looks like it was professionally done! I can’t thank you enough for your tutorial. I would recommend that EVERYONE try this wallpaper. It yields truly amazing results!
OMG that is just the coolest thing I have ever seen . Thanks for sharing…
I’m thinking about using the beadboard wallpaper to cover paneling about 3 ft. with chair rail. will it cover the grooves in the paneling. Love your bathroom and the kitchen cabinets.
Cheryl, I am not positive that it could cover the grooves, but I do think it would if you filled in the grooves with some spackling of some sort. It would be worth a try for sure. I would caulk/spackle the grooves and then prime it first before you try the wallpaper. The wallpaper is pretty thick so it could definitely work.
I love this! I’m looking to use the beadboard wallpaper in my motorhome, so I really appreciate your step by step instructions! Your finished result is BEAUTIFUL! And I love the navy/white combo too! So fresh, so nautical, so beautifully coastal! <3 Lesli
this is so pretty!!! great JOB! by any chance do you remember what the name of the blue paint is called?
Hi, Alicia, yes it is by Kilz paint & is called Magellan.
I love this room! I love bead board wall paper. What would you do if you have all oak trim? Is it possible to mix white bead board wallpaper with the oak trim?
This is perfect for my dining room. I already have the chair molding up and some outdated wallpaper on the top & bottom of it. I’ve been trying to think of something to use in the place of it. I wasn’t too sure about painting wallpaper and how it would hold up. Also, where would I find this type of wall paper at? I can’t wait to get started. Thanks for the great idea. 🙂
Hi, Linda, I think you’ll love the wallpaper esp. since you already have chairrail installed. I sell this wallpaper in my online shop here:
http://southernhospitality.mybigcommerce.com/
Just stumbled across your blog and LOVE the wallpaper… I was going to put up bead board in my Master Bath until I saw this !!! … Why did you paint over the wallpaper though….was it just to fill in the gaps?? And where can I find it??? Must have it!!!!!