I hope you all are ready for some fun today. Prepared to be inspired to try something new!
In case you missed my kitchen project using beadboard wallpaper, that is the one that got me hooked. Go back and check that out if you missed it. After using it so successfully on the ends of my kitchen and bathroom cabinets, I was itching to try it in some other spots and this bathroom makeover seemed like the perfect place to do that.
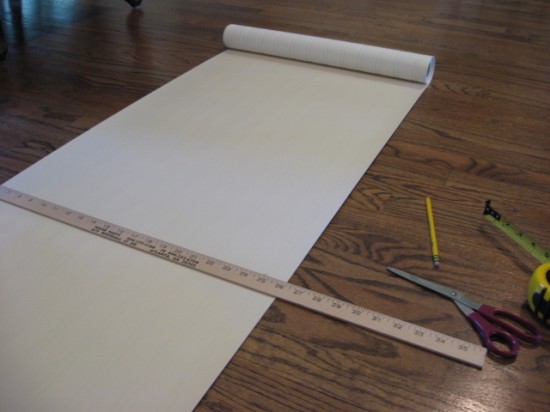
I laid out the wallpaper in my livingroom floor and began cutting the pieces, after deciding the height I wanted the paper to come to on the wall.
And the decision was made to have the chair rail sit right on top of the light switch on this wall, so that’s where my line went. I made the brilliant deduction that putting up the paper first would be the way to go. 🙂 Then, I would add the chair rail molding right on top of the paper. Easy! I bought one 8′ length of chair rail molding and cut it to fit this wall space with my mitre box.
Then, again I wet the back of the pre-pasted paper in the bathtub and let it sit for 5 minutes before applying it right to the wall. No priming necessary.
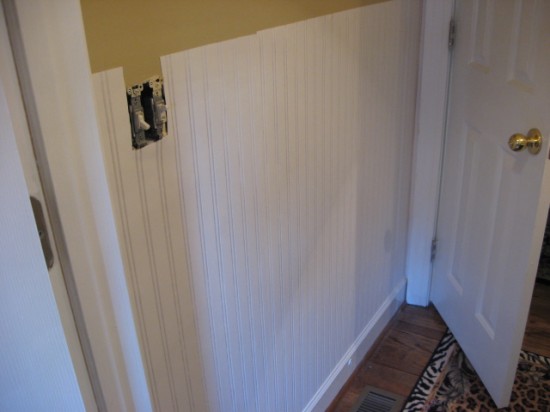
I got all the pieces cut and hung up, being careful to cut around the light switch. 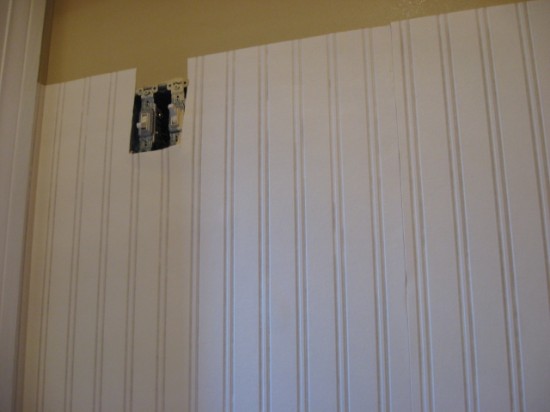
As I did in the kitchen, I went back with some caulking and added that in the seams to make them disappear even more. A couple of spots on my seams seemed to dry out too fast without sticking, so I took some craft glue and swiped it down the inside edges and pressed down really good. So, if you have that problem, just add a tiny bit of glue to the edges. Then caulk! After painting it all with your trim paint, it shouldn’t come up at all.
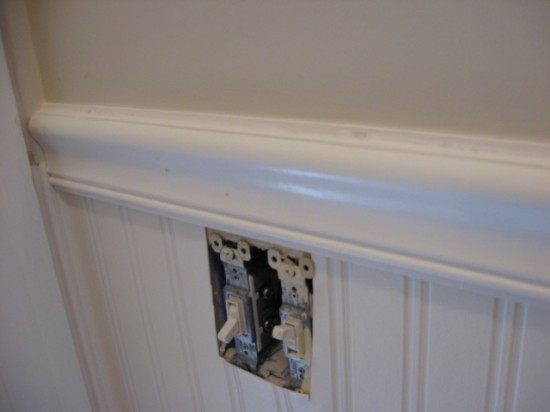
I prepainted the molding with 2 coats of my white trim paint and then hammered it in place with some finish nails. This time I did a better job of counter sinking them and caulking to hide them. See that tiny little wall edge to the left? I wrapped the wallpaper around that corner too, just for continuity.
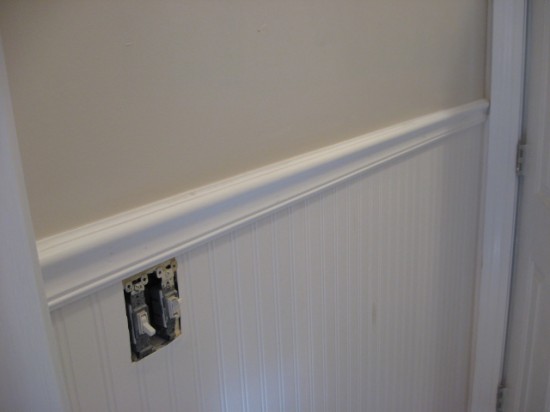
After 2 coats of trim paint on the paper and touch-ups on the molding, that was all there was to it. Truly an easy project and I think a great way to add some architectural interest to a small room. I thought that just this one wall was all that was needed and I really love it.
The Antique White paint really transformed this space too and I love the lighter color and feel in here.
And with the light switch cover back in place, it looks like a new room.
Here are a few closeups so you can see how it looks. It really does look like the real thing, but of course, it doesn’t FEEL like the real thing. That I can live with.
To me, this is the perfect solution if you don’t want to go to the trouble of cutting real beadboard and taking out baseboards. This is the next best thing, for a very cost-effective price. I spent $25 on that roll of beadboard wallpaper and did my kitchen cabinet project and this one. And I still have a little bit left for something else. If you didn’t see the entire makeover on this bathroom, go over to the Homegoods giveaway post to see it all. It’s quite the transformation! In fact, if you haven’t signed up yet, the giveaway will be on for almost a month, so don’t miss out.
I’m very happy to say that I’m now carrying the Wall Doctor Graham Brown paintable beadboard wallpaper in my online shop so click HERE to order it for yourself! You will love this stuff! There are other versions of this wallpaper, but I can tell you the Graham Brown version is the ONLY one I would use. The others pale in comparison.
************************************************************
One of my readers, Kristen, who doesn’t have a blog also used the beadboard wallpaper on her kitchen backsplash, so I’m going to share those with you here:
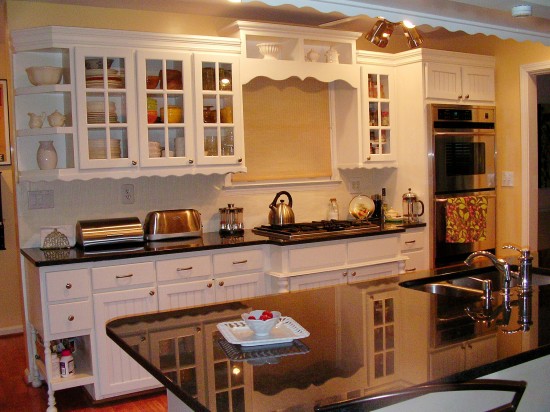
Doesn’t Kristen have a beautiful kitchen? She used the beadboard wallpaper to cover a handmade tile backsplash that wasn’t her style and this was a good temporary solution until she commits to something else. She said she’d love to use it in more spots too. 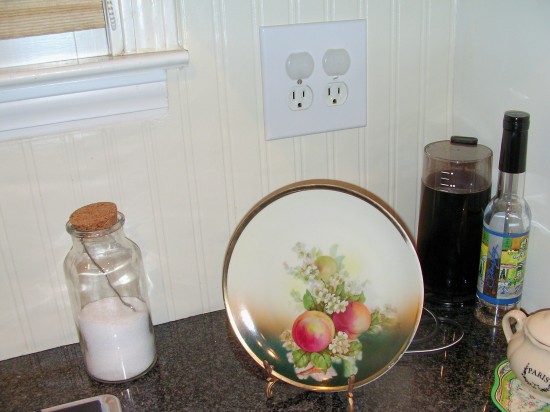
Thanks, Kristen for sharing your project with us too!
So, I can’t wait to see what y’all have done with beadboard wallpaper. You know how to play: add your link to Mr. Linky so that we can all come by and see your project too. This is going to be fun!
- Be sure and add your permalink (the link to your post) and not just your blog address.
- Add a link back to THIS post, so that all of your friends can come over to the party too.
Let’s get inspired!
Beadboard Wallpaper party Participants
Powered by… Mister Linky’s Magical Widgets.


Rhoda, I looked at Home Depot and Lowe’s for Beadboard Wallpaper. Don’t think it was the kind you recommend, but what I found at Lowe’s was wonderfully thick, but easily dented. That’s doesn’t seem practical for the areas I’d want to use it for, especially a kitchen backsplash or an island. Is that true of the Graham & Brown?
Thanks!
I used it last Sept. to redo my kitchen island! LOVE it and so easy to use! check it out on my blog:
http://thehappilyorganizedhousewife.blogspot.com/2010/09/kitchen-island-makeover.html
I used the Graham & Brown stuff last summer for a backsplash. Superb! I just started a blog of my own and made sure to credit you as inspiration. Thanks!
http://somersetstyle.blogspot.com/2011/06/behold-power-of-beadboard-wallpaper.html
http://bickleyblackboard.blogspot.com/2011/08/bead-board-wallpaper-party.html
Your blog inspired me to try the bead board wall paper and boy oh boy did I get some awesome results! I love how it turned out and am already thinking of my next beadboard wall paper project! Thanks for the inspiration!
Can’t stop thinking about this paper since I saw this post. I think I could do it without my husband’s help unlike the wood panels.
I get so fired up seeing all the incredible projects here!
I live in an apartment, could SOMEONE….ANYONE direct me to sites,blogs, etc. that are specifically for apartment living?
Thanks,
Michele
I am going to order some of this beadboard wallpaper from your site, but I don’t know how to calculate how much to buy. Can you help me? Thanks!
Dear Rhoda,
I realize this post is 3 years old but I just had to write and say thank you for the inspiration. I stumbled upon your website while looking for ideas for our only bathroom. It’s the main bathroom but it’s quite small and was painted a dark salmon, peach color which made it dark and dingy, especially since there are no windows. I thought that I would have to spend thousands on upgrades to make it fresh and pretty but then I saw your post on beadboard wallpaper and decided to try it. My bathroom now looks like someone came in and designed it for me. What a difference!! My sister helped me wallpaper the lower half of two walls, we installed a chair rail, caulked the seams and along the bottom, and then I painted the paper and the rail with two coats of semi-gloss ultra white. It is stunning! And I haven’t even painted the rest of the bathroom yet, it’s still primer at this point. I’ll be doing the same to the wall in the entryway. I am so excited to start the next project. The wallpaper is so easy to install. Thank you again!
I love the beadboard. I went to order 2 rolls but the cheapest shipping cost was more than 3 times the cost of the wallpaper. Did I do something wrong? Thand. I want so much to get this quality paper.
Hi, I’m sorry that happened. It’s is set to figure shipping from the zip code. If you want to email me, I can try to figure out a shipping cost and send through the order for you and you can pay via Paypal. Please email me at [email protected]
I’m confused. Does this wallpaper actually have grooves in it? Otherwise, it seems that painting it would completely cover the wood pattern.
Hi, Tom, it does have grooves just like real beadboard. Painting it makes it look more real.
How wide is each strip of beadboard? I’m thinking of using these on my cabinets but I have the beadboard paneling on the walls and I’m not sure it would look too busy. I bought some at Menards and it’s very thin paper and the stripes are much wider than my paneling. Thank you!!
HI, Diane, the thickest part of the strip is about 1 1/4″ wide. The smaller beads take up more space, but that’s the widest part.