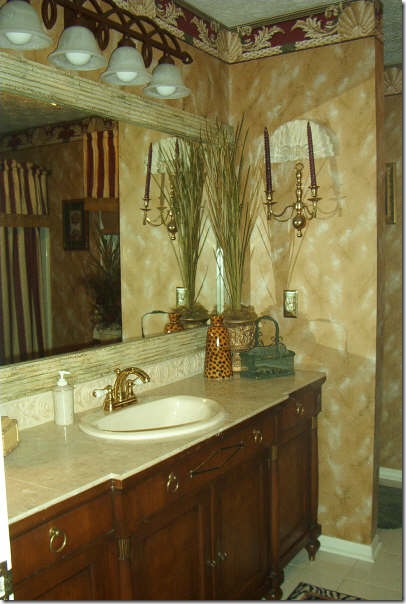
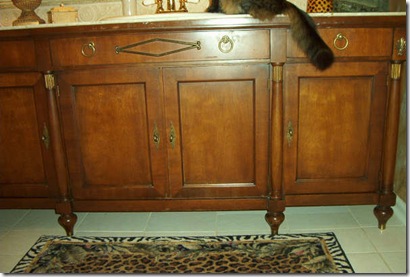
This is my old bathroom in Georgia. We put in the furniture piece complete with sink and marble tiles and it really turned out pretty. I loved this vanity, the feet, hardware and everything about it. That was back when wallpaper and borders were really in (hello 90’s), but I don’t miss either, however, and it was time to move on to Alabama and a new house.
This was a classic dining room buffet in a former life, but worked out well for a new vanity in the bathroom. And yes, that is indeed a cat’s tail you see in the pic. My sweet kitty that I used to have loved drinking water out of the sink.
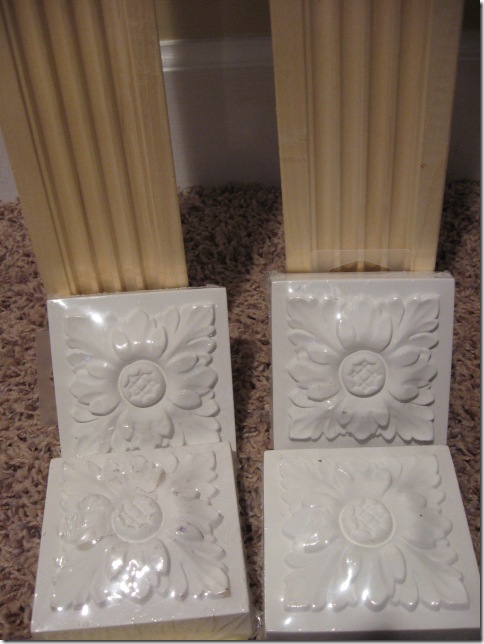
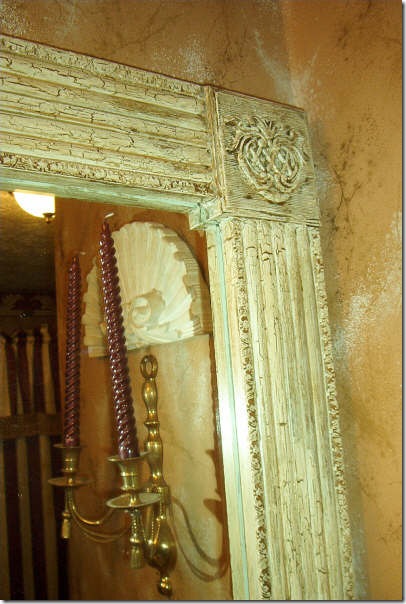
Now, here’s the part I really wanted to show you. This mirror was framed out using square blocks and fluted moldings and glued on with Liquid Nails. These were painted and glued on the mirror by me. And just to clarify, YES…they are glued directly on top of the mirror, not the wall. So, you don’t need extra space on either side of your mirror at all. No more crackle finish this time around, but I’ve got big plans for these……
And 2 naked bathroom mirrors just crying out for some bling. You’ve probably seen this done before, but it’s a great way to frame out a plain bath mirror without taking it down and starting over. You’ll see soon enough and I’ll show off both of them! I’m working on the first one now.


I have GOT to do this. So if I use the corner blocks there is no mitering needed! That is the ONLY was it will get done in this house:)
Rhoda………
are they glued on the mirror edges or to the wall surrounding mirror?
I so have a bath mirror that needs this !
And it will be FABULOUS for sure!!!
xo,
Kim
Hi, ladies, I'll be sure & do a whole post on this in steps as I'm getting these up. And YES, you can glue the pieces directly to the mirror. One thing to remember is to paint the backside of your molding as it shows a bit in the reflection of the mirror. Liquid nails is wonderful for a projects like this. You'll need to tape the pieces in place with blue painters tape to hold it while it dries. And it will need a little caulking in the seams after everything dries. Then go back with touchup paint. Some of my molding is real wood & some is that lightweight stuff, but either will work. My molding is drying now & then I'll cut the pieces to fit. I'll show you all the steps later!
Oh I can’t wait to see the finished project.. hugs ~lynne~
I have been thinking about buying a new framed mirror to replace the one in my bathroom. I can’t wait to see the results and give it a try.
Kerri
In my family room I used the mouldings to creat wainscotting , I will show pictures of that too , it is really good looking when done well.
Chris
We want to do this with the mirror at the lake, but I couldn’t remember how you did yours. I had no idea you just glue to the mirror! I see another project at the condo!! Maybe two, both baths have these mirrors!
Oh! I can’t wait to see the new finished project!
What a great idea! I really don’t want to give up my giant wall mirrors, so this is the perfect answer!
Rhoda,
These are going to look great. I am WAY looking forward to the finished product!
I liked the first one you did in your last home. Enjoy the creating and hurry PLEASE:-)
♥♥♥
I can’t wait to see it….we have a large mirror in our guest bathroom and I have been wanting to frame it.
Rhoda, When we moved into our home six years ago it was brand new, but the mirrors in all three bathrooms were naked.
I framed all of them just exactly like you did except I painted mine mahogany.
Love your site. Give us more projects like this!
I have been thinking about doing this for at least 3 years now!
As soon as you reveal the secrets (like how to get around the mirror clip with the molding) then I will get started!
Rhoda, I just read your comment regarding Liquid Nails. I used builders glue, which is almost the same thing, but here’s a little tip I learned in case the tape won’t hold the heavy pieces:
Put the Liquid Nails on BUT ALSO put a daub of hot glue on each end. That takes hold immediately and will hold it until the LN cures.
Oh, You’ll work your magic…I am sure of it!
What a great idea! The mirror in my daughter’s bathroom needs some help…this would be perfect in there.
I can’t wait to see you finished product.
Lou Ann
I am inspired every time I read your blog – and this mirror frame treatment is a perfect example why! My mom is wanting to re-do her bathroom but doesn’t want to remove what I call “the big honkin’ mirror” and this will be the answer to making it fit her new cottage decor! The corner pieces come in several motifs and I figure if we just “shabby white” them and the fluted side pieces – well, voila! Thank you for such a stellar idea.
Rhoda,
I have been wanting to frame my bathroom mirrors for some time now. I just didn’t know quite how to go about it. Thanks for the post. Also like the commenters suggestion of hot glue to hold until liquid nails dries. Now I just need to decide what “finish” to use on the wood!!
Blessings,
Lorilee
I can’t wait to see~!
I have been thinking to hang a framed mirror on my mirror, but I like this idea instead. I will let you know if/when I do it. Thanks Rhoda!