Here’s how it all started. Ripping that carpet off, one step at a time. Unearthing all the ugliness that was hiding beneath. Our builder certainly never meant for these stairs to be shown, that’s for sure. And like I mentioned, if I had any delusions of something nice lurking beneath this mess of carpet, that was quickly put to rest after the first couple of stairs. Ripping off the carpet and painting the stairs was the best decision I made.
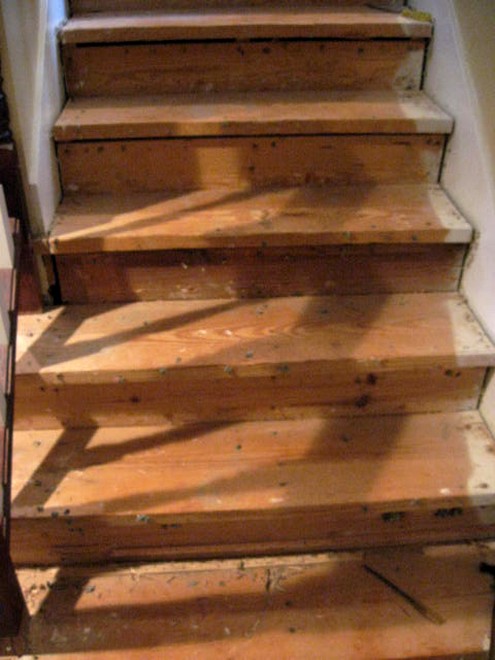
In fact, it just got worse, as I went down the stairs ripping that carpet and padding off. 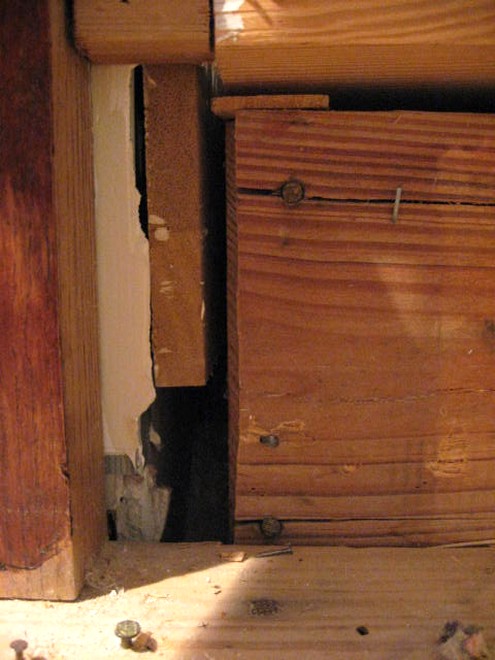
Like this gaping hole! I know, it’s really bad. So bad that I started to question my sanity. But, one thing I’ve learned in the DIY world is this fact. Most anything can be improved upon by hiding it with molding or caulking with caulk and that was my motto here. Hide it, cover it up, or make it look better. 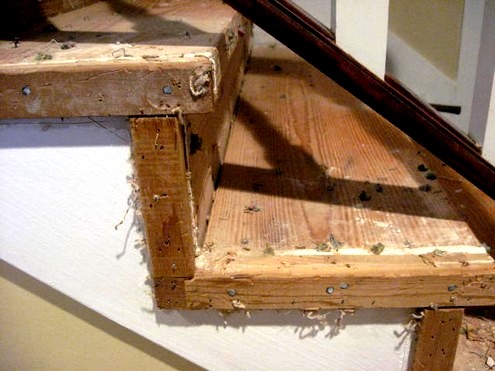
Look at the ends of the stairs. Pretty darn bad, with all the carpet fuzz and the milllllllions of staples that were in here. That itself took awhile, just to get the staples pulled out. This wood was not meant to be seen either, so I had to cover it all up with molding. 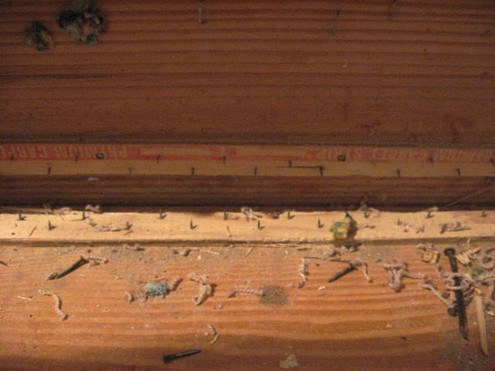
Evil, evil carpet tack strips. I pulled and tugged and finally got them all out of there. 
Using these tools. Don’t even try this without safety glasses and leather gloves. I didn’t have a crowbar or I would have used it. 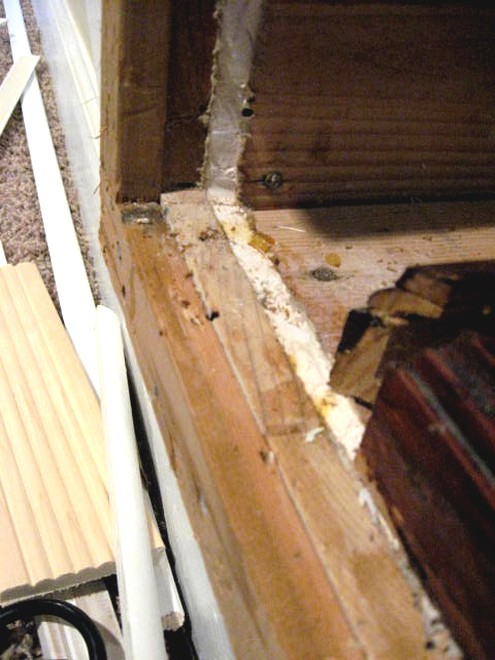
How about these lovely edges with drywall trapped inside. Is there any hope to beautify THIS?? Well, yes there is. 🙂 You see, I had a vision. Or maybe it was a nightmare after I saw what I was working with. 🙂
First, I bought a nice hand sander and began sanding as much roughness as I could off all the stair treads and risers. I went through several pieces of heavy duty sandpaper and sanded them as good as I could. And no, they were not even smooth at this point either, but then came the wood filler putty. That works pretty good too for smoothing out holes and gaps in wood. There’s only so much you can do with rough raw wood like this, but paint works wonders too. I went back and resanded after I added the wood putty to all the holes and uneven gaps.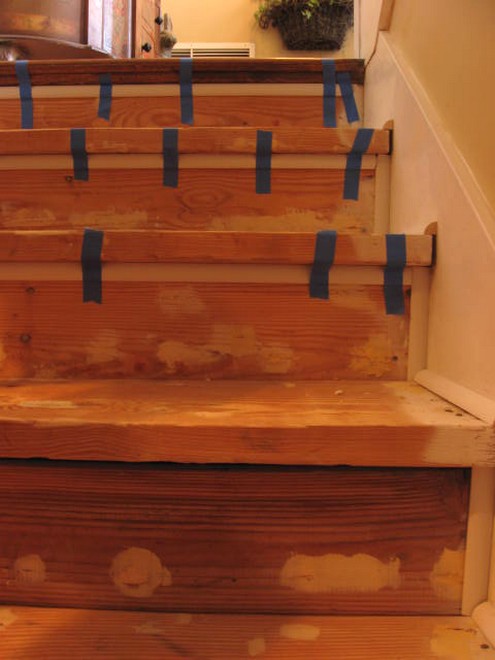
So then began the process of covering all the ugly gaping holes with molding. I went to the store and bought about 3 or 4 kinds of molding, going back a couple of times when I fine-tuned things a little more and figured out what all I needed. I started at the top, cutting those pieces to fit and used wood glue to hold them in place. Cause they are nothing but foam and could be cut with scissors. You gotta love molding you can cut with scissors.

See, here it is. It will splinter a little, but I made it work just fine. It was all I needed to cover underneath the stairs and on the sides to cover up the ugly holes and it was cheap. Cheap, I like for something like this. Held in place with blue tape til dry.

Here’s all the different size moldings I used, so you can be on the lookout for it as I explain it all. Some of this was leftover from other projects and some I bought.
Left to Right:
3″ Reeded molding
1/2″ fluted trim (bottom of stairs)
1 1/4″ small chairrail type
1″ MDF (this is the one I cut with scissors)
1/2″ shoe molding
1 1/2″ to trim out the stair nose
All of this was real wood molding, except that one piece. Someone asked if I have an an electric miter saw. NO! I wish I did and one of these days, I may have to break down and get one. I used a less than $10 yellow miter box that you can buy at the home stores. It works fine, of course takes much longer than an electric one would.
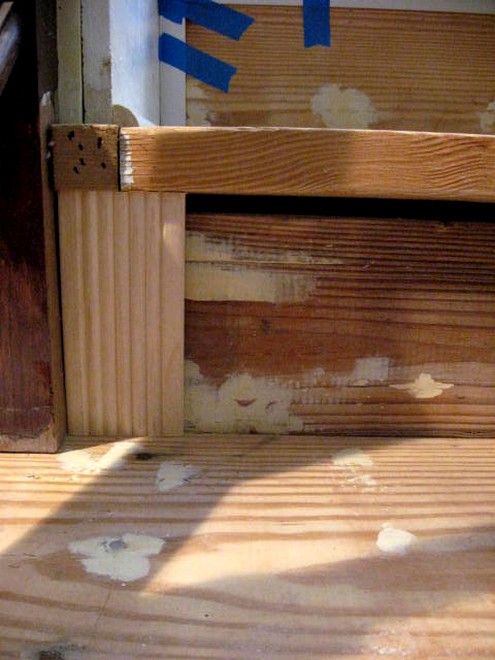
And I knew I would need some wider molding to cover the really BIG gaps, like this one that you see above. One nice piece of 3″ reeded molding covered it right up. I had some of this leftover from another project, so I raided my extras for this and used up all my left over pieces.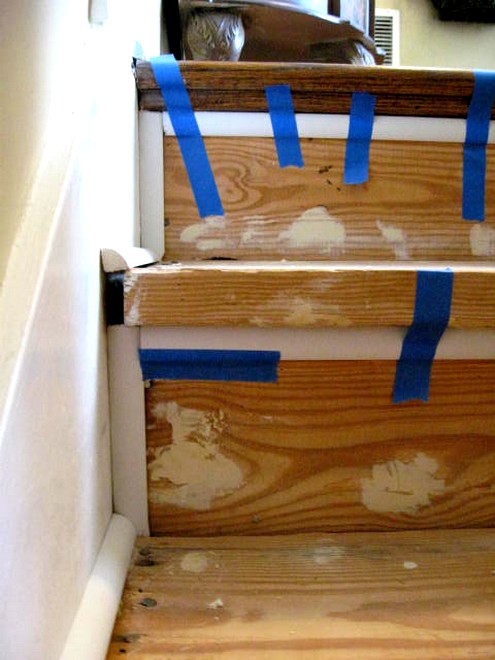
Used quarter round on the edges of the stair treads to cover more gaps. And you can see the big gap on either side of the stair nose. I knew I would have to cover that up, so that’s what drove me to use a nice molding piece on each stair nose. It looked better AND it covered up that gap too. You’ll see more of those down below.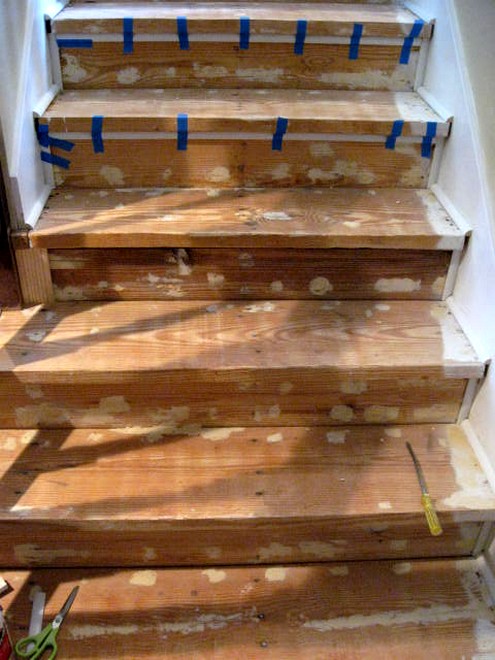
Making progress all down the stairs, one at a time. Aren’t they starting to look beautiful now. 🙂 Ha! Not yet, but we’re getting there. 
Now, this bottom part down on the edges of the stairs was the most challenging part. I knew I’d have to cover the ugly down here and be creative about it too. Again, left over fluted molding was used as well as some of the quarter round I had bought. I figured it out as I went along and started with a small base piece of molding at the bottom. 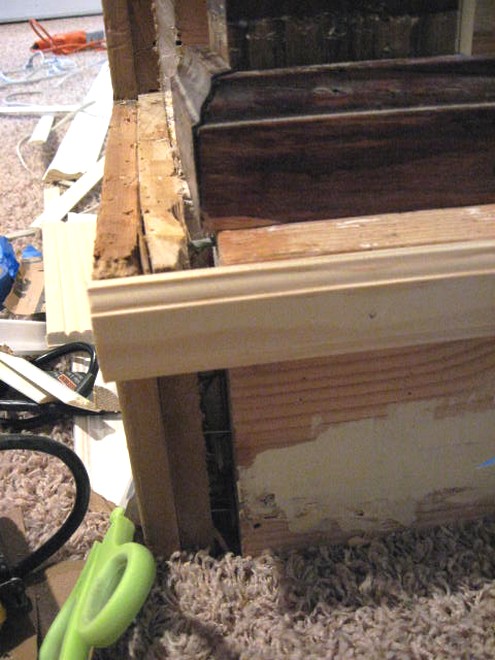
One good thing about the stair treads were that they were nice and thick. I figured out that I need to put some molding on the front of them to help hide gaps on either side of the stairs, so I found this flat piece that fit on there perfectly to make the stair treads look better AND hide the gaps on the sides. This is about 1 1/2″ wide. I used wood glue AND finishing nails on these. 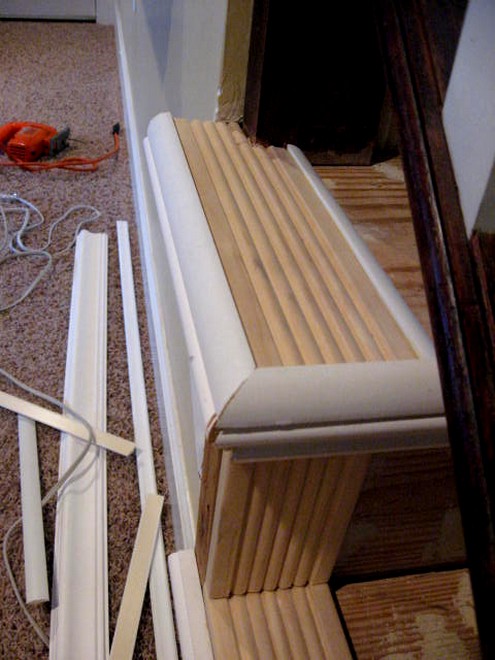
Working on the bottom 3 steps that had more molding to deal with. I just kept going, again figuring it out as I went along. I started with one layer and that wasn’t looking so great, so I just added another layer on top and they started to look decent. 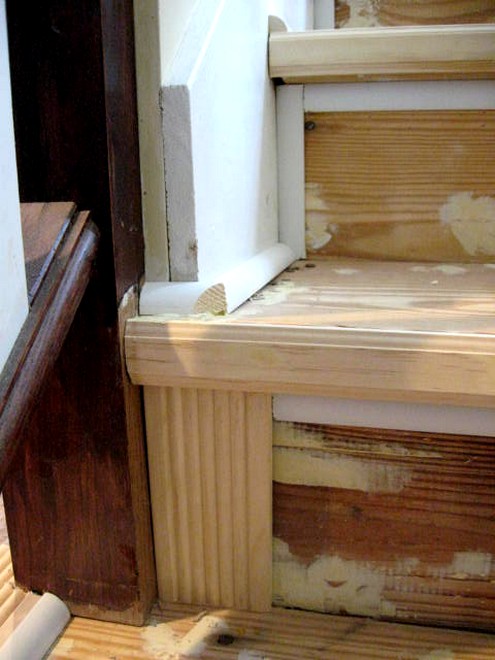
Cut, glue and wait. All the way down. 
Getting there. 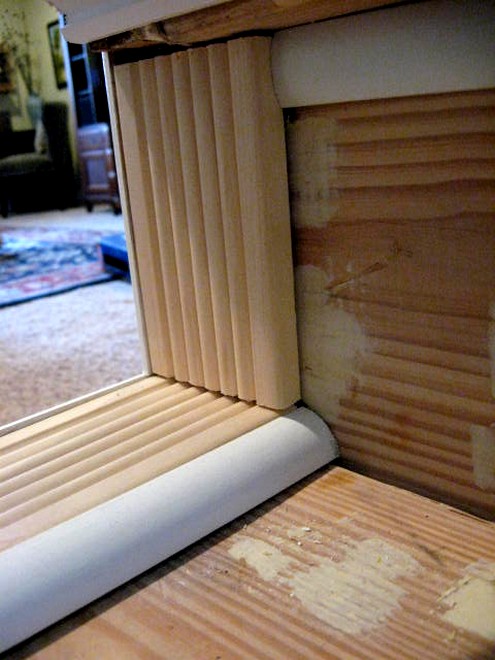
Cut more, glue more, keep on going.
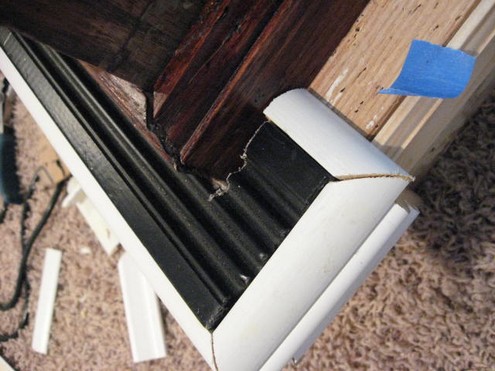
Getting to the final part here, this was the last thing I did was figure out this corner. 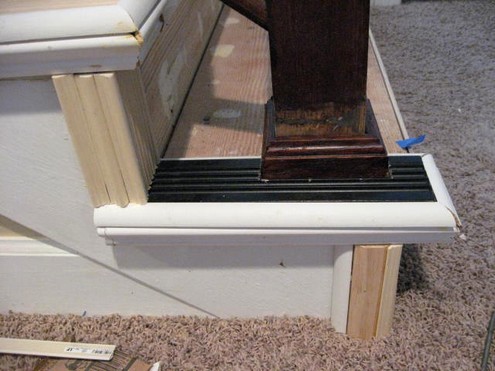
You can see I used all the leftover pieces I could find in the garage to make it all work. And it did! Once it’s all painted out with my white trim paint, it looks beautiful. 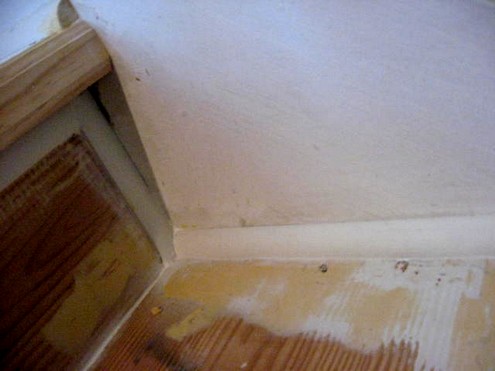
When all the molding was in, it was time to caulk. Again, caulk hides a multitude of flaws. It’s a DIYer’s best friend! I used an entire large tube of caulk in my caulk gun on these stairs. 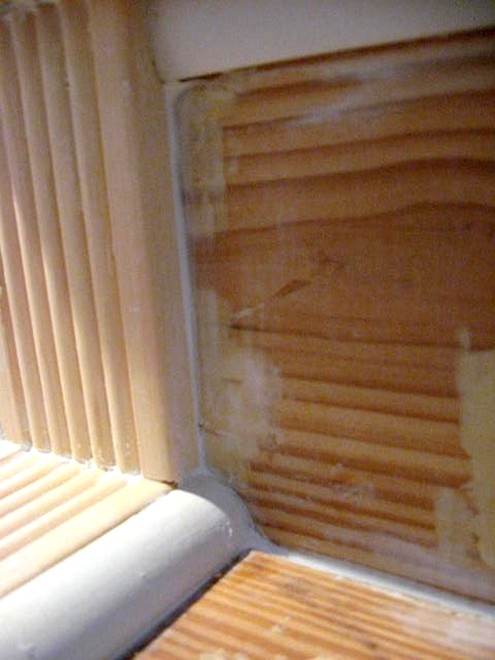
Caulk, caulk and more caulk hides all those seams and gaps. Another sanding and it was time to prime. 
Even the primer looks pretty good! I then painted all the white trim with my interior white trim semi-gloss paint, letting it all dry overnight between coats. I figured it would be easier to do that first and then go back and do the stair treads black. 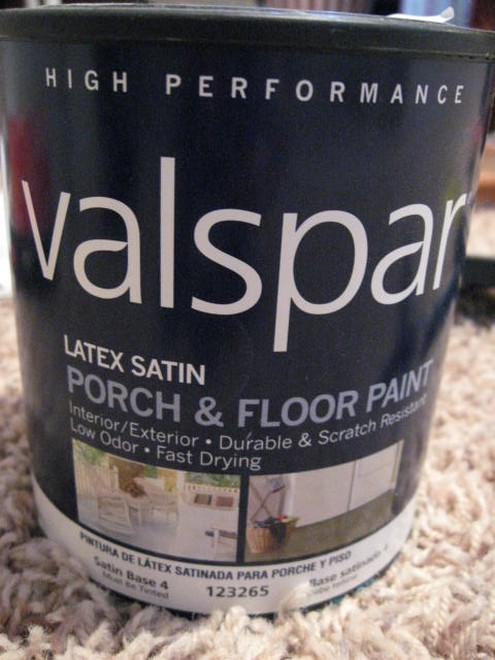
One quart of black porch and floor paint was plenty for this project. I didn’t even use 1/2 of this can.
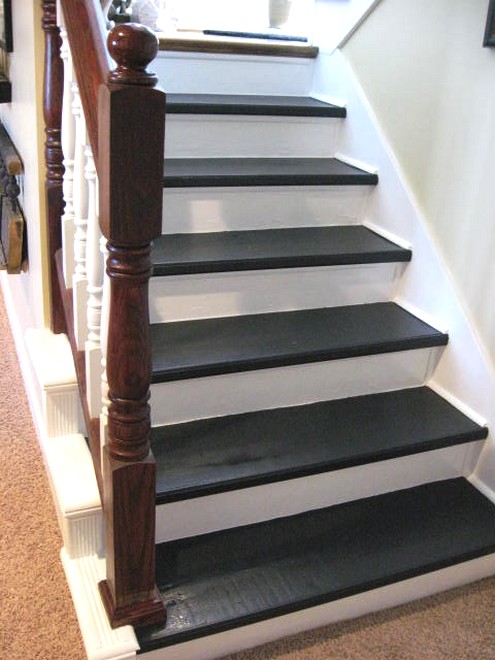
And I put on 3 coats, letting it all dry at least overnight in between. I used a small foam roller and a tiny craft brush to get around the edges by the white trim.
Just a quick visual here…BEFORE
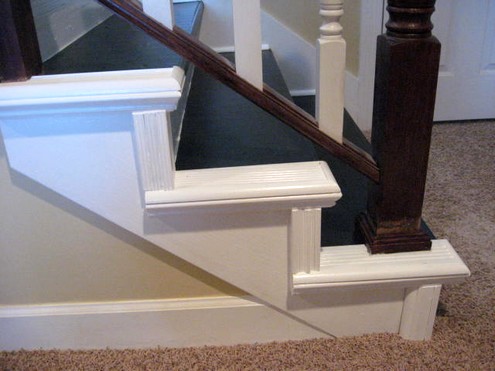
And AFTER….here are the ends all trimmed out and painted. Lots of difference between Before and After on this for sure!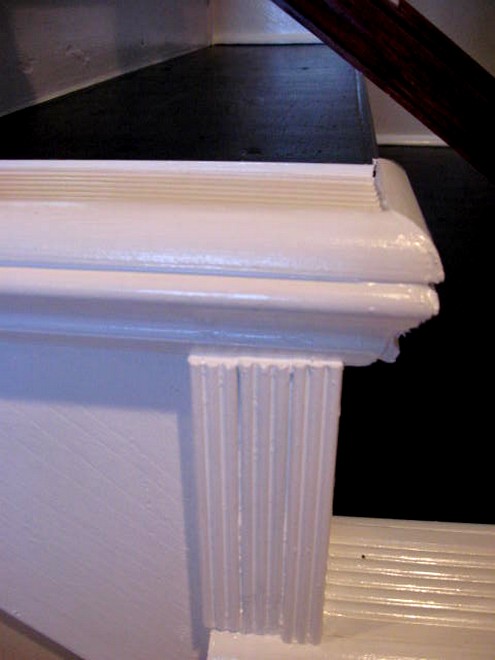
These are SO not perfect, but unless your nose is right down here, it all looks great.
From this BEFORE….
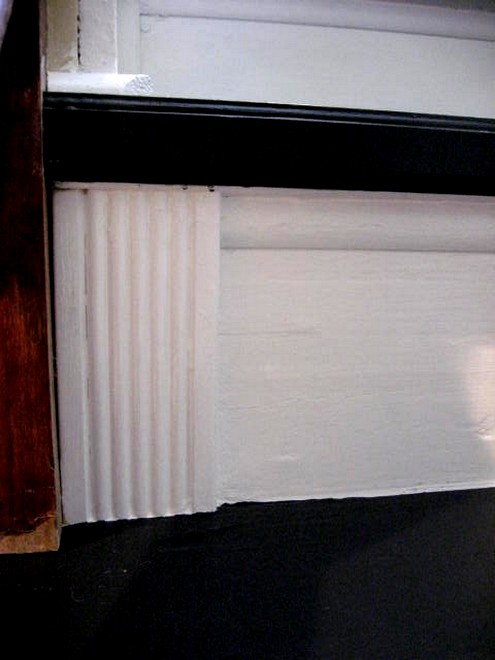
And AFTER. It IS pretty dramatic, huh? I still have to touch up my dark post railings at the bottom too, but I’ll get to that.
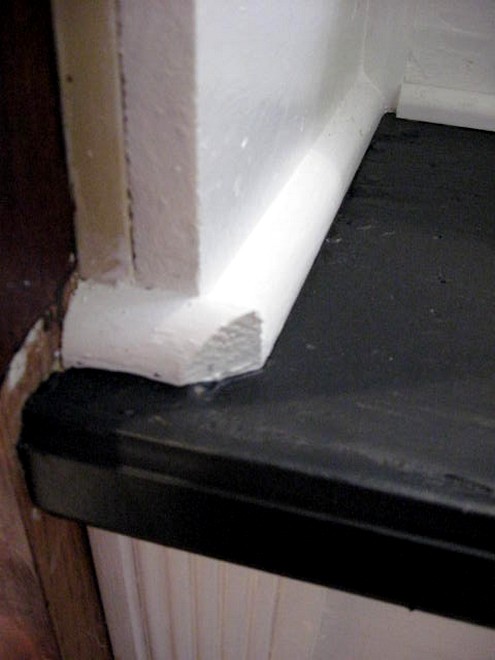
See, not perfect, but perfectly beautiful. And I’m OK with NOT perfect, since it’s totally better than before.
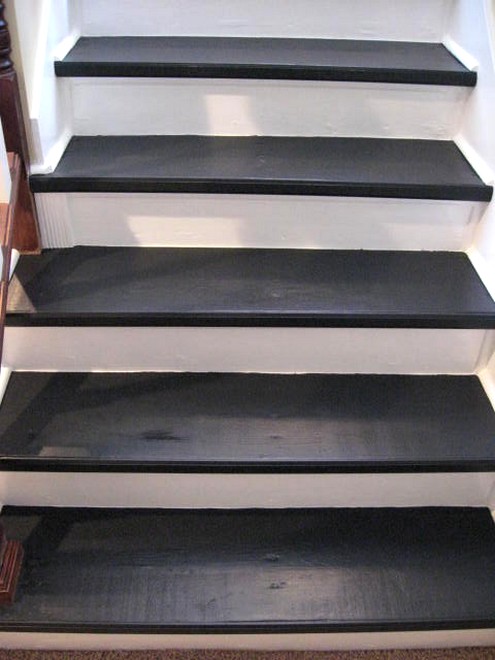
After 3 coats, the black painted stairs are done. You can see nails in the stairs. There’s just no way to completely cover them, since they are on each end and in the middle. So, that was one reason I decided to add a runner. That and the fact that I really love natural runners. But, really if you have steps that are in pretty good condition, I think the 2-3 coats of black porch paint look pretty fabulous too and I would not have had a problem leaving them like this. But, I like that extra touch that the runner added. 
And one final addition of molding here at the back of the stair treads. It was impossible to keep a straight line back here.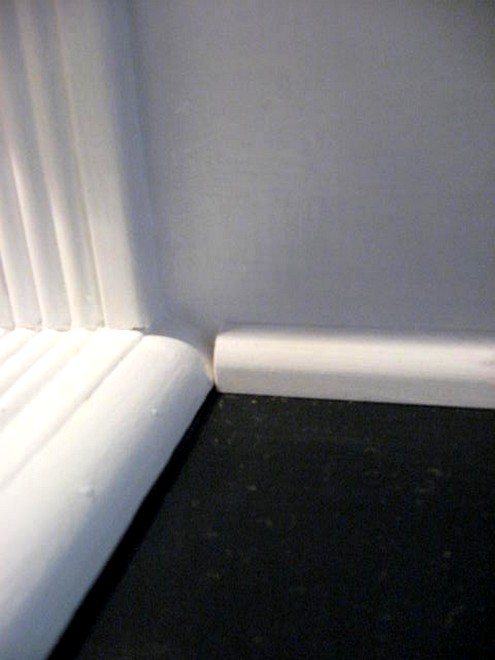
So I just added an additional small shoe molding on top and that hid all the wavy lines.
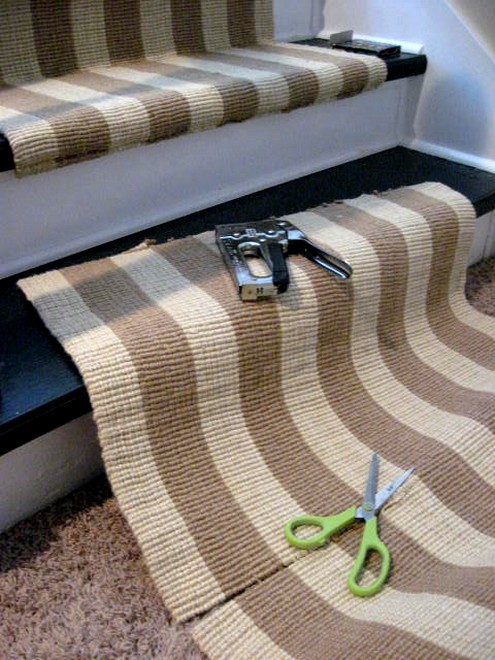
Next, stapling on the jute runner which I got from Overstock. The one I used is long gone. I had to order 2 of them, since one wasn’t quite long enough. I needed to cut an extra foot or so off the 2nd one to fit that last step and it was easy enough to cut with scissors. And I have a whole section from the 2nd runner in case I need to replace one stair tread later on (like if something gets spilled, etc.). Nice to have a backup piece. 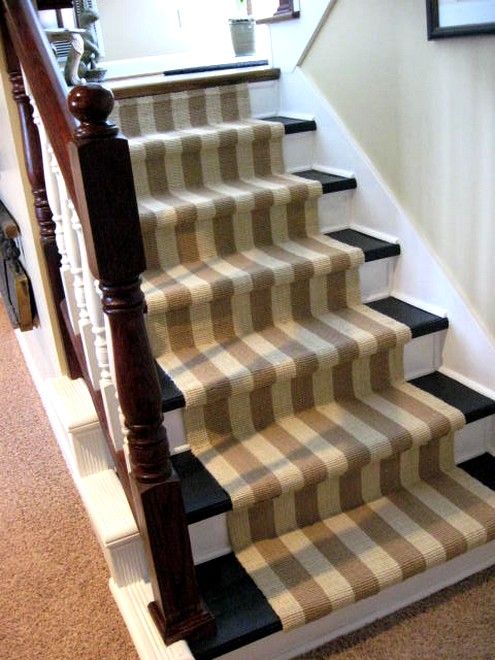
And after stapling away, this is the end result. You can see even more AFTER pics in this post.

I did go back and add a little jute twine at the back of the stair treads to sort of hide the staples, since I had 6 of them that came with my rug. I simply wrapped them around the rug on either side and they are laying in place just fine. But really, those staples don’t bother me a bit. I had the twine so I used it.
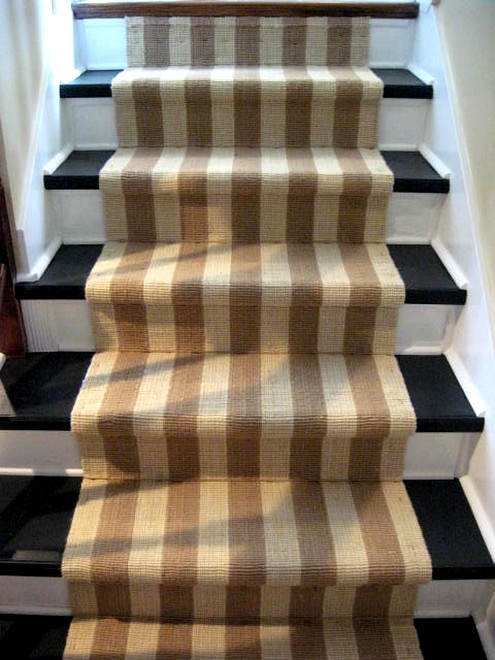
Dramatic AND beautiful, a great combo! We will definitely be enjoying these stairs for a long time to come. When the runner wears out or gets too dirty, I can pull it up for something else.
This whole project cost around $200:
1/2 for the molding, paint and supplies and 1/2 for the runner.
It was very cost effective and SO totally worth every penny. Keep in mind, I only had 6 stairs here, so if you have a whole staircase, it will be even more work. But, it is TOTALLY worth every minute of pain.
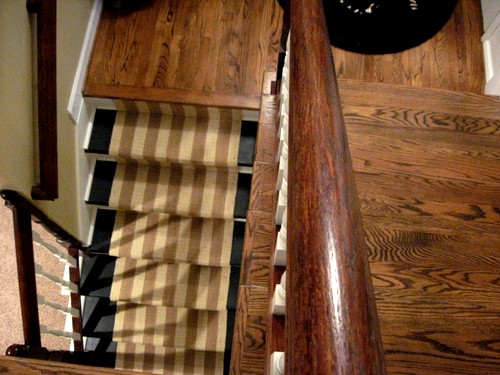
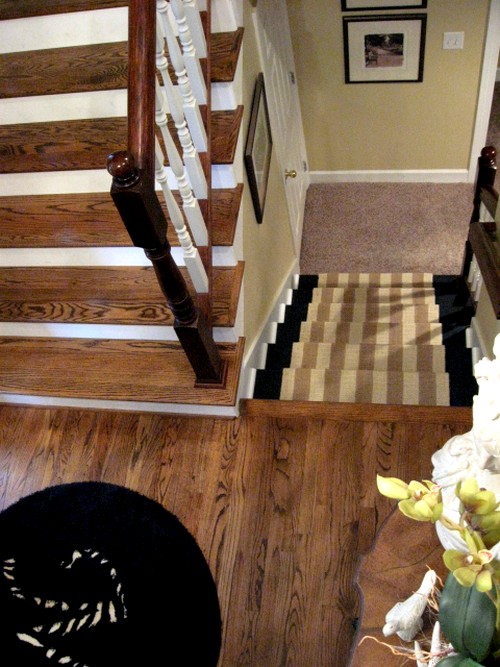
Here’s a visual from the top of our upper stairs looking down towards the foyer landing, and down to the newly painted stairs, so you can see how it all ties together.
As you can see from the pics, our foyer landing already has beautiful finished hardwoods, as do the flight of stairs going up to our main living area. I simply wanted to tie these down stairs into what we already have and get rid of that ugly carpet! Mission accomplished!
Do you have some ugly carpet on your stairs you’d like to rip up? This might convince you to do it, right?
Your stairs can’t possibly be any worse than mine. 🙂
Added to Kimba’s DIY party.


Thanks for blazing the trail. I’ve been looking into how to install a jute/sisal rug as a stair runner, and this tutorial will really help. One question I still have is where you pieced the two rugs together. How did you prevent the jute rug from fraying? Did you fold it over on itself to create a hem? or did you just butt the two raw ends together and not have any fraying issues? Thanks!
HI, Allisen, I think I did turn it under slightly and it didn’t cause a problem. I did my stairs in my current house the same way and you can check that out under my DIY Projects tab. AS long as you staple it good, it should be OK. I also used carpet tape the 2nd time around. Check out that project too!
The carpet on our staircase was dangerous. It had to go! So I ripped it out. But what to do next? We had a contractor out for another project and I asked him about redoing the stairs. Not only did he NOT want to follow my vision, his quote took my breath away. He HAD to be kidding! There HAD to be another solution that DIDN’T involve carpet or cost a small fortune! Then I found your blog. I nearly squealed with delight. Your stairs were almost identical to mine. I was inspired! I could do this! No more carpet for us!
And I did it! It took some time and a lot of hard work, but the stairs look AMAZING! And the cost was maybe $100. Maybe. Everyone that sees them cannot believe the difference it has made to brighten up the entry, hall and stairwell. I LOVE THEM!
For anyone else who is also inspired by your project, I’d like to recommend the following for painting the tread as it is perfect for this type of application:
ArmorSeal Tread-Plex Water Based Acrylic by Sherwin Williams.
Thank you so much! 😀
Thank you so much for sharing your stair story, Amber! I’m happy it turned out so great, that makes me excited when what I do inspires others.
Rhoda:
Thank you so much for the step-by-step instructions! I ripped up the carpet on my stairs a few months ago and was horrified with what I found. As you said, the builder obviously never meant for the stairs to see the light of day. And every stair refinishing DIY project I ran across usually started with, “I pulled up the carpet and found these beautiful hardwood stairs!” LOL! The prospect of refinishing mine has been so intimidating, I’ve considered covering them up with laminate – even though that wasn’t what I had in mind when I took up the carpet. Now you’ve inspired me to move forward – molding and yellow miter box in hand. Thank you!
Now that’s what I call dedication. It makes my set of stairs look like child’s play. Thanks for this posting – it has given me lots of ideas and clarified a few things too. Good luck with your ongoing projects.
You are a ROCK STAR – I have stair envy now. I am in the process of decoupageing my stair way wall with torn up Sci Fi novel pages. Now THAT is a fun project!!!!! no really, I mean it. Now I want to rip up my ugly carpet. Thanks for the demo.
Hi Rhoda,
I just finished remodeling my basement and painted my stairs black. Problem, I didn’t think of was having is the dust beyond visible. I saw the jute rug runner and I know you bought two. My question is did it lay perfectly length wise, were you just stapled it the ceases? Also what is the best way to know the correct length that is needed? Any advice will be helpful.
Thank you
Hi, Nessa, I did have to buy 2 runners and cut one of them to fit under the stair lip, so it wouldn’t be noticeable. It worked out fine. Here’s another tutorial on my current stair runner. I did the same method except this time I used double sided carpet tape to help it stay down. You just have to measure your stairs and take a fabric tape or something that bends so that you can get the curves right and figure out how much you need. Two runners were more than enough for my stairs. And yes, the runner did lay nice and flat.
http://southernhospitalityblog.com/painted-stairs-and-adding-runners/
Great job on that problem child.
I am facing the same task and this really gives me some ideas.
Thank you for this great how-to on stairs. We have a rough finished house (walls bare sheetrock, floors bare concrete, stairs rough lumber). We’ve been stuck trying to figure out what to do with the stairs. This looks perfect!
Where can I get those foam moldings
Sabrina, I found them at either Home Depot or Lowes and I’m pretty sure they are still out there. Ask someone in the molding area about them. They are very lightweight and feel foamy.
Rhoda, do you think this process could work on stair teads that are made of particle board? We just purchased a house, removed all of the carpet hoping for wood under the stair carpet but ended up with particle board. Now my goal is to find a process to make them look finished without having to remove the stairway treads and risers.
Hi, Katherine, I don’t see why you couldn’t leave the particle board, trim it out and paint them just like regular wood. Are they pretty smooth? Probably as smooth as my old stairs were, so I’d say go for it!
Thank you so much for sharing! I’m looking to do this very same project in a home I just bought, a cosmetic fixer, built in 1986. I’m now sure the builder used the same method, so I won’t be so shocked once I remove the 80’s green carpet.
Blessings,
MJ
Don’t take this the wrong way, but you should have hired a professional. The stairs scream DIY. But if that’s the look you wanted, you’ve certainly achieved it.
Maybe so, but I was really happy with them & it was better than carpet!
You are a lot nicer than I would have been, faced with such rudeness. I’m looking to pull up the carpet on my stairs, and if they are in bad shape, I will be coming back to this as a reference on what to do.
Fo Florz makes extremely low profile rubber backed rugs and runners. I cut a runner and carpet taped along the back edge to each stair. No tripping or slidding. Easy clean, washable, many designs.
Do you know the color of stain your wood floor is?
HI, Jessica, I don’t remember what they used on the floors. That was my old house. It’s similar to Provincial.
Wow this is great! I wish I knew that you could calk those holes and hide so many imperfections! I just had carpeting installed on my stairs and made a post about pulling off the carpeting! I feel your pain, but the end result is so worth it! I also re-vamped my basement stairs and those were such a hot mess Im impressed with the black and white lines now i’m second guessing if I should have painted them black and white instead of grey! Im impressed you installed your own runner you make it look so simple 🙂 I think once you re do stairs you have an appreciation for how much work it really is! lol 🙂
This is an exceptionally explained tutorial!! OMG. !!!! That’s exactly what I needed. Mine is next. Thank you so much !!❤
You have given me inspiration and courage!!!!
I have a full stair case. Its nasty and gross. So scared of what i will find. This gave me awesome ideas and helpful hints. So i wont panic, cause its going to be bad i just know it. Thank you!
This is exactly what we faced when we pulled off the stair carpet…Your photos and, suggestions were perfect and, my husband wasn’t intimidated by the holes and sanding needed. Thanks a bunch!!!!
I would love to do this to my stairs. I have already pulled up the carpet and the stair tread is bull nosed partical board. Any suggestions?
HI, JoAnn, if it’s smooth particle board and bull nose, I think you can just prime and paint it. Give it a go!