You all know how much I love painting things around the house. I’ve been doing it for years and years, way before blogging days. Spray paint and I have been friends for a long, long time. And mixing up a quart of paint and redoing a vanity or side table is such an easy fix to get a new look without breaking the bank.
So, let’s take a look at some of my past projects that have been the most popular (and pinned) of my projects and they all involve paint.
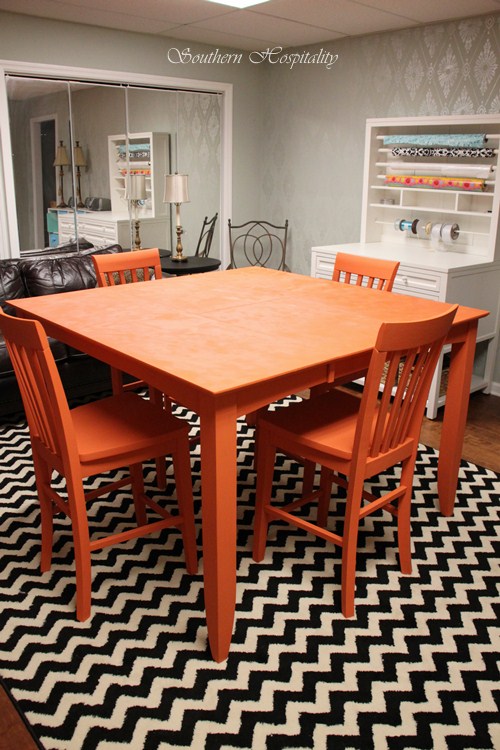
I’ll start off by giving you all a little update on the Annie Sloan chalk paint project I’m currently working on at my sis’s craft room. I came to the conclusion that this table should never have been waxed. It is just not the right application for waxing, so I’m going to Plan B. I’ve heard you can remove it by wiping with mineral spirits, so that may be my method. I’ll remove the wax and probably add a hand applied Satin poly topcoat to smooth it out and protect it as well. Chalk paint does have a chalky feel and finish and it’s not all that touch friendly used alone. The wax gives it a nice smooth feel.
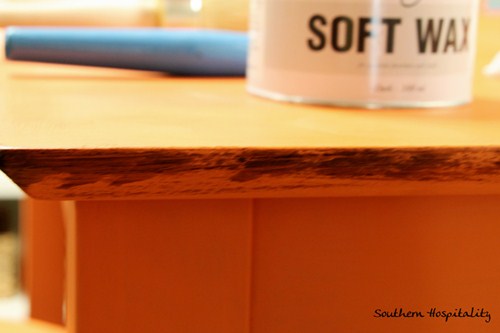
You can see below that I brushed on clear wax. We left it for about 2 weeks and finally got back to it. That wax dries pretty hard.
See how splotchy it is? The purpose of the wax is to protect your chalk paint and once wax is applied and dry, you go back and buff it to a shine and it gives a hand rubbed wax finish and you can distress it for a vintage feel. I should have just left this table and chairs alone and not tried to wax it. The tabletop is too big to get a really smooth wax finish. I really think the vintage pieces are much more suited to the whole Annie Sloan Chalk Paint and waxing procedure.
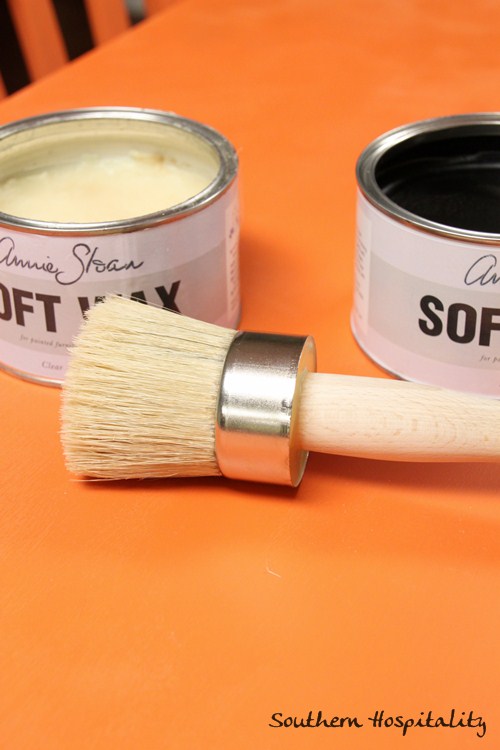
Clear wax on the left, dark wax on the right.
The dark wax is great applied on areas that you want to highlight. It acts just like a stain would and will grab the wood, so you have to apply the clear wax first, before you even think about adding dark wax. I wiped most of this off and it left a little bit of aging. But, then I changed my plan and decided to just do a straight painted look. We are not going to sand down this table, that blond wood underneath is not great to highlight. My plan now is to just add wipe on Satin poly and to spray the chairs with poly as well just to protect and make the chalk paint feel better. This Barcelona Orange is a great color though and we are glad we chose it.
I still give a big thumbs up to Annie Sloan chalk paint and will continue to use it, but it will mostly be for vintage pieces with more details that I want to highlight. I’m going to try to buff down the wax more and I heard that I can then paint over it with another coat of chalk paint. I’ll get this thing finished one day!
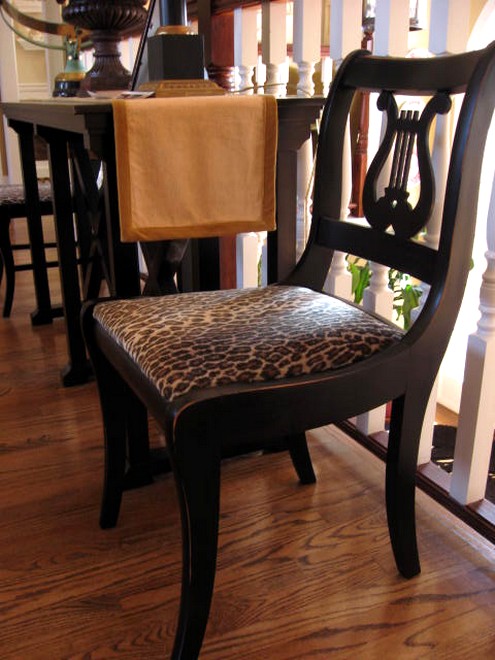
So, let’s get back to other ways you can change up furniture. I love paint! Love it for updating older pieces and here are some of my favorite projects to date. These chairs were a little tired looking to me, so a couple years ago, I got out the black spray paint and updated them with new paint and fresh fabric.
You can find all the details in this post, spray painting furniture black. It’s one of my top projects that get lots of clicks.
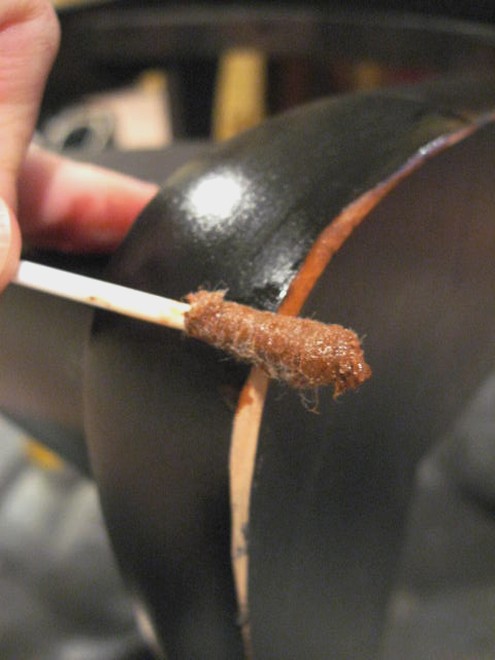 After spray painting, I simply used an electric sander and sanded back the edges, added stain with a Q-tip and that was it. It’s a simple and easy project that anyone can do! Yes, even you!
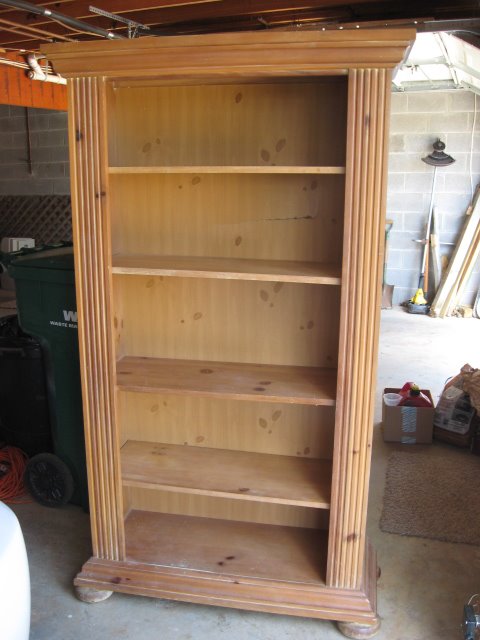
A few years ago, I found this pretty, but plain pine bookcase out on one of my yardsale ventures for $50.
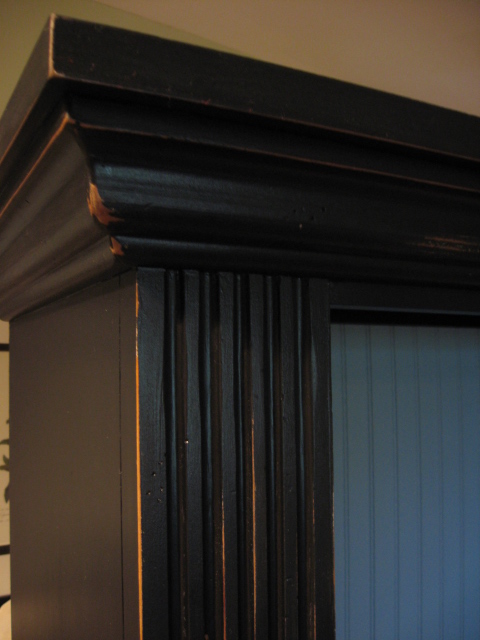
I brought it home and completely changed it with paint. After adding a real beadboard backing, I painted it all out black and the beadboard in a soft blue and this has become one of my favorite pieces ever.
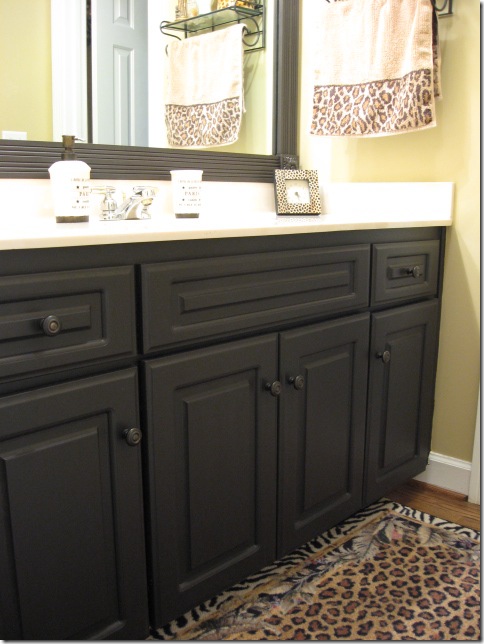
In my old house, I decided to spruce up the plain jane white laminate vanity by painting it with Ralph Lauren Turret Stairs, a deep dark chocolate brown and it added so much depth and interest to this small bathroom. If you prime laminate well, you can definitely paint it! All the details are on this post. I won’t hesitate to paint a vanity again if I inherit an ugly one in the next house I’m in.
We are actively house hunting and when the right one comes along that we can score, it will happen. I cannot wait for the right one!
So, that’s a few ways that I’ve updated using paint in the past few years. You can see I have had a bit of a thing for black paint and I have loved adding black to a space over the years. It really does ground a space by adding black around the room.
I hope this will give you more ideas on changing up some older pieces of furniture that you may have laying around. Or, it might inspire you to get out and yardsale or thrift to find some good paint candidates that just need a fresh coat of paint. Whether you use black or a bright punch of color, the effect is the same. Updated and fresh!
Are you painting furniture these days? I’d love to hear about it! What is your color of the moment?
I’ll be back tomorrow with my parents’ bathroom reveal. It is beautiful and I know you’re going to love it too!

I’m partnering up with Apartment Guide today on this project. You can definitely stretch your dollar using second-hand pieces. Follow Apartment Guide’s steps to find the right antiques or vintage items for your place.
Whether you’re living, looking or moving, ApartmentGuide offers how-to tips for making the most of your space on a budget.
- If you’re ready for a whole new space or looking to move, ApartmentGuide has the photos, floor plans, features and tips to help you find the perfect apartment community.
- “Like” Apartment Guide on Facebook at Facebook.com/apartmentguide, follow them on Twitter @AptGuide and “circle” them on Google+ for real-time tips and updates on making the most of your space.
- Let Apartment Guide help you create your own budget-friendly design by following their tips for decorating on a dime.
- Want to find even more design tips for your home? Apartment Guide has budget friendly ideas and DIY how-tos for people in any sized home on Moving Today and the blog at Apartment Guide.
Disclosure:
Apartment Guide and owner Consumer Source, Inc. partnered with bloggers such as me to participate in their monthly blogger programs. As part of that program, I received compensation with giftcards. They did not tell me what to purchase or what to say about the products used, and believe that consumers and bloggers are free to form their own opinions and share them in their own words. Consumer Source’s policies align with WOMMA Ethics Code, FTC guidelines and social media engagement recommendations.


Will the annie sloan wax dry hard for use on a buffet and a dresser top? If so how long does it take. If I have put wax on the piece can I put poly on top of that? Can’t wait to hear from you as I am a little stressed about these projects.
Yours Cynthia
HI, Cynthia, I’m not a complete expert on ASCP, but from what I understand the wax will dry hard in just a couple of days. And I do not think there is a need to add poly on top of that. The wax should protect your tabletop from harm. I wouldn’t add poly on top of the wax.
The problem is mine isn’t drying hard. I did a piece for my daughter 4 weeks ago and you can still see if you try to scratch it. I have read that it does dry hard but not for me. I use as little wax as possible also. Anymore hints?
Thanks for replying
Hi, Cynthia, since I’ve just started working with the paint & wax, I don’t know what else to tell you, but go over to Robyn Story’s Facebook page and ask them your questions. THey are down in Tampa, Annie Sloan stockists & know exactly how to use all the products. They will help you!
https://www.facebook.com/robyn.storydesigns
Hi Rhoda,
Can you tell me some brands of the poly sealer to put over the ASCP?
Thank you
Pam
Hi, Pam, there are several brands that are good. Rustoleum, Minwax, and Valspar all should have clear sealers that will work well over paint. I usually use a Satin clear finish and water-based.
Thank you!