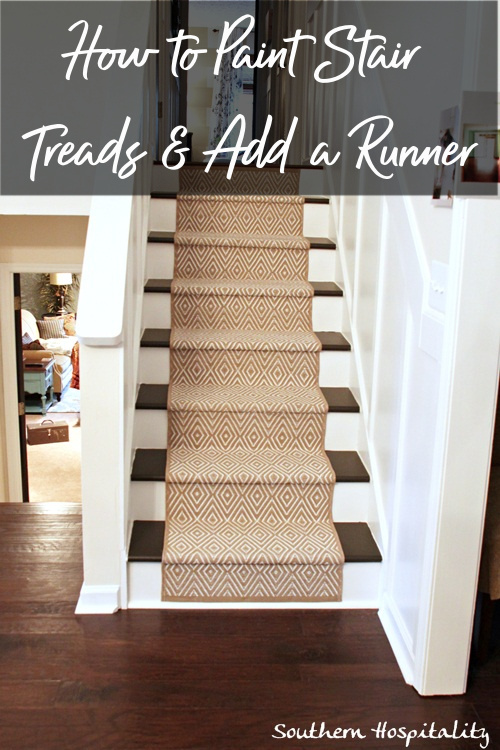
You’ve all watched as my stairs transformed before your very eyes and we ripped that old carpet off and added new pine stair treads and new risers as well. I knew that I could make the stairs look pretty and had every intention of adding a runner, just like I did in my old house. I loved how that one turned out so much and wanted to repeat the pretty again.
In came Dash and Albert runners with a blessing from Wayfair.com and I received the runners for my stairs from them as a gift. Of course, they knew I’d be blogging about it and spreading the word, so it’s a win-win for both of us. 😉
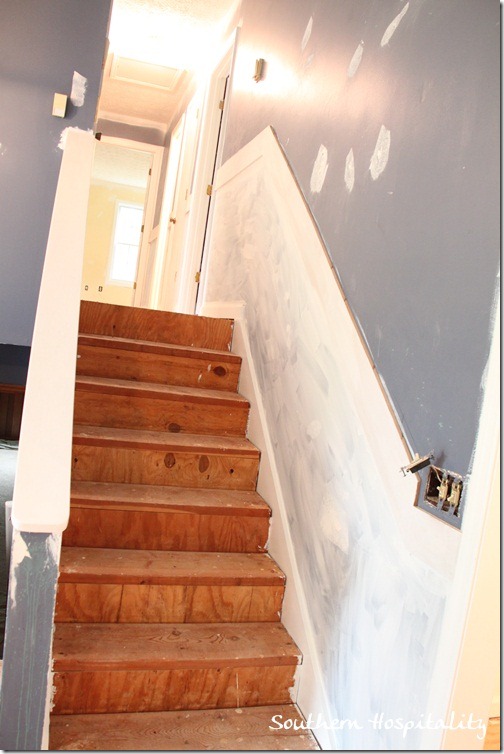
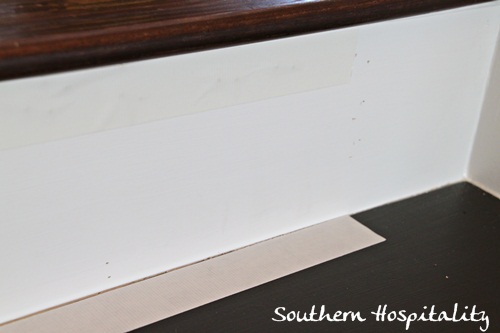
Here are my main stairs after ripping off the nasty old carpet. That was one of the first things I did.

Here they are in progress and you can see the painted pine stair treads going on, as well as new white risers. 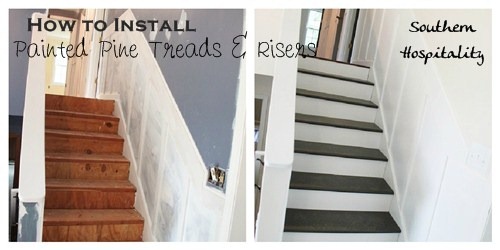
You can see the entire tutorial on ripping up carpet and adding new stairs. That totally updated the stairs and I would be really happy with painted stairs, but I definitely wanted to soften them up with runners. I found these Dash and Albert runners (affiliate link) online at Wayfair.com and they are perfect for my renovation. They are indoor/outdoor and should be very durable and clean up nicely.
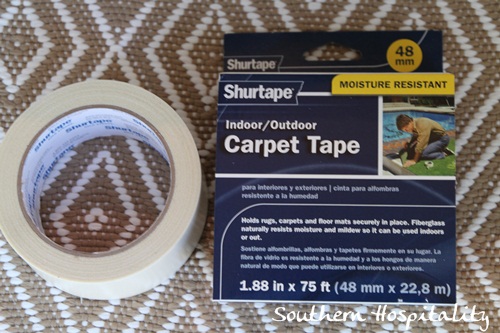
I knew that I’d be using an electric staple gun for this project, but had a lightbulb moment when I thought about getting some double sided carpet tape that I found at Lowes. This is really pretty sticky and I thought it might help to keep my runner in place.
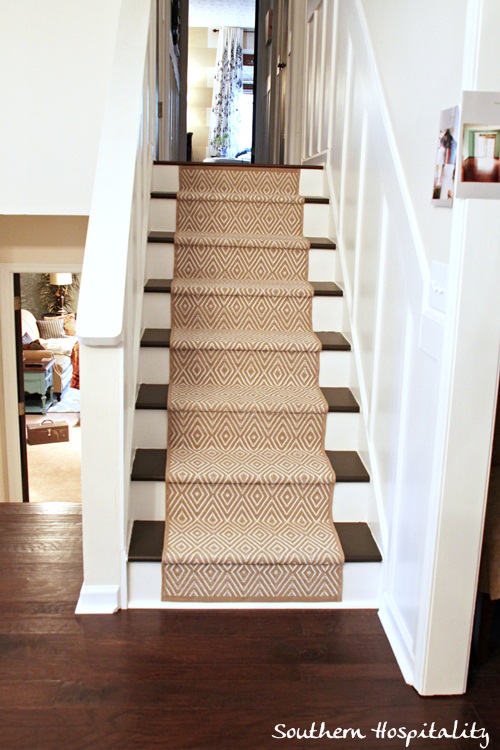
I decided to leave 5 inches on each side of my runner for the stairs to show. I have 3 stairs in this house, the foyer being the widest. On the foyer stairs, I left the runner intact, which is about 2.5 feet wide. It was fine to leave a large expanse of wood showing on either side, so I used the full width of the runners.
On the other 2 stairs, though, they are different widths, so I visually looked and decided to leave 5 inches of painted stairs showing on either side of the runner. That required me to get my other 2 runners cut down and bound on each side. For the main stairs, I cut and bound them to 24″ and the other stairs going to the den, I cut and bound at 26″.
Does this make sense? I wanted those 2 stairways to visually have 5″ of dark wood showing on either side, so that’s how I figured it out. I took my runners to to a local place in Kennesaw, RBS, that cuts and binds rugs and had them do it. It cost me $60 to cut down all my runners and have them bound, which wasn’t bad at all. They matched up the binding to what was on the ends of my runners and it all turned out great. Hang on and you’ll see the finished stairs!
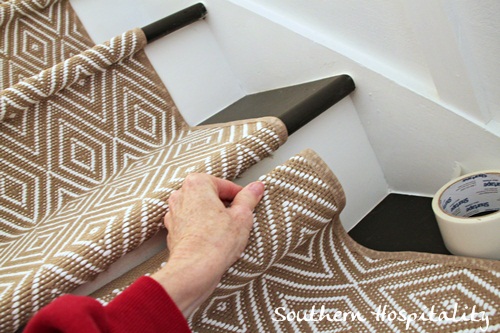
So, to get started on putting these in, I added my double sided tape 5″ in from each side. I added it to the back of the stairs, and to the very top of the first stair, outlining where I’d be putting the runner.
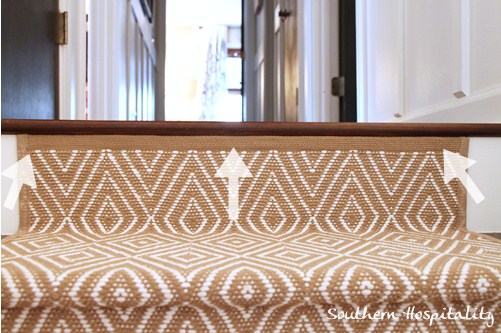
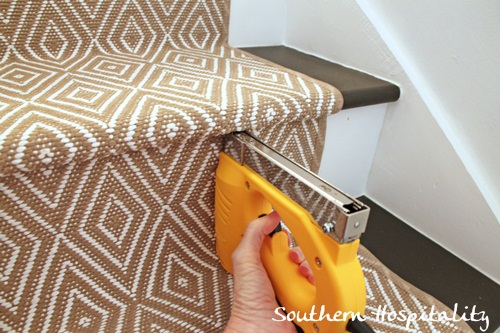
I left the binding on the top of my runner and used it right against the base of the floor at the top step. And I did add some staples to the top too, trying to hide them as best I could right at the edge of the binding and runner, as indicated by the arrows. You really can’t see the staples unless you really get down and look for them. Using the tape allowed me to use less staples.
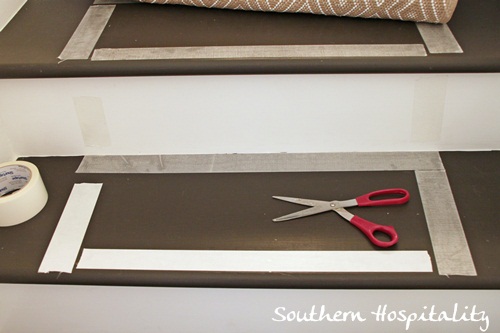
You can see the part that I’ve already pulled off the backing, leaving a sticky strip to press the runner down on. You’ll need scissors for this too.
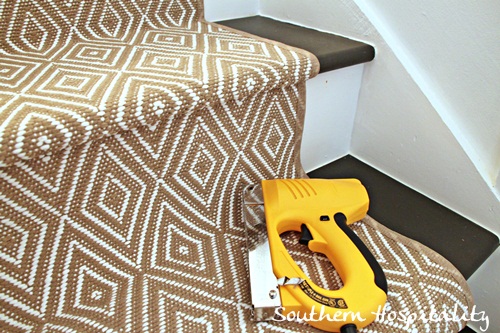
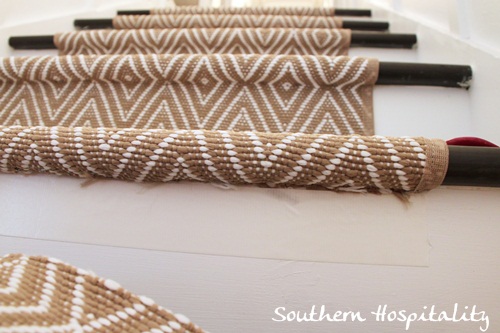
Once you get the very top stair in place, then it’s time to wrap the runner over the nose of the stair and staple. I pulled it taut and then just pressed the stapler up under the stair nose, stapling underneath every 2 inches or so, creating a tight fit on the runner and stair. I did this method with each and every stair until I reached the bottom.
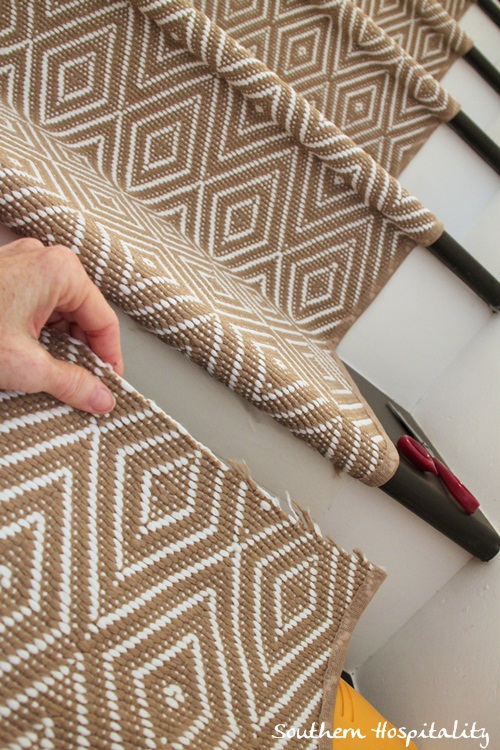
Staple, add tape, and move on down. Always start at the top and move down to the bottom, that’s what worked for me. Then, at the bottom, you’ll cut off the excess runner. On my longest stairs, I did have to piece this one together and I’ll show you how I did that too. The other two just got trimmed off and the edges were tacked down.
So, I’ve moved all the way down as far as my runner will go on my longest stairs. I wrapped it around the stair nose and then cut off the excess, stapling that all underneath. You can see that these runners will ravel, that’s to be expected with a raw edge. But, the new piece will cover that up.
One thing to be aware of. Be sure and measure at least on one side as you are moving down the stairs to be sure you’re leaving the same amount of stairs showing all the way down. It’s easy to let the runner slide a little and that could throw off the runner an inch or more if you’re not careful. Just throw a tape measure up every time you get to the next stair to be sure that the right amount of inches are showing on your stair. You don’t want to get to the bottom and have it all wonky looking and out of line, do you?!
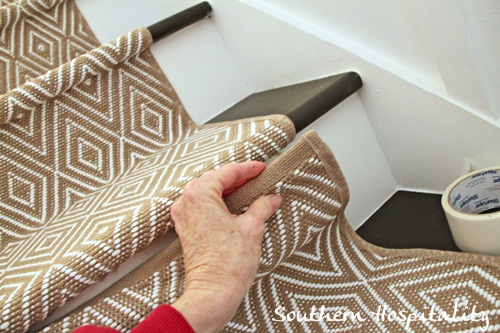
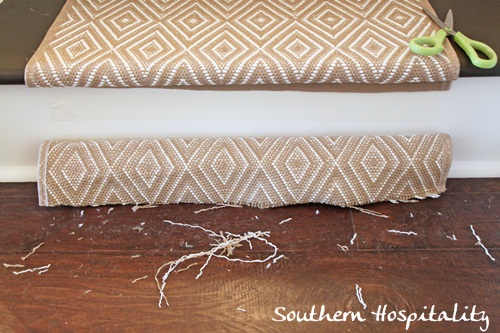
Above is the extra little piece that I cut off this runner. I had gone as far I could with the long runner and had one little piece left that I actually used too. You will want to piece anything right under the stair nose and that will hide the staples and no one should ever know it was pieced if you do it well.
Next, I took the extra piece that was going to finish these stairs off (I actually got 3 long runners and then had to get an extra 2×3 rug which finished out my long stairs). I got all of these bound at 24″, so it worked out fine for these stairs. This piece was my extra 2×3 rug.
Instead of cutting off that binding, I simply turned it under. It will be stapled right under the stair and it’s about the 3rd stair up on my staircase, so no one will see that it’s been pieced even though that binding adds a little bit of thickness there. With the double sided tape in place and stapling, I got it on nice and tight.
I moved on down the last two stairs until I got to the very bottom. The rug just fit under the last stair without cutting any of the binding off. I didn’t have enough to go down to the bottom of the riser, so I used the other small piece that I had cut off above.
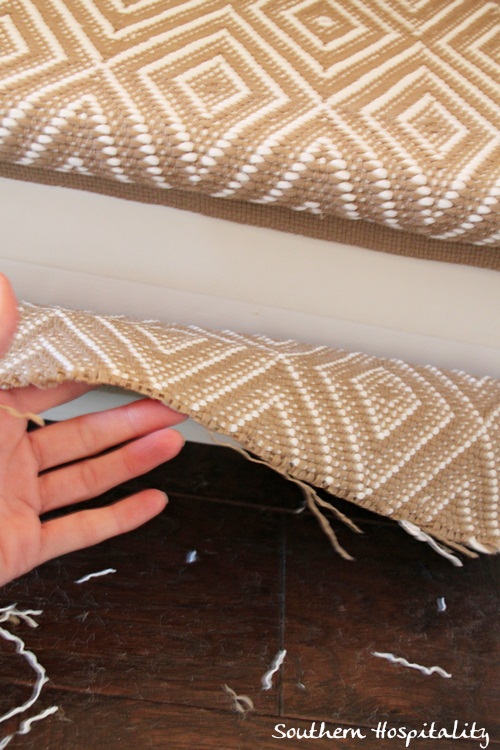
I fit that piece on at the bottom and ran it right above my quarter round molding next to the stairs, leaving the binding intact. Once I got that in place, I simply turned under the top of the rug to hide the raveling edge and then stapled/taped this little piece into place.
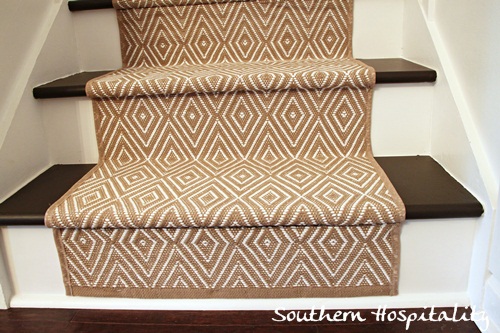
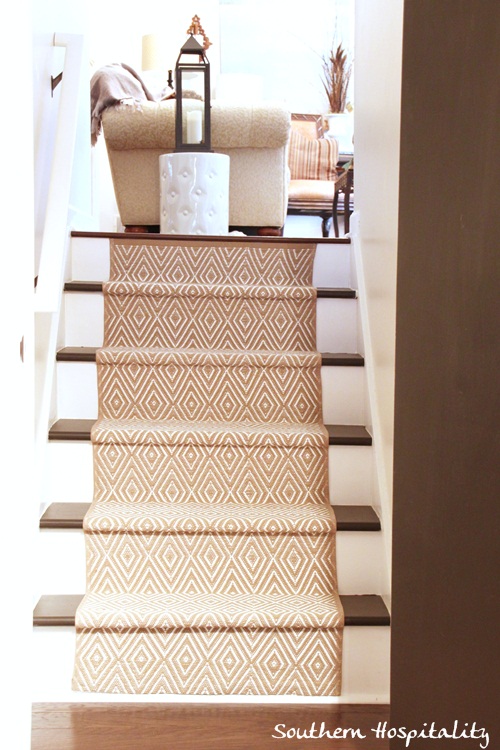
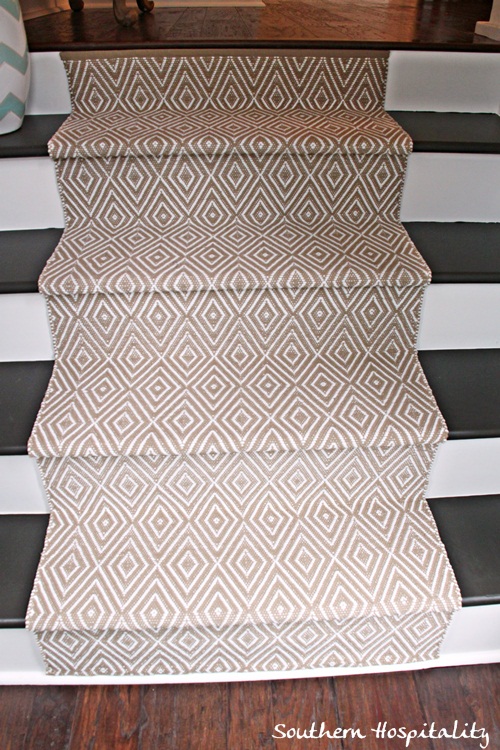
And ta-da! Done! I’ve got all 3 stairs finished now and they look wonderful. See can you tell where I’ve pieced the rugs? You can’t, can you? It’s barely noticeable and using tape and staples, the runners are on there pretty tight. I don’t think I’ll have a lot of problem with them moving, but if they start to loosen up with wear, I’ll just add some more staples.
Here’s the longest staircase all finished from the bottom looking up.
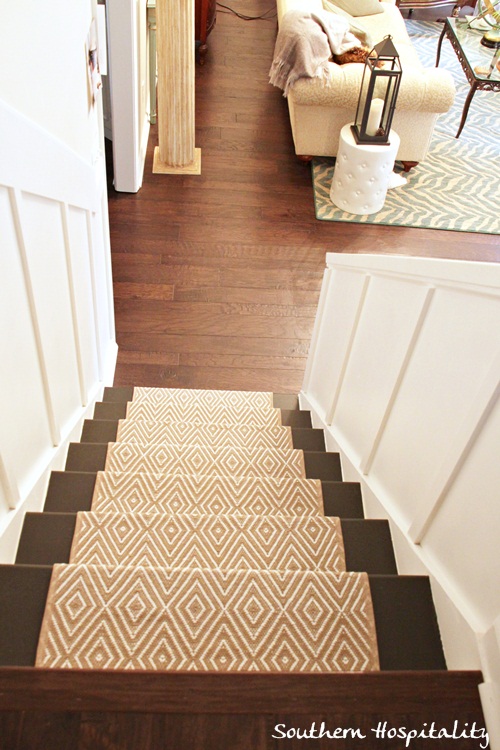
And from the top looking down.
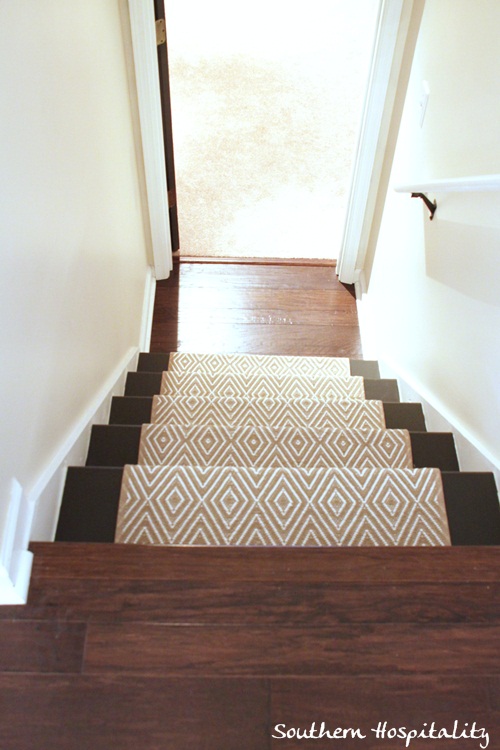
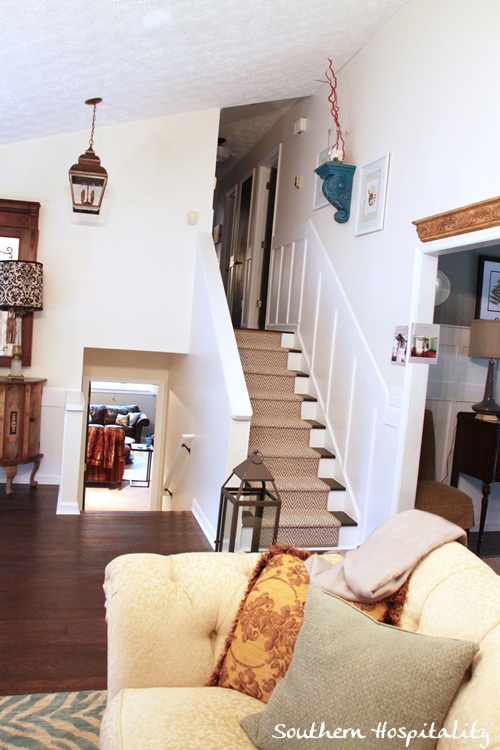
The den stairs got the exact same treatment. This runner is so pretty and I think will be a good choice. Very neutral. You can see the binding that the rug company put on, it turned out really nice.
From the den looking up.
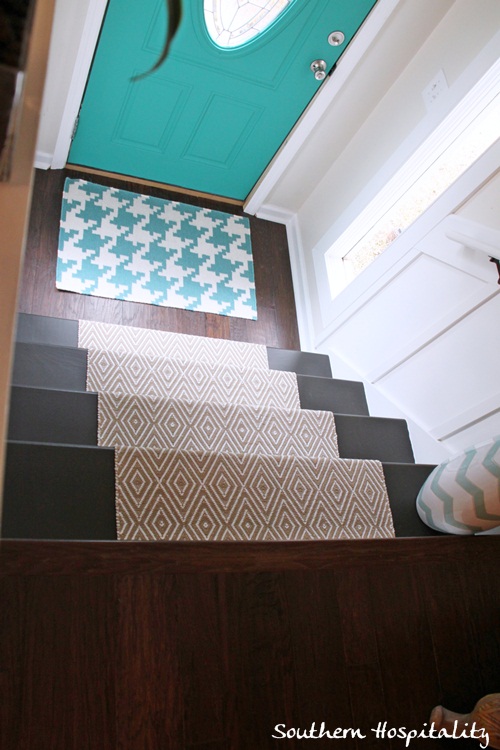
And the foyer stairs with no binding. Again, I left these as they were and didn’t need to cut them down since these stairs are extra wide coming in the front door.
I absolutely LOVE how they all turned out, exactly as I had it in my head all those months ago.
I love that there are ways to make stairs look pretty these days without spending a fortune on hardwood stairs. So glad I went this route and painted my stairs and added runners. To me, they look so sophisticated and beautiful.
What do you think?
Do you have some stairs that need a makeover?
I did a very similar painted stairs with runner treatment in my old house and loved those too. I expect that I’ll love this one even more!
Joining Traci’s party and Beth’s this month!


Hi, Rhoda, was just surfing the internet and I came across your site, I am doing upgrades and my stairs are very ugly, I would love to use this same technic for my stairs, I am painting the walls the same exact color as your runner. I would love to find that pattern and get started as soon as possible. It really looks great. Now all I have to do is go buy a runner at a carpet store and that’s it. Is your steps painted a brown or black color or are they stained?. . Please help if you could, Thank You so much, Bless you
HI, Marquita, my steps are painted deep chocolate brown, called Fired Earth by Valspar at Lowes. I still love my stairs and runners 4 years later. Thank you for stopping by!
Do you happen to remember about how long this project took you? Would love to attempt, but feel like it may take me weeks! So cute though!
Hi, Elisa, it really didn’t take that long after the stairs were painted. I think maybe 3 days total with getting one stair run done each day. I taped, stapled and kept moving, so it goes pretty fast.
This project came out beautiful! Can you share what staple gun you used? I’d love to do this! Thanks
Hi there! I just saw this post and LOVED the look! I’m moving into a home that has all wood floors throughout the main areas of the home (everywhere expect the bedrooms). I have a 3 year old, a small dog, and my (not as strong as she thinks!) mom who lives with us. I would like your opinion if you think it would look nice to have a carpet runner on just the stairs? We do plan to have accent rugs throughout the home so I was thinking maybe it wouldn’t look bad?
Thank you,
Lany
HI, Lany, I don’t see why you couldn’t just do a runner on the stairs. I think it looks nice no matter what you have elsewhere.
I love your use of neutral colours and patterns to add interest without totally distracting us from what should be the focus of the areas: relaxation or relationships in the livingroom and getting around on the stairs. And I love the way the runners’ diamond shapes and the animal stripes echo eachother without being too “matchy-matchy”!
Wondering how your runner has held up on the stairs. Any chance of an update?
HI, Leslie, I still own that house and the runner has held up great. I haven’t had any big problems with it at all.
Thanks!
Rhoda, I was so happy to find this tutorial! It’s something I just decided to explore doing and your tutorial is perfect. So detailed and well thought out. Thanks for the information.
HI, Tracey, I’m so glad you found this one. It was a fun project and really changed my house!
Just wondering how these are holding up? Considering doing this to mine
HI, Kila, they are holding up very well. In an active family they might move around a little bit, but if they come loose a bit you can restaple them. Mine are still up at my old house.
Hi there!’
Thank you for the tutorial. I really appreciated the step by step and specific direcitons for the tricky parts! We recently tiled our stairs with the kind of tile that looks like wood planks. We have that everywhere but the bedrooms. It looks beautiful but we realized that hard tiled stairs are not pleasant to walk on. I’ve decided on a stair runner to soften them up a bit. I won’t be able to use the staples but I ordered stair rods and the carpet tape you suggested. I feel pretty good about it. My one question is this: Another tutorial said it was important to start with the bottom stair rather than the top. Do you think that makes any difference?
My stairs are carpeted with your standard light brown, tannish carpet, but I would like a runner to give it some color. Do you know if I can use your technique and staple a runner to the carpet or would I have to remove current carpet?
Thanks.
Hi, Marie, I would remove the old carpet before you add new.