Today’s post makes me giddy and is really all about why I started blogging in the first place. Sharing home renovation ideas on a budget was a big part of why I started sharing online years ago and that continues to motivate and excite me today. Even though this isn’t my kitchen, I had a major big part in helping Andrea and David renovate this kitchen, making it new and fresh and also adding their own personality to the mix. You will remember I introduced you to Andrea and David (who I go to church with) a year ago in this post, Updating a 1950’s Brick Ranch House. I know you’ve been waiting for a finale of that kitchen and I’ve been dying to get it done too. I shared an update on the kitchen progress back in June and I thought we’d never get this thing finished!
Andrea is an Old Marietta girl and grew up here, going to Marietta High School. Her parents bought this house years ago, off the Marietta Square and Andrea later bought it from her mom as a single gal and lived in it for years before she met and married David 7 years ago. They were ready to make the house their own and it was in dire need of updating and freshening up. The kitchen was one of the first areas they wanted to tackle. We worked on the sunroom first (if you missed that one, go and take a peek!) and really improved that space and then moved on to the kitchen, which we knew would take awhile. I didn’t think it would take this long, but this is a real life renovation, done on a budget and with time restraints. Andrea works full time so has limited time to shop with me, so we met and texted as much as we could to get this project done. David is the handy man and got a lot of things accomplished too, so getting this kitchen finished is a thrill for all of us! They absolutely LOVE their new and improved kitchen!
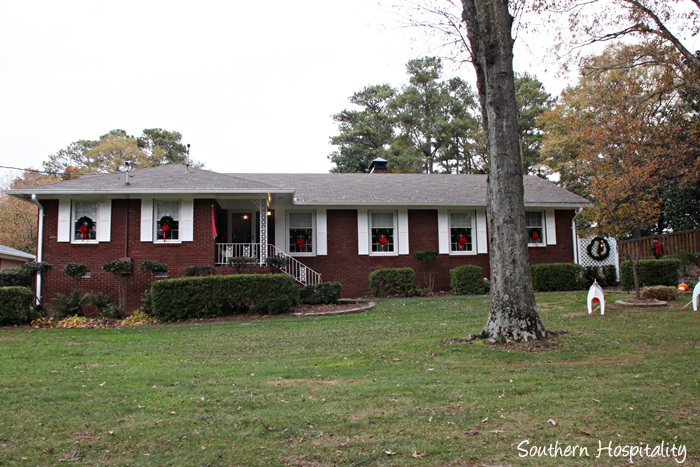
I can’t wait to share it all with you. Let’s start back at the beginning, when I shared their house with you a year ago. I’m going to show the same angles of pictures and let you see the dramatic BEFORE and AFTER shots. It is jaw dropping amazing, if I do say so myself. Andrea and I worked together to achieve her dream of a brighter and beautiful kitchen, with functionality and decluttering a part of the overall project. Her personality is reflected in the colors and patterns and everything she did, she ran by me first. Some things I nixed and other things I scouted and found for her. We shopped for many things together, including the fabrics, lighting and accessories. I chose paint colors for the cabinets and walls and we worked together on everything. Texting helped this project move along!
The hardest thing to find was a good island. It took months of looking all during the summer before they found the perfect island that fit their space like a glove. They found the island at Haverty’s and when she texted me the picture, I said BUY IT!
I’ll share all the sources in the post, on the things I can share.
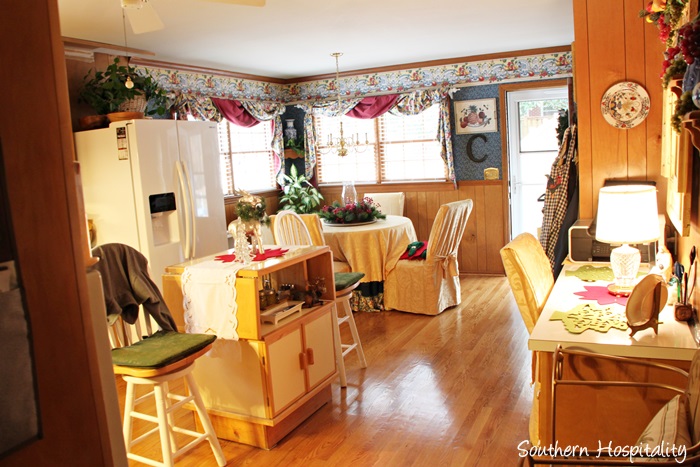
These were horrible BEFORE shots that I took a year ago when I first got to Andrea’s house and we began to talk about her spaces. I gave her my brutally honest opinion on everything in the room, including the fact that almost everything needed to go. Decluttering was a big part of what I talked them through and Andrea was more than happy to listen to my ideas. She told me from the beginning that she would do what I asked them to do and they did! She had left things exactly the way her mother had left them and it was time to make it Andrea and David’s kitchen. She was more than ready to let go of that stuff! It doesn’t even look like the same space now!
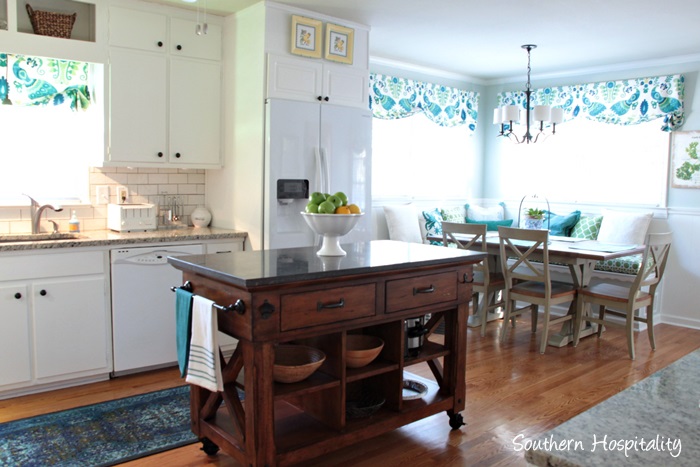
The cabinets all stayed, but were painted White Dove by Benjamin Moore. Paneling was all painted too and above the chair rail, Sea Salt by Sherwin Williams was added.
Are you dying at the changes?? I know, just wait til you see more!! I took a lot of pictures, so please hang with me. I wanted to show all the details of this beautiful renovation! I have the BEFORE shots all sprinkled throughout so you can really see the dramatic difference in this makeover.
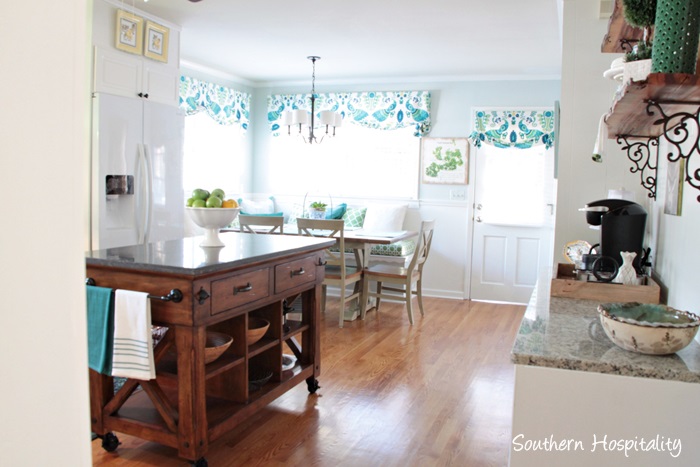
Can you believe this is the same kitchen? It has gone through such a transformation, so I’ll walk you through all of it.
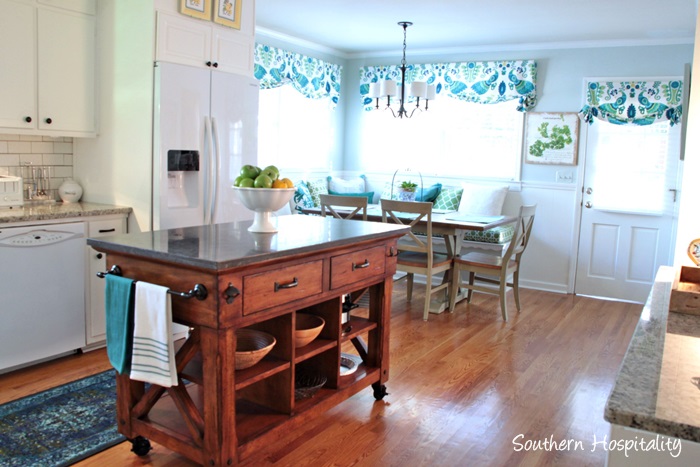
Painting the cabinets was a huge part of renovating this kitchen and doing the built in banquette also added so much charm to the space and they added extra seating too.
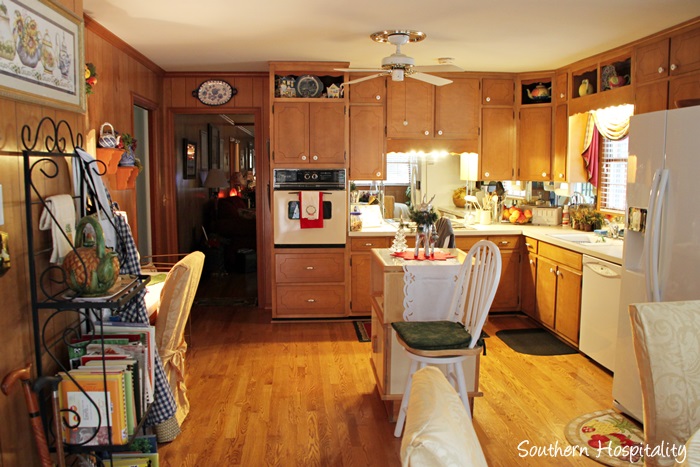
This BEFORE shot captures the dark feel of the room. It was so cavelike from not a lot of light coming in to all the darkish wood around the room, from the paneling, to the floors, to the cabinets. Too much wood! And notice the original to the house appliances. 1950’s people!! These things had seen better days and it was time to update.
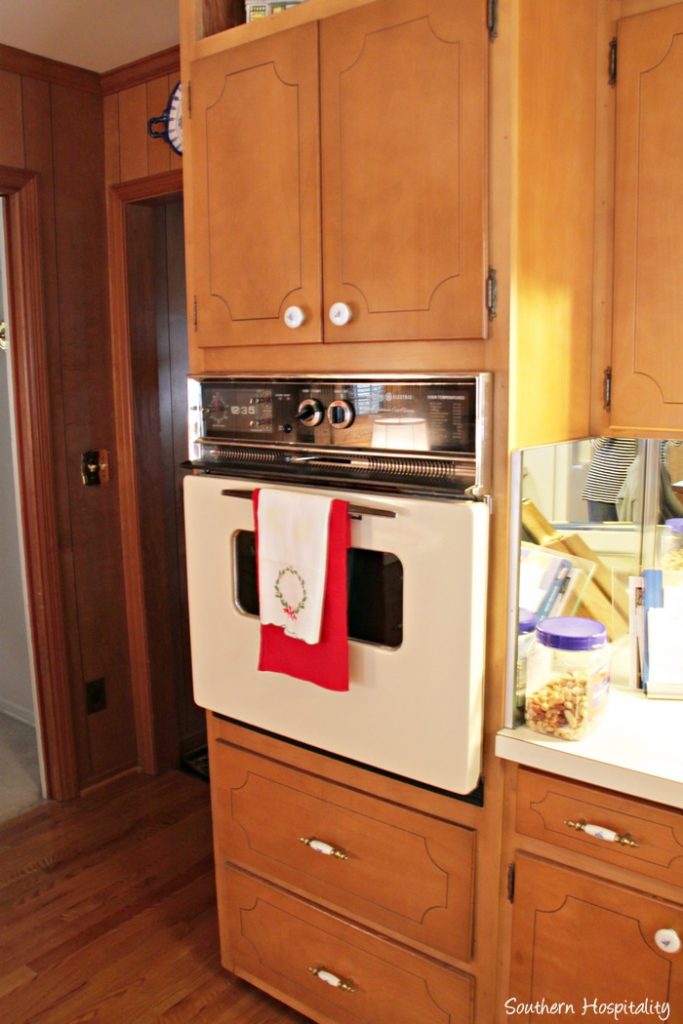
A new stainless wall oven was added. They put their microwave behind those doors above the oven and are still getting that in place, but it moved from where it was originally on the other side of the fridge. I didn’t get a good shot of it before, but it was too cluttered where it was before.
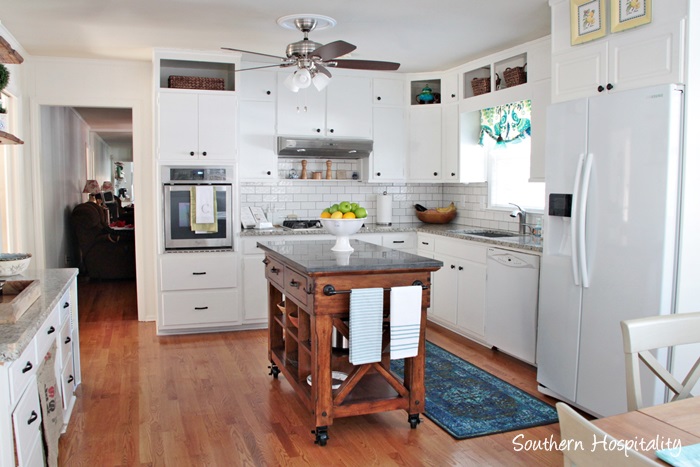
So clean and fresh and new looking! I can’t even get over how great it looks.
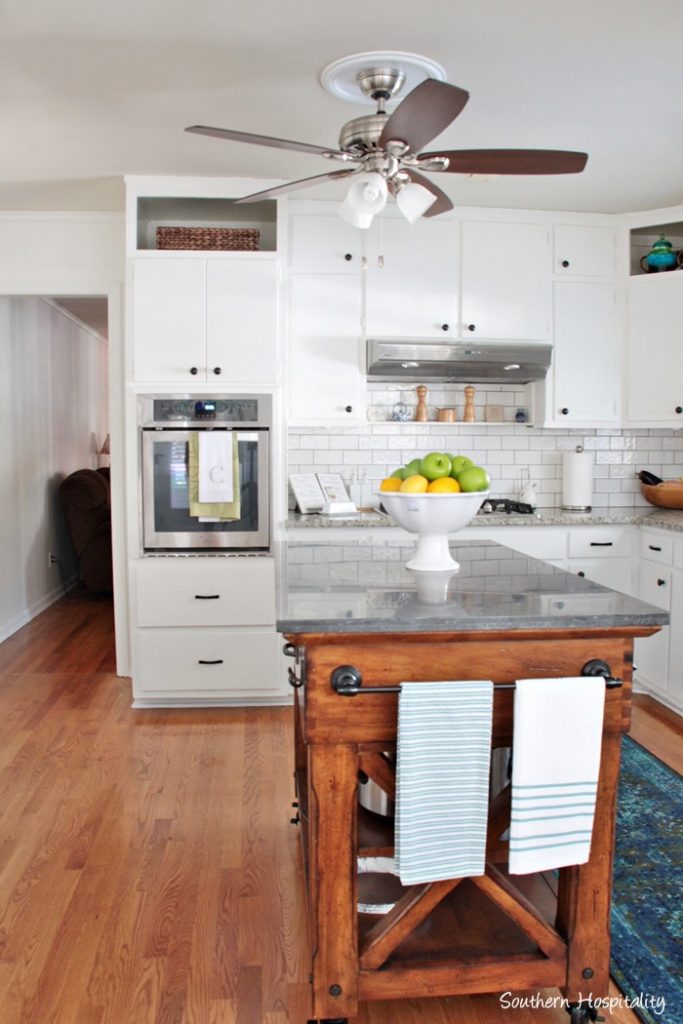
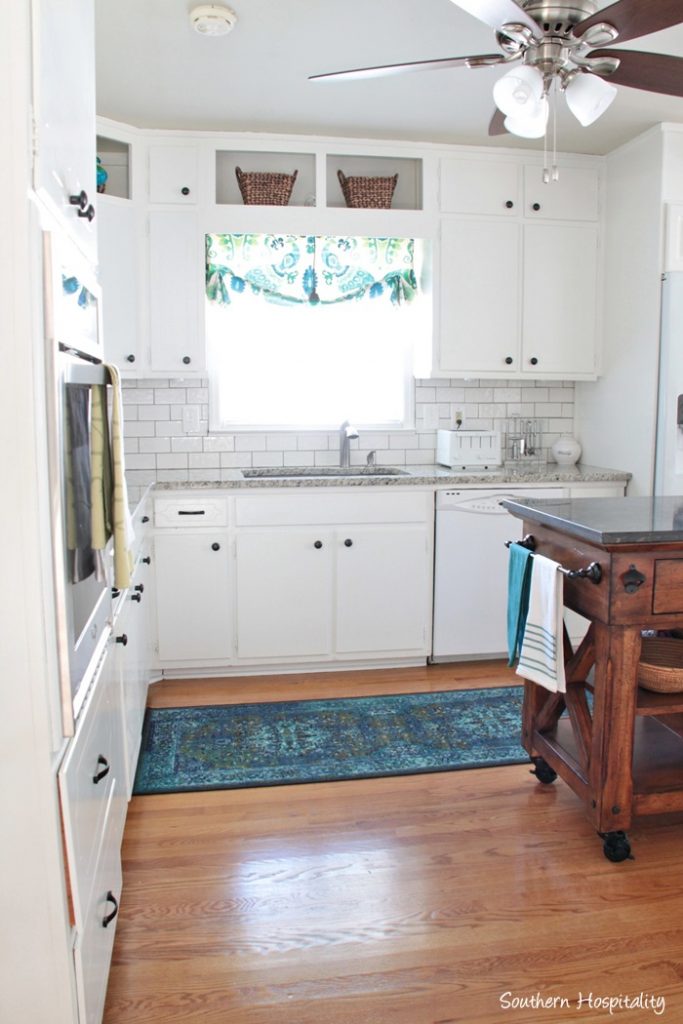
You’ll notice they replaced the old fan and got one with lights, so it does add some much needed light in here. I’m not normally big on fans in the kitchen, but they used their fan so I think the new one is much improved, especially with added lights. Take a look at that gorgeous island.
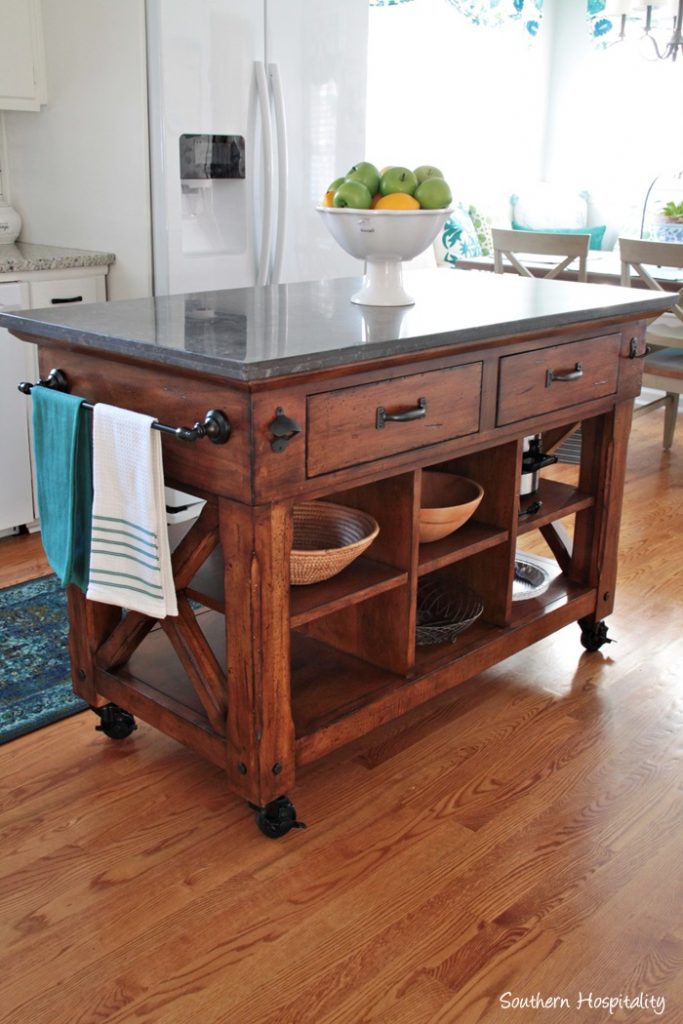
They found it at Haverty’s (the Hanover) and it was the perfect piece to complete the space. Worth waiting for! With drawers and open storage underneath, it’s a great piece. It has a natural stone on top in dark charcoal which complements their granite countertops. Great extra prep space!
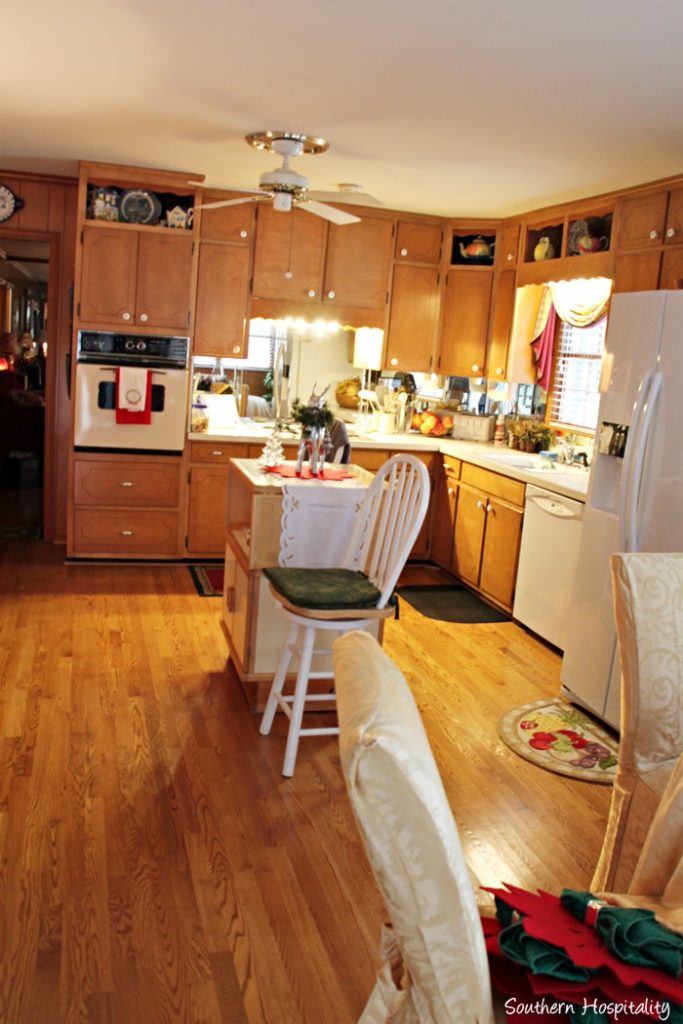
Another BEFORE shot from this direction.
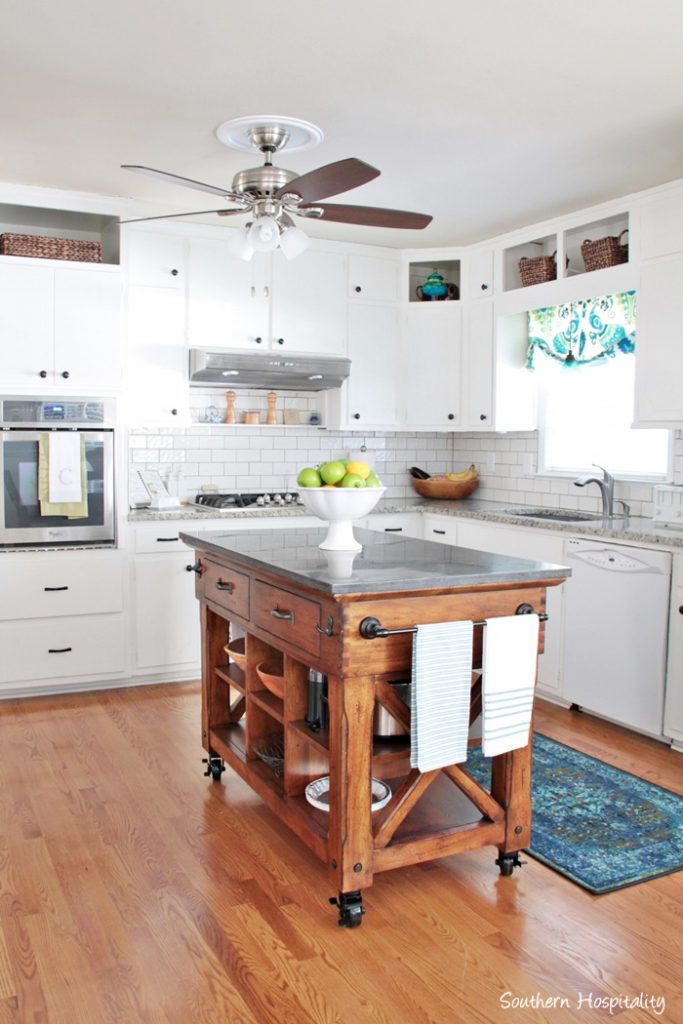
And what a change! The scalloped trim around the sink and stove was removed. New appliances were bought (except fridge and dishwasher), including wall oven, stainless vent hood and gas cooktop. David bought panels of wood and built in the refrigerator and then it was all painted White Dove.
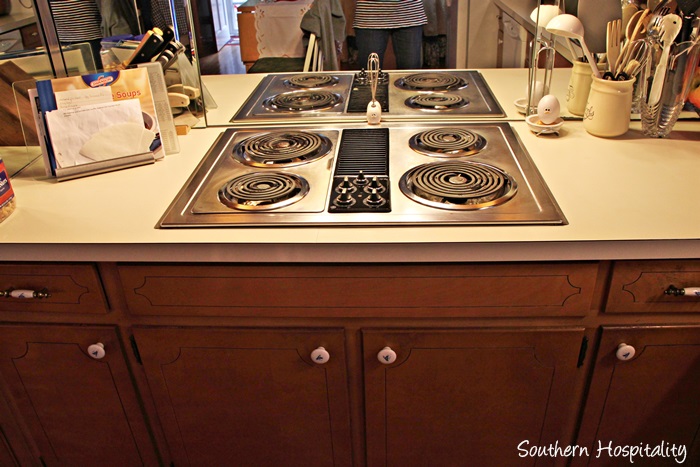
A look at the old cooktop. They were more than ready to update this one. Notice that mirrored backsplash from before.
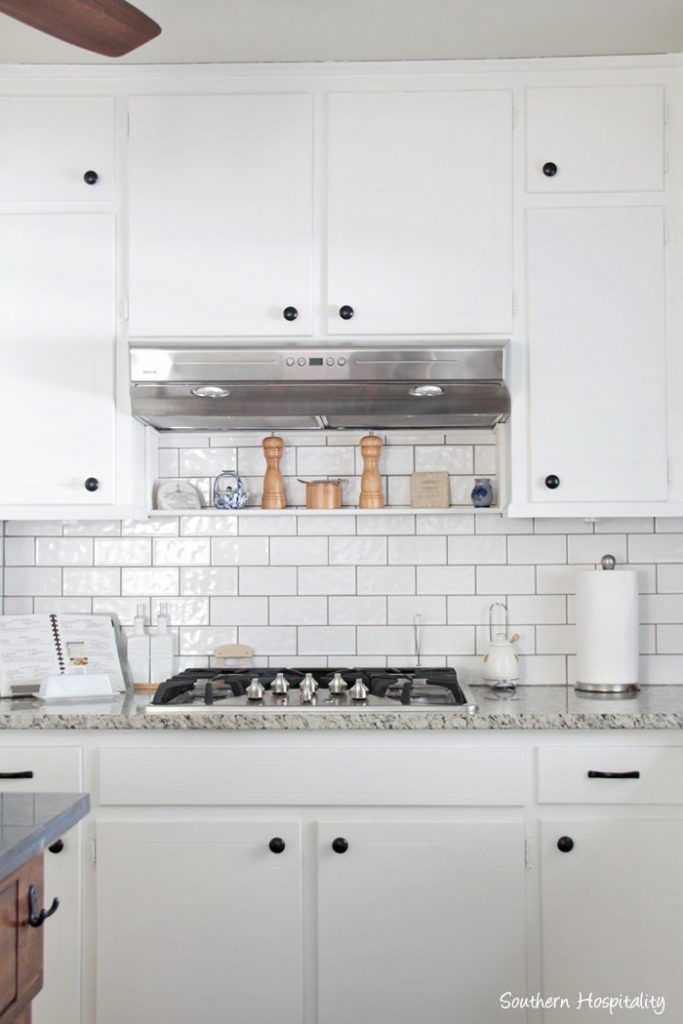
After painting the cabinets and adding new hardware, a new gas cooktop went in along with a stainless vent hood. David tiled the backsplash and it turned out great.
Liberty Hardware was very nice and sent hardware that they had picked out from Lowes. Here’s the information if you’re interested. That’s the only help they got in this kitchen..
PN0120H-BL-C Ceramic knob in black
P18949C-FB-C Step Edge Pull Black
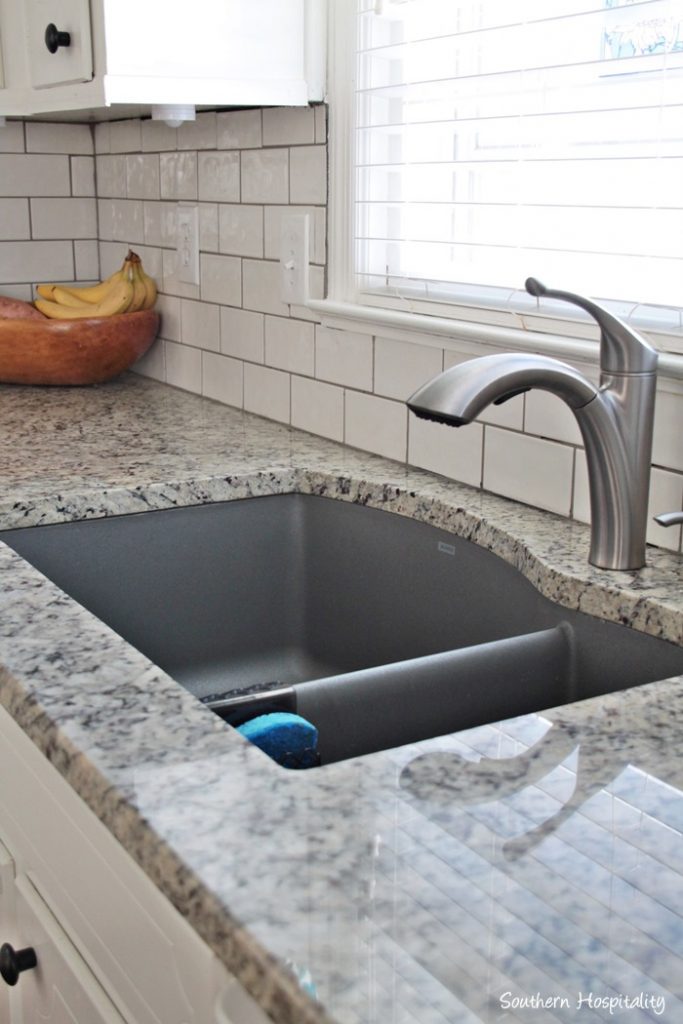
They ordered a Blanco Silgranit sink (affiliate link), which is what I have in my kitchen and they love it too. This color is Metallic Gray, the same color I have. They opted for a dual sided sink with a smaller one for the garbage disposal. They ordered their granite from the same place that did mine and loved working with Legacy Granite in Alpharetta. Those guys do a wonderful job from template to installing the granite.
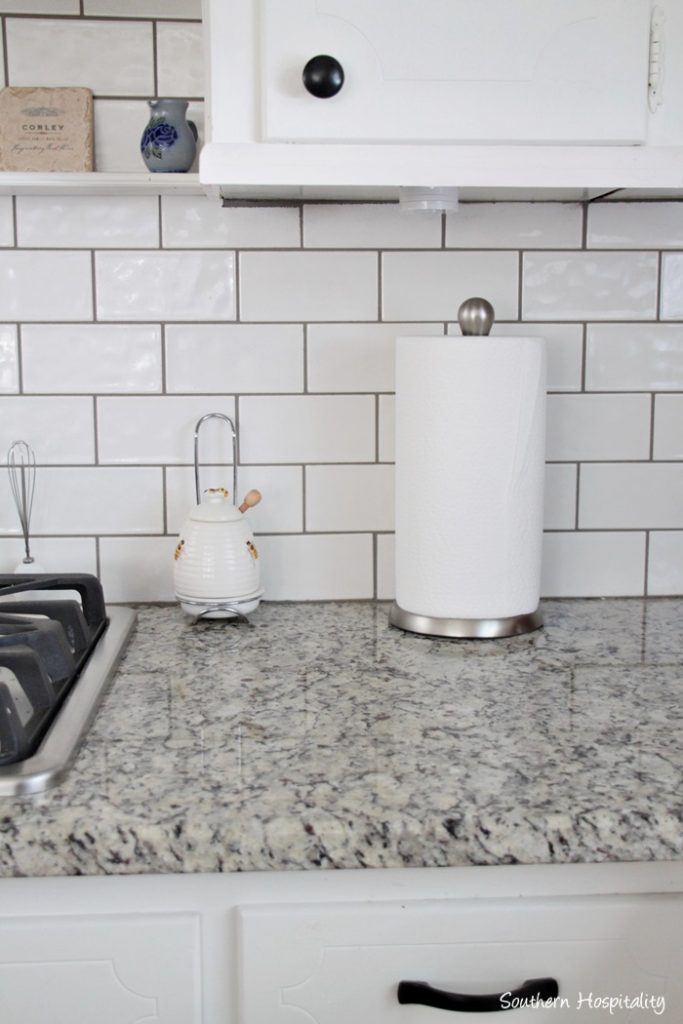
I don’t remember the name of their granite, but Andrea and I shopped there together and chose this one, a lightish creamy white with black/gray flecks. It’s beautiful!
Subway tile for back splash came from Home Depot.
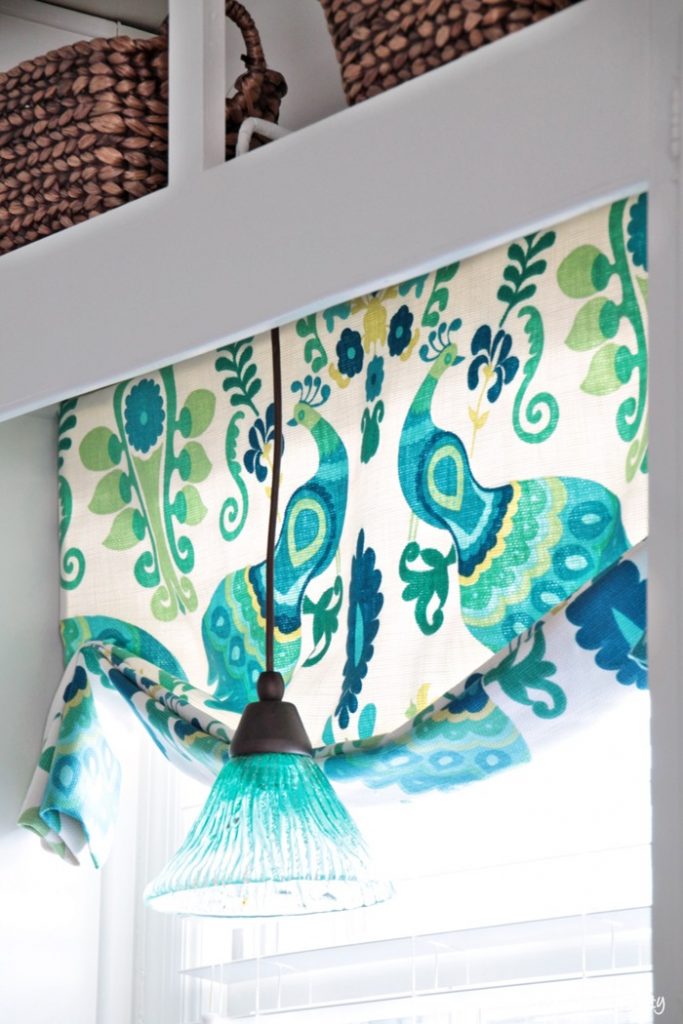
Did you notice this gorgeous little pendant light? I found it on Overstock and Andrea ordered it. David is going to move it up a little bit as it is hanging a little too low. Andrea and I shopped for this curtain fabric and I love the vibrant colors in this peacock fabric. She had the Roman shades in the kitchen made at a local shop, Fringe Benefits, who did all my drapes in my house.
We picked out and she bought the peacock fabric from Forsyth Fabric here in Atlanta, and it is called Bellando. Here it is in the color Marine. And here it is in the same color way as Andrea’s (called Richloom Bellando in Calypso) from an online source.
Cambridge Pendant from Overstock (affiliate link)

Another shot of that gorgeous island looking towards the breakfast nook.
I found the runner online at Rugs USA during one of their big rug sales and Andrea got this gorgeous runner for $40. It’s perfect in here!
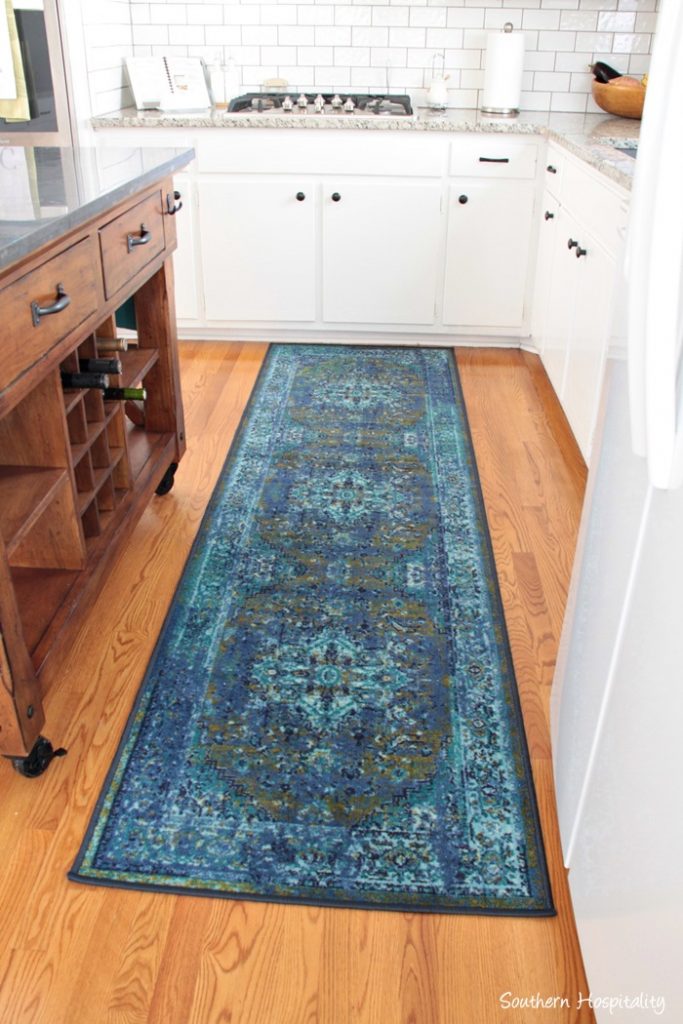
This is the Ashlina Printed Persian Overdye from Rugs USA (this is not an affiliate link, but I wish it was, they don’t do affiliates! ) and it’s manmade and should be perfect for the kitchen. The darker color helps too!
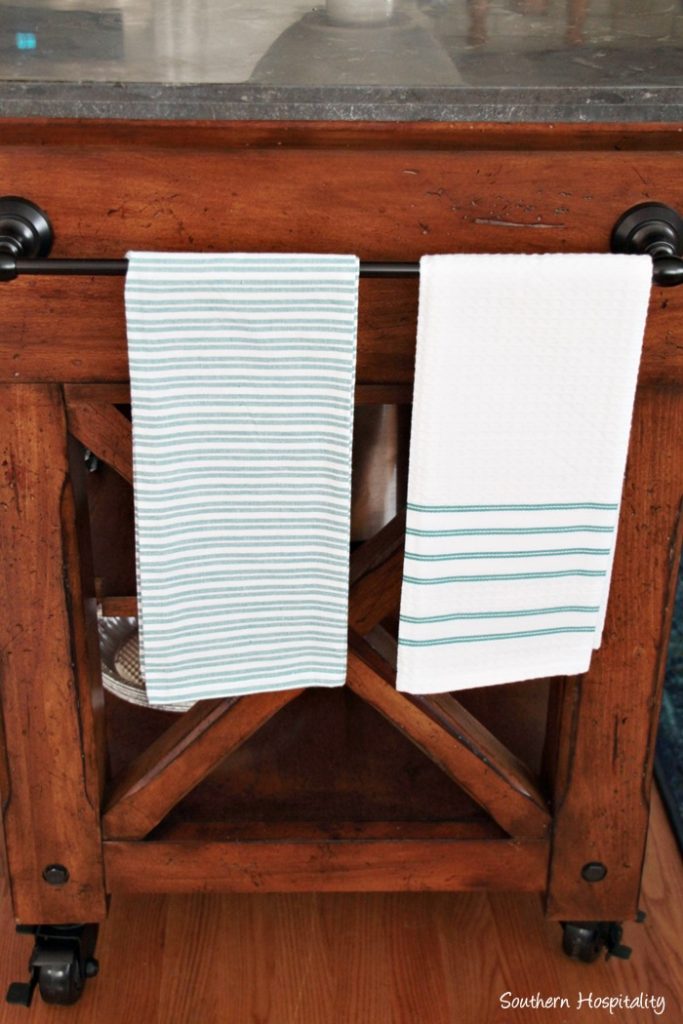
Kitchen towels on the island.
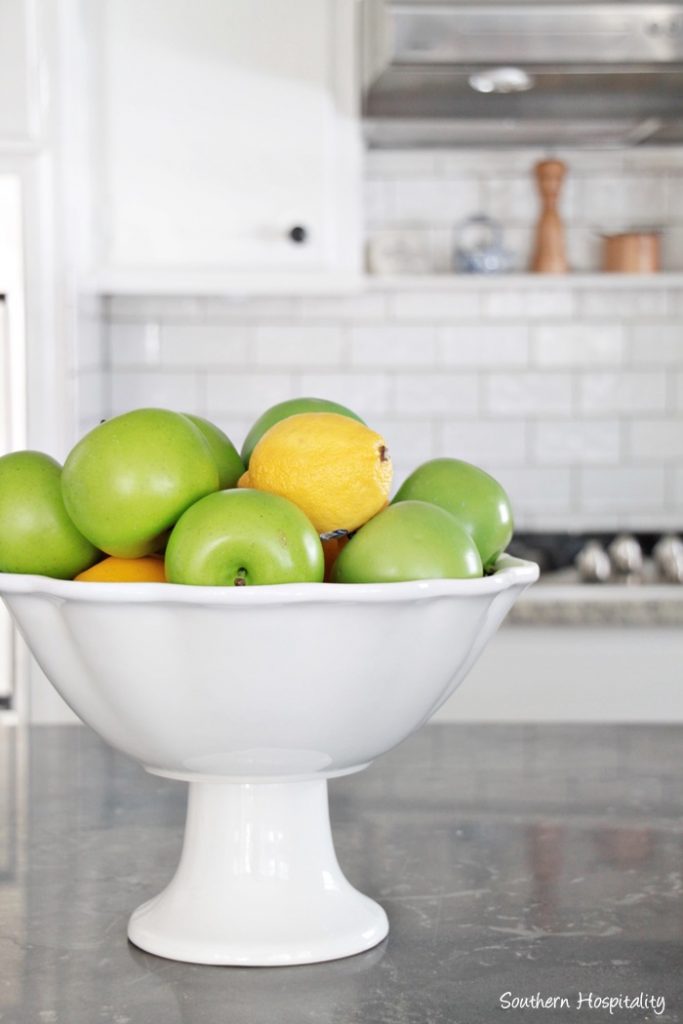
Of course, I had to do some beauty shots around the room.
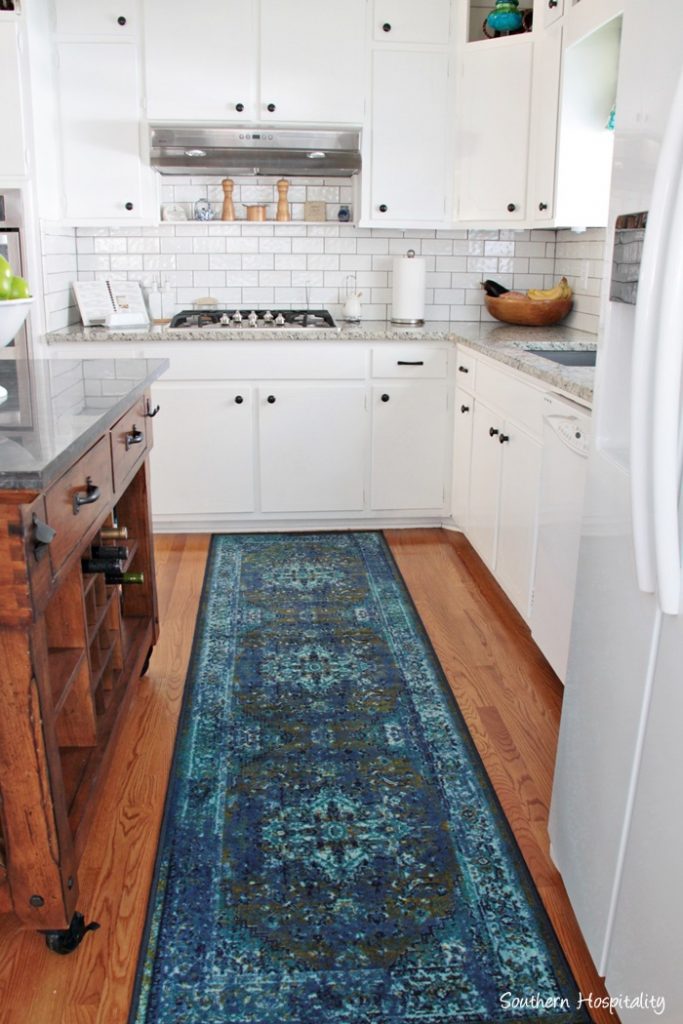
Another look from this direction at the pretty runner and the cabinets.
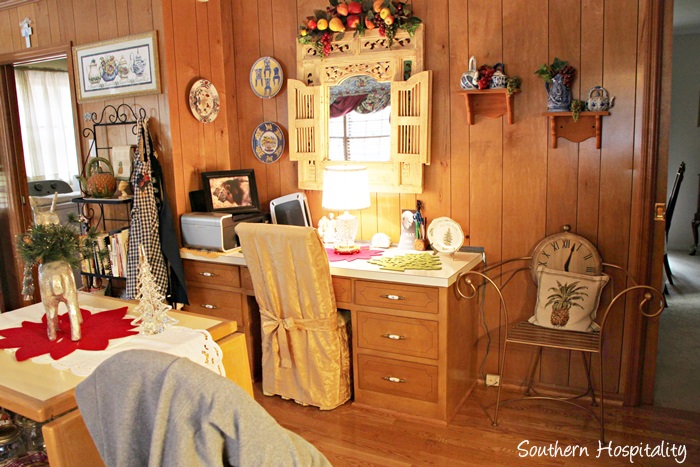
Moving to that old built in desk area. The old desk area was in dire need of a makeover. We decided to leave the desk, declutter and move things off of there. This whole area was revamped and decluttered. The bakers rack left the room.
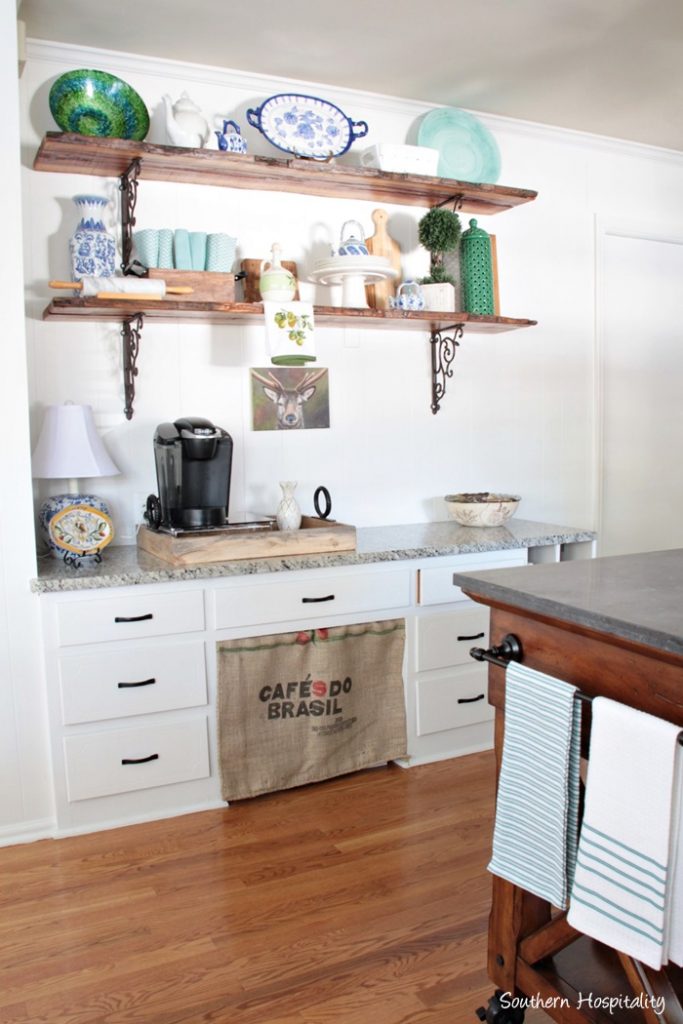
After all the paneling and desk was painted, David extended the desk to the right with cubbies for trays and platters.
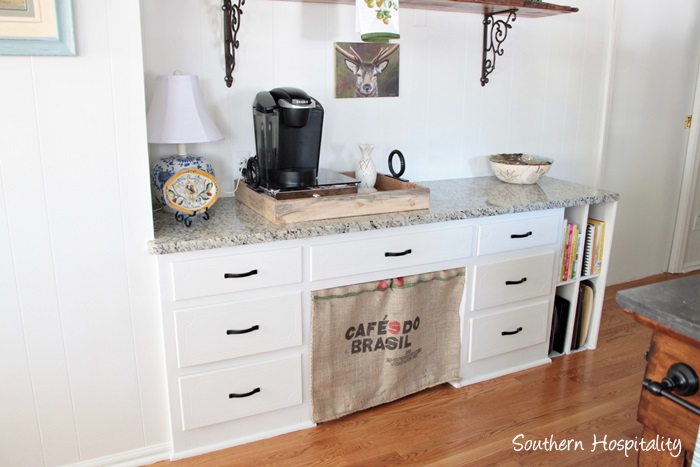
They added a coffee bean burlap bag for some rustic details and it hides the hole. He may go back later and build doors for this area, but for now it works. Cookbooks and trays are stored in the cubbies. On top of the desk, we found this beautiful wood tray at Homegoods and they added their coffee maker here, with pullout storage trays.
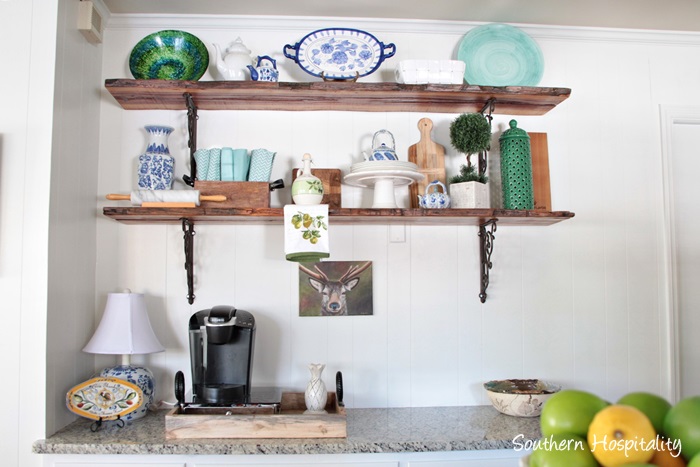
A blue and white lamp was added that Andrea already had.
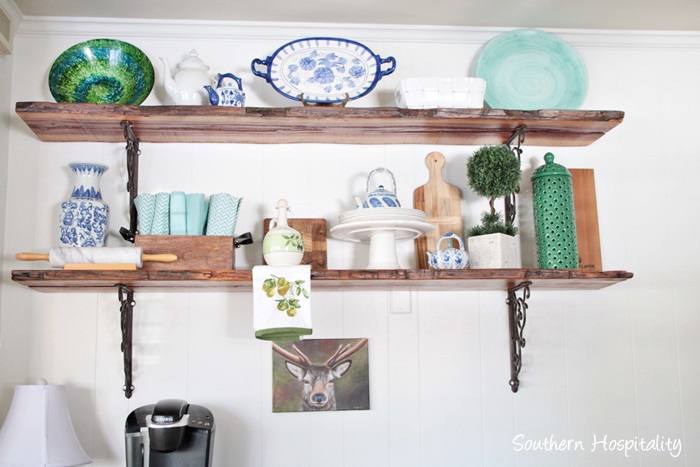
Now, about those shelves! I had told Andrea and David about my friend, Garlan over in Cullman, AL with Southern Accents and all the cool reclaimed stuff he has. They drove over there one day and bought these reclaimed wood shelves and black iron brackets to add to this wall and they are the perfect accent here above the desk. Great place to display pretty things and they can use them when they need to.
David’s granddaughter painted that cute deer head. I liked it and wanted to display it here.
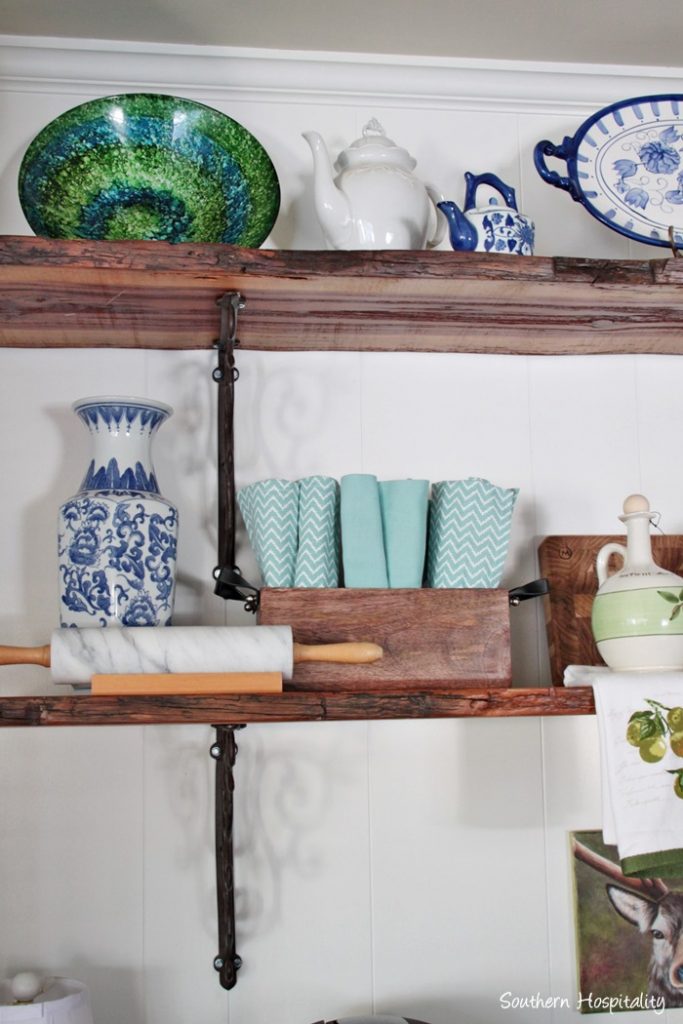
Andrea had some of these accessories already, but we also shopped Homegoods for some extra pieces, adding color and texture to the shelves. I love how they turned out!
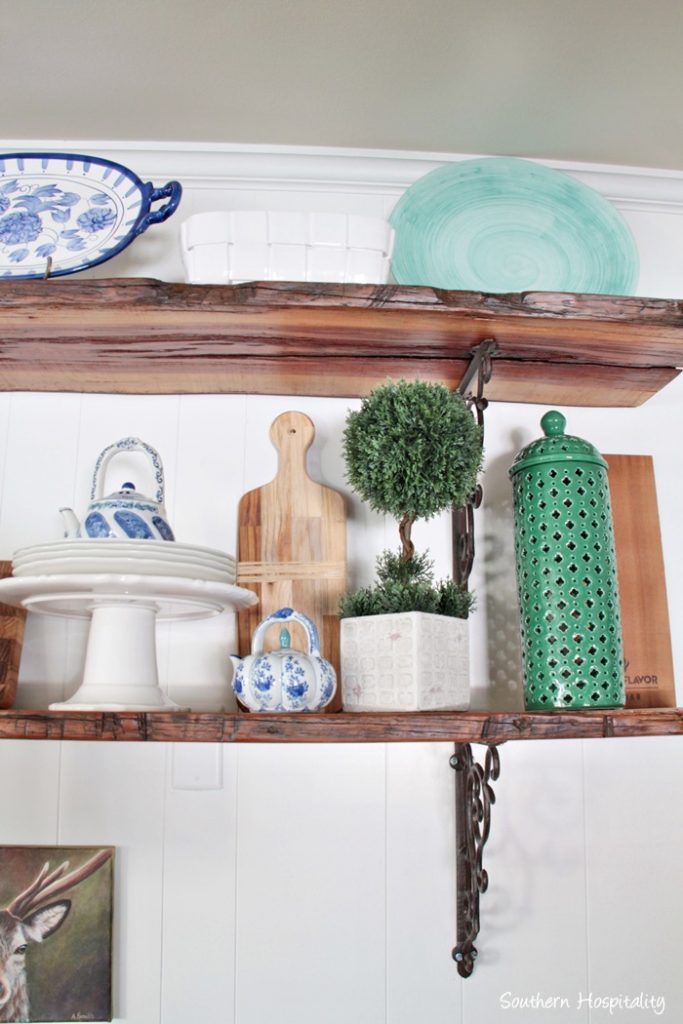
The shelves complement the island and those black iron brackets pick up the black hardware on the cabinets.
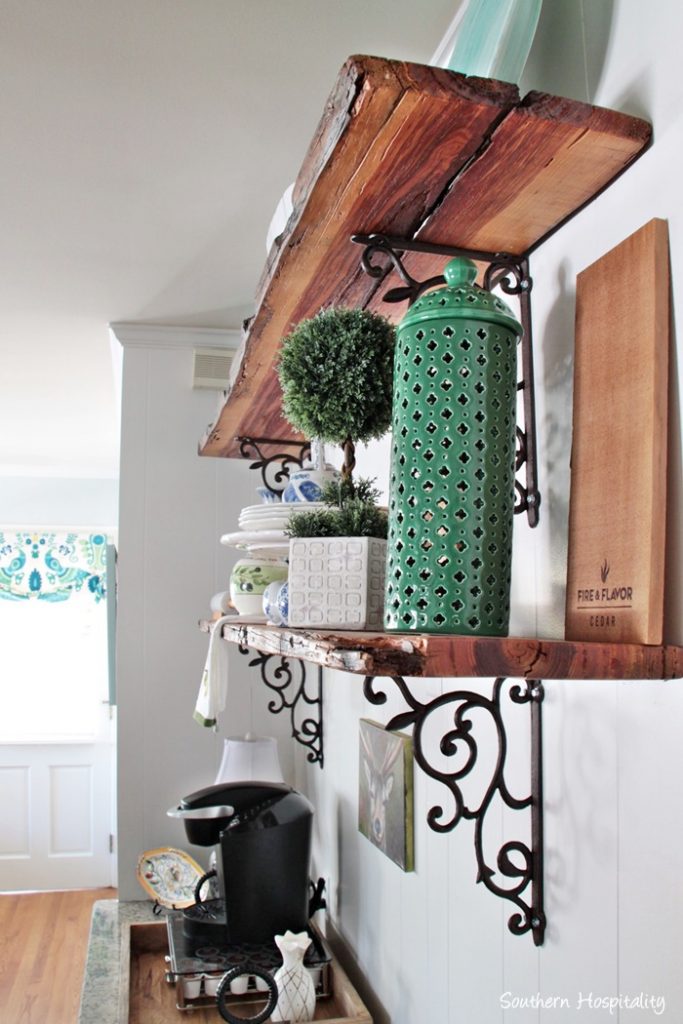
Having wood in a space warms it up so much. They just had too much wood, but now that the walls and cabinets are painted, it’s just enough warmth with the wood floors, reclaimed shelves, and that gorgeous new island.
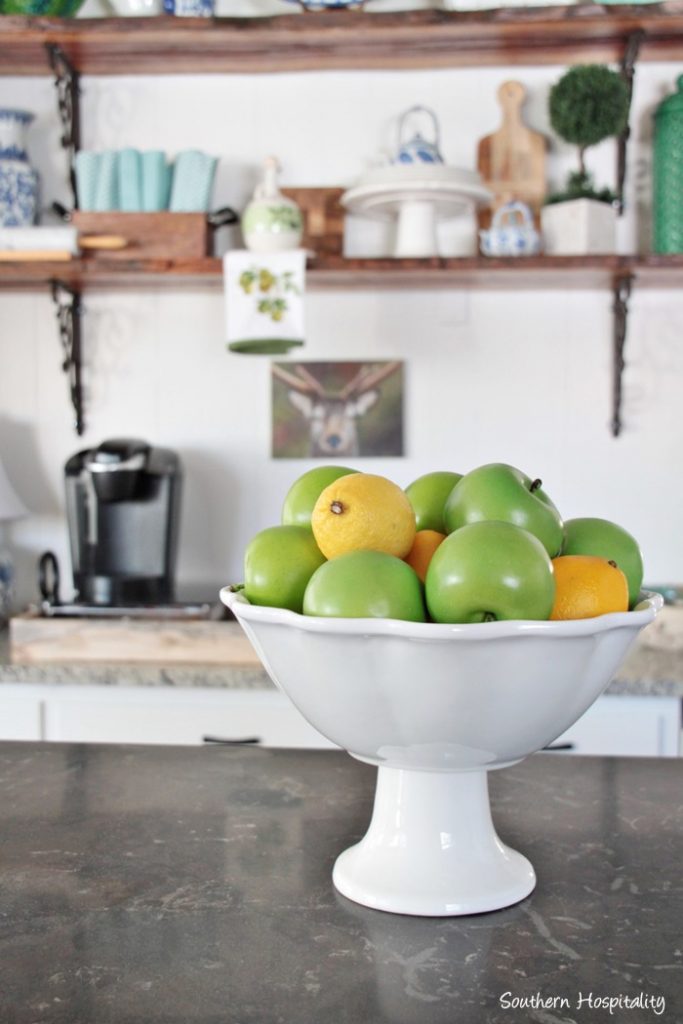
Pretty ironstone bowl from Homegoods looks great on the island.
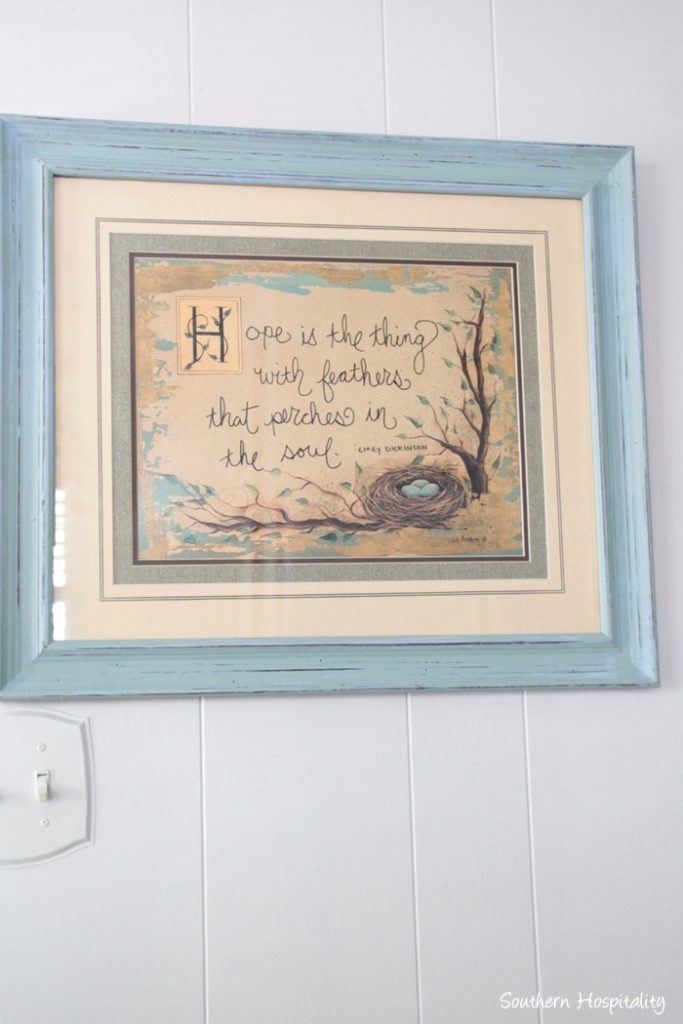
Andrea found a few things she loved, so I gave the thumbs up on this art piece, with a saying that spoke to her. It’s to the left of the shelves on a wall.
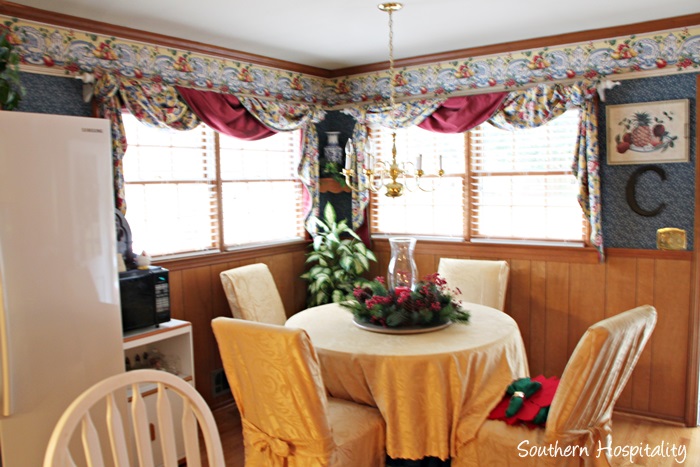
Back to the breakfast nook, you’ll remember this look from a year ago. It has come a long, long way! Gone is the dated wallpaper border, the frilly swags and there’s a peek at the microwave and stand we got rid of.

Now it looks like a whole new space! I just love how this area turned out.
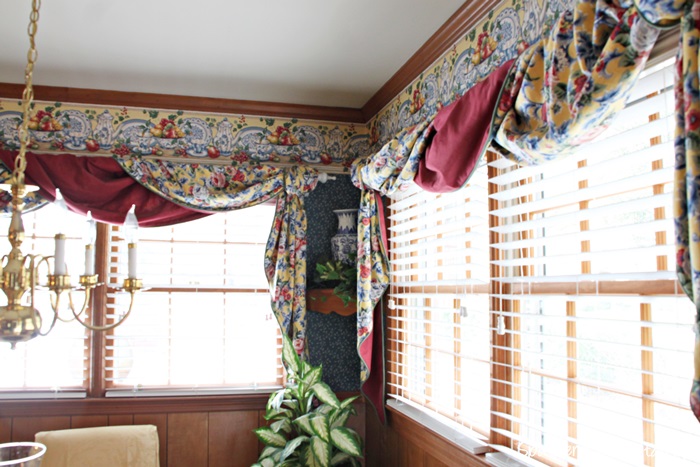
Bye bye dated window treatments and light fixture!
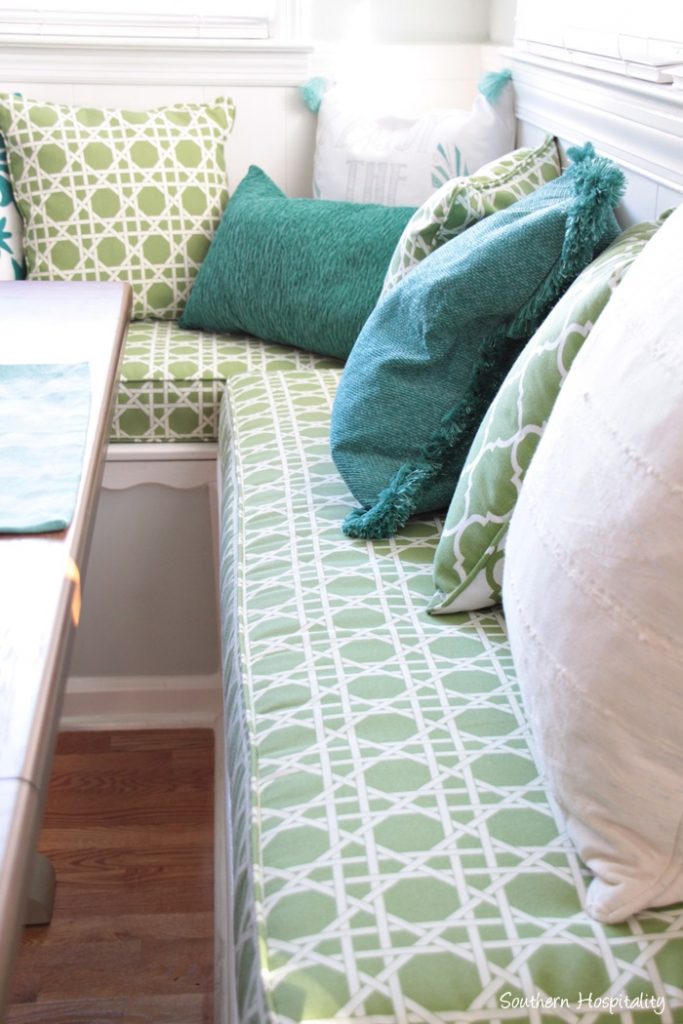
After David built this banquette, they got 4″ foam and had it covered with some pretty outdoor fabric, which will repel stains. I helped her pick out these fabrics to coordinate them together. I love how happy this space is now! The trellis fabric looks so pretty with the peacock fabric on the windows.
They used a local guy to cover the cushions and here is his information. He also recovered a chair for them. I’m going to use him next time I do an upholstery project: Jon Papanicolaou (Cell: 404.906.8372)
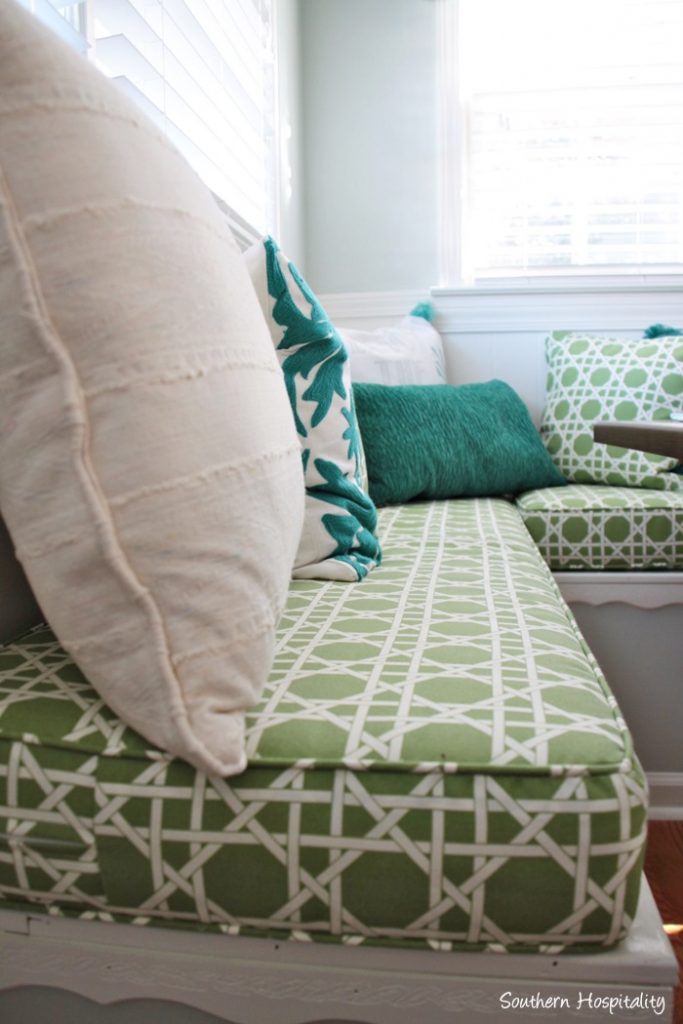
I know they are enjoying this new breakfast banquette.
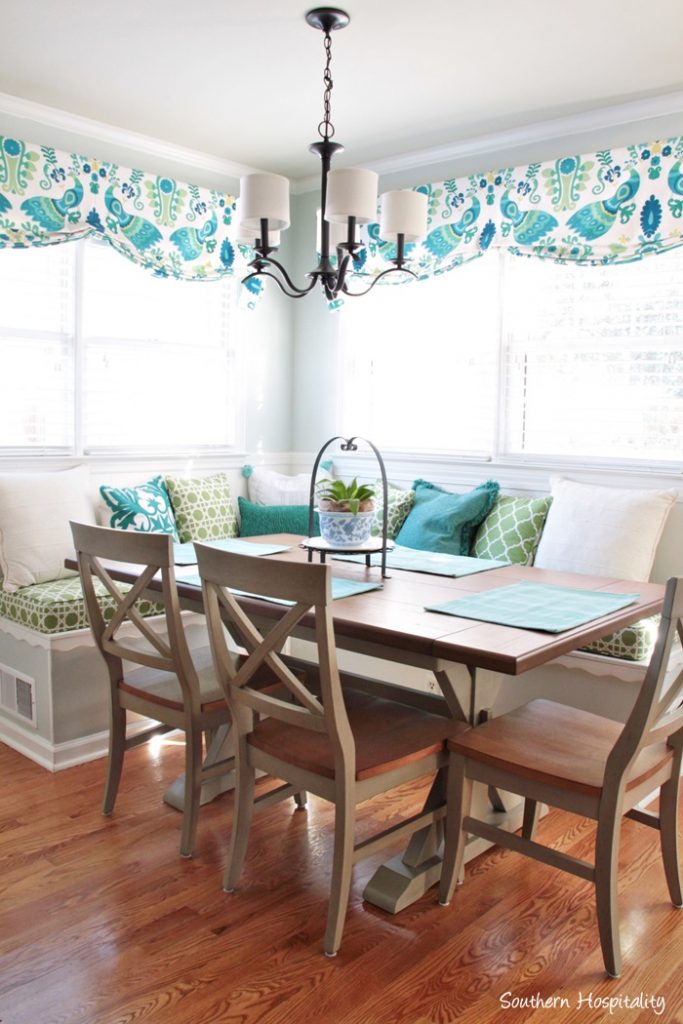
Here it is all together. The new table and chairs came from Haverty’s as well. Now they can seat at least 6 here.
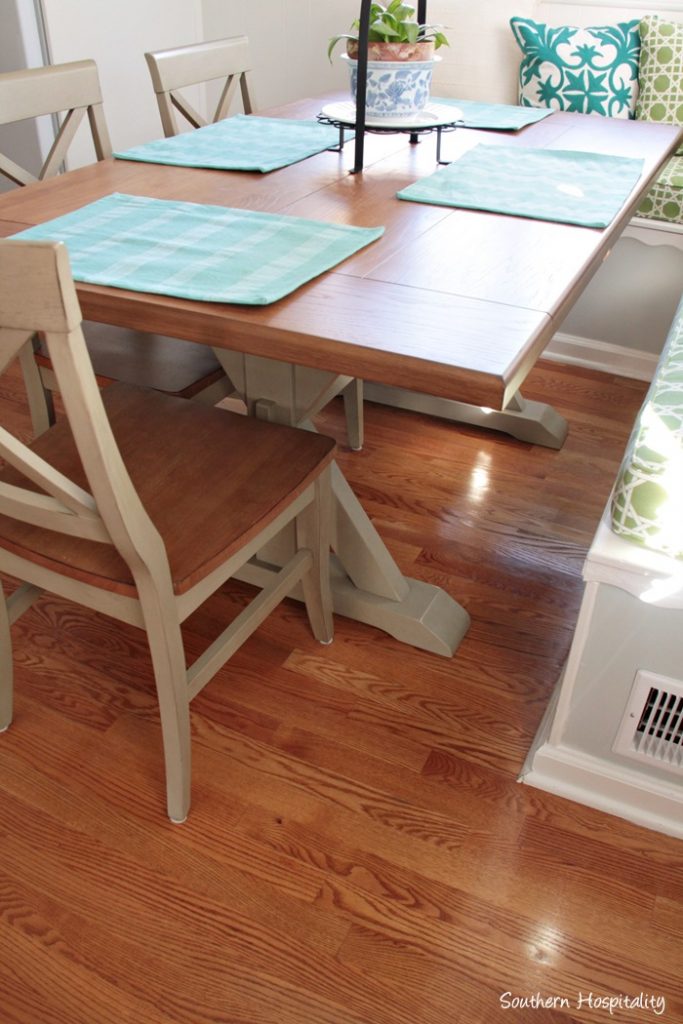
It’s a farmhouse style trestle table.
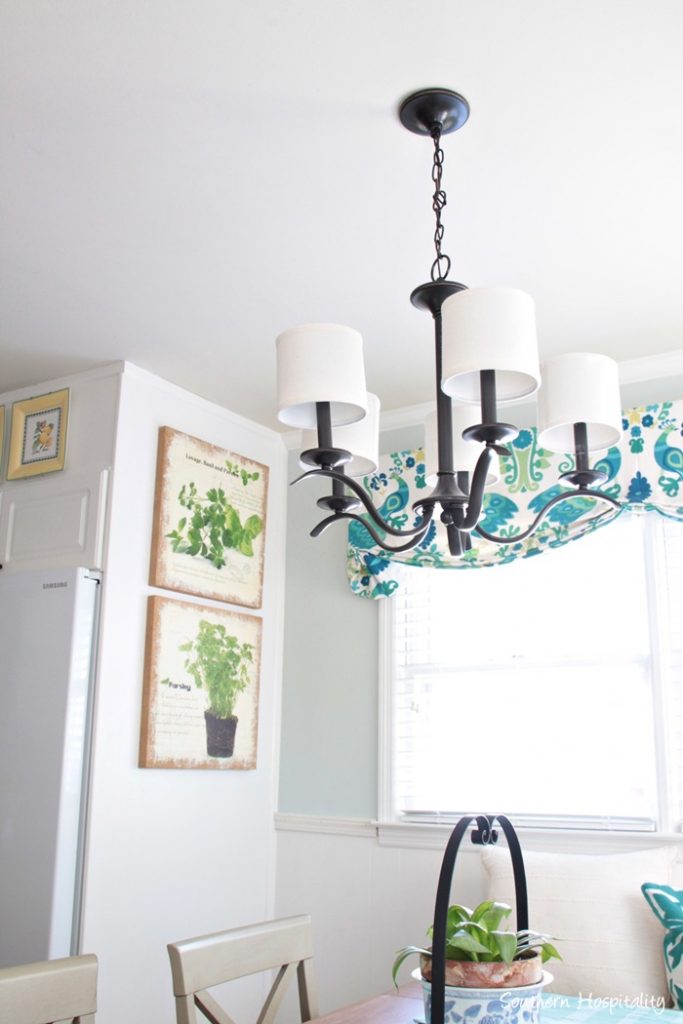
Andrea found those pretty herb art pieces at a local store and texted them to me. I said yes, they would be great in here.
Light fixture from Lowes.
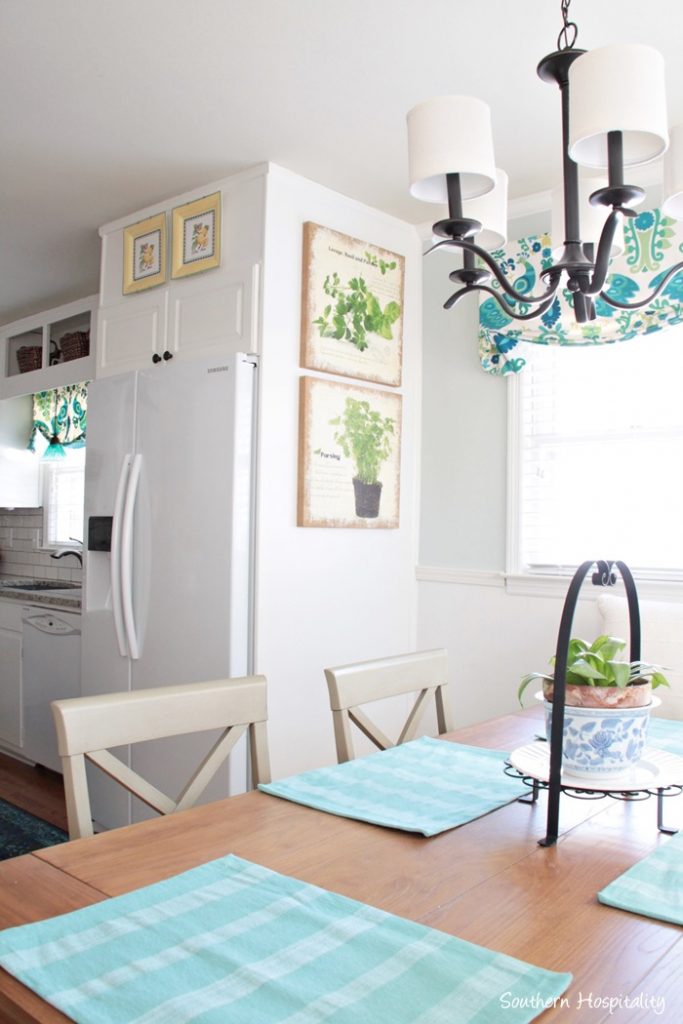
This space looks so different from before.
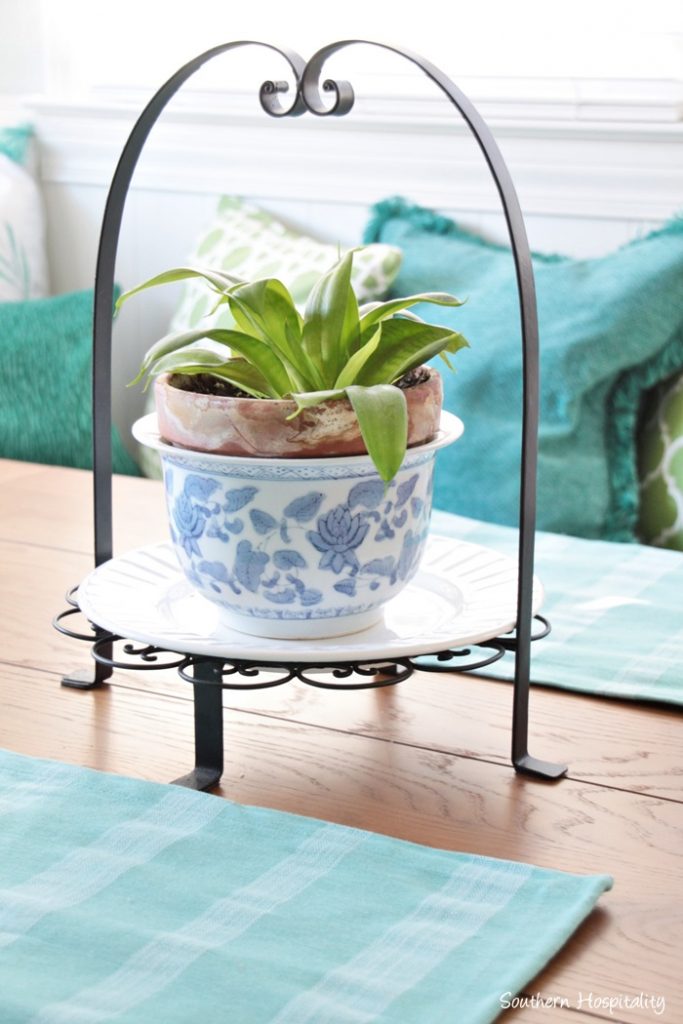
A cute plant adds some color to the table.
I hope you enjoyed this kitchen renovation as much as I did! Nothing gives me greater joy than seeing a room transform into something better and more enjoyable. With all the spaces I’ve ever done, it’s always such a wonderful feeling to look back at the Before pictures and see how far a room has come. I saw it in my own house and now Andrea and David get to experience it in their kitchen.
We have MANY more rooms to move through in their house, so stay tuned for more room makeovers next year. We’re taking this house out of the 50’s and 60’s and bringing it right up to the 21st century. Woohoo for that! It might be slow, but we will get there eventually and I’ll share it all with you along the way.
Andrea and David are thrilled with how their home is looking and now can’t wait to finish all the other rooms too!
Andrea gave me a ballpark of what they spent on the space to freshen it up. They did hire out part of it in painting the cabinets and walls, electrical, and plumbing, so that factored in the cost. With granite, sink, appliances, back splash, island, lighting, window treatments, furniture, rustic shelves, accessories, etc. they spent around $10K. It sounds like quite a bit, but it’s a great way to update a kitchen without completely gutting it!
If you love this project, please pin it for later!
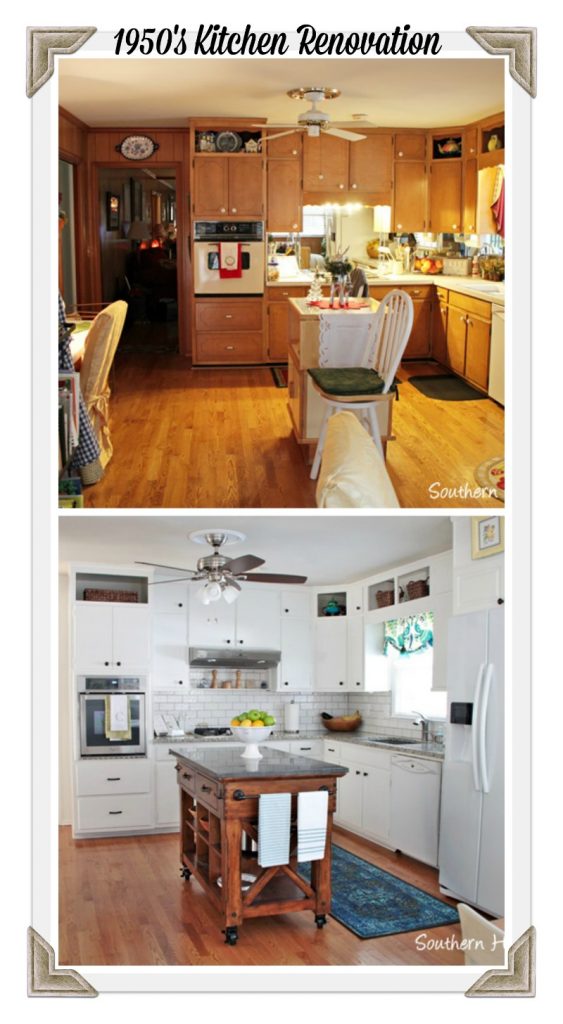


Love the color scheme of blues and greens, plus the warm wood with the white. Gorgeous transformation!
Absolutely gorgeous!! I can’t wait to show my mom and dad so they can paint their paneling 🙂
What you’ve done in the kitchen is gorgeous! That island is simply beautiful and goes perfectly with everything. I cannot get over how much bigger it looks but just getting rid of the fou fou and painting the paneling was a major happening!!! I love all of it……..
Wowwww! That is an amazing transformation, so fresh, clean, and colorful. It is wonderful to see a makeover done by “real” people with budget and time constraints…instead of unlimited $$$ and help out the wazoo. All three of you should be extremely proud!
Beautiful!
Absolutely transformed! I’m amazed. Love the banquette especially. Good job.
Late, but had to look.
Knew it would be fab, it is.
However, that first pic.
Let’s go, my eyes said.
Paint downspouts copper color. They disappear and no longer behave as ‘columns’. Counterintuitively, long horizontal gutter needs painting copper color too. House is shoebox long, narrow and ‘low hung’. Painting entire gutter length copper color pushes it upward into the roof. Promise. Double dog promise. Height of the house will rise. Again, promise.
Replace shutters with a single shutter scaled to glass width at each window. Shutters to left of front door placed to left of windows. Shutters to right of front door placed to right of windows.
Paint new shutters that fabulous blue/black copied from the rug next to their new kitchen island.
Paint lattice fence panel to right of house the same blue/black from kitchen rug.
Paint white iron at front door a tone darker than shutters.
Remove flag from front door zone, too crowded.
Paint front door teal blue copied from valences in ‘after’ pics of kitchen.
These are all easy things to do.
Landscaping? Easy too. There is zero entry to the home from the front curb, start there…..
Garden & Be Well, XO T
Looks great! This gives me ideas for my own ranch home remodel.
Very nice transformation! They already had really good light coming in but now the light is enhanced with all the white instead of being absorbed by the wood tones. One suggestion about the microwave. The new place above the oven seems incredibly high and even perhaps dangerous. In my kitchen the microwave is below my counter. It appears that large drawer below the oven doesn’t close properly from the photo. Why not remove that and trim it out, add a panel for it to rest on and move it there? Much safer and handier.
Lovely job, Rhoda! What a striking change! I love the new color scheme and built in nook especially. Congrats on a gorgeous project!
THIS! Wow! How I’ve longed for a “one stop shopping” (so to speak) for what and how to rekindle my love for the home my husband and I bought 15+ years ago. Everything is here as a guide for how I want to transform my house. The colors, the space, the decor, the furniture, it’s all here. This will be the place I continue to refer back to.
What is the dispenser next to the paper towel holder next to the oven?
I’m not sure that the homeowner will see this. My guess is olive oil maybe?
Wow wow wow, what a beautiful transformation. I also love how you lighten up the space. I know the homeowner got to be bursting with excitement
Oh my goodness, I love the final results of this kitchen! What a transformation! I’m getting my kitchen cabinets redone by a cabinet refinishing company, and I’d love to use the same paint color as you! I’ve seen so many kitchens on Pinterest using White Dove by Benjamin Moore, that I’m convinced it will look good on my cabinets too.