I hope you all are ready for some fun today. Prepared to be inspired to try something new!
In case you missed my kitchen project using beadboard wallpaper, that is the one that got me hooked. Go back and check that out if you missed it. After using it so successfully on the ends of my kitchen and bathroom cabinets, I was itching to try it in some other spots and this bathroom makeover seemed like the perfect place to do that.
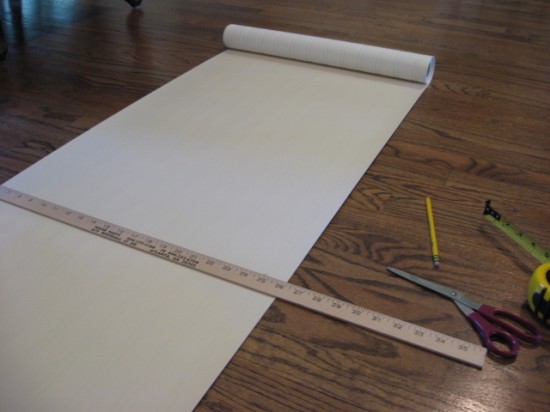
I laid out the wallpaper in my livingroom floor and began cutting the pieces, after deciding the height I wanted the paper to come to on the wall.
And the decision was made to have the chair rail sit right on top of the light switch on this wall, so that’s where my line went. I made the brilliant deduction that putting up the paper first would be the way to go. 🙂 Then, I would add the chair rail molding right on top of the paper. Easy! I bought one 8′ length of chair rail molding and cut it to fit this wall space with my mitre box.
Then, again I wet the back of the pre-pasted paper in the bathtub and let it sit for 5 minutes before applying it right to the wall. No priming necessary.
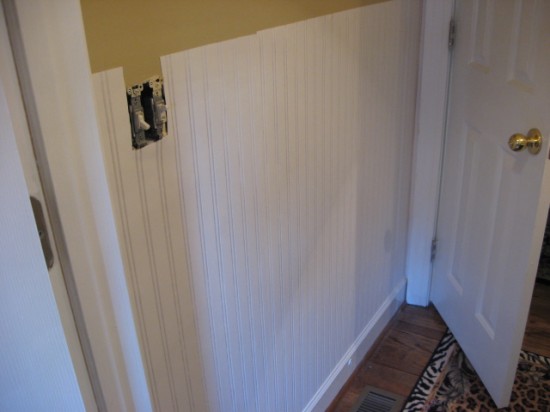
I got all the pieces cut and hung up, being careful to cut around the light switch. 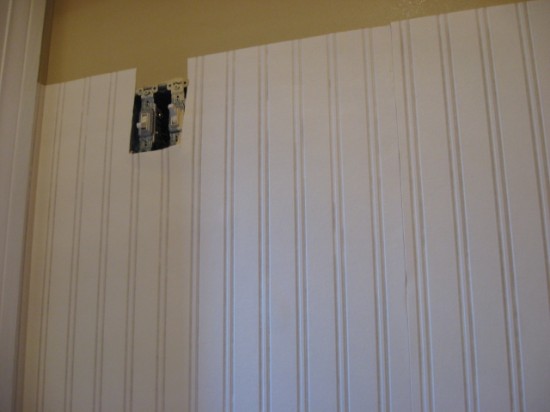
As I did in the kitchen, I went back with some caulking and added that in the seams to make them disappear even more. A couple of spots on my seams seemed to dry out too fast without sticking, so I took some craft glue and swiped it down the inside edges and pressed down really good. So, if you have that problem, just add a tiny bit of glue to the edges. Then caulk! After painting it all with your trim paint, it shouldn’t come up at all.
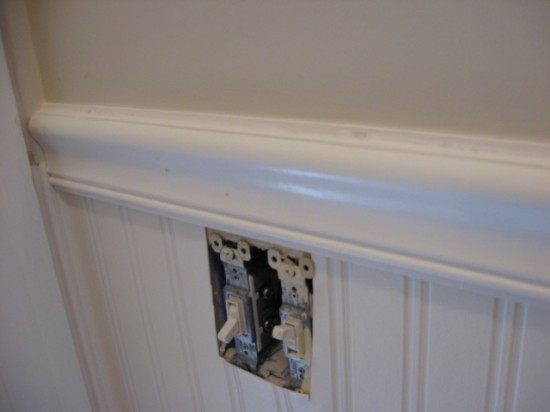
I prepainted the molding with 2 coats of my white trim paint and then hammered it in place with some finish nails. This time I did a better job of counter sinking them and caulking to hide them. See that tiny little wall edge to the left? I wrapped the wallpaper around that corner too, just for continuity.
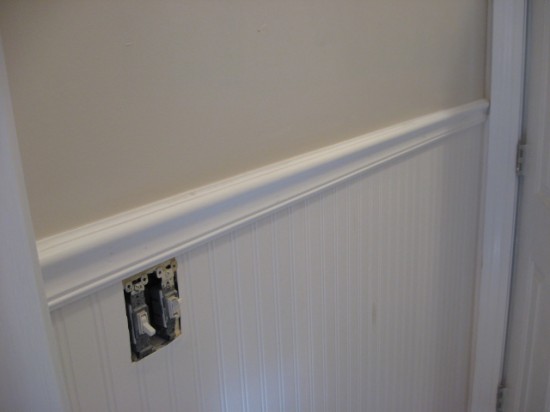
After 2 coats of trim paint on the paper and touch-ups on the molding, that was all there was to it. Truly an easy project and I think a great way to add some architectural interest to a small room. I thought that just this one wall was all that was needed and I really love it.
The Antique White paint really transformed this space too and I love the lighter color and feel in here.
And with the light switch cover back in place, it looks like a new room.
Here are a few closeups so you can see how it looks. It really does look like the real thing, but of course, it doesn’t FEEL like the real thing. That I can live with.
To me, this is the perfect solution if you don’t want to go to the trouble of cutting real beadboard and taking out baseboards. This is the next best thing, for a very cost-effective price. I spent $25 on that roll of beadboard wallpaper and did my kitchen cabinet project and this one. And I still have a little bit left for something else. If you didn’t see the entire makeover on this bathroom, go over to the Homegoods giveaway post to see it all. It’s quite the transformation! In fact, if you haven’t signed up yet, the giveaway will be on for almost a month, so don’t miss out.
I’m very happy to say that I’m now carrying the Wall Doctor Graham Brown paintable beadboard wallpaper in my online shop so click HERE to order it for yourself! You will love this stuff! There are other versions of this wallpaper, but I can tell you the Graham Brown version is the ONLY one I would use. The others pale in comparison.
************************************************************
One of my readers, Kristen, who doesn’t have a blog also used the beadboard wallpaper on her kitchen backsplash, so I’m going to share those with you here:
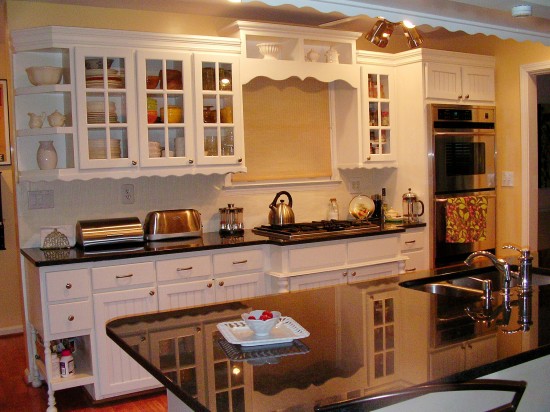
Doesn’t Kristen have a beautiful kitchen? She used the beadboard wallpaper to cover a handmade tile backsplash that wasn’t her style and this was a good temporary solution until she commits to something else. She said she’d love to use it in more spots too. 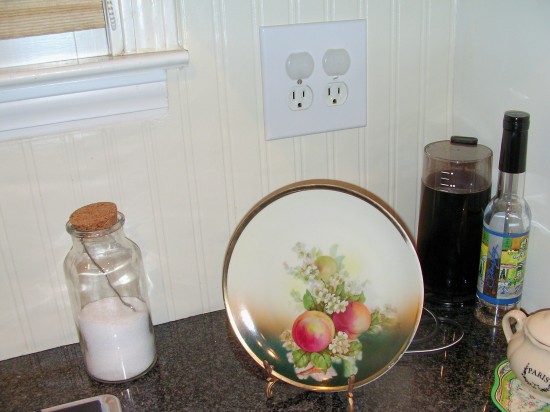
Thanks, Kristen for sharing your project with us too!
So, I can’t wait to see what y’all have done with beadboard wallpaper. You know how to play: add your link to Mr. Linky so that we can all come by and see your project too. This is going to be fun!
- Be sure and add your permalink (the link to your post) and not just your blog address.
- Add a link back to THIS post, so that all of your friends can come over to the party too.
Let’s get inspired!
Beadboard Wallpaper party Participants
Powered by… Mister Linky’s Magical Widgets.


Another fantastic project by you. Thank you for hosting this party. I appreciate that. You are one talented lady who inspires so many of us. You are generous in sharing your knowledge and experience. I hope this post will inspire others to expand on their creativity by using this wonderful product. Blessings Rhoda!
it just looks so ‘real’!!!!!! i think i’ll have to put it in the kids’ bathroom!!! love it!!!
I cannot say thank you enough for bringing this wallpaper into my life (ha ha). Your post came at the perfect moment when I was about to purchase real wood panels.
Your projects are always an inspiration.
PS. I had NO idea you could paint this stuff. Now I’m off to do just that.
looks great rhoda! i love it! i just posted up pics of my craftroom with the makeover items that i put in there. come check it out!
Now seeing the close-up pic…it really is incredible! You may switch my allegiance from a faux seagrass wallpaper I’ve got my eye on for our half bath. 🙂
This is awesome!!
It looks so real.
thanks for all the pics and instructions.
blessings
barbara jean
Wallpaper…OVER TILE?????? Stop by my blog and tell me how…i have the most Godawful BATHROOM tile in my kitchen, i have NO IDEA what the previous owners were thinking…having the kitchen re-done is NOT in our budget..if i could wallpaper over it, i would be one happy camper!!! Thanks…great blog!
Dear CatHerder,
It has been 3 years since you posted this. Did you get an solution for covering over your bathroom tile? I have pepto-bismuth pink tile trimmed in blue from the early fifties. Can’t afford new tile. Would love to paint over it or “something”. I am sick, sick, sick of it. Does this mean you have multiple cats. I do.
You just blow me away, chickadee! Love this!!
Hugs,
Susan
LOVE the backsplash idea!!!! Our builder didn’t do our tile backsplash and I am just left w/ plain ole’ walls. 🙂 This is such an affordable idea!!! I think I just found a weekend project. I think I could even do this under our bar….whew…now the ideas or flowing. Thanks!
stephanie
Wow that looks absolutely fantastic. Need to find some of this wallpaper – you would think it would be easily available here in the UK but I haven’t seen any yet 🙁
Rhoda, it’s so pretty! And I love the idea of using it as a backsplash! We are in desperate need to redo our kitchen but I haven’t decided what to do for my backsplash…this gives me a great idea!
okay, I am convinced to give this product a try around the kitchen bar area where my 9 yr old likes to mark up the painted drywall with his sneakers…
Is anyone else going to any of the Home Depot FREE “Do it Herself” workshops this Thursday evening? I found out about it on another blog (sorry can’t remember which one) and my best friend and I are both going to get some hands on practice before we tackle refinishing different cabinets in our homes, and the hubby’s are thrilled! okay, not really that thrilled. HA..
Love your kitchen backsplash idea to cover up old tile, Kristen! I may use your idea on my plain painted wall behind my stove.
Beautiful blog, Rhoda! Have a blessed day!
Rhoda,
I’ve been wanting to put beadboard in my powder room but I was dreading the mess of ripping out the baseboards. I’m so inspired by this post.
Did you say you painted the wallpaper after you put it up? Or did you leave it as it came on the roll?
Hi, Amy! YES! it is meant to be painted, so that just makes it look all that much more real. You paint it just like you would your trim all the same color. Give it a try! I really can’t say enough good things about it.
Hi Rhoda,
You are such an inspiration. Your house is absolutely gorgeous and I look forward to trying some of the projects you have shown us when we move into our first house next month!!! I adore the Antique White paint in your bathroom. Do you mind me asking who makes it?
Thanks so much,
Claudia
I was going to post about this tomorrow, but saw you had a party going on so I had to join! Thank for your inspiration Rhoda! I love this stuff! 🙂
Carrie
Rhoda, thank you so much for including the pictures of my backsplash! I can’t wait to show my husband all the positive comments, because he was shaking his head at the idea of me using it as a backsplash! Of course now he really likes it.
It was fun to see all the great ideas everyone else had.
Thanks again Rhoda for sharing your blog with me today.
Kristen
Claudia, I used the same color in my dining room earlier this spring & it is a dead-on match to Sherwin Williams Antique White. It’s a long story, but we had a bunch of left over paint from grandma’s house & I actually got a quart of the SW Antique White to try out & discovered that all that leftover paint was a dead match, so why buy more? Try out a sample quart & I think you’ll love it.
Rhoda,
For your reader’s backsplash (Kristen), did she go DIRECTLY over the tile with the wallpaper? Wouldn’t that show the grout seams? I had planned on pulling down my tile and then covering up the *probable* drywall mess with REAL beadboard panels. I would dearly love to avoid having to do that by using the beadboard wallpaper, but need an explanation as to why the grout lines won’t show. Thanks!
What a great idea! It looks wonderful…and your tutorial was easy to follow. I’ve just found your blog and love it! I need lessons on how to begin one. *embarrassed smile*
Kristen’s backsplash is beautiful…the whole kitchen is beautiful!
Thanks ladies for sharing your homes with us.