• Skip to primary navigation
  • Skip to main content
  • Skip to primary sidebar
  • Skip to footer
  • Partner
  • About
  • Contact
  • Privacy Policy

Southern Hospitality

Adventures in Decorating, Thrifting, Cooking, Fashion & Gardening

  • My Home
  • Categories
    • A+ Blogs
    • My Blog Story
    • Decorating
    • DIY/How-To
    • Family
    • Gardening
    • In the Kitchen
    • My Home Tours
    • Thrifting
    • Travel
  • DIY Gallery
  • Fashion
  • Feature Friday
  • Shop My Home
    • Email
    • Facebook
    • Instagram
    • Pinterest
    • RSS
    • Twitter

Covering a Lampshade

October 14, 2008 By Rhoda 84 Comments

4221 shares
  • Share
  • Tweet

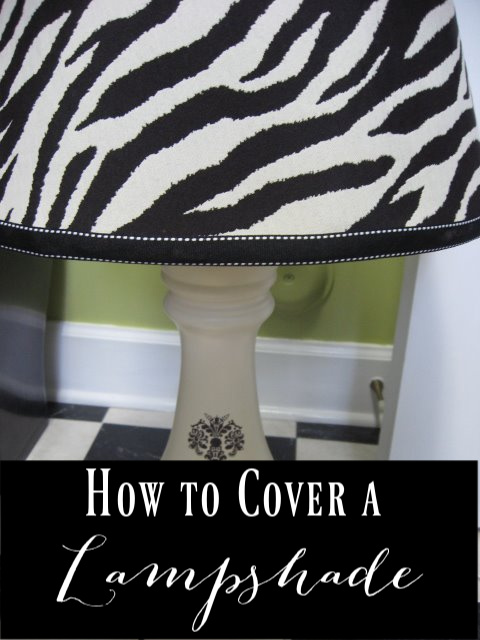
How to cover a lampshade with a simple method and using a glue gun. Cut fabric, fold and glue and before you know it, you’ll have a new lampshade
How to Cover A Lampshade

How to Cover A Lampshade

Covering a Lampshade So, I’ve done a lampshade covering tutorial before, but thought I’d throw it in here again, with my newest project underway. You’ve seen the yardsale lamps I found for the guestroom redo & I spied some fabric that I really wanted to use on these lamps, so that meant recovering my own. That also meant I sure didn’t want to pay much for lampshades that I was just going to recover. So, back to the junk store that I told you about last year..where I found 2 of these beauties for $1 each…just right for this budget. You can see they were in sad shape, but the price was right. The fabric on there was literally falling apart, so I went ahead and ripped it off.
Covering a Lampshade And ended up with just the metal frame. Now, I’ve never covered a lamp with just the metal frame before, but I figured I’d wing it. Since my new fabric needed something to stick to, I pulled out some old white lining fabric I had laying around.
Covering a Lampshade And pieced it together, hot gluing it at the top and bottom of the framing, overlapping it as I went around. I pulled it as tight as I could to get a taut framework for my new fabric.
Covering a Lampshade I snipped off the extra fabric and turned it just under the top and bottom of the frame, pulling and gluing, pulling and gluing (man, does that hot glue hurt!).
Covering a Lampshade It looked like this when I was finished. Nothing pretty about it, but it’s not going to stay like this.

Covering a LampshadeFound this pretty zebra fabric at Hobby Lobby (30% off this week) and picked up 2 yards. Enough to recover the lampshades AND to cover that pretty little Big Lots bench too. I showed you how to make a pattern for your shade before, but here’s a refresher. This is just old wrapping paper that came out of a shopping bag that is pieced together. Lay your shade on it and pencil around the top & bottom (leaving about 1″ above and below) as you roll the shade across it, meeting at the back. This gives you a pattern to follow when you’re cutting out the fabric. I cut out 2 pieces for my shades. I wing things a lot and didn’t even pin this down, just held with one hand and cut with the other. I take shortcuts like that. Did I tell you I’m not a perfectionist. Well, I’m not. Covering a Lampshade I missed a couple of pics, but next step is to spray the outside of the shade (on top of my white fabric) with spray adhesive. This stuff works great on a project like this. It keeps that fabric smooth and will help it lay down correctly. So above, I’ve already sprayed with adhesive spray and have started to smooth out the fabric. This part takes a little time, but you can pull the fabric back up and keep working with it until you smooth out the wrinkles. Work your way around until both pieces meet on the back of the shade.
covering a lampshade with fabric Then you’ll want to turn under one side and glue it down. I also take the iron and run over that seam to help it stay down. I used my glue gun to then pull and turn under the top and bottom edges just like the white fabric that I put on first. Pull and glue until you get it all tucked under the inside of the shade. You’ll have to trim it again with scissors. Doesn’t matter how neat the inside is anyway, that won’t be seen. I used a little fabric glue on the main seam but the glue gun would be fine too. I then added some simple ribbon from Hobby Lobby around the top and bottom of the shades with fabric glue and here it is….
covering a lampshade with fabric Two finished lamps for the guestroom redo. Total cost: $38 for both lamps. I’d say that’s pretty cost effective, wouldn’t you?
covering a lampshade with fabric And they are custom lamps, one of a kind…even better! So don’t throw out those old lampshades. Look at them in a whole new light…get it?!

Covering a Lampshade

Related


Don't Miss a Post, join my list!

Filed Under: Decorating Ideas, Projects and How-To 84 Comments

Reader Interactions

Comments

  1. virginia says

    June 2, 2013 at 6:43 am

    you and i are alot alike. i never measure anything. and it comes out right somehow. I like your ideas. Thanks V

    Reply
  2. Deb Smith says

    June 13, 2014 at 4:54 pm

    I absolutely love your blog and web site, you have done such and awesome job, and you inspire me alot, i have a whole basement of used furnature that i have bought here and there, when I read your blog you give me such great ideas , and just wanted to say thank you!
    Happy creating and blogging
    Deb Smith

    Reply
  3. Bridget says

    January 12, 2015 at 12:07 pm

    Thanks so much for sharing this project! I have had an old standing lamp in my living room for years. You can’t buy products like the one I have. For years, I’ve covered it with a large fashionable scarf. The lining is dry-rotted. Your tutorial is the first I’ve seen where you replace the lining. Now, I can do this!

    Reply
« Older Comments

Trackbacks

  1. Bedroom Makeover, part 9: Mood lighting & 4 tips says:
    September 20, 2010 at 7:05 am

    […] your lampshades with fabric, so I won’t go into those details.   (Southern Hospitality has a kickass tutorial here, Centsational Girl has one,  and YHL has one as well.) But I do have a few tips of my own to […]

    Reply

Leave a Reply Cancel reply

Your email address will not be published. Required fields are marked *

Recipe Rating


Primary Sidebar

Thanks for stopping by! I’m Rhoda, from Atlanta, GA and I love decorating and DIY projects. Decorating a home doesn’t have to cost a fortune and I’ve spent years thrifting at antiques markets and yard sales, finding those treasures that make a home unique. I’m here to inspire and encourage other women to find their own inner creativity. Won’t you join me?

Click Here

Click Here

Email Series
How to Decorate in
Classic Timeless Style
.....without breaking the bank!

House Renovation Journey!

Our Paint Colors

Archives

Categories

Footer Widget Header2

Featured here:

Better Homes and Gardens
Atlanta Magazine
Better Homes and Gardens

Footer

  • Email
  • Facebook
  • Instagram
  • Pinterest
  • RSS
  • Twitter
  • Home
  • Contact
  • Partner

Copyright © 2023 · Southern Hospitality · Blog Design by Little Blue Deer
Privacy Policy

Get my FREE Email Series How to Decorate in Classic Timeless Style....without breaking the bank!
After years of decorating my own homes, I've learned a few tricks on how to create a classic home on a budget. Hope you'll join me!
Your information will *never* be shared or sold to a 3rd party.