This post is sponsored by Wayfair.
Hope you’re all having a wonderful Sunday! We’ve been busy around here with several things going on, some big and some small. The bathroom is coming along and if you’ve watched any of my Instagram stories, you will have seen some sneak peeks. It’s looking SO good. I still have to find someone to install the glass shower doors and I am getting that wallpaper I talked about earlier, so this project is coming together exactly as I had hoped. It’s not inexpensive to do a bathroom renovation and we couldn’t have done this one right now if not for the help from Wayfair. All the materials came from Wayfair for the project, including tile, vanity, light fixture, which is much of what was needed for the whole project.
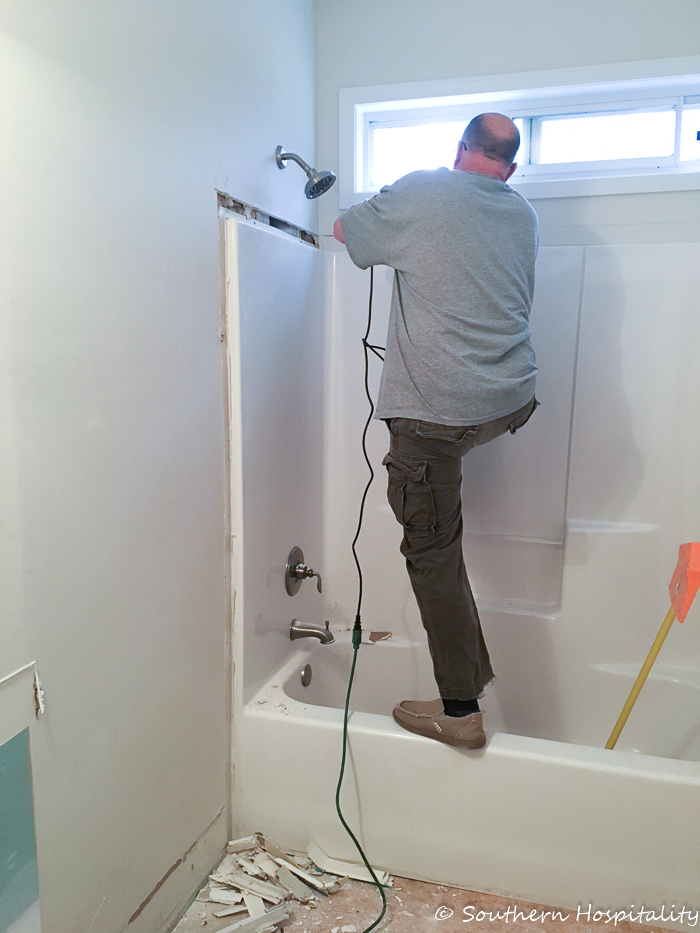
I hired the same tile guy that I hired for my previous house black and white master bathroom that I did almost 2 years ago. He did a really good job and I was happy with him, so hired him again for this one. We decided to try to do as much as we could on this renvation to keep the costs down as much as possible, but it still adds up, even with getting most of the materials sponsored. I’ll do a breakdown on everything when I get the final post up so you can see how much it costs to do a bathroom. I haven’t added up everything yet, because it will cost to install the shower door and also get the wallpaper hung so that’s an extra few hundred dollars that will be added in the budget.
Here’s a look at the first post I did with the Before pics of this guest bath. It was boring and blah!
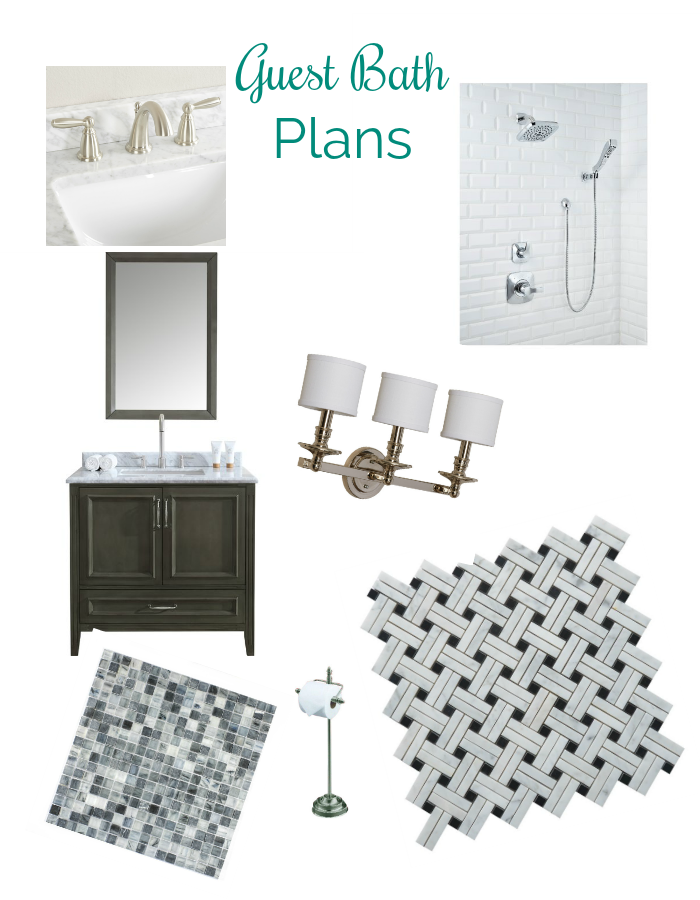
Here’s a look again at the mood board I put together for this guest bath renovation.
I’d say this project will come in a little over $7K, with $3K coming from Wayfair and the rest of it out of our pocket. I l ike to share costs, because I know they are different all over the country and you all like to know these things too. I know I’m always curious what budgets are when I’m watching renovation shows on TV. I’ll share the tile guy’s information at the bottom of the post.
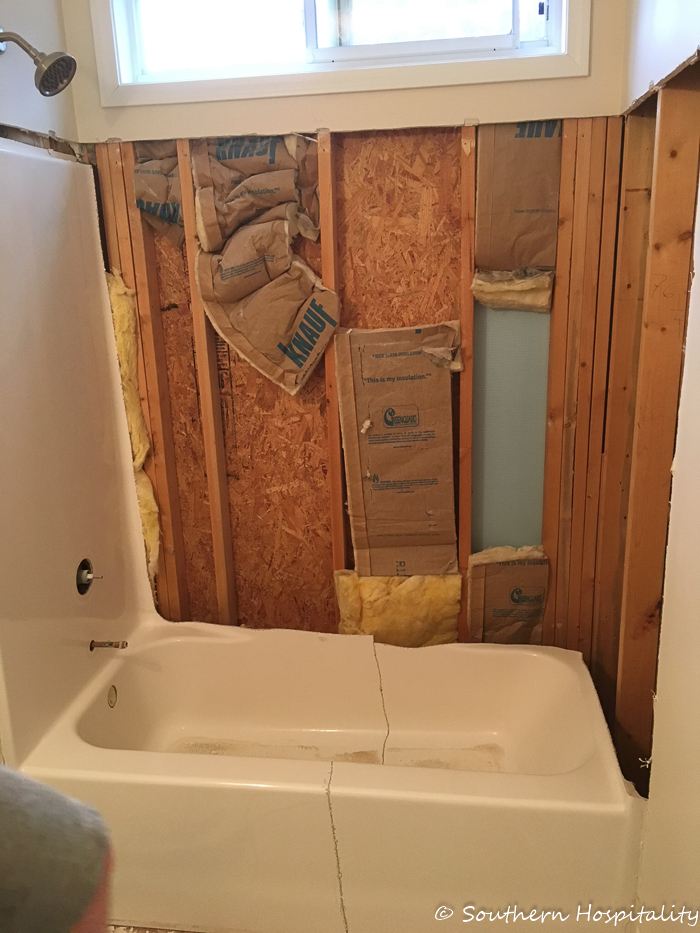
So, to save almost $900, Mark demo’d the tub, vanity, old floor tile and baseboards out of the room. The vanity was pretty easy and I helped him carry it all out. I called the local Habitat for Humanity store and they came and picked up the vanity and countertop/sink/faucet, so I felt good about that getting recycled. Mark used one of his multi-tool cutters to cut through the fiberglass shower to get the tub out of there. Since there’s no way to take it out in one piece, it made sense to cut it into smaller manageable pieces and that’s what we did. He cut out the pieces and I hauled them outside.
Our local city of Acworth hauls away trash on certain days of the week, apart from our garbage can pickup, so that helped. We piled all the cardboard boxes, old tile in boxes, and all the demo’d materials out by the curb and they picked it all up, so that was nice.
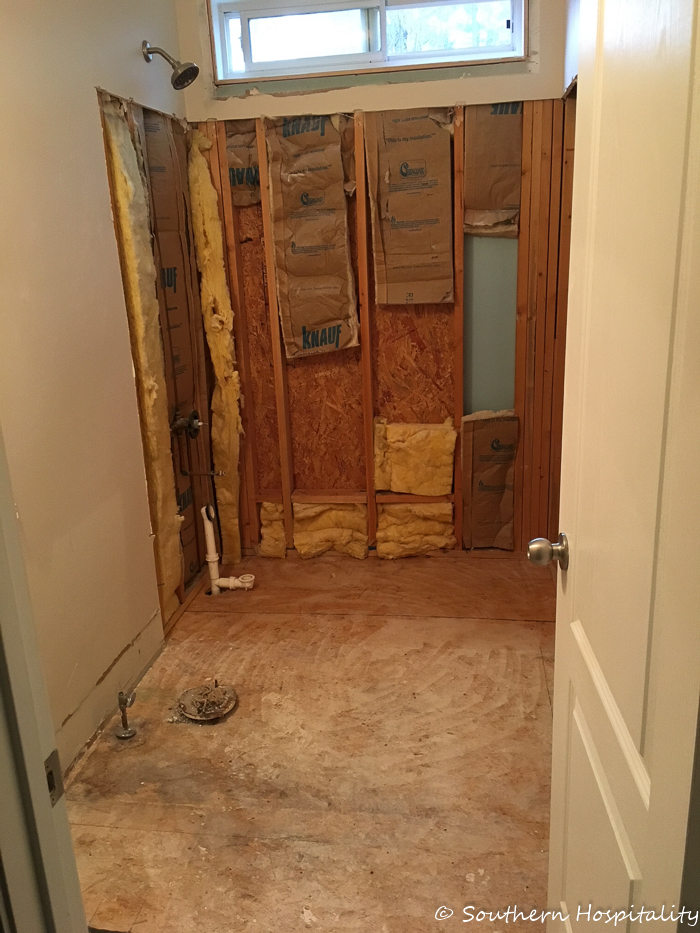
Everything’s out and ready for the tile guy to come in and do his thing.
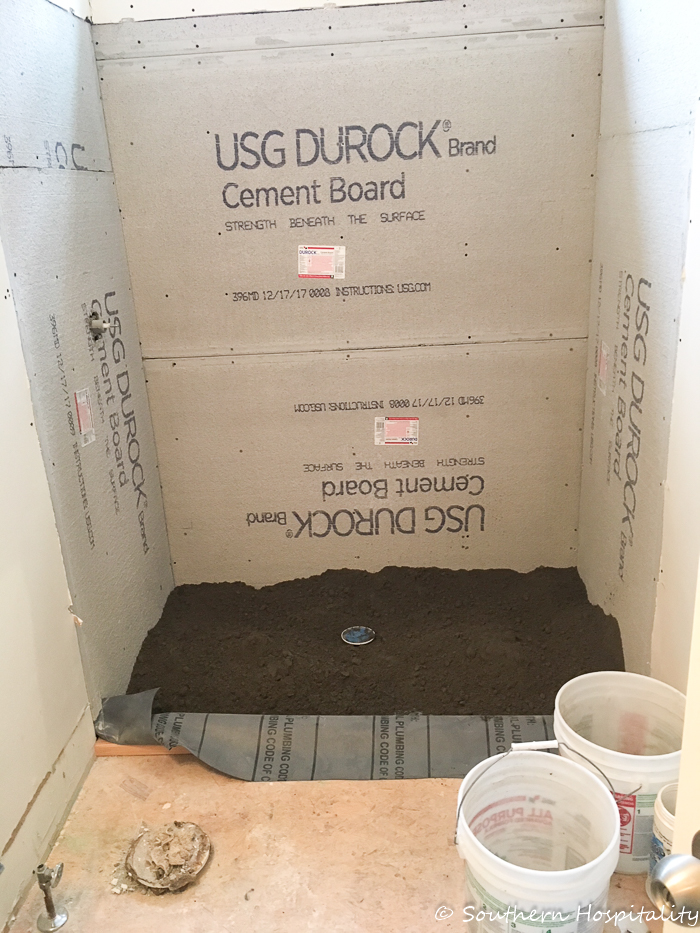
The first day was shower prep and he got all the plumbing done for the sink and shower faucet installation. Since the old one piece tub came out, we were going to do a complete tiled shower floor to ceiling, like I did in my old bathroom. It’s such a great look! We toyed with the idea of just adding in a cast iron white tub and tiling above, but since this space is a guest room downstairs, we thought a beautiful tiled shower would be such a nice look in here and I’m glad we went that direction.
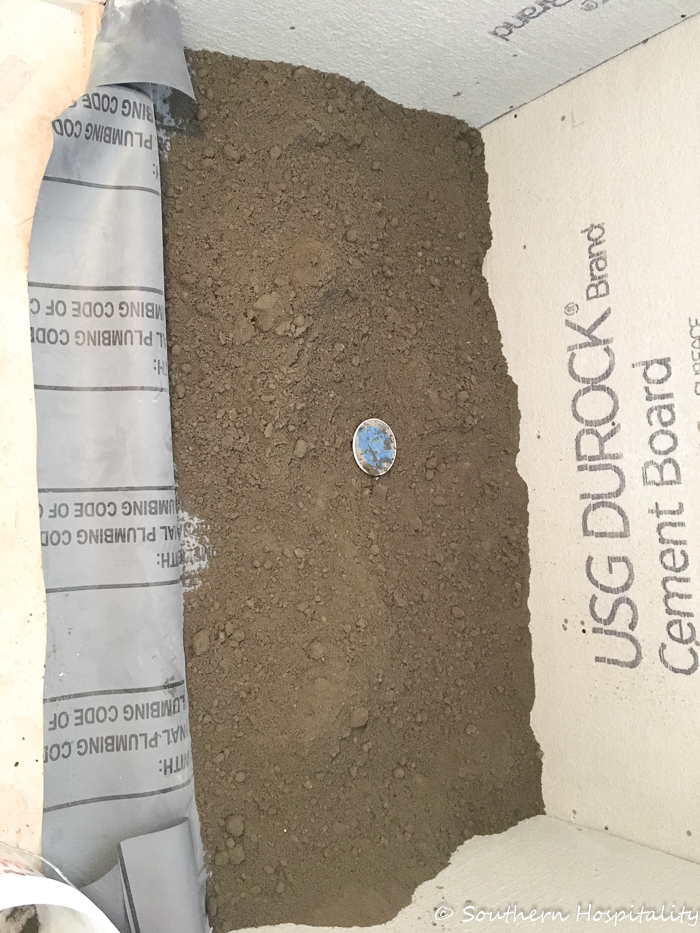
Drain is installed, along with the rubber shower liner and the shower pan mud is added and sloped to the drain. This is looking down at the shower floor sideways, in case you are wondering.
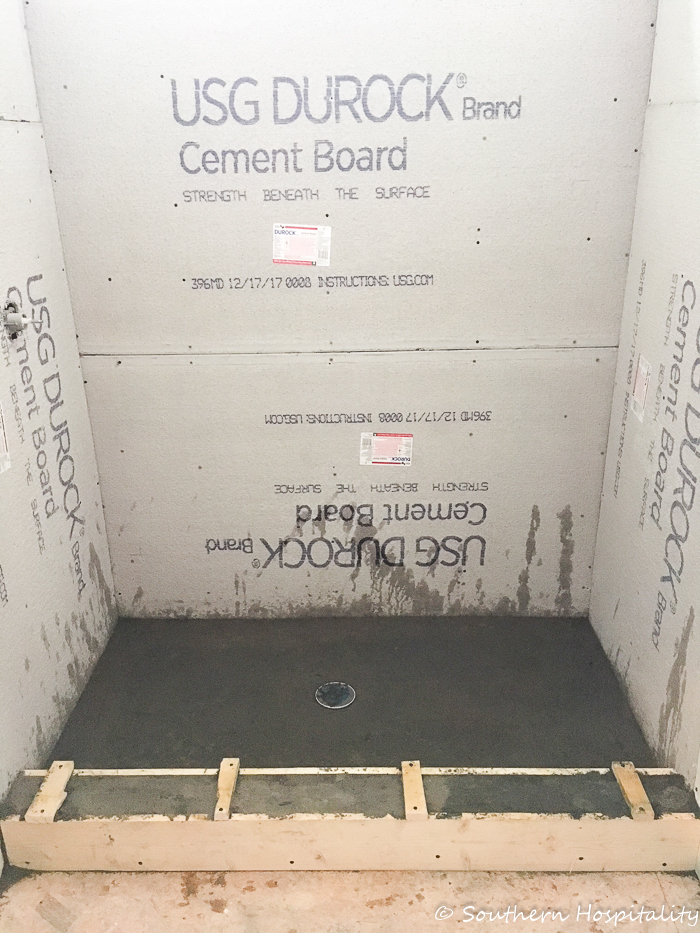
And here’s the shower curb and floor after he finished building it and carefully sloping it correctly towards the drain. Waterproof concrete board goes on the walls for the tile to adhere to.
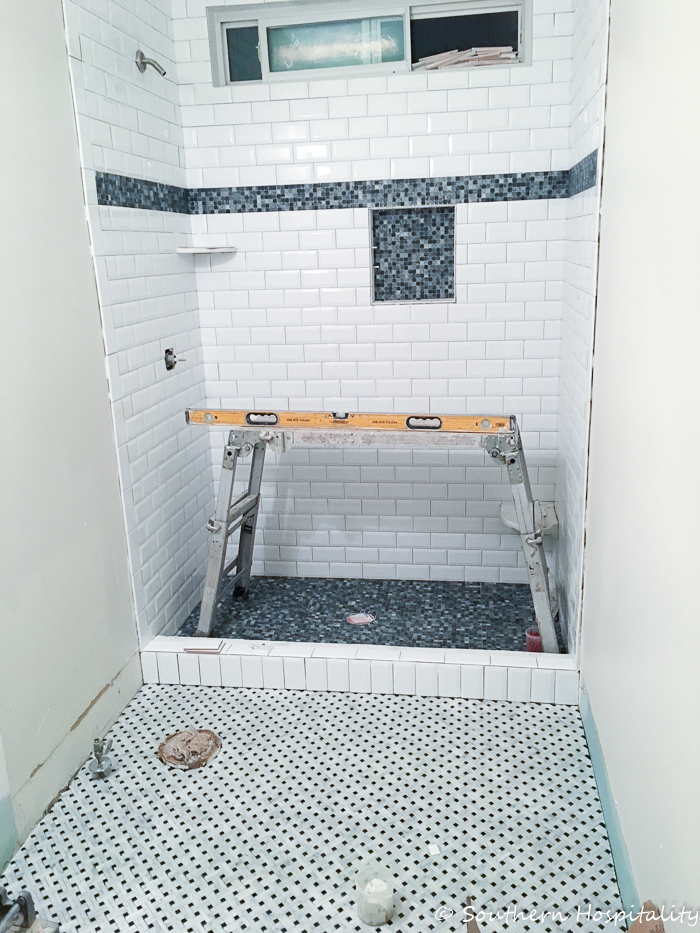
And tada, the magic of tiling! He got the shower done first and then started on the marble basketweave floor. Isn’t it gorgeous?! We took out the wood molding trim around the tall window and he tiled all that too. I made the mistake of not ordering enough white bullnose trim tile, so that delayed things for a few days as I waited for that shipment to come in, but all in all, it worked out great. My tile guy worked with the schedule and then came back and finished the last part all in one day, including setting the vanity and getting the faucets hooked up.
I love the marble mosaic border we chose for the shower floor and the border/niche.
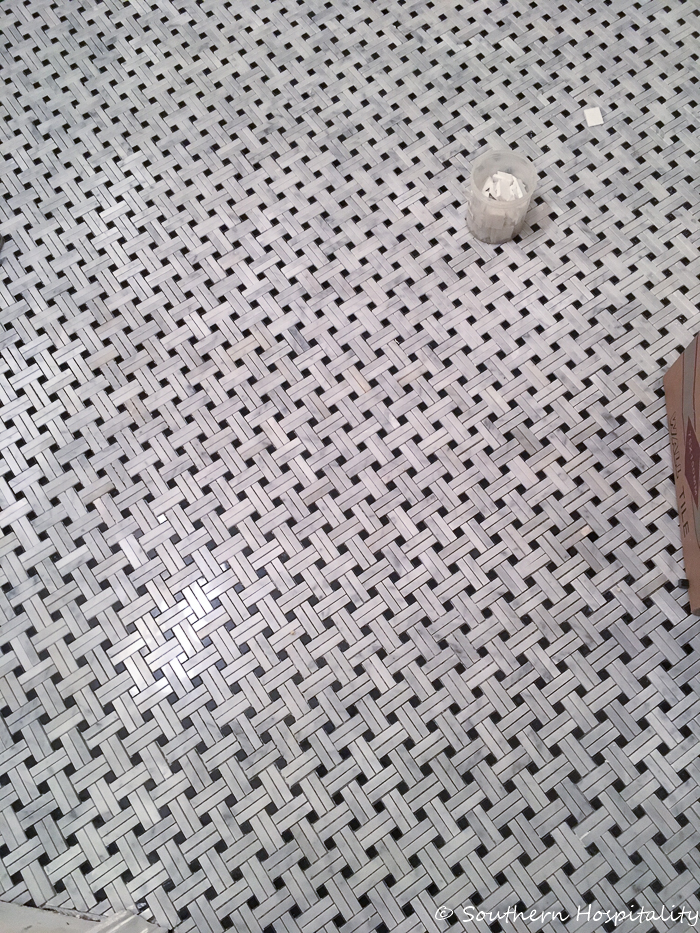
This basketweave tile was already on the diagonal, so it was easy to get it installed with that look. We just love this floor so much!
Again, the tile guy I used is Luis with Keystone Renovations. He’s here in the Atlanta area and has been doing tile work for over 10 years and he does plumbing too. I’ve been very happy with the 2 bathrooms he has completed for me. His number is 404/569-8845.
His labor charge for getting the shower prepped for tiling and plumbing completed, all the tile work/grouting and setting the vanity/faucet and toilet was just over $3,500. From what I hear, that’s a really good price, so we were happy to hire this part out. Redoing a shower is not something we would attempt to tackle ourselves.
Here’s a look again at the products we got from Wayfair. We love these choices (affiliate links)
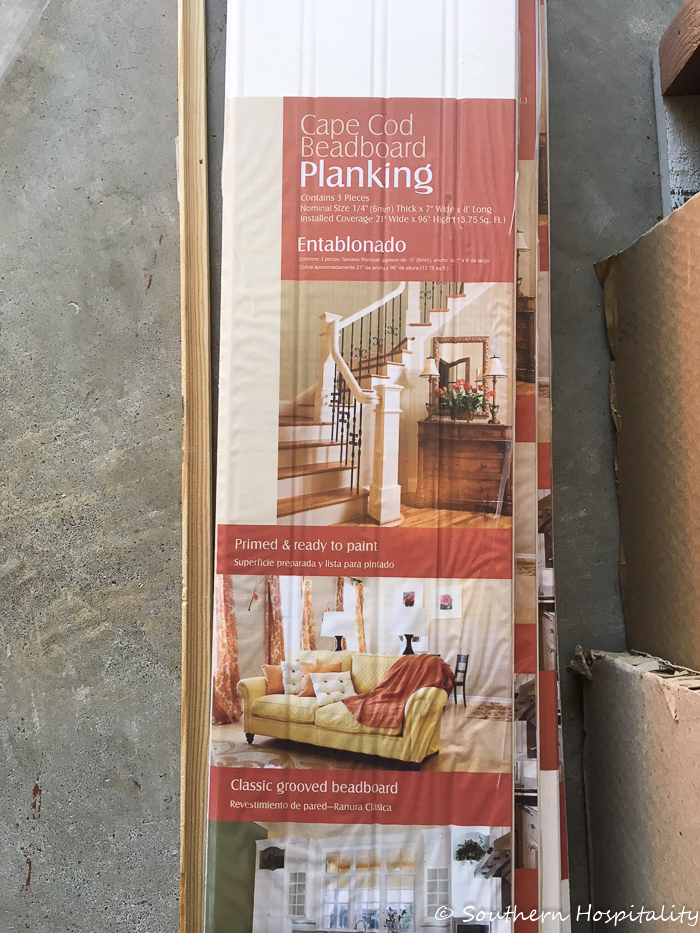
Next, it was time for Mark to do his thing on the walls with Cape Cod beadboard planking. This is what he used in the dining room as well. It’s an MDF product and the panels slide together like a tongue and groove. He’s used this many times in the past, but for some reason, this time they were really hard to slide together, so he’s not sure he’s going to use them again. We do have some shorter pieces that he’s saved from our other projects that he’s going to use going up our staircase, but other than that, I’m not sure he will use them again. The panels were very frustrating to get together for some reason.
But, once they are up and finished, they are beautiful when painted.
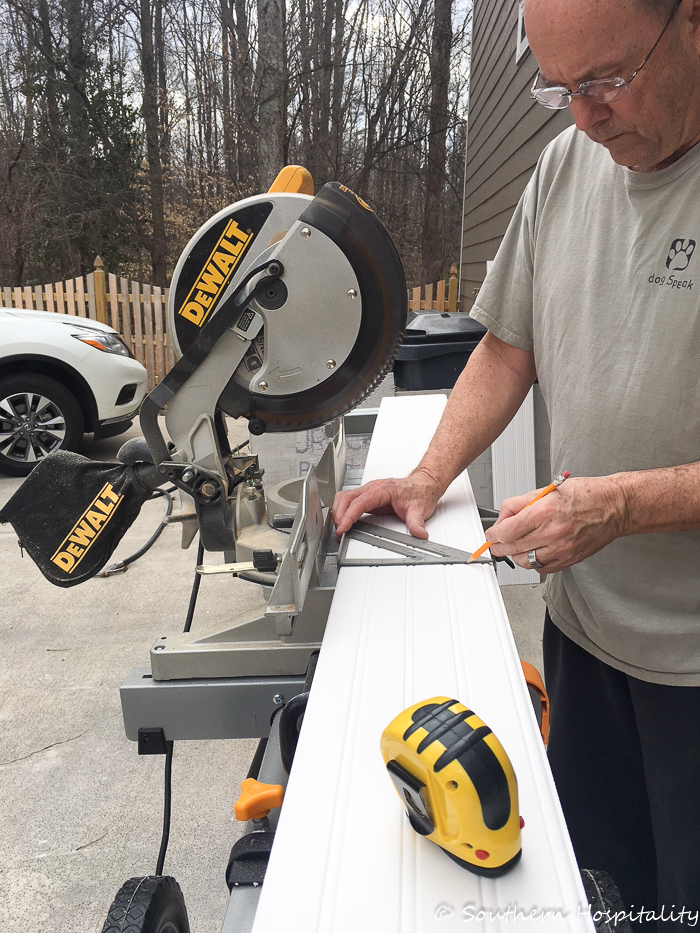
He got out his miter saw and got busy cutting the panels to length. We decided on a 65″ top of the board finish on our beadboard panels. The ceilings in our downstairs is 9′, so this left about 3 and 1/2 feet above the wainscot that would be open. When deciding on heights like this, it’s really a personal preference. We could have gone shorter, but decided that 65″ was about right for the look we wanted in here.
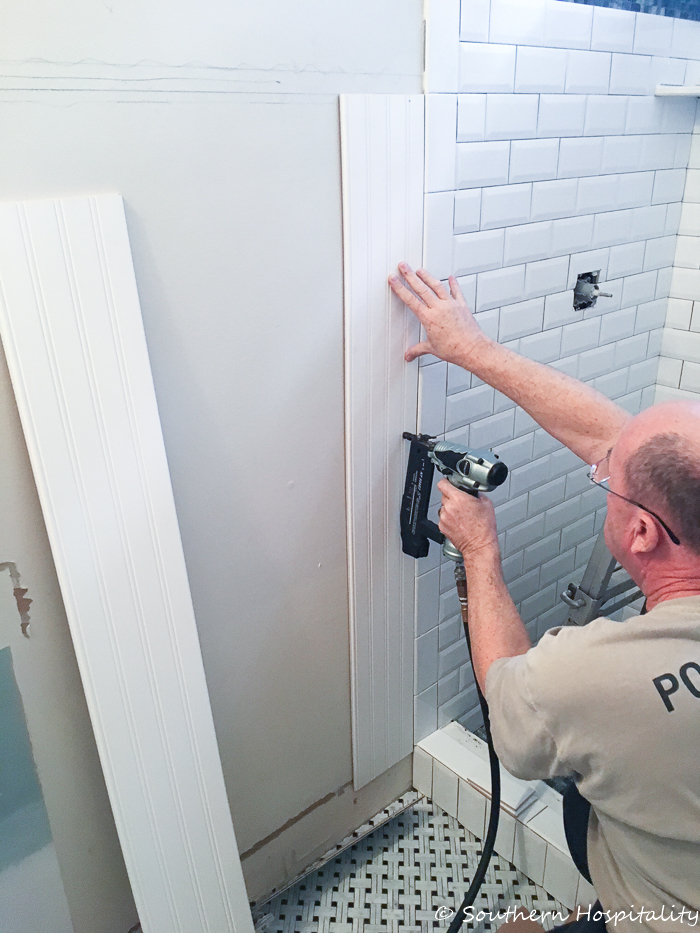
You can see Mark drew out where each piece would sit when finished, with a small trim piece on top of the wainscot and a 5 1/2″ board on top of that, capped off with a small 2″ board on top. You’ll see it when it all comes together.
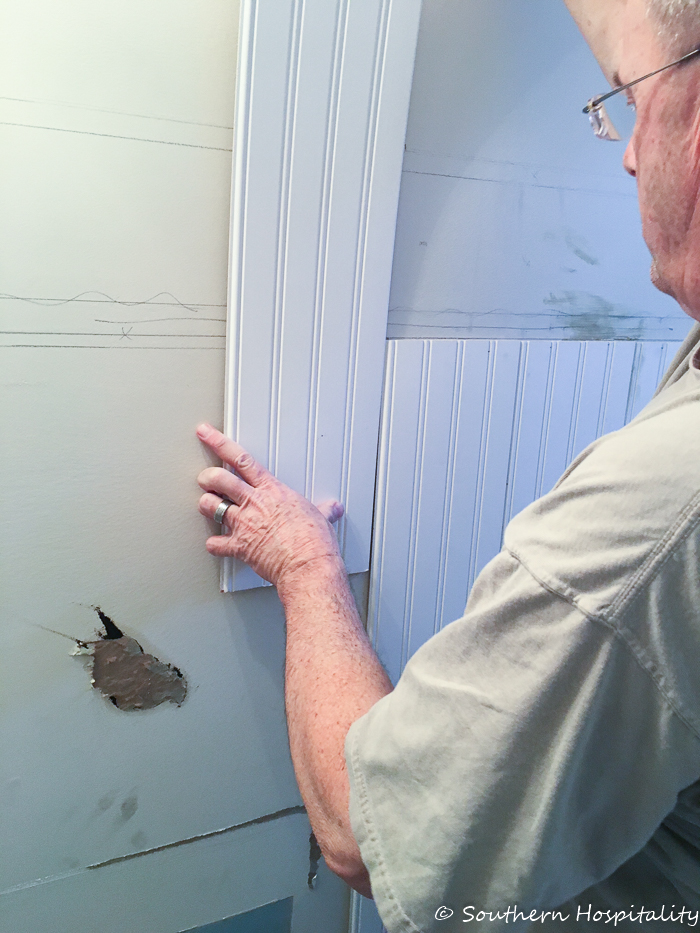
He uses Liquid Nails and his nail gun to install this beadboard and tries to keep his nails inside the grooves so they are less noticable. Usually paint fills in the nail holes pretty well along with caulking in the seams and where needed. You can see how he had to slide the panels together and usually they pop together much better, but many of these he ended up having to get the tongue started and slide them into place, which was very frustrating for him.
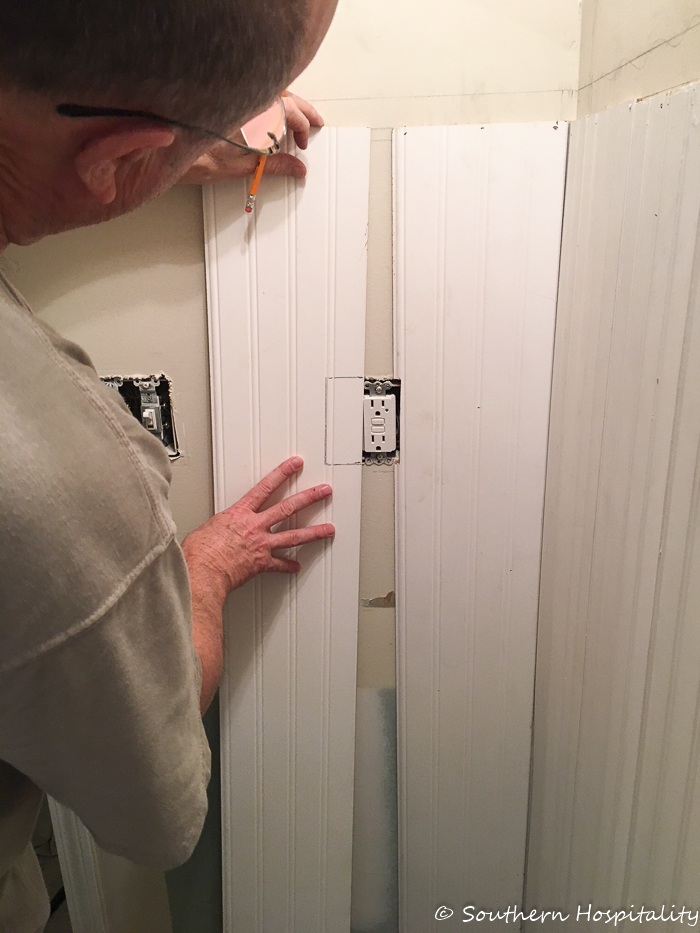
Figuring and cutting around the outlet covers was part of it too and we finally made it around the room and got it all finished. We were happy to see that day come too!
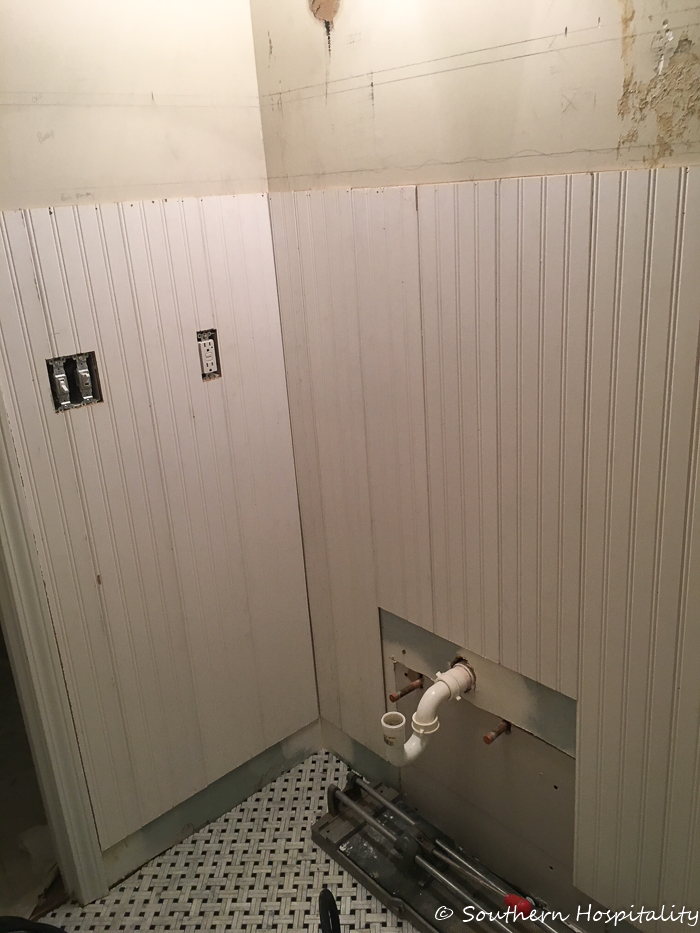
All done with the beadboard panels and waiting for caulk and paint and the top trim boards and baseboards. It looks ugly before it gets pretty again, that’s just the way it is with renovations.
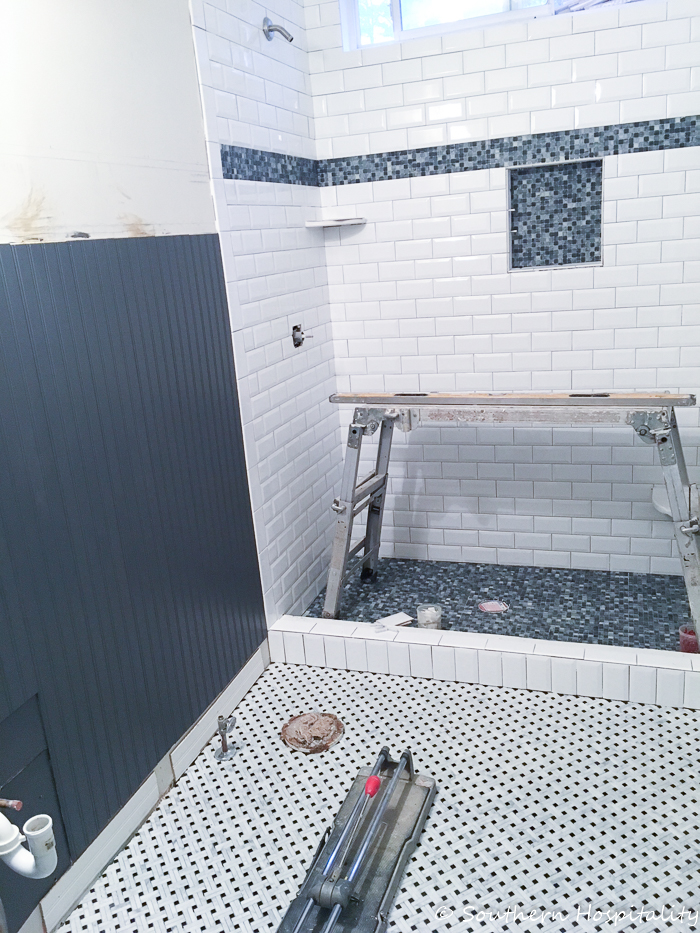
In another big change of plans, I decided to paint the beadboard a dark dramatic color. The vanity is also a dark gray but with all the white in here and the sunlight that comes in, I knew it could handle a dark color. I ended up using Peppercorn by Sherwin Williams and it’s a great dark charcoal color.
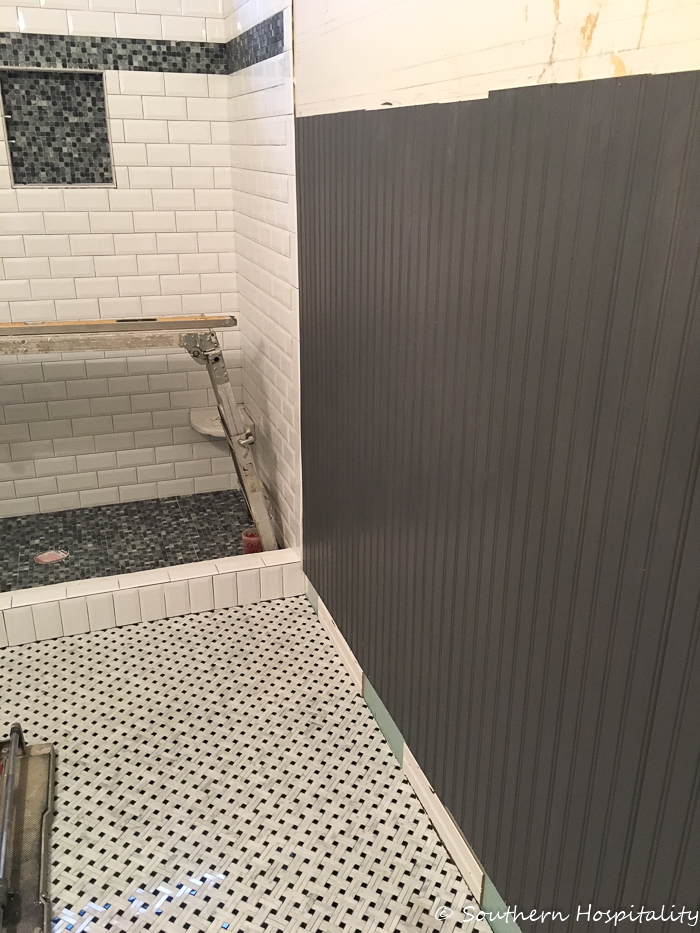
Very dramatic, yes?! I just loved it as soon as the first coat went on and Mark was on board with the dark color too. I just love small spaces with dramatic colors and patterns, it really makes them special.
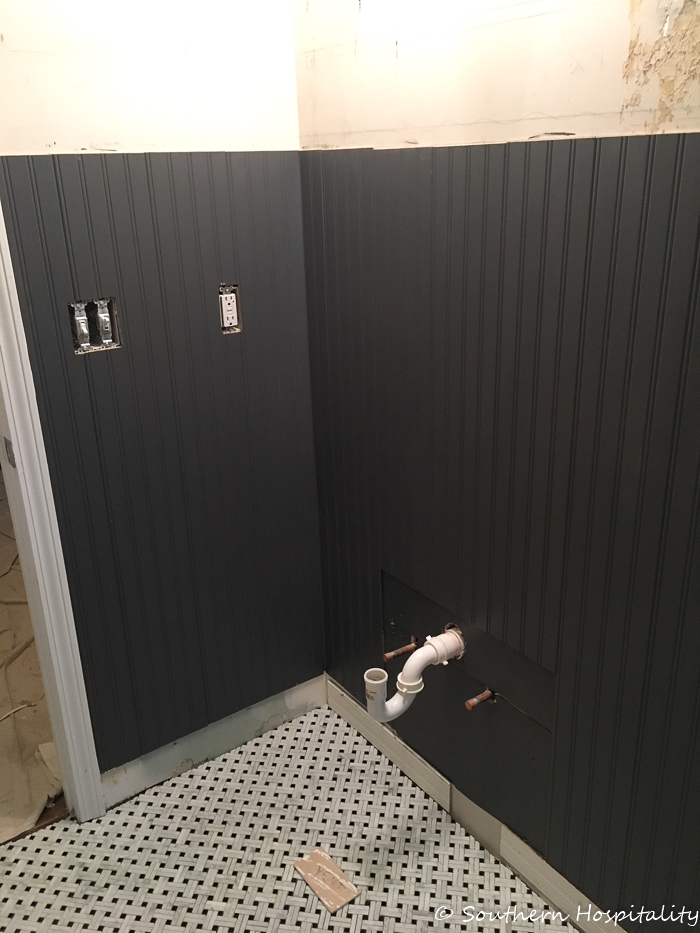
Painted and waiting for the trim boards to go up.
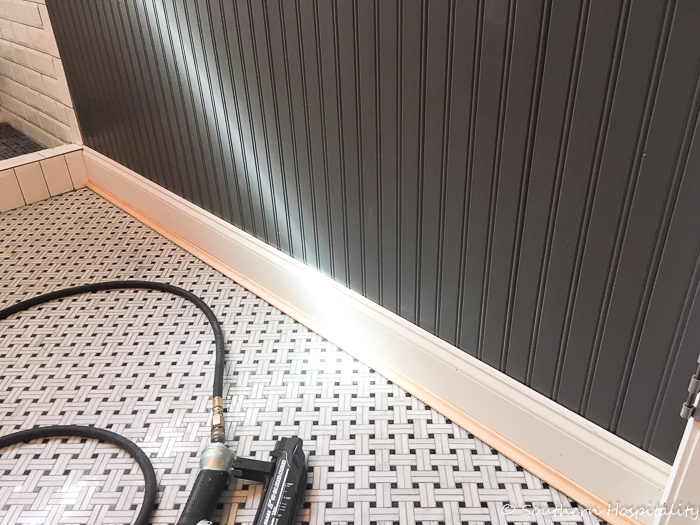
Mark worked on those one weekend and we got them all mostly finished when the tile guy came back and finished his last day.
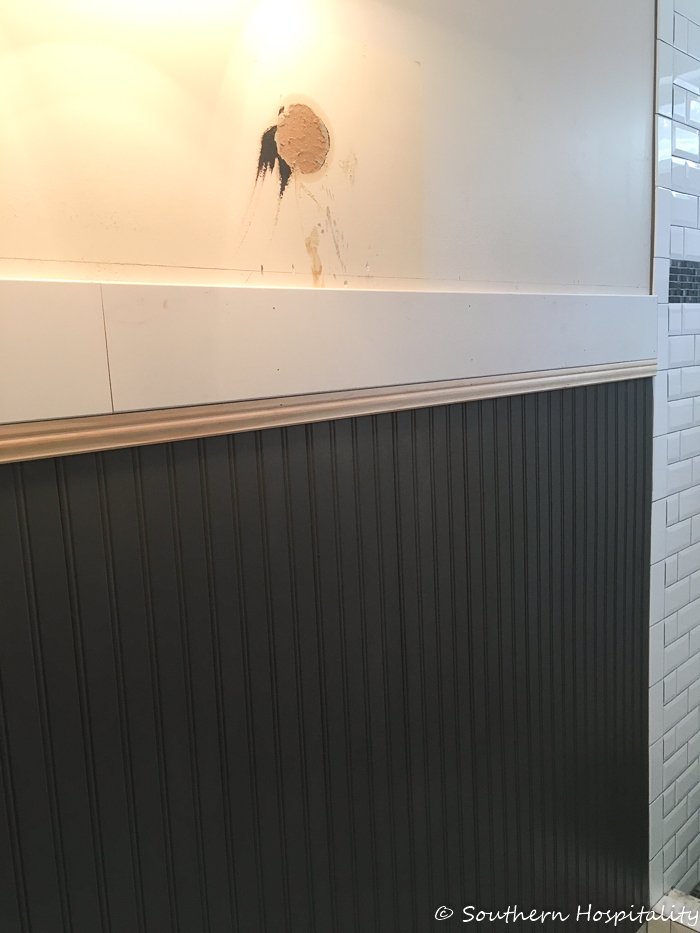
There will be one more small trim board that will go on top to finish it off. I did order the wallpaper and it’s going up too! Can’t wait.
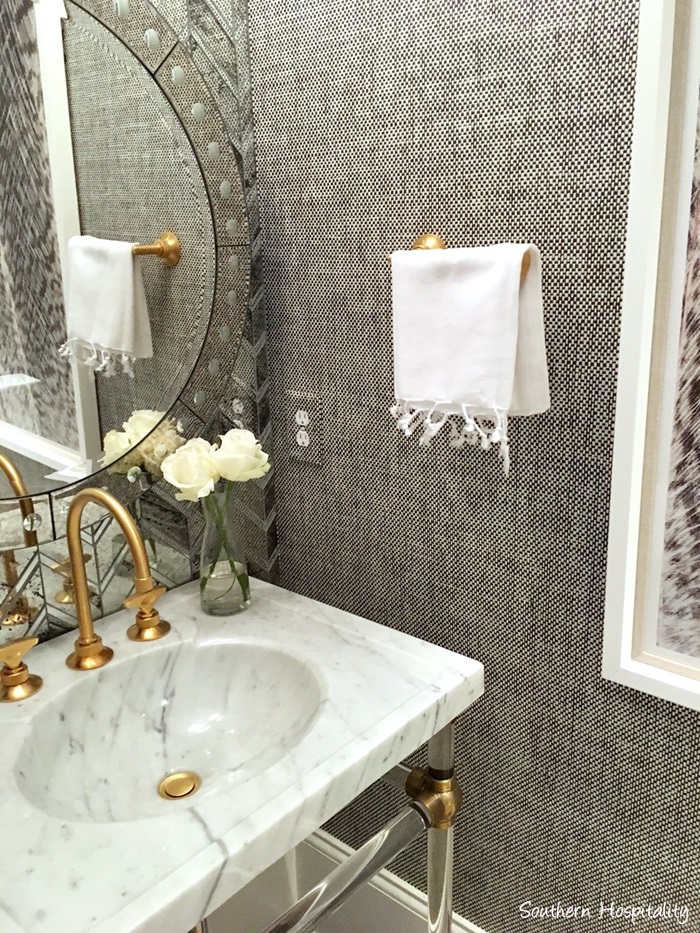
Again, this is Thibaut Wicker Weave in Black and it’s on the way so this bathroom is one more step to being finished. I decided, what the heck…a little more $$, but it will make such a nice statement in there.
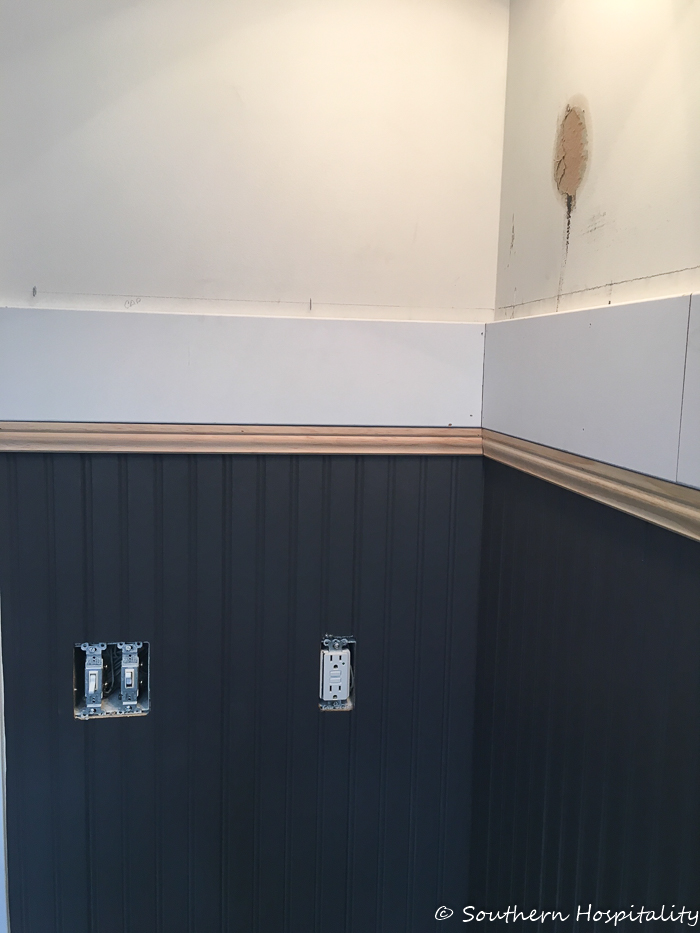
All the trim boards were added and I got them all painted out.
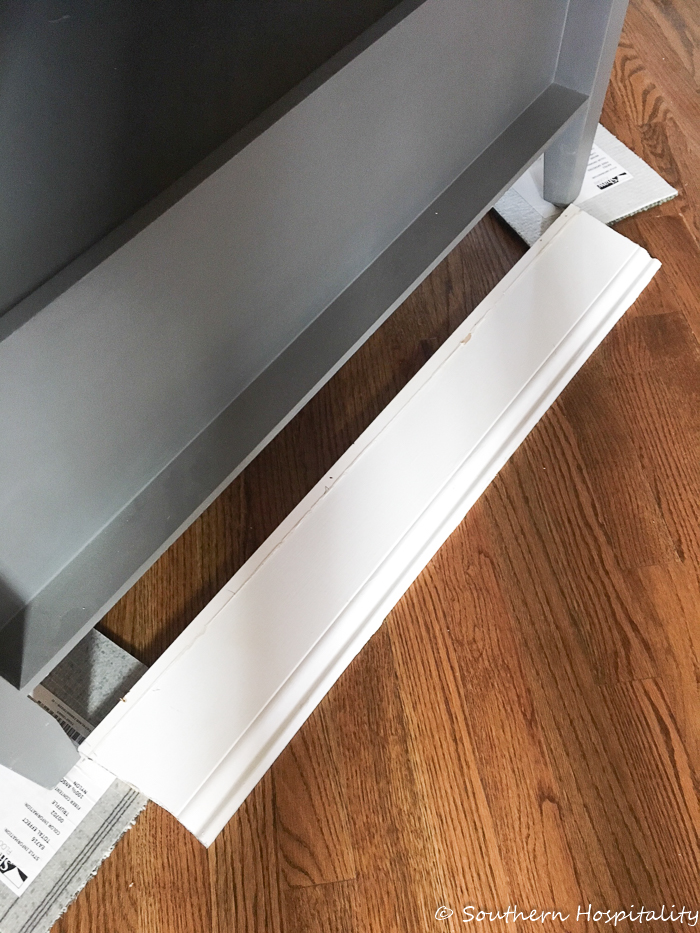
Meticulous Mark even cut out a piece of baseboard trim to add inside the legs of the vanity. Even though it really won’t show unless someone was on their knees looking under the vanity, he wanted to finish it off so that was put in place too. He scribed it to fit insde the legs which are slightly curved.
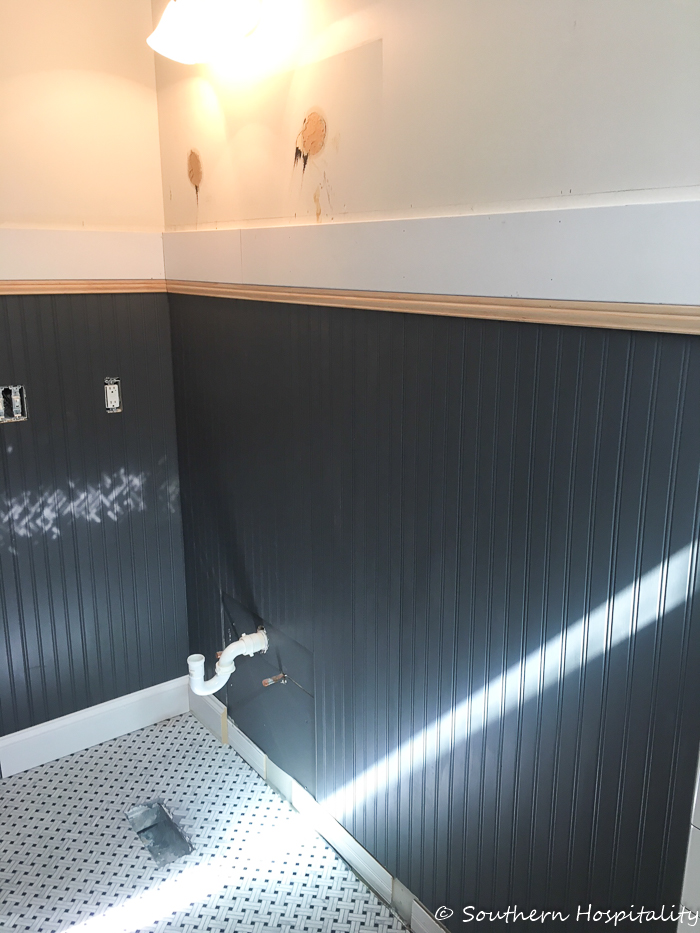
Waiting for the baseboards and the vanity to go in.
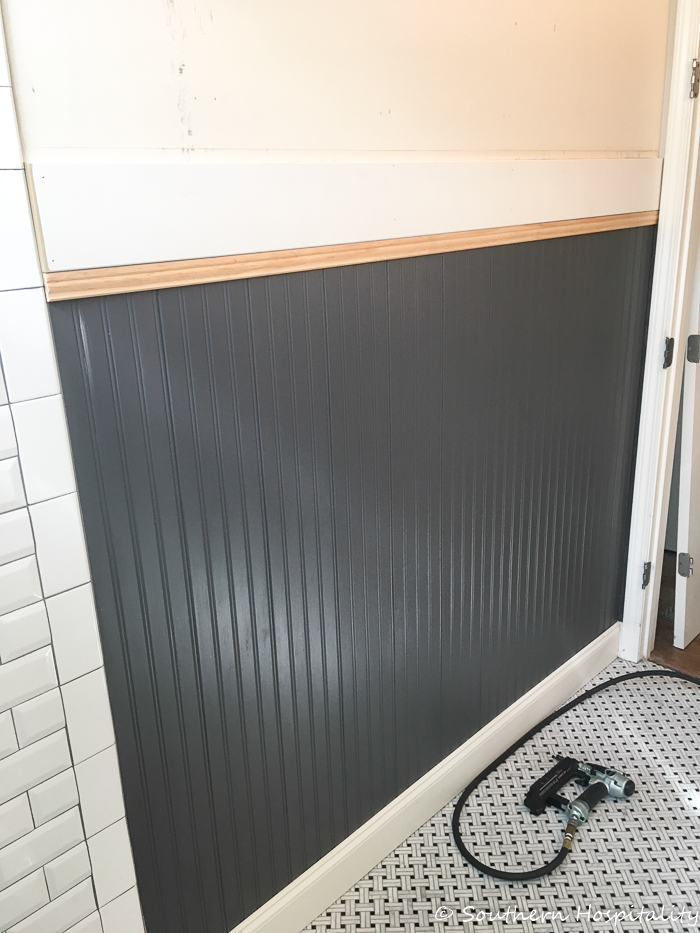
Mostly finished on this side.
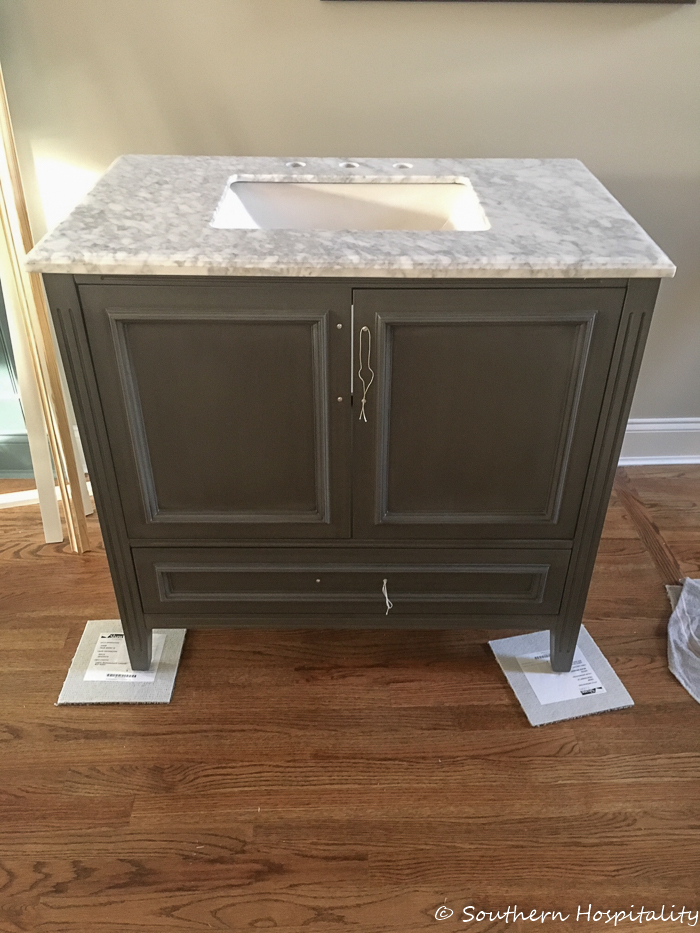
And here’s the vanity waiting to go in there and get installed.
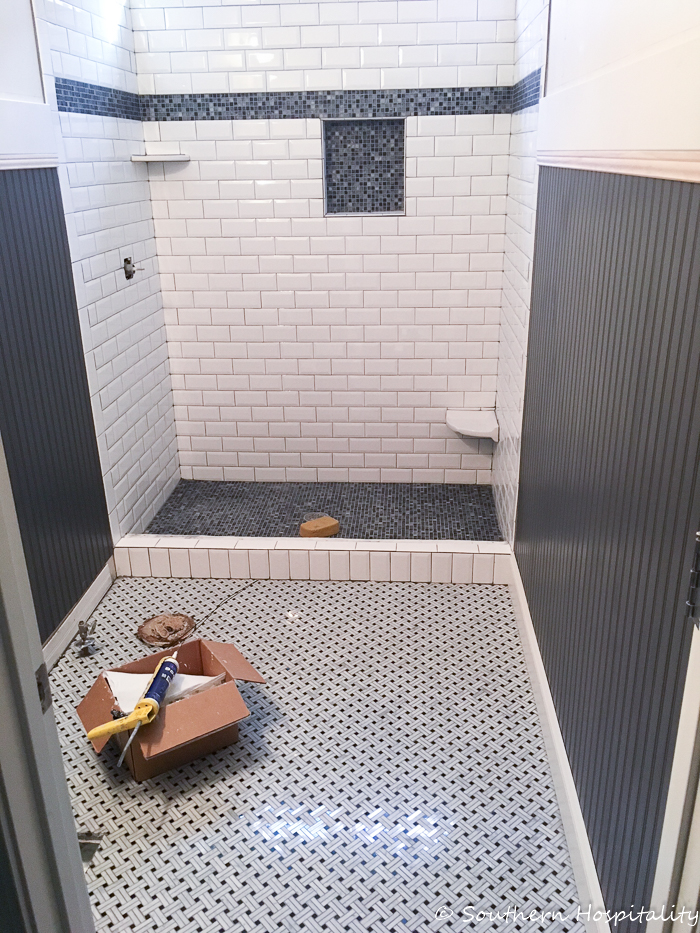
This is where I’ll leave you for now! That’s the progress on the bathroom. All the beadboard and trim has been painted and the vanity and toilet are back in place and next is getting the shower doors installed, adding the new mirror and light fixture and getting the wallpaper installed. Still have a few more things to do before I can show you all and that won’t be until after April 1st, so stay tuned for the final reveal! It’s going to be beautiful, I can hardly wait to share it with you.
If anyone knows someone who could install a glass shower door (from Kohler) let me know. My tile guy doesn’t do those anymore, simply because they are too much trouble, so I’m looking around now to find someone. Most plumbers don’t install shower doors and I want to find someone who knows what they are doing. Mark doesn’t want to tackle it either and I don’t blame him, since holes have to be drilled into the tile to set the doors. The one I chose is the same one I used before, the Kohler Levity semi-frameless shower doors.
At first, I thought 2 months was more than enough time to get this finished but now I’m glad we have plenty of time, since we still have some important things to complete.
One of my readers saw my bathroom plans earlier and did this cute drawing on a computer program, using all my mood board ideas to show what the bathroom would look like. 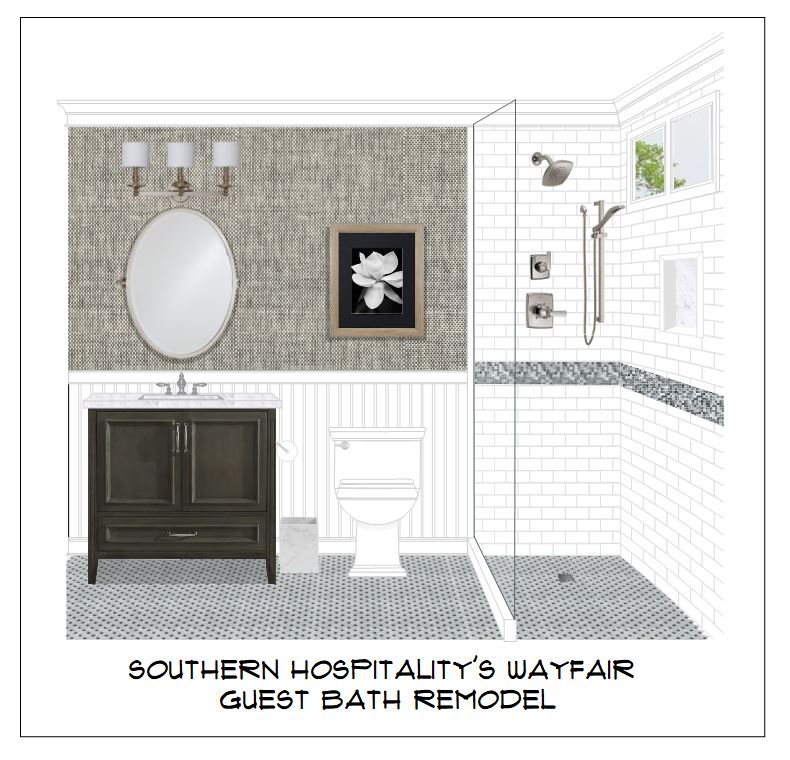
Isn’t that cute? I did a change of mind and ended up doing a dark beadboard, but this is really neat how it gives a good idea of the final look! I apprecidate her taking the time to do that!
I can’t wait to share it all and get those final and finishing touches in there! It’s so exciting to see it now and how great it’s looking.


We’re knee deep into a total kitchen remodel that we are doing ourselves.
I would love to remodel my main bath and get rid of the tub, but it’s the only tub in the house, and they say you really need a tub for resale. We do have a half bath though, which has come in handy.
Hi, Renee, yes we have another tub upstairs in the other guest bath, so we are leaving that one. And the master tub will stay too.
I would love to know how you removed the mirror over the vanity.
Many thanks,
Laura
Hey, Laura,most mirrors are adhered with that black mastic stuff in spots, so Mark just pried and it came off all in one piece. Then you have to scrape off the black mastic, but it comes off pretty easy.
Hi Laura,
My sister and I removed large builder grade mirrors in her master using the largest flat metal rod that we could slip down behind mirror a little at a time. Heading limited some but that being said, we dropped quarters down behind as we were carefully prying. Quarters helped keep mirror from resticking while working on new area. Came off in one heavy piece. SUCCESS.
Good tips, Vicky! Usually with a little prodding those mirrors will pop off in one piece. I’ve removed a few of them too.
Looks very nice! My son in law is going to attempt to install his shower doors. I wish my husband was there to help but we are in England.
A glass and mirror business should be able to install your shower door. Especially in a large metro area like Atlanta , they should be plentiful. Love all your info.
How sweet of your reader to do the computer drawing for you! Really confirms your choices, doesn’t it? II have wanted this classic basket-weave tile for a long time–it’s beautiful! Glad you found a good tile guy, too. Mark’s work, as always, is impeccable. Watching for the end of the story.
It really looks good so far! I think the darker color on the beadboard was a great idea! Can’t wait to see it finished.
Hi Rhoda, you bathroom is looking beautiful. Glad your going for the wallpaper,it’s so pretty. I’m having a hard time choosing my favorite,but the tile floor has the edge ( So far ).
Perfect
Can’t wait for the completion ❤️
I LOVE it! It’s hard to pick my favorite detail…I really like the little tiled niche in the shower. My thought was the same as Melinda’s that a glass and I’m rotor company would be the ones to call.
Wow, autocorrect had a field day…it should have said glass and mirror!
Your dad probably has a bitter sweet feeling that Mark is now taking over all of the jobs that he once did for you. I couldn’t help think this when I saw that one photo of Marks hands at work—soooo reminded me of your father!!!!
Hey, Gilda, I think Dad is happy to retire and let Mark take over, really! He’s only interested in his little garden right now and I’m happy he wants to get out there again.
Everything you have chosen is beautiful! The bathroom is looking gorgeous. I like the change to the darker color and can’t wait to see the wallpaper up. I’ve always loved that basket-weave tile, too.
My daughter-in-law is expecting twin boys and I had thought the bead board wainscoting would be nice in their room. I hate to hear you had such problems with those panels. We used 4 x 8 bead board sheets cut in half for our basement in a former house, and they bowed out over time so I wouldn’t use those again. Maybe we should just go with board and batten? I feel like the walls need something that is more durable that painted drywall. Do you have any suggestions?
Hey, Kim, you can always go with real wood sheets of beadboard. That’s what I used in my old screened porch and it’s real wood, more rough textured, but looks great all painted out.
Rhoda,
Love the bathroom…especially the shower. As you know we are going to start our bathroom project later in March. We are trying to find someone to put in the shower without such a large expense. The rendering of the shower is so pretty. That is exactly what I want.
Can’t wait to see the finished product.
It looks great! Can’t wait to see it finished. Did u say what the measurements are of the bathroom and the measurements of the shower now that it’s finished? Would like to know. I’m getting ready to do my guest bath and cant decide between black and white tile or a grey and white marble. Great job!
Hi, Phyllis, the shower is the size of the old tub, so about 5′ x 3′ and the floor space is about 5 x 6′, so not very big.
Oh Lord! I love it all. I swore I would never put wallpaper up again, but seeing what you’ve picked has me re-thinking as we are about to start a bath remodel too. I hate it when everything is tore up though…ugh.
Thank you, Lori! I hate the torn up part too, but it will be nice when it’s finished.
Rhoda,
You and Mark have done a beautiful job of designing and remodeling your bath and the wallpaper is just stunning! My husband renovated our master bath last year when we torn out an old 90’s Jacuzzi tub and replaced with a walk-in shower and bench with built-ins. We have been using a shower curtain temporary until we order a glass enclosure.
My husband wanted to order one and try to install it himself but I have discouraged him because I think this is sometime he should hire out professionally. So we have gone to several glass shops in our area getting estimates. Perhaps if you know someone who works at a glass shop and does some outside work on their own that might be an option since you already have your door.
Hi, Teresa, thank you so much! We are so happy with the way things are looking. I didn’t want Mark to have to stress out over that either, so we’re hiring it out. I’ve gotten 3 estimates so far and will decide on one this week.
Looking fantastic and looking forward to the final reveal…how sweet of your reader to create the computer drawing of your vision for your bathroom….
Rhoda, your downstairs bathroom is really looking nice! I love what you have done so far. Your wallpaper will just add the final touch! You will certainly enjoy having this all finished. It’s always so much work with a reno.
Blessings! Have a great week!
Rhoda,
Did you contact Thibaut for samples or go to a store. I am in the market for wallpaper as well. Ive ordered some online, but was wondering with a higher end paper how to go about it.
Thanks!
HI, Marley, I have some interior design friends who can order for me, so that’s what I did. If you know anyone in the Trade, you can probably go through them to order. I did get samples sent to me and then ordered through her.
Hi Rhoda…..love your blog!! Can you identify the website where you found your samples. I love this paper but would like to see a sample first. Thank you!
HI, Mary Lou, I ordered them from a designer friend here in ATL. I’ll see if I can find a website that has samples too, but if you know any designers they can order for you.
Love everything in that fabulous bath! You and Mark are a great combo when it comes to renovating, great taste and all sorts of skill. I’m so anxious to see it finished.
In regards to Kim R.’s comment; we bought and used “ wide wood bead-board sections bought at a big box store about 7-8 years ago when we added a master bath here at the beach cottage. It was easy to install, the quality was excellent, no knots or holes and an almost paintable surface. Recently I added tall headboard to the hall bath using the same product and they were night and day different, so rough they needed a lot of sanding, lots of knots and even holes where knots had fallen out. Some were warped so badly they had to be exchanged, the wood was flimsy compared to the other, finished it looks as though I used two totally different products although they were even the same brand. I wish I had used the headboard wallpaper I bought from you years ago for the kitchen backsplash instead, could have saved myself about 3 weeks of work and it would look better!
Hi, VBG,isn’t that interesting? I do think products can change over time and Mark sure thought this Cape Cod panels had changed since he last used it. It was doable, but not without frustrations. I still like the real wood beadboard too, but if it’s as rough as you experienced, that’s not good. Thank you on the bathroom, we really tried to make good solid choices that are timeless and classic and I think we achieved it.
Hi Rhoda – I’m a long time follower of your blog. My husband and I are wanting to redo our master bathroom and convert to a walk in shower such as this – which means removing the tub. Currently we have a separate shower from the garden tub that back up against each other. Do you think removing the tub from the MASTER bathroom and just having a walk in shower would eventually hurt in resale? We NEVER use the garden tub, in fact I think its actually a safety hazard because of its design. It’s really hard to step into and out of. We do have another guest bathroom just down the hall with a shower tub combo.
I would appreciate your input.
Thanks,
Marilyn
Hi, Marilyn, I think it’s fine to take out a master bath tub and just go with a large walkin shower. I think more and more people are doing this and my sister and BIL did it in their master bath reno a few years ago. It turned out great, so take a look at the after of theirs:
https://southernhospitalityblog.com/a-master-bath-renovation/
They took out their big jetted tub and put the shower in its place and then took the old small shower and added it to the walk-in closet. They love it and have no regrets about taking out the old tub. I think you should do what works for you and don’t worry about resale. It will all work out as long as you have at least one tub in the house.