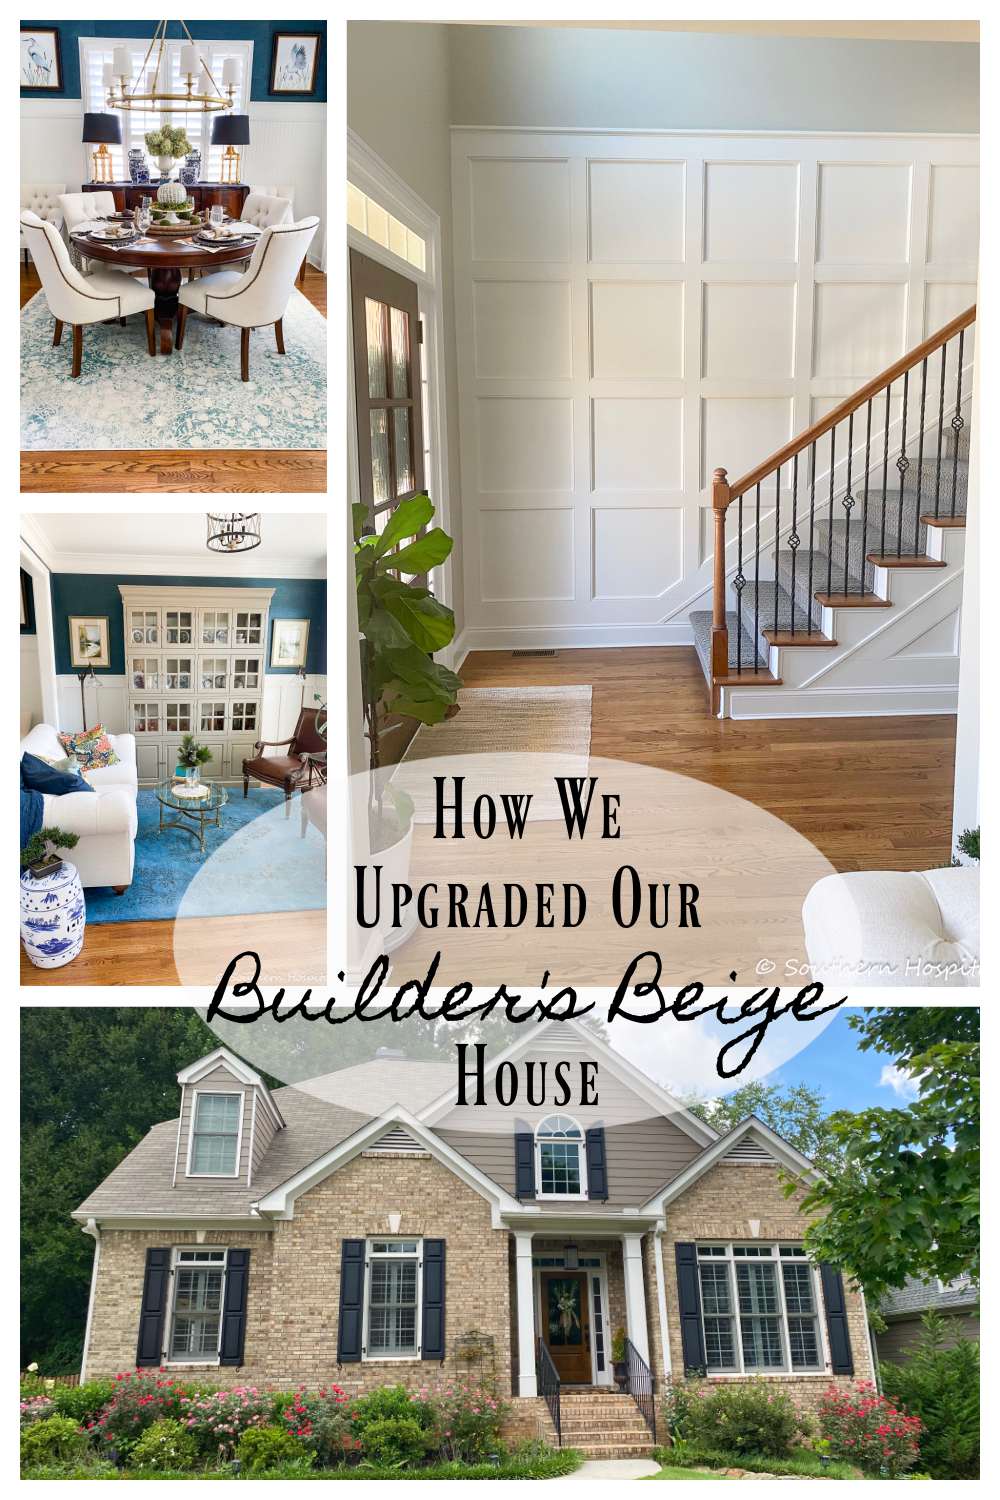
How to upgrade a builder’s beige house or builder grade home and make it something really special? Keep reading for the whole story on how we personalized our plain house making it our home sweet home.
We moved in our house in late summer 2017, so it’s been almost 6 years of projects, (2017 – how fast it’s gone!), so a lot has changed since then. I thought you’d enjoy seeing a fresh look with all the Before and After shots in one place. We have changed so many rooms and spaces for the better! One project at a time!
Our house was truly a diamond in the rough. We were just thinking about how long we looked for a house before we found this one. It took us over 6 months to find one we really loved and wanted and even then we weren’t 100% sold on this one, but it seemed to be a good choice for our needs. We found other houses that we missed out on and at the time, it was so sad and disappointing. But now I know that God had a plan for us to be in THIS house. We didn’t even know then how much we would love living in Acworth, GA, with a 5 minute bike ride to Main Street in town and also the same distance to the lake behind us. It’s been such a joy to be a part of this small community and our house has been delightful to live in. With all the changes we have made, we aren’t going anywhere in the near future.
This is a cute story. When we first bought our house and I posted the pictures here on my blog, someone left a comment that they had looked at our house before we got it and passed it over because it was boring or something like that. She didn’t see the potential that we did! I’m so glad they passed it over.
A builder’s beige house has plenty of potential and this one had great bones and just needed a good eye for detail in changing it for the better. The previous two families lived here, but never made any updates at all. Lucky for us, it was very clean and well maintained, just a bit boring for our tastes in its builder’s beige state. We love to make improvements that reflect our personalities and that’s what we’ve done with this house. Hope you enjoy seeing all these pics! The proof is in the After shots!
So, buckle up this is a long one! I hope you like details and lots of Before and After pics, because that’s what you’ll see today. It’s so fun to go back to the beginning and to now see the house after we have done our thing, Some of the Before pics are from the real estate listing so the old owners things are in the pics.
Also, if you’re interested in sources of some of the items in our home, you can check out my Shop my Home page for details on every room. I’ve linked the things that I could share there, so check it out. Some things may not be available by link anymore.
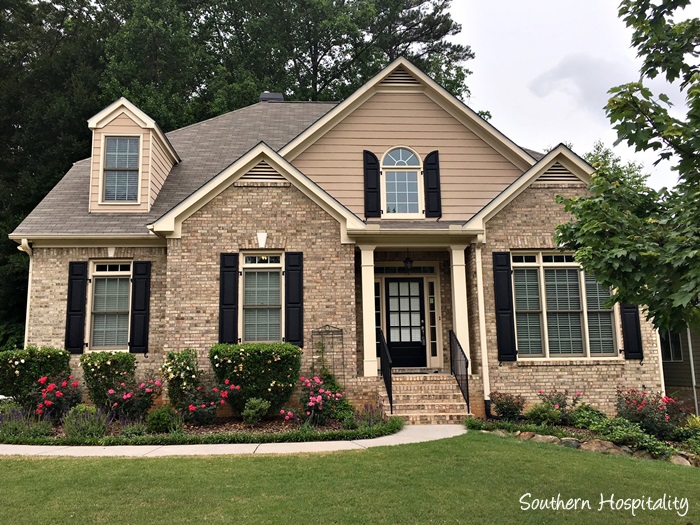
BEFORE: The exterior when we bought the house, July 2017. Nothing wrong with it really, but we decided to go ahead and paint the exterior to suit our tastes a bit more and while it doesn’t look drastically different, we love it more. It was a beige/tan color with darker than white trim. We changed it to a gray/taupe color siding with a whiter trim and it sets off the brick more.
The house is 2600 s.f. with a side entry garage, which we love and was built in 2005. We have an almost full unfinished basement, which was on our wish list. It’s so great to have a basement. We plan on finishing the main middle room of the basement eventually. Our house is one of the smallest houses in our neighborhood. It appraised for $35K more than what we paid for it, so we have a good amount of equity in our house already especially with the improvements we’ve made.
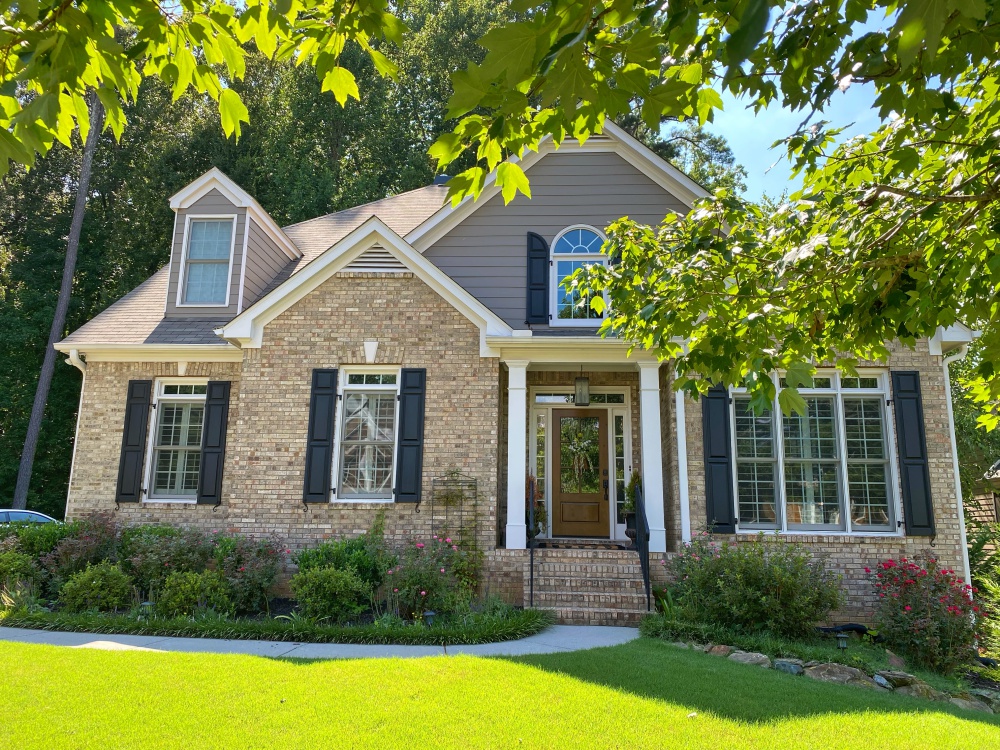
AFTER: We went more gray/taupe on the siding (Backdrop by SW) and a brighter white for the trim (Simple White by SW). I’ll link all the posts that go with these projects as well, new exterior paint.
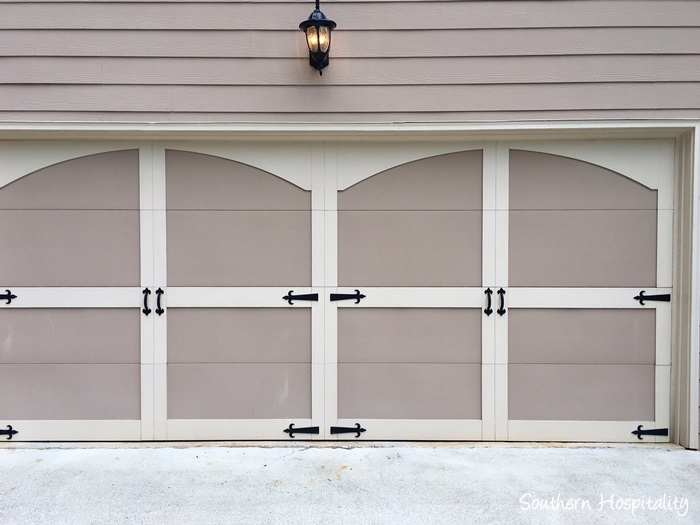
Before
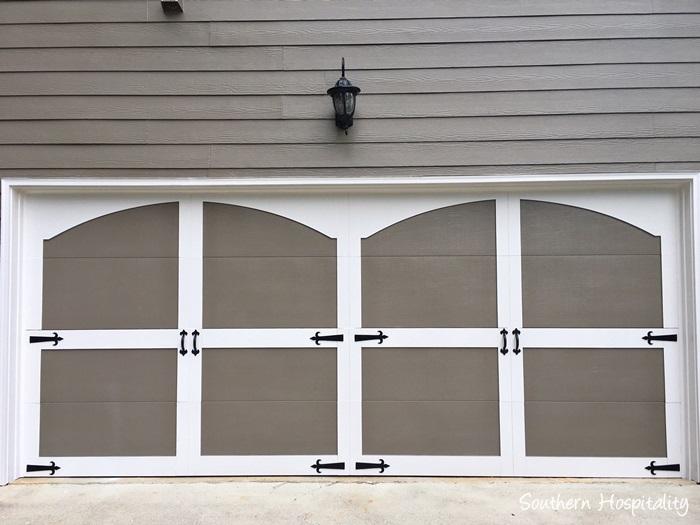
After: Backdrop and Simple White by Sherwin Williams
And to get started on this post, I’ll share our interior paint colors too.
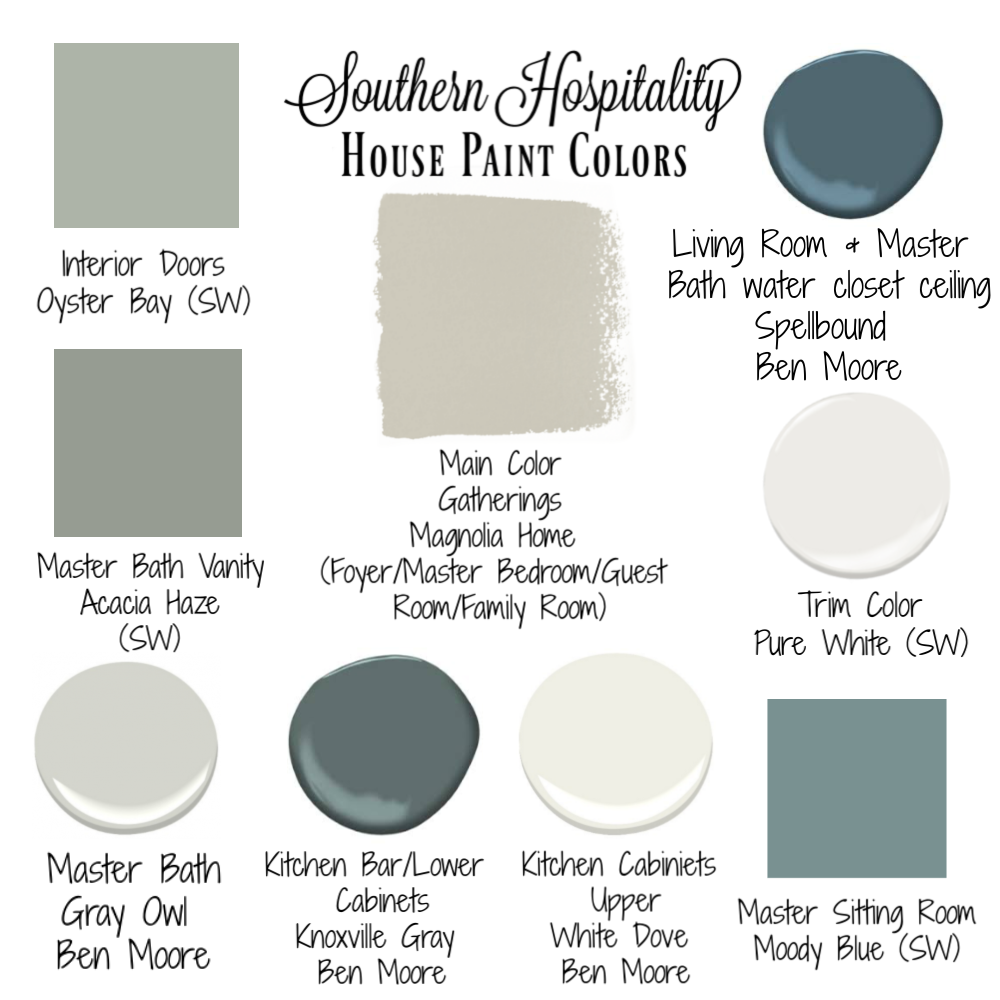
I’ve included our Paint color chart on the sidebar since I get asked this a lot, but here it is again. You can see most of the interior paint colors we’ve used throughout our house.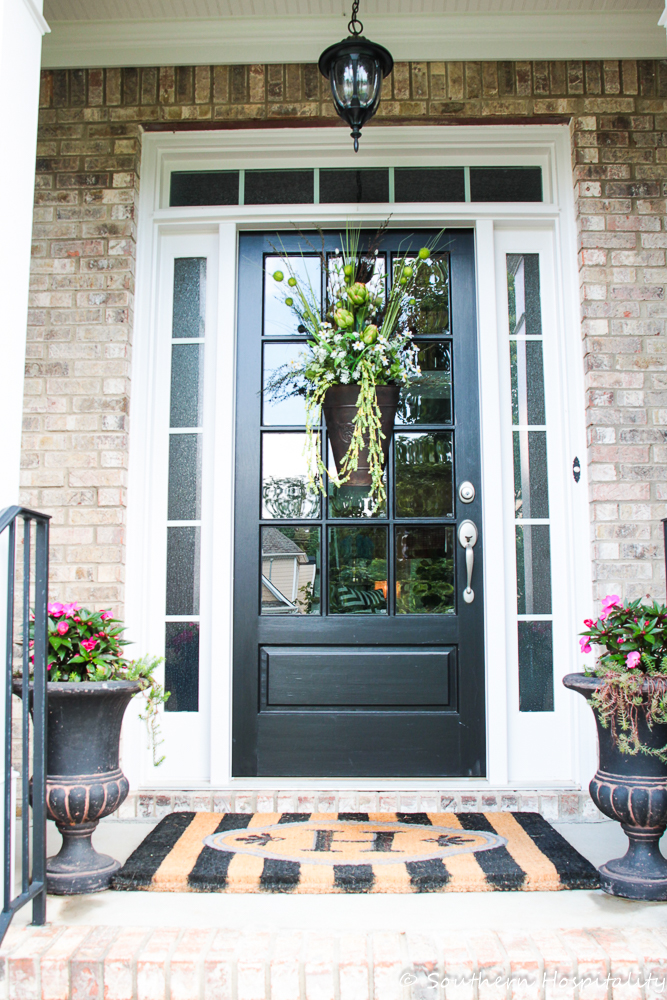
BEFORE: Original Door, nothing wrong with it, but we got a chance to change it out.
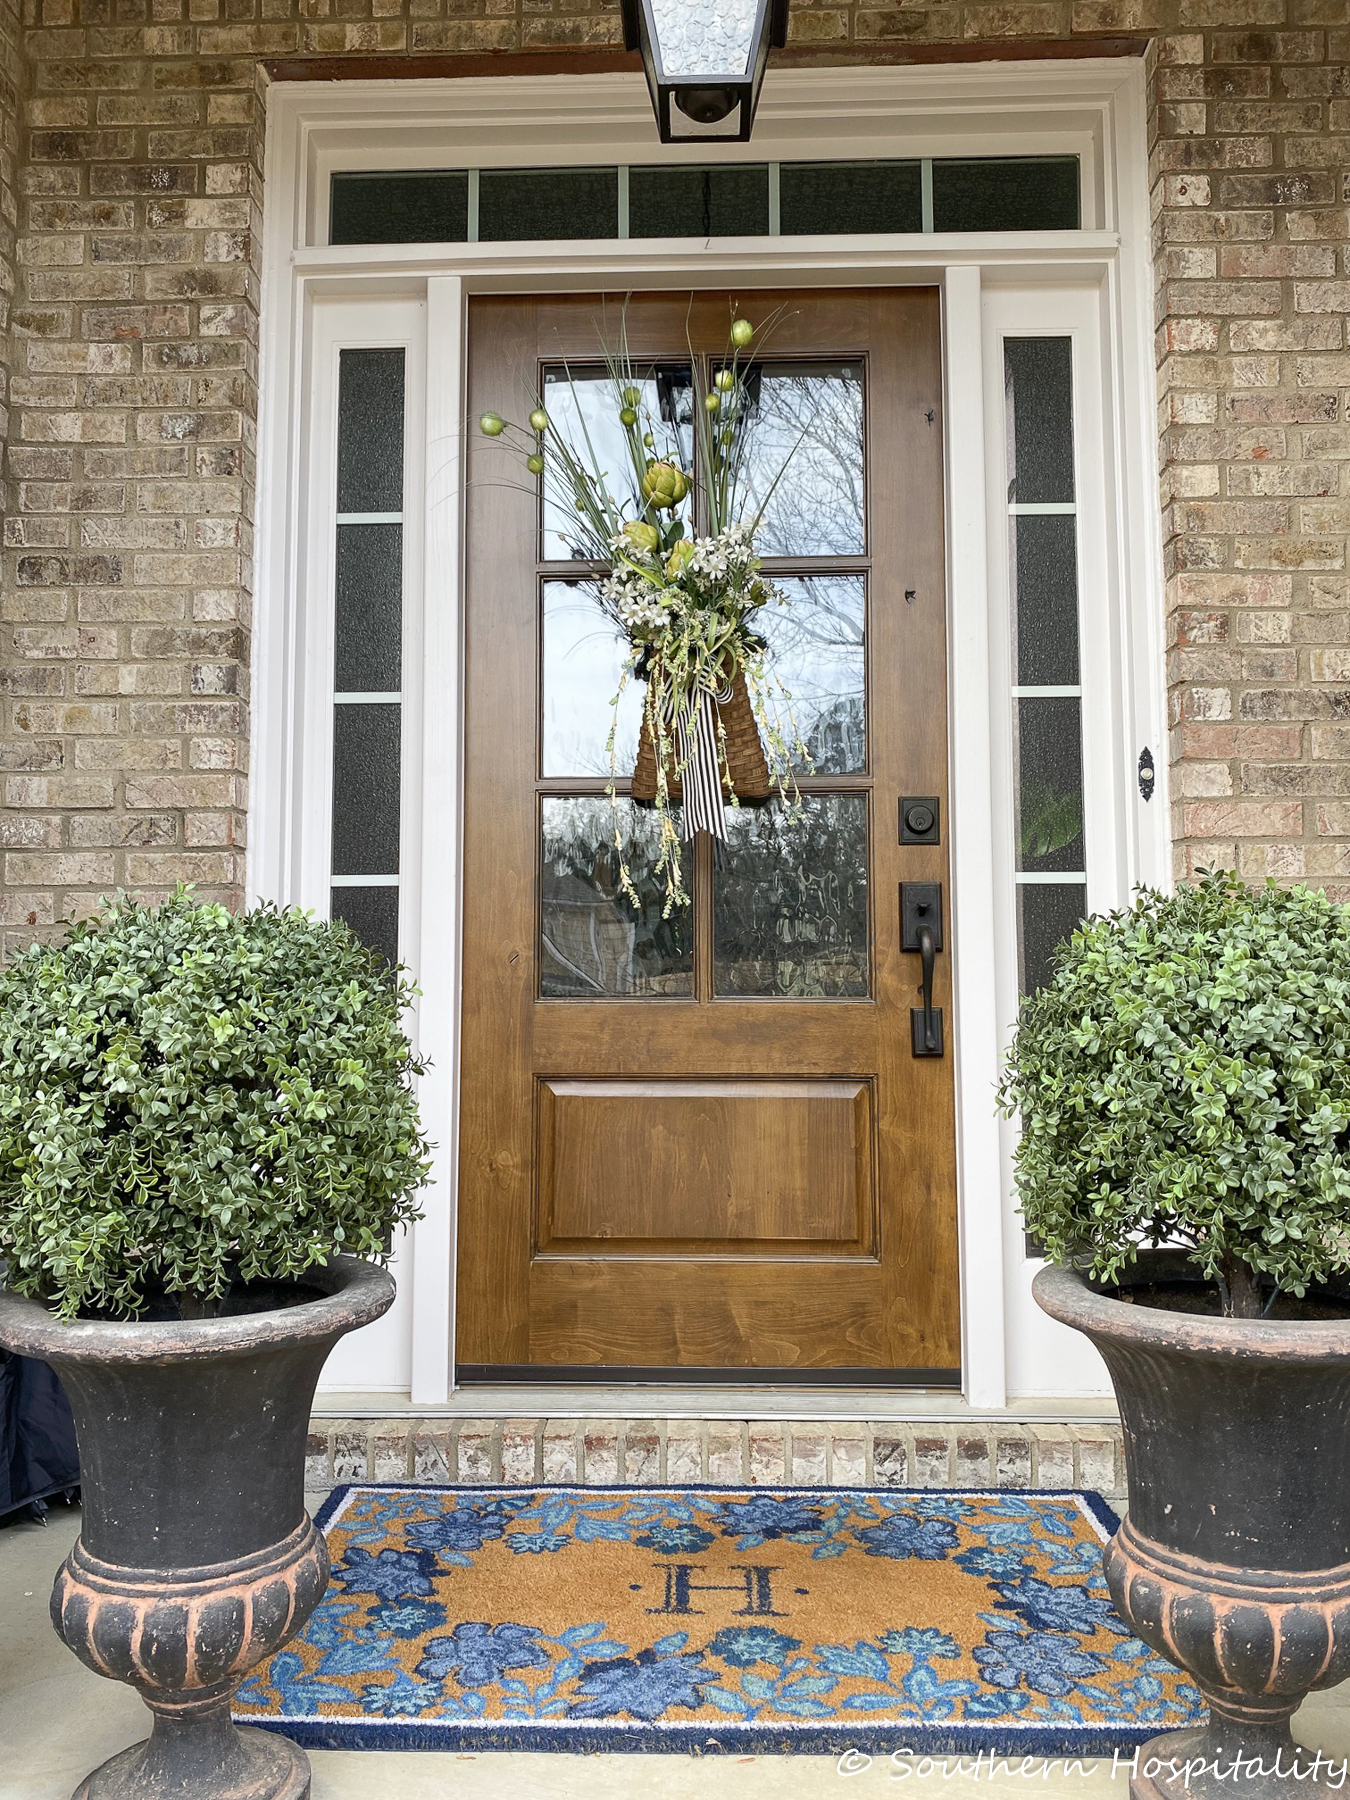
AFTER: A new stained wood door by Knockety with wavy glass. We love it! Note new light fixture too.
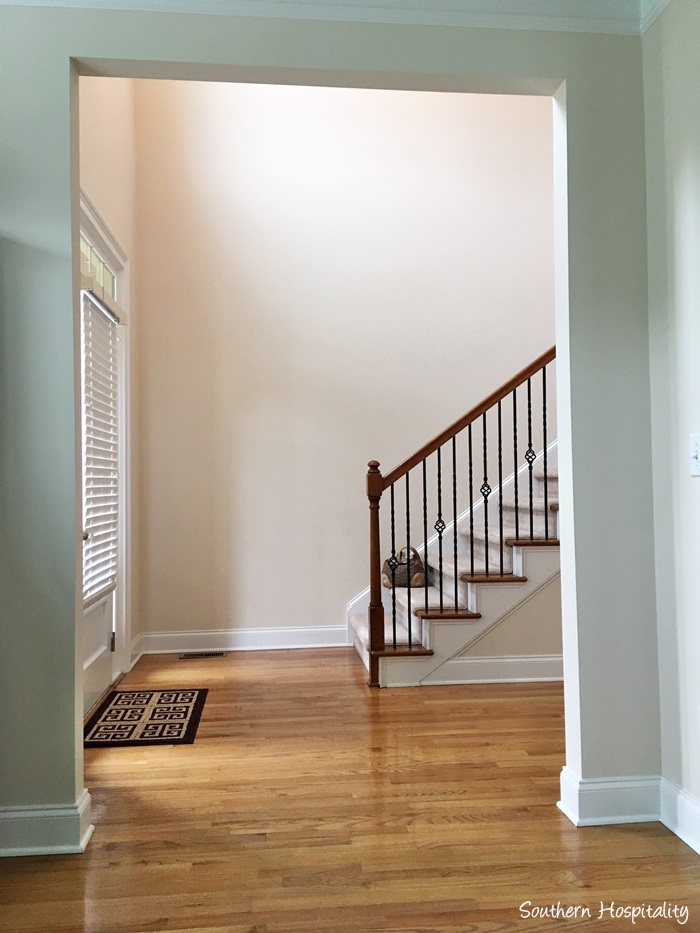
From living room to Foyer: BEFORE
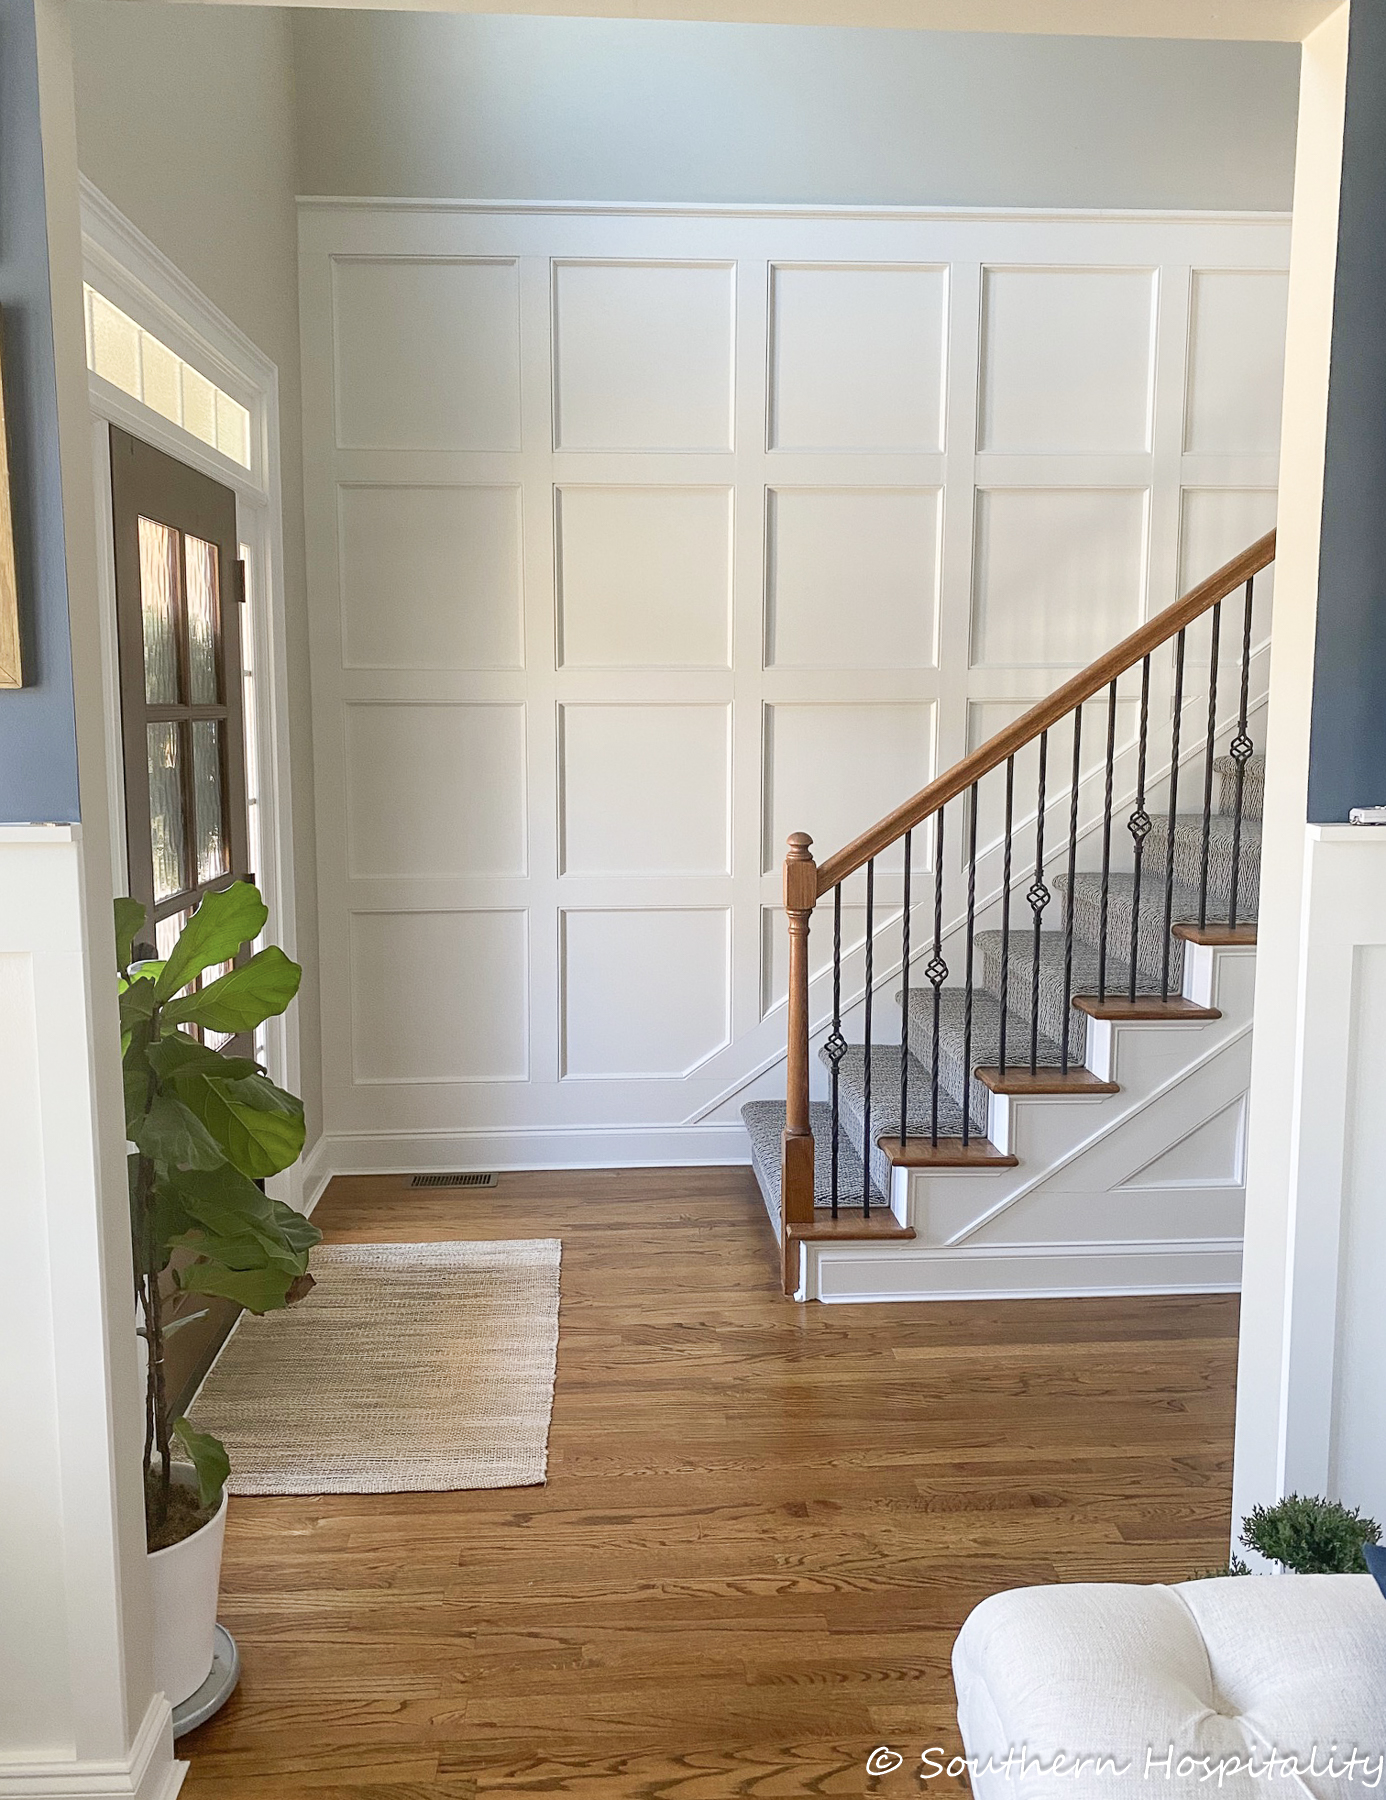
AFTER: Addition of the box molding walls in foyer.
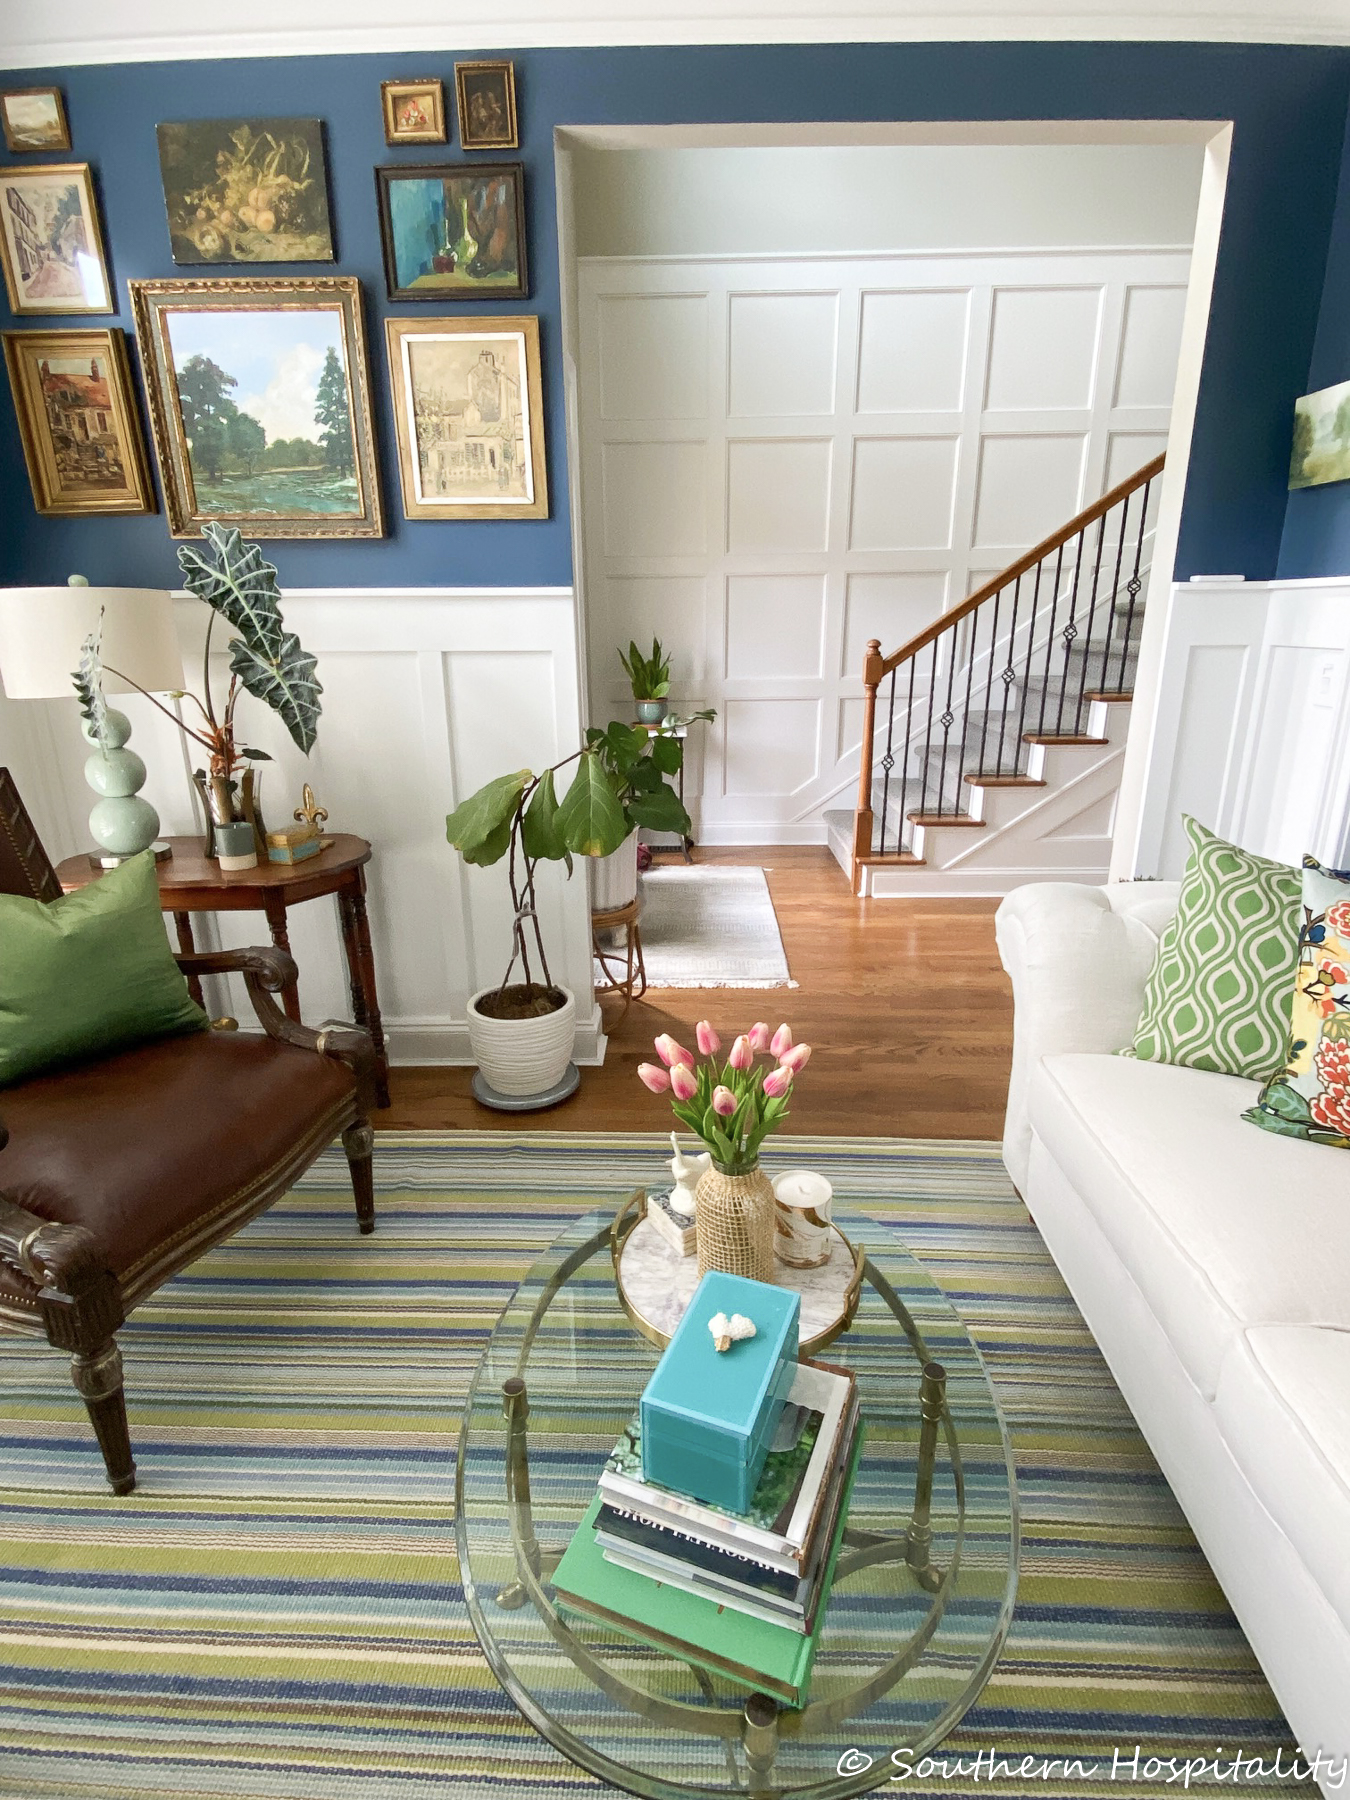
AFTER: Living Room to Foyer view.
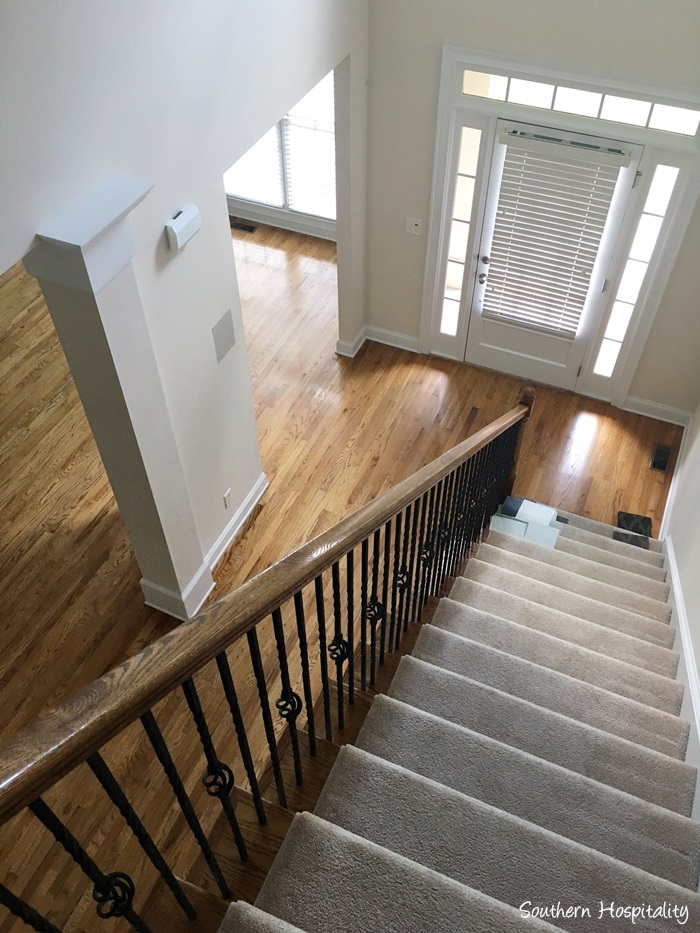
BEFORE: Top of stairs looking down.
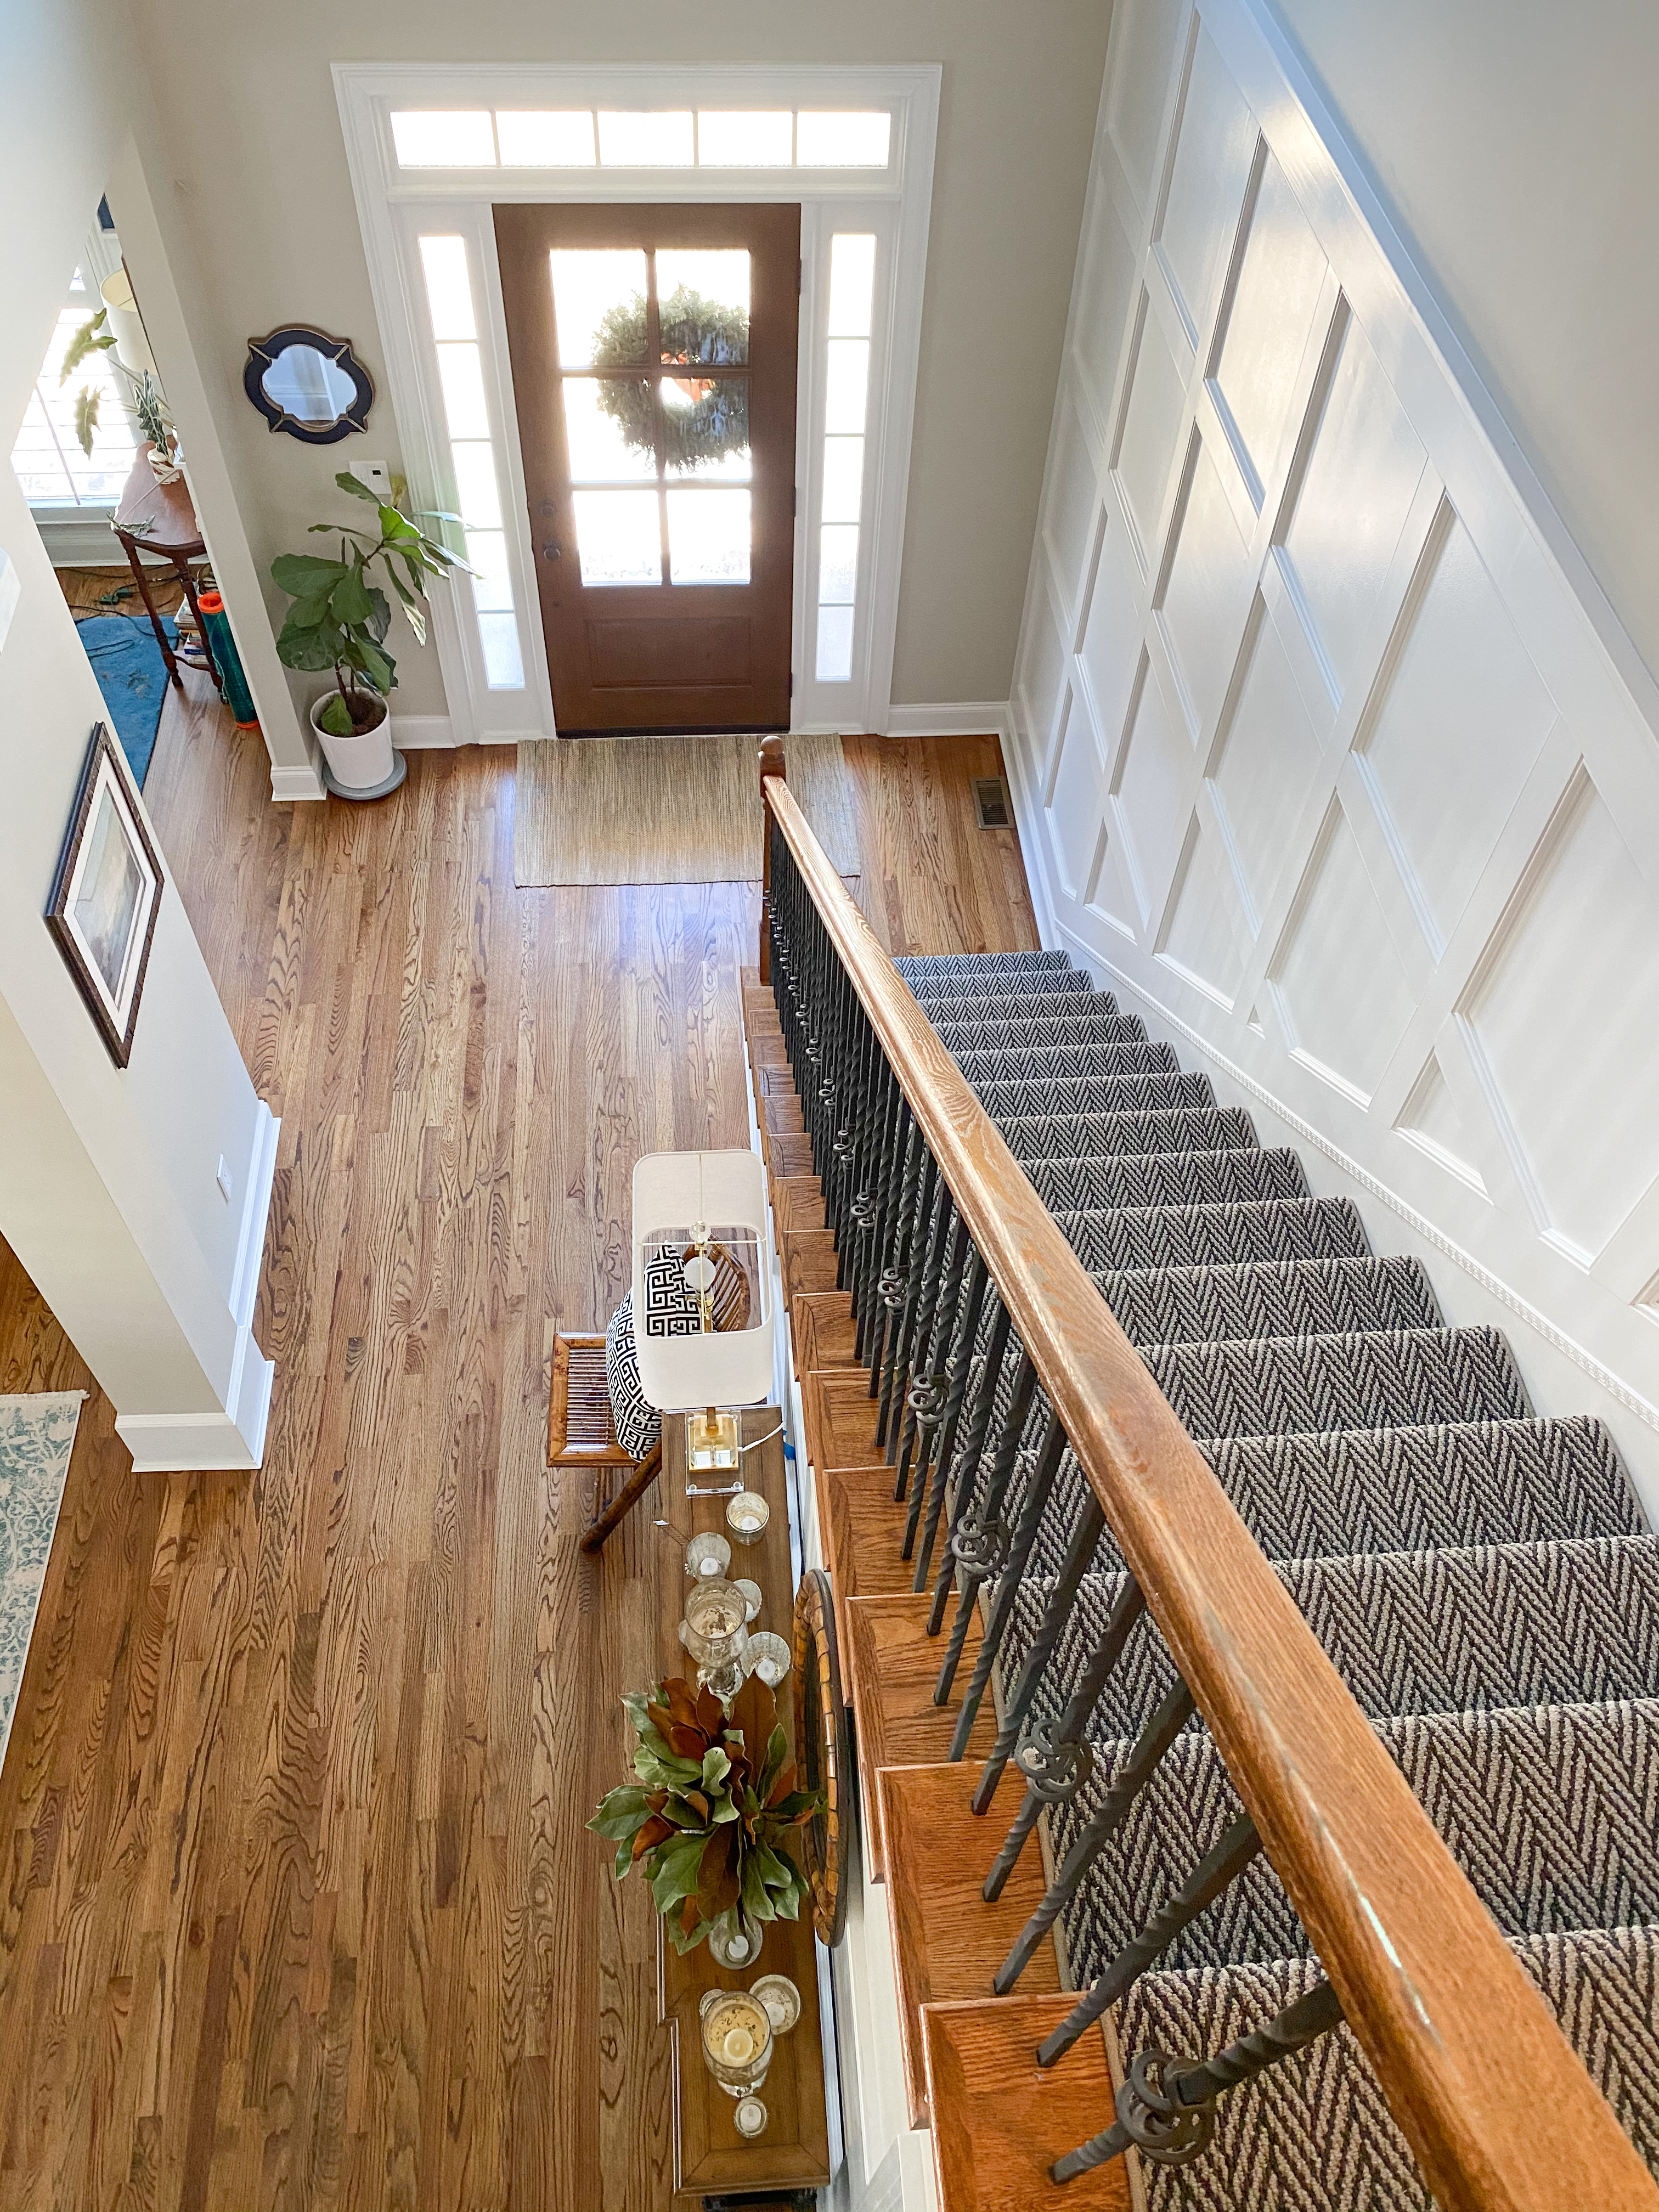
AFTER: With new carpet runner from Shaw Floors.
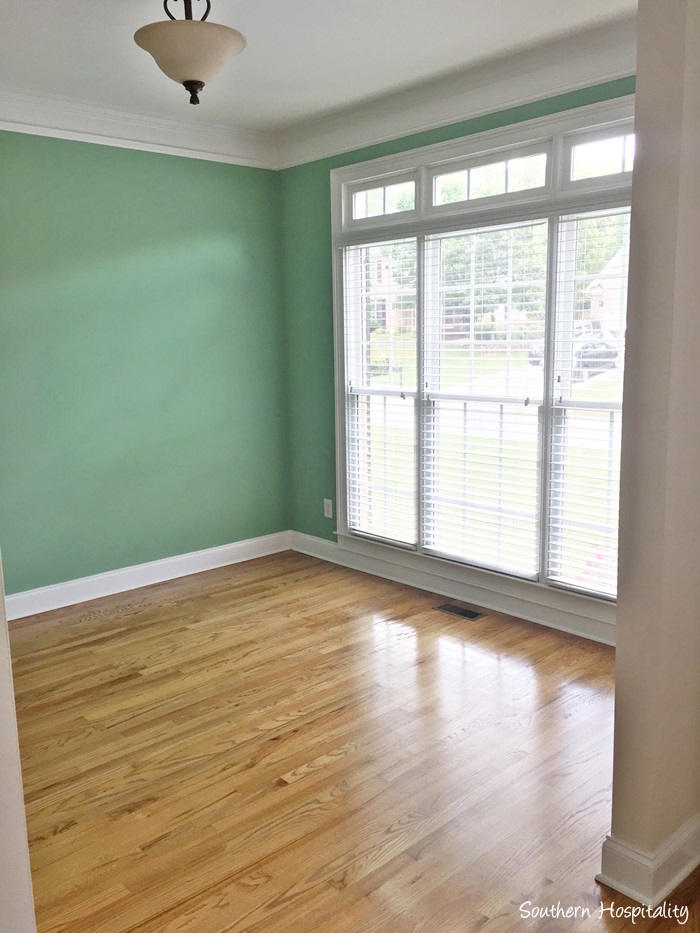
BEFORE: Living Room
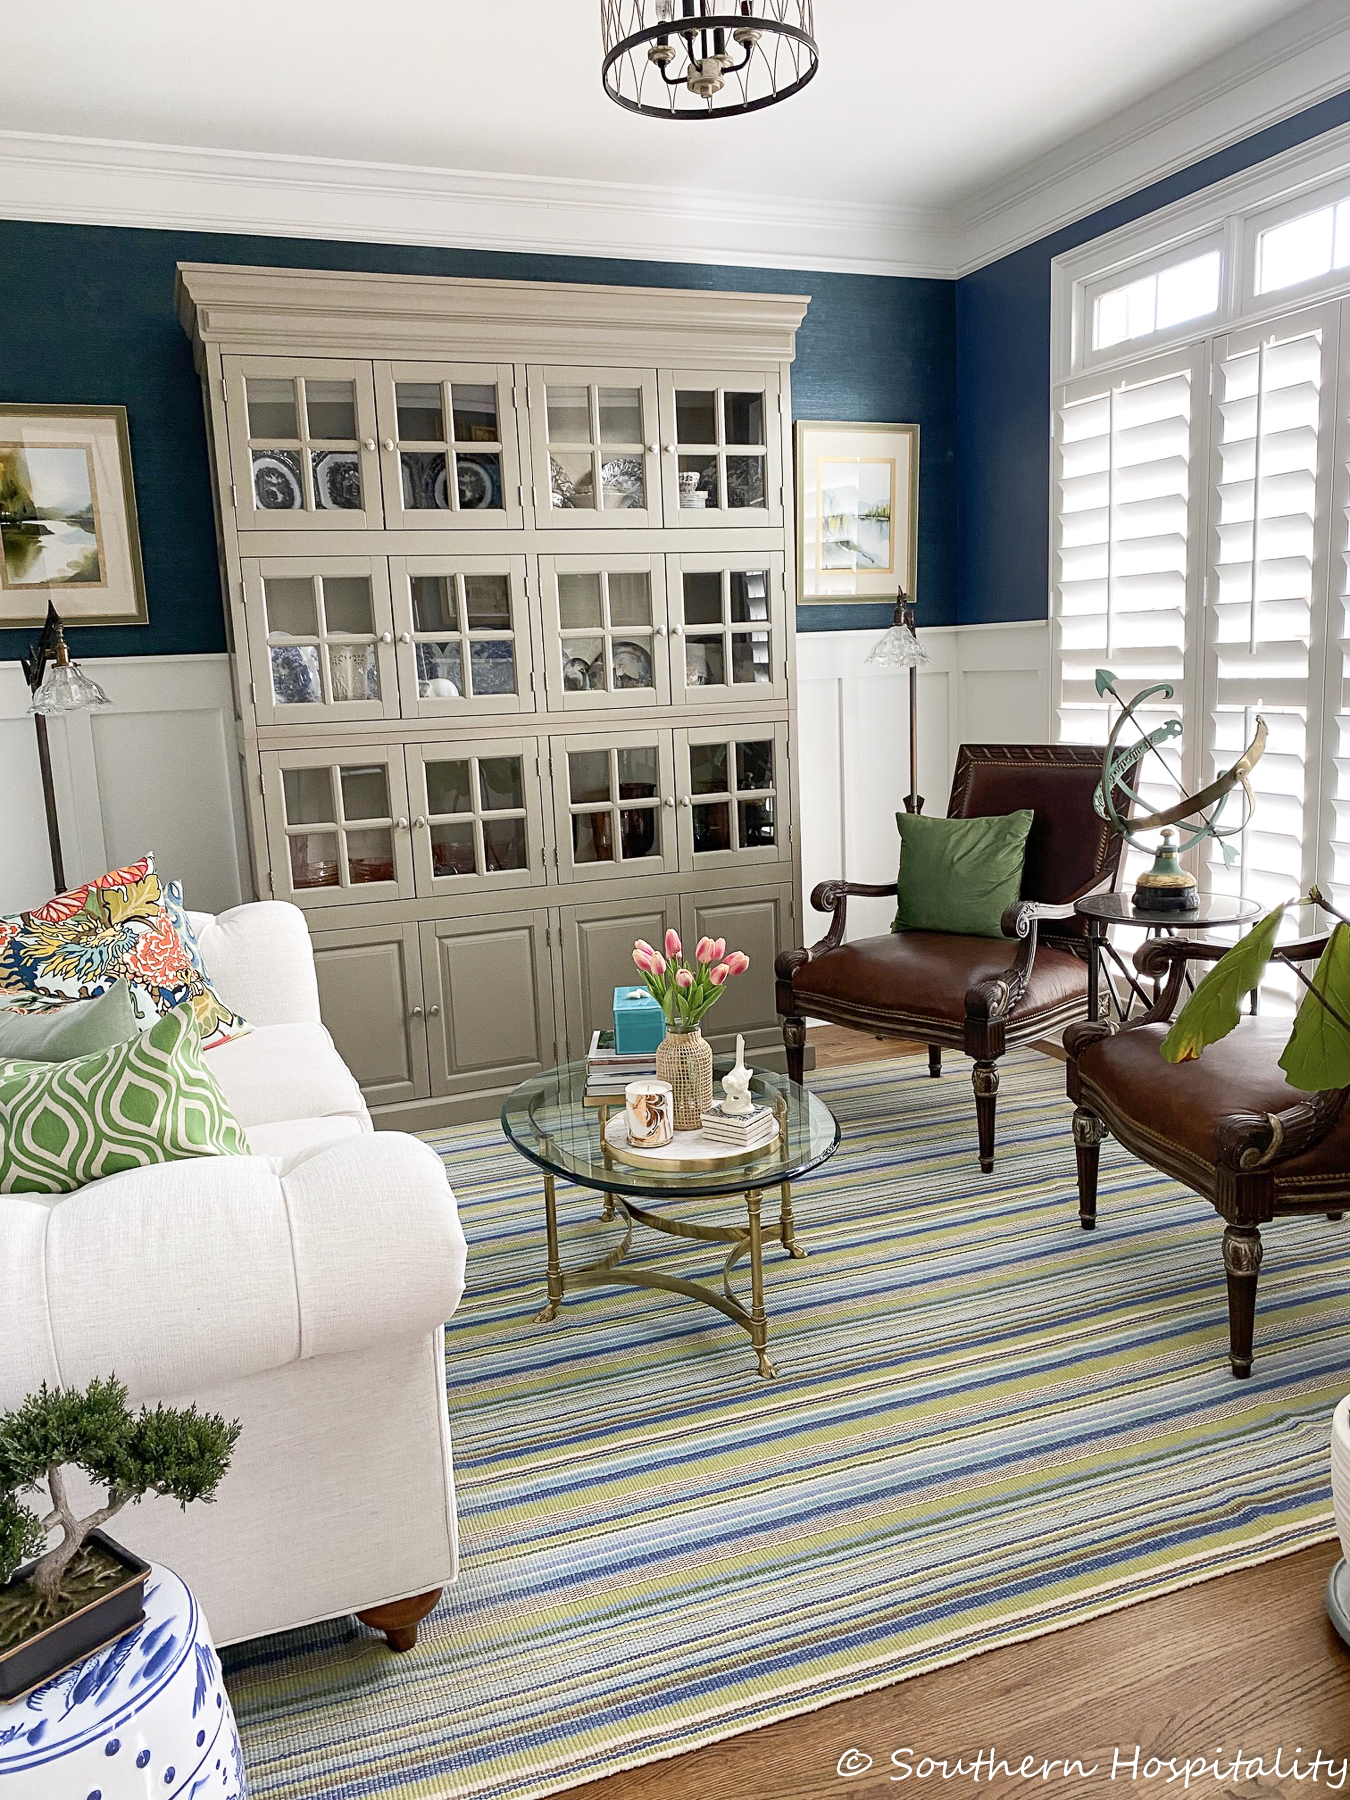
AFTER: Mark added board and batten in here and all that made a difference. When Mark and I got married, we both had furniture, but I had way more than he did. That big cabinet that so many people ask me about, Mark found at Haverty’s years ago. The rest of the furniture in here was mine and I absolutely love how this small living room turned out. I actually dyed those leather chairs a darker brown. Those floor lamps you see were handmade by Mark. He loves Art Deco style and restores lamps using pieces that he puts together.
This wall has the same blue grasscloth as the dining room.
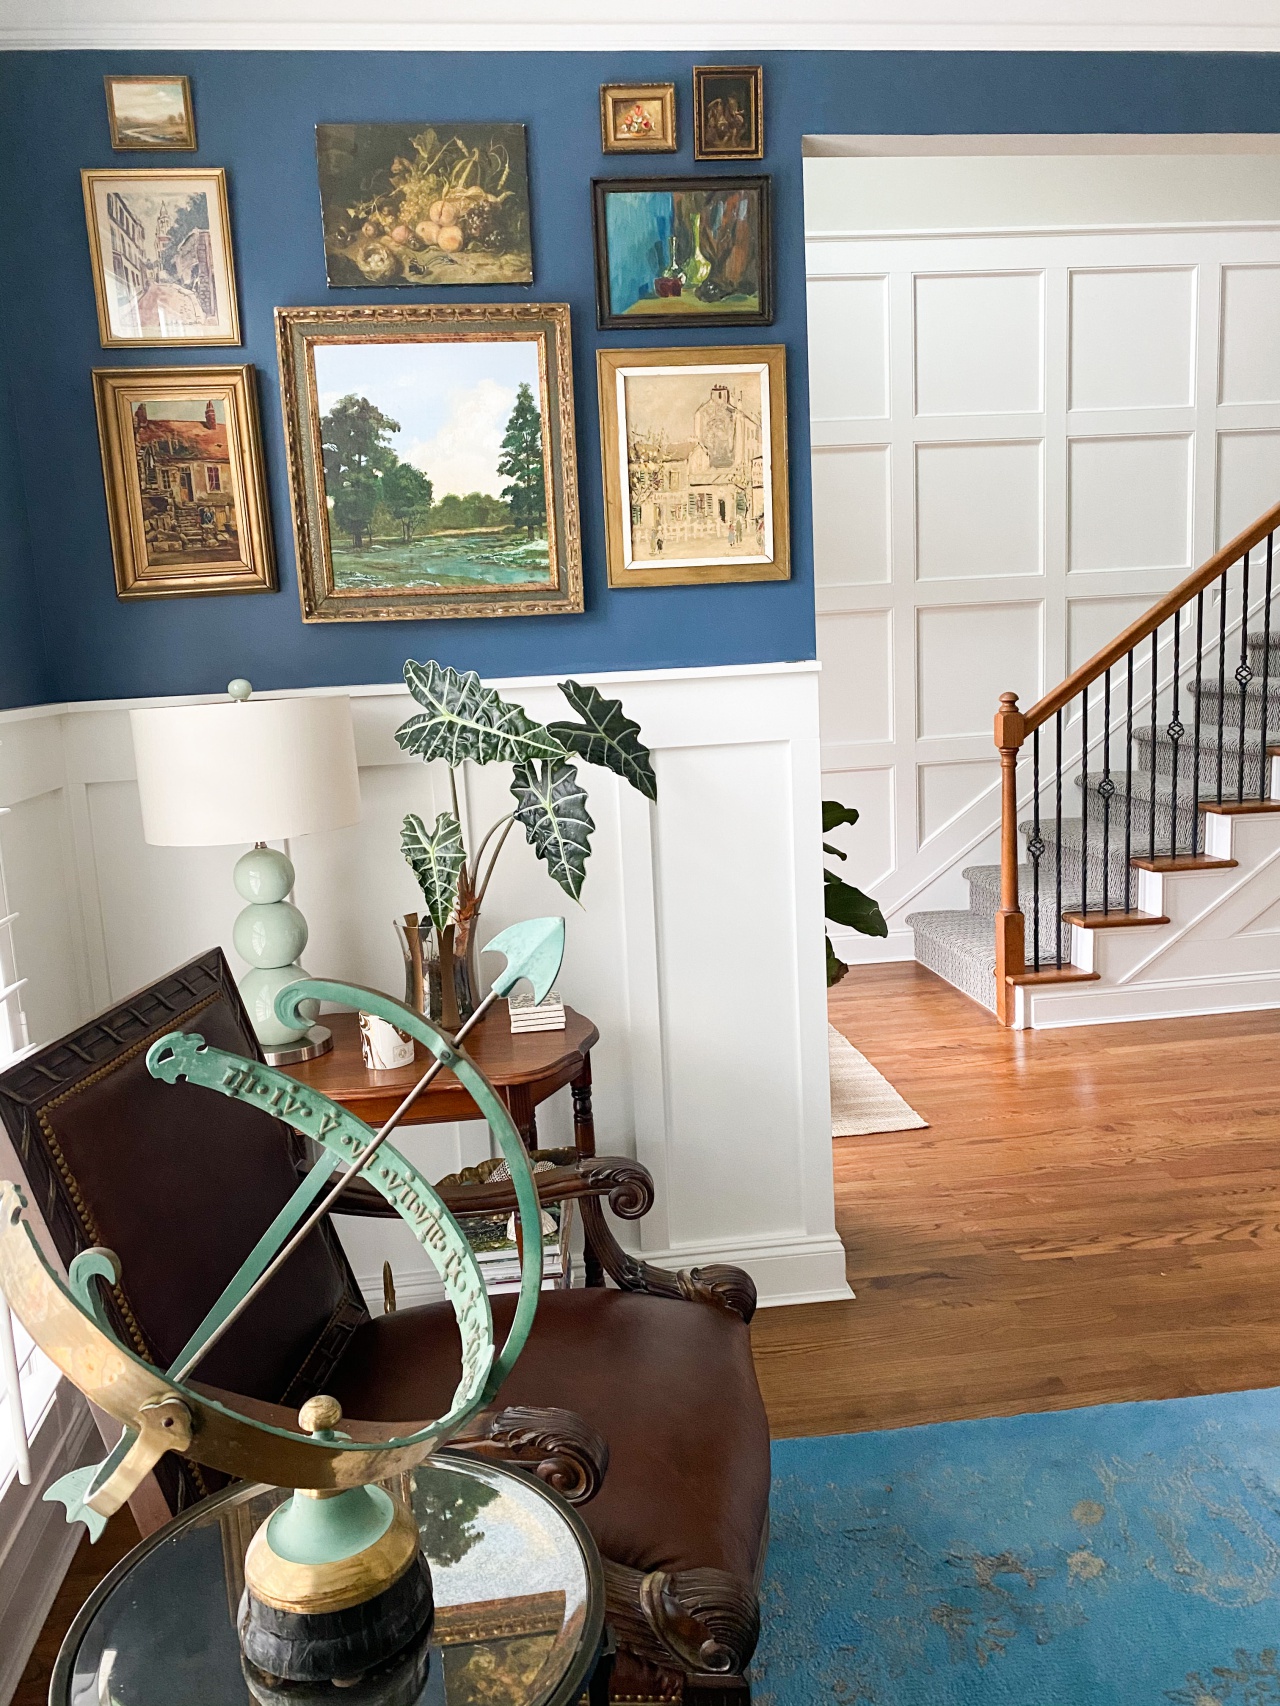
AFTER: The other walls are color matched and the paint is Spellbound by Benjamin Moore.
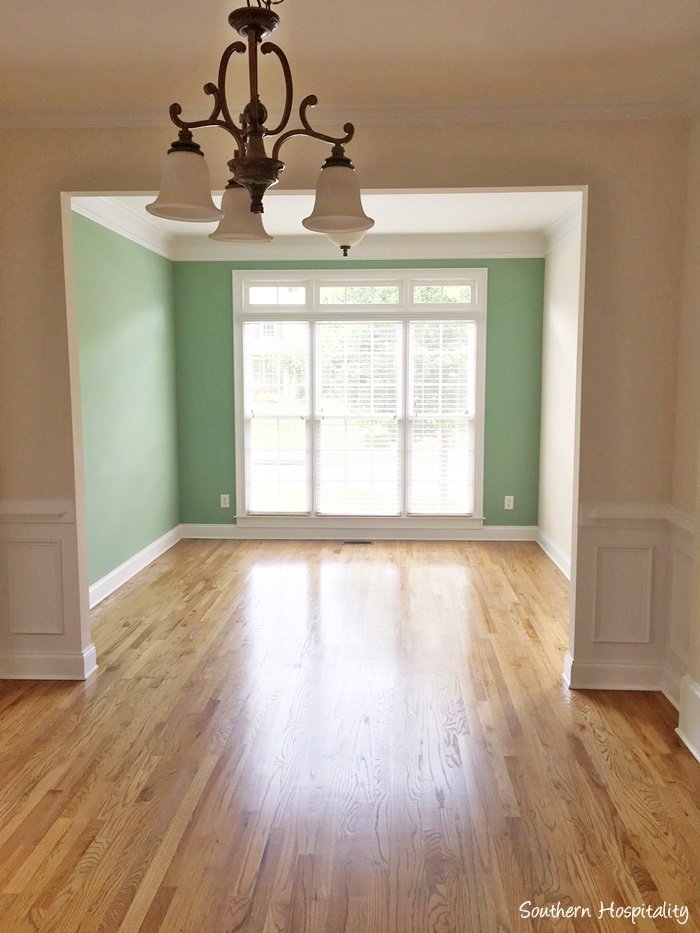
BEFORE: Dining Room to Living Room
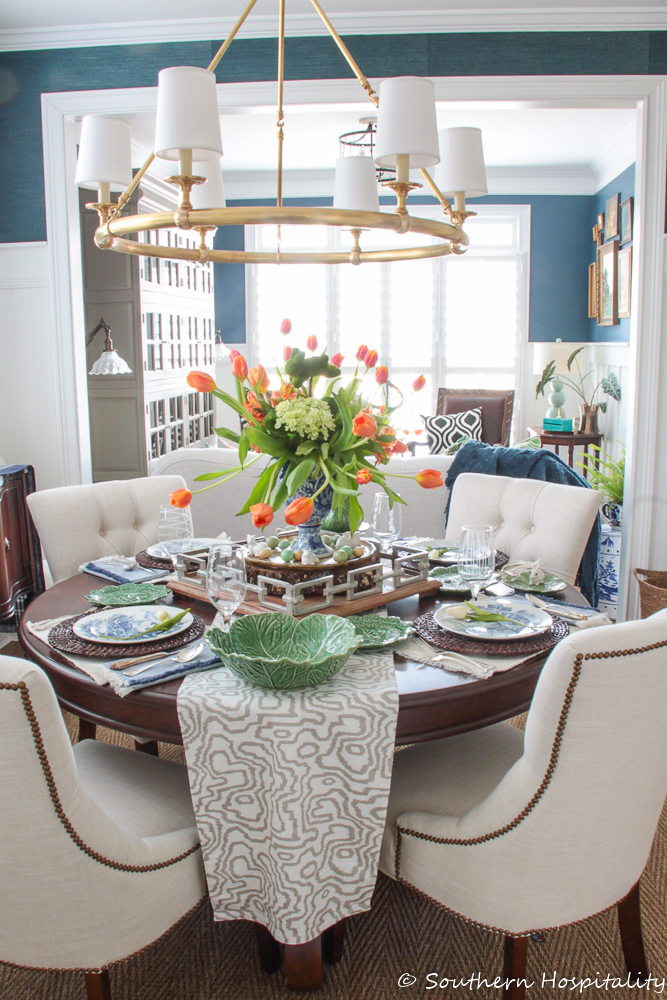
AFTER: New light fixture. Mark added chunky door frame molding around this opening that was missing before. Adding wainscoting is such a nice upgrade for a home.
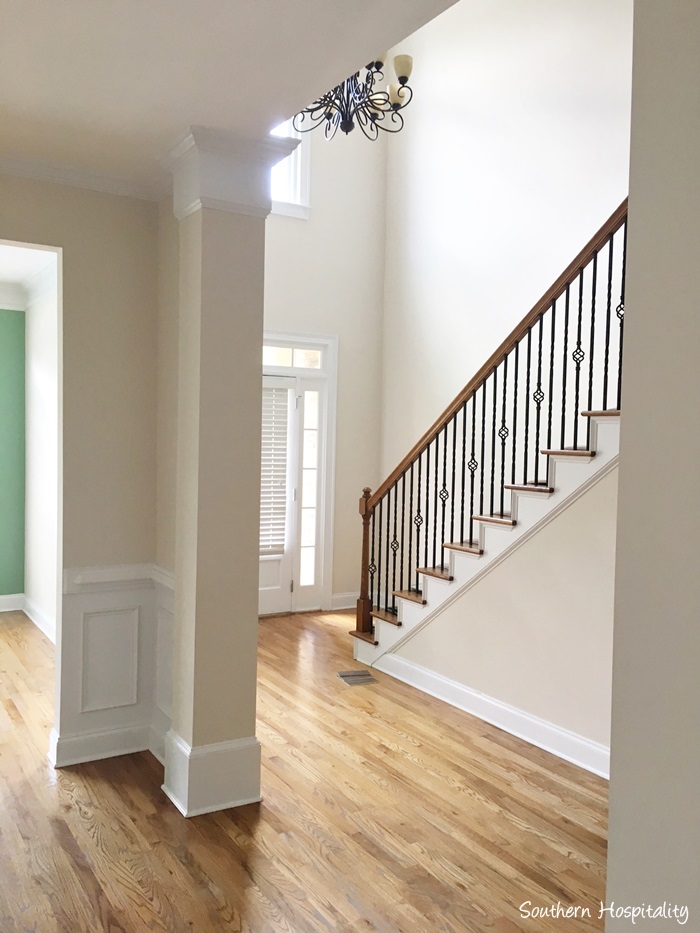
BEFORE: Looking to foyer
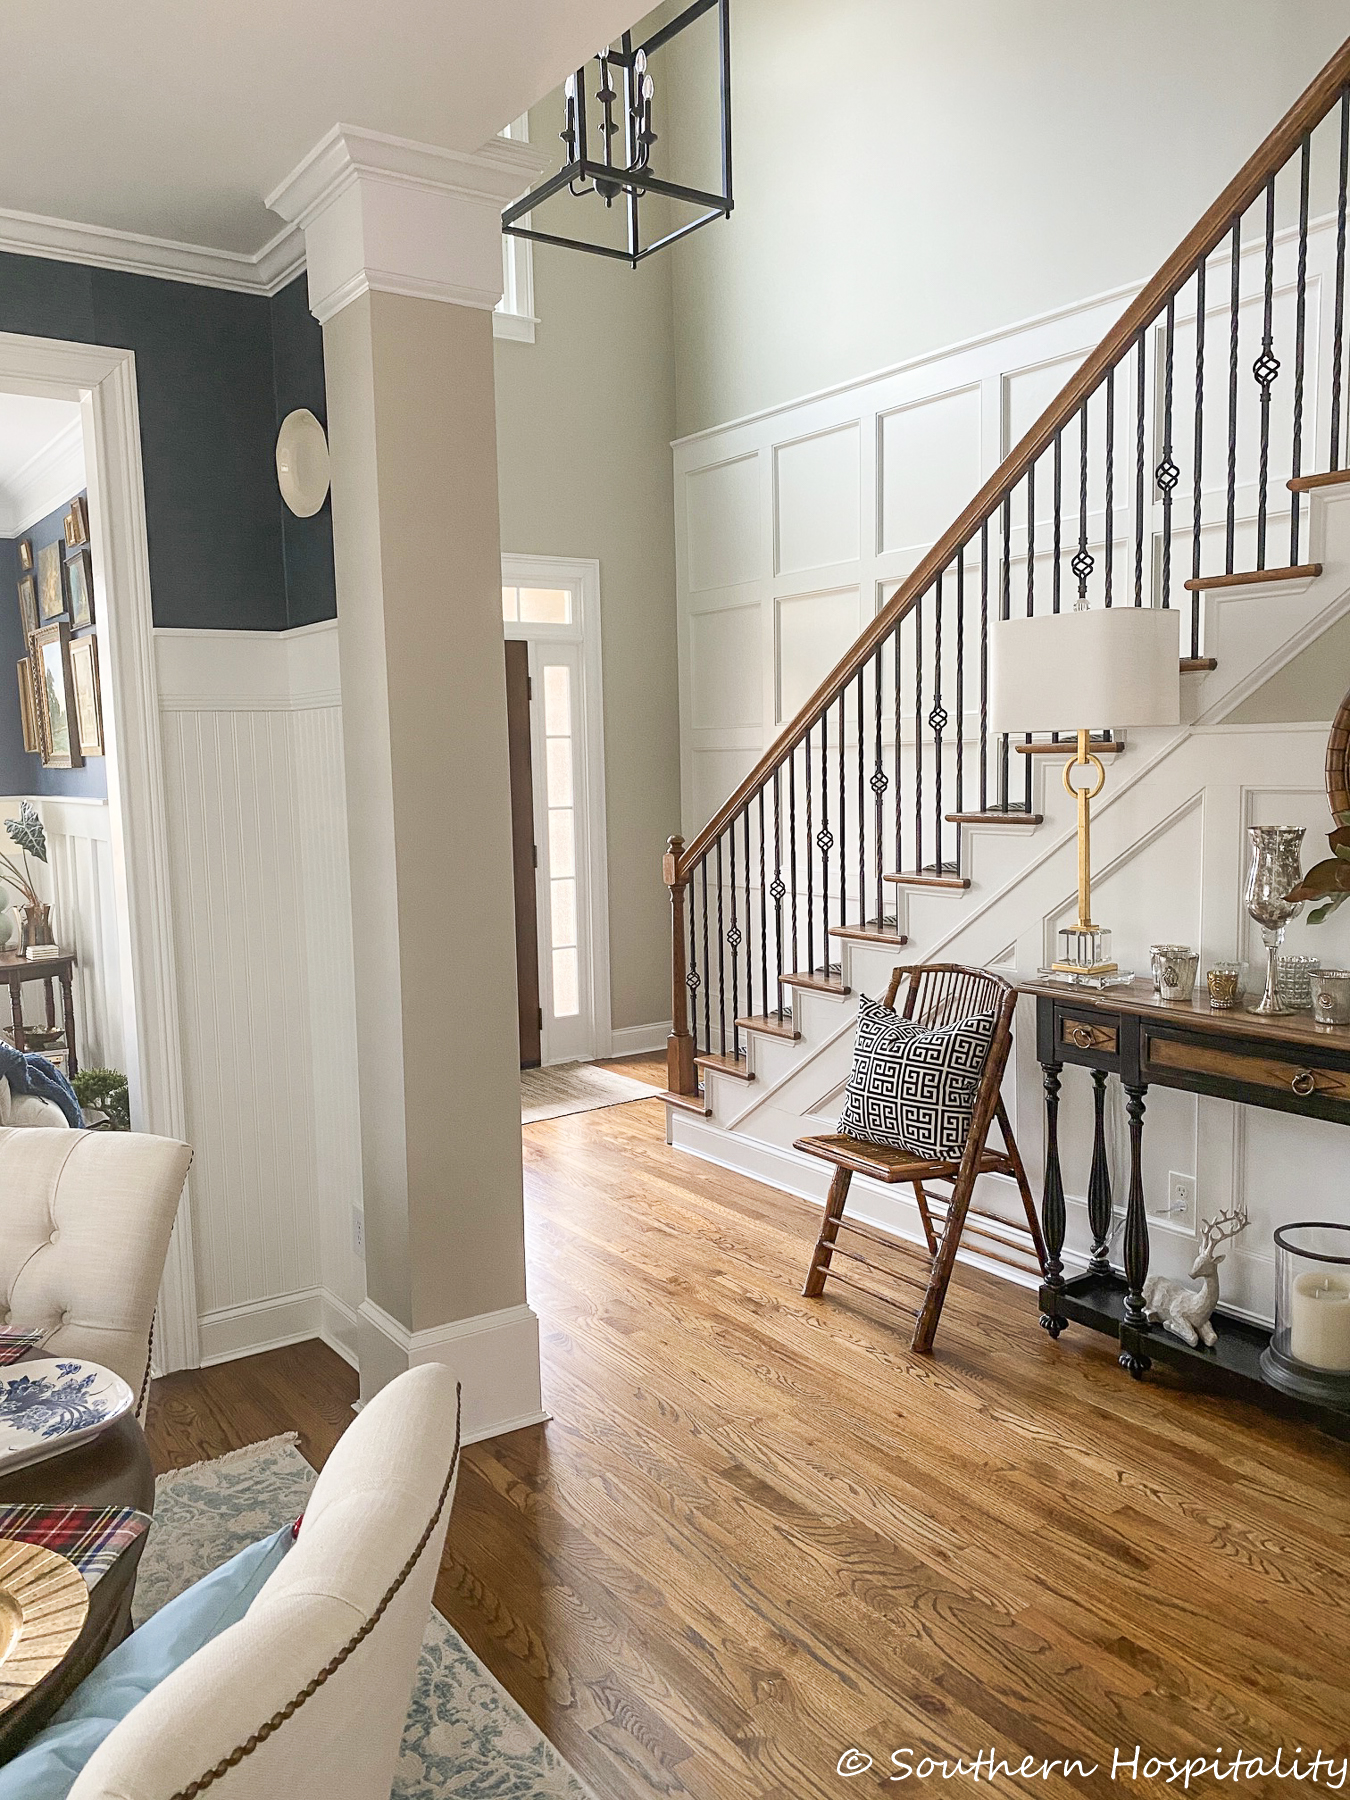
AFTER: New box molding installed and beadboard wainscot in dining room.
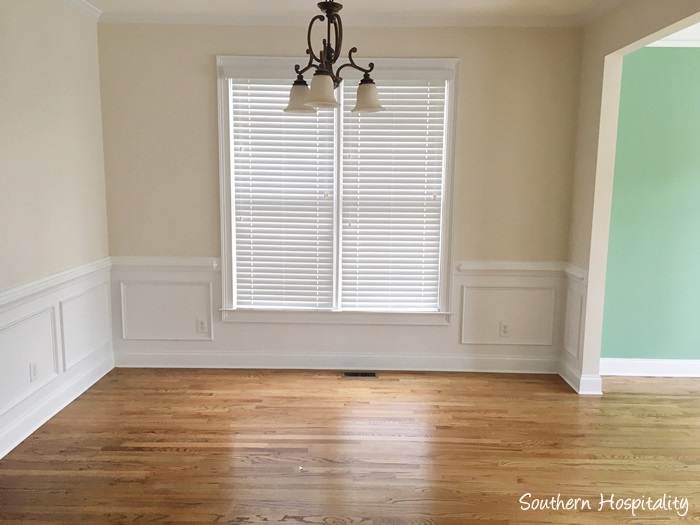
BEFORE: Dining Room
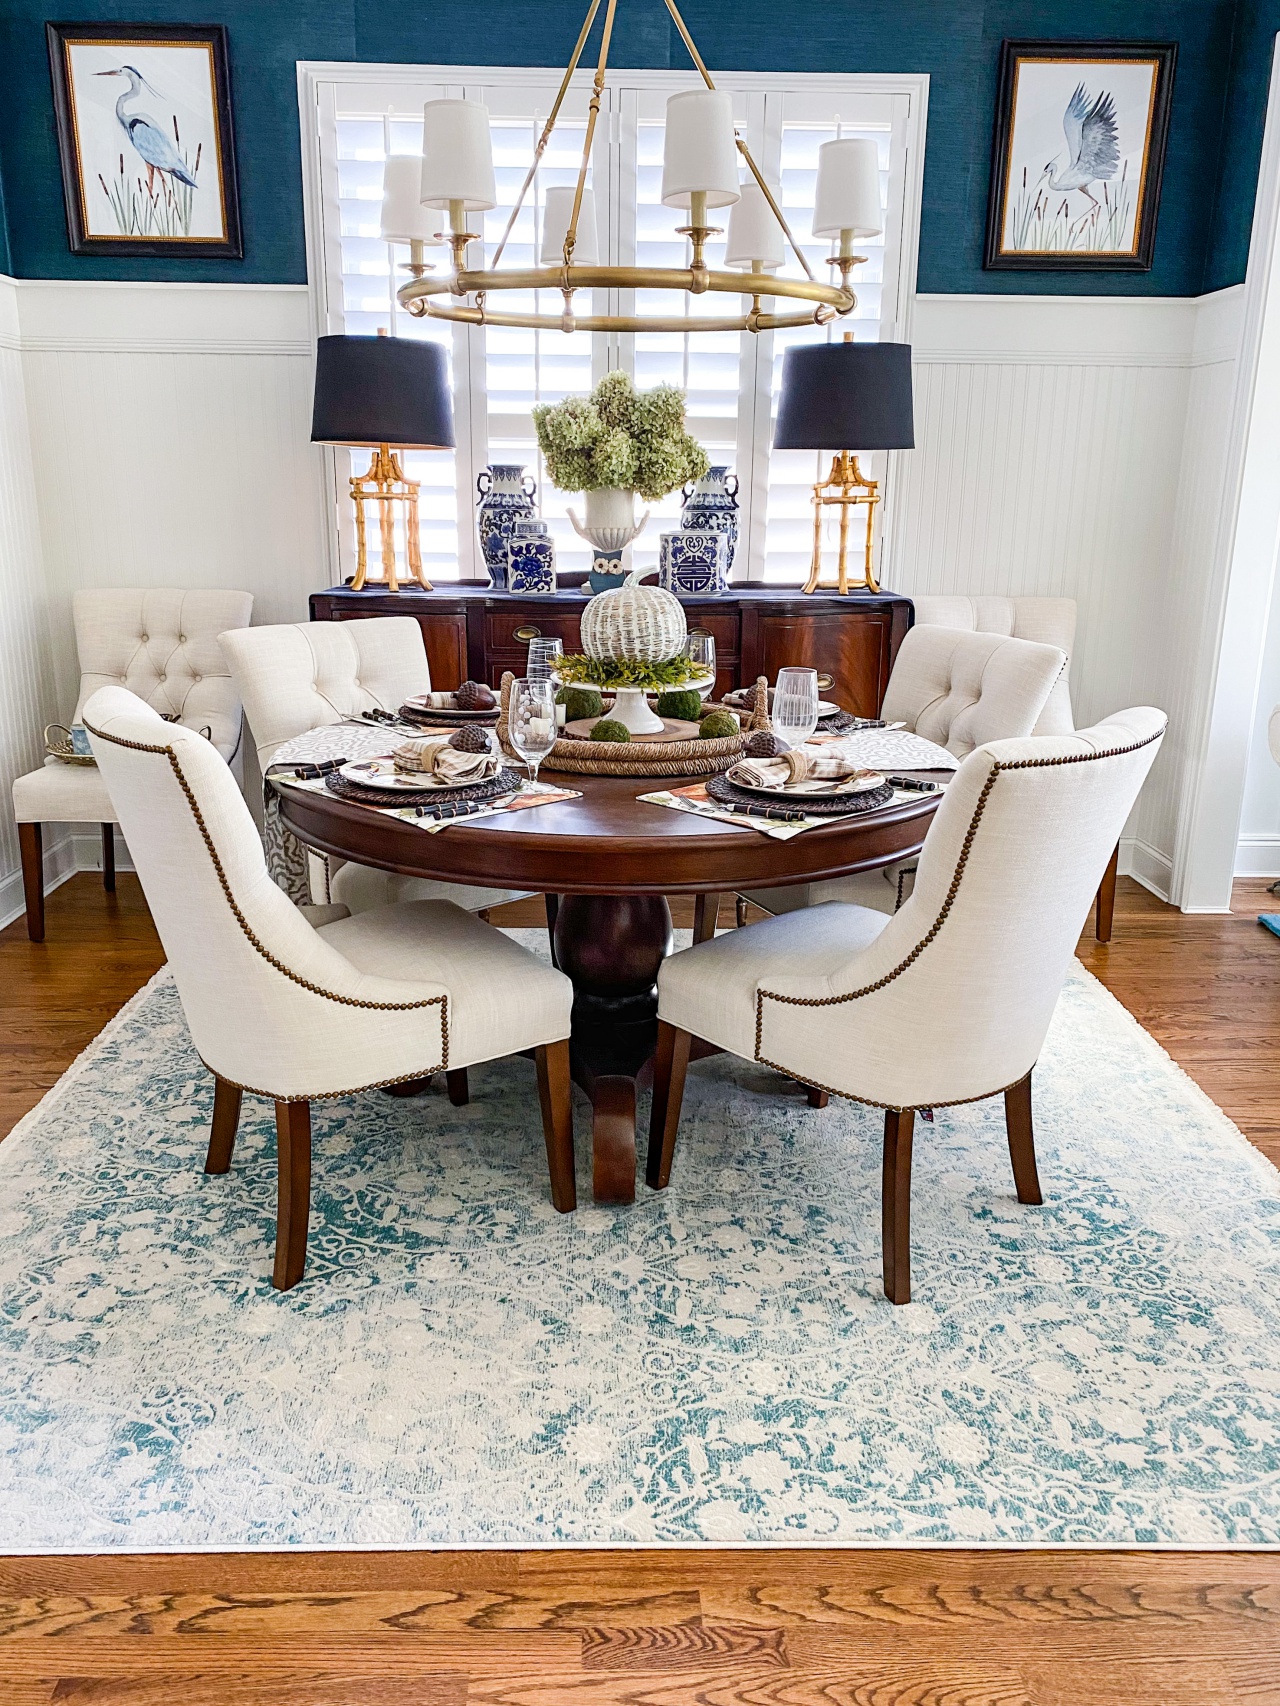
AFTER: Mark added Cape Cod beadboard wainscot, I had blue grasscloth wallpaper installed. Mark also added new trim around the big opening which wasn’t there as well as new brass light fixture, all made a huge difference. Added Plantation shutters in the dining room and living room as well.
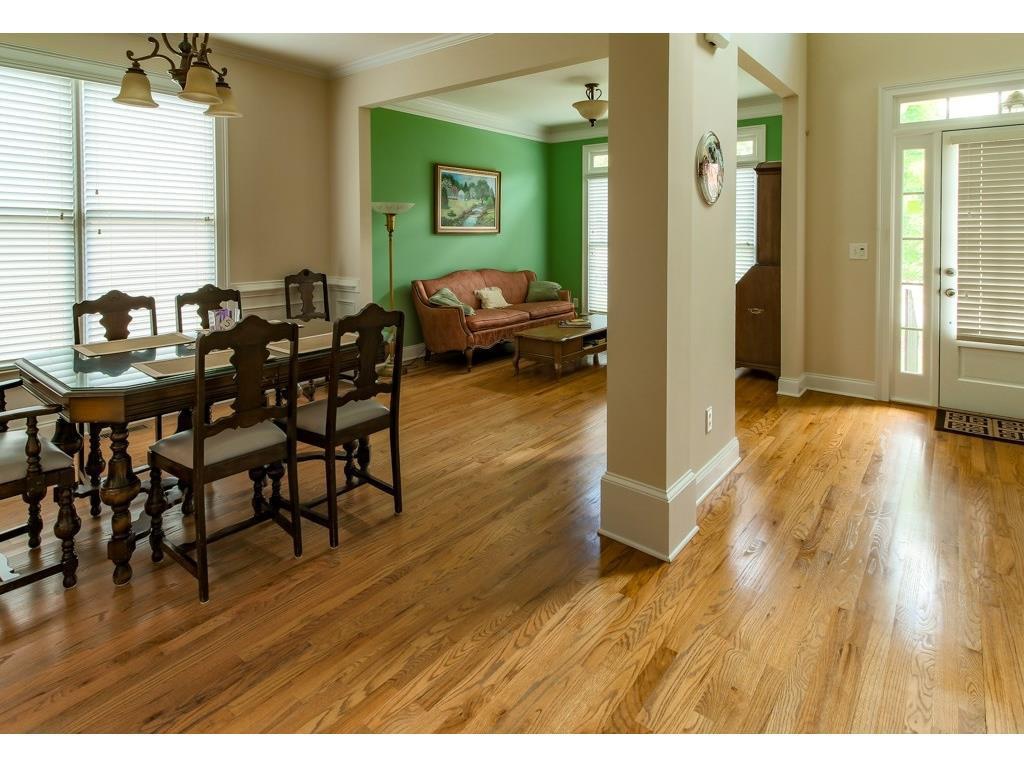
BEFORE: Real Estate pic
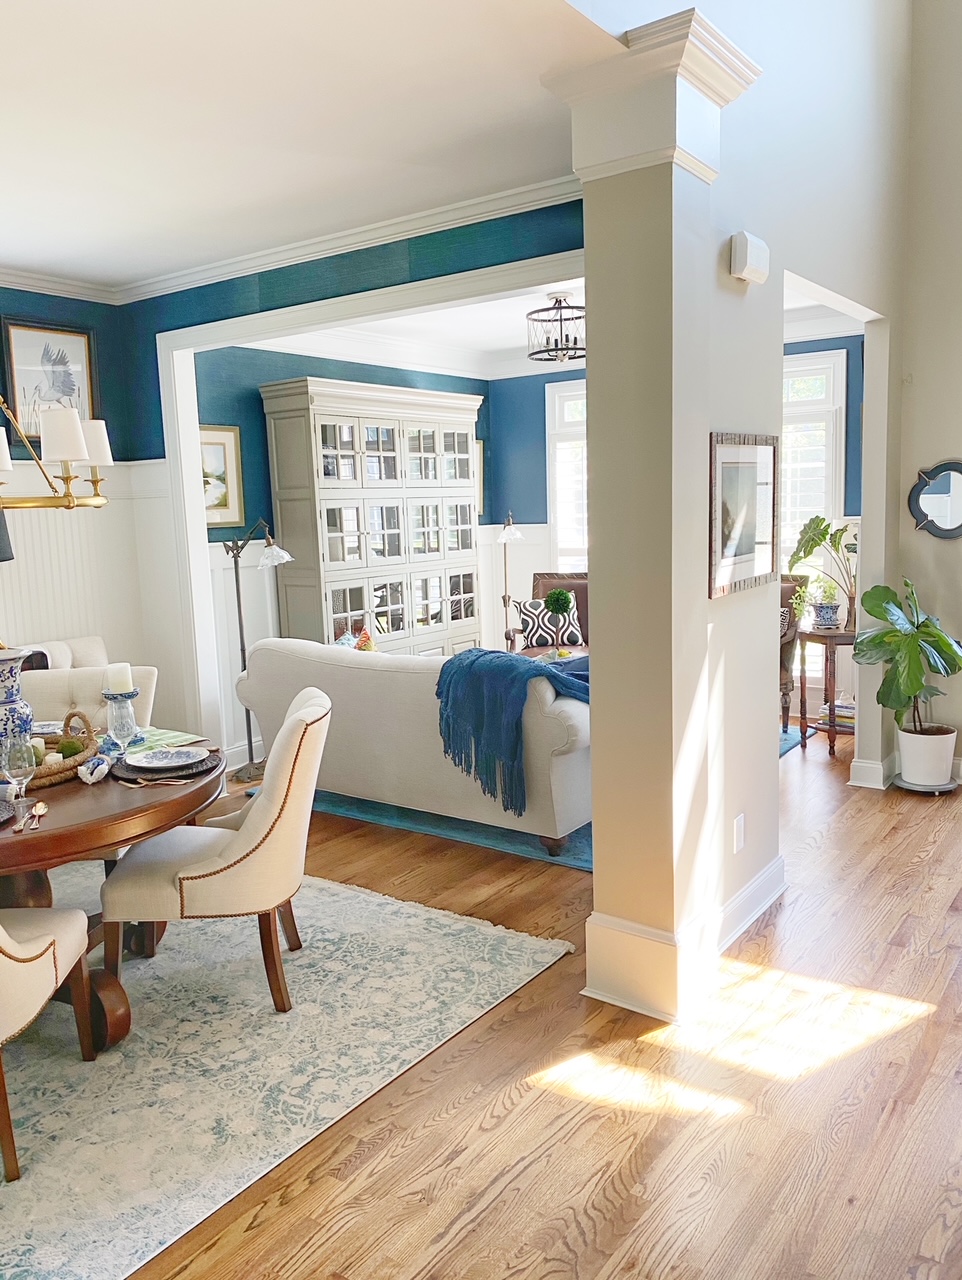
AFTER: What a difference decorating and color make!
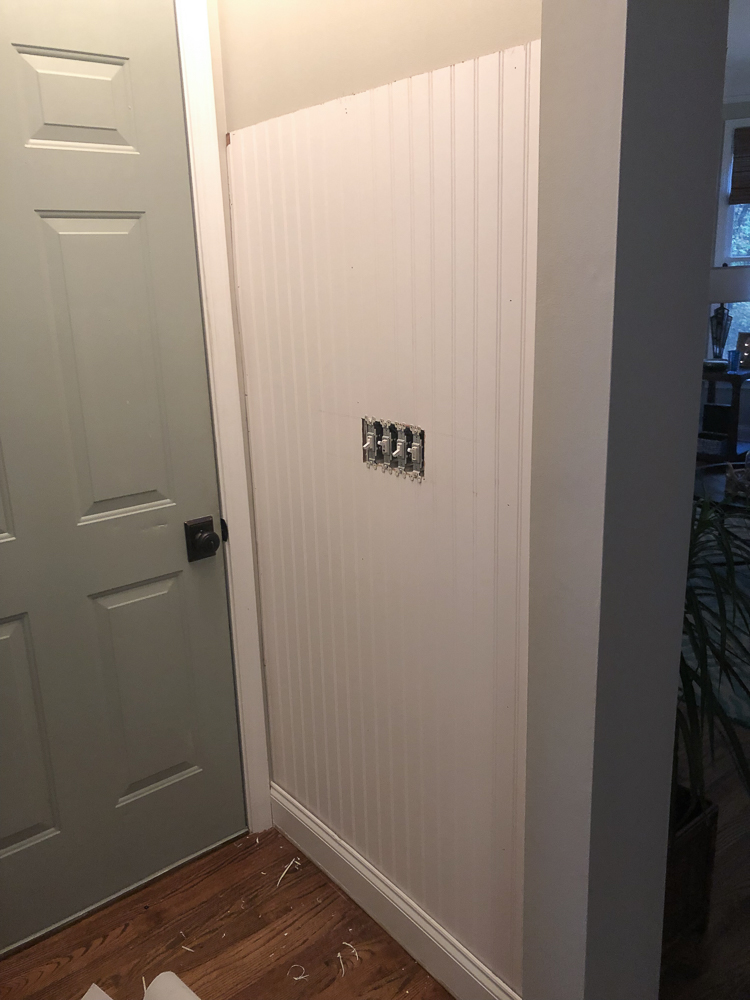
In Progress: Nook coming in from garage.
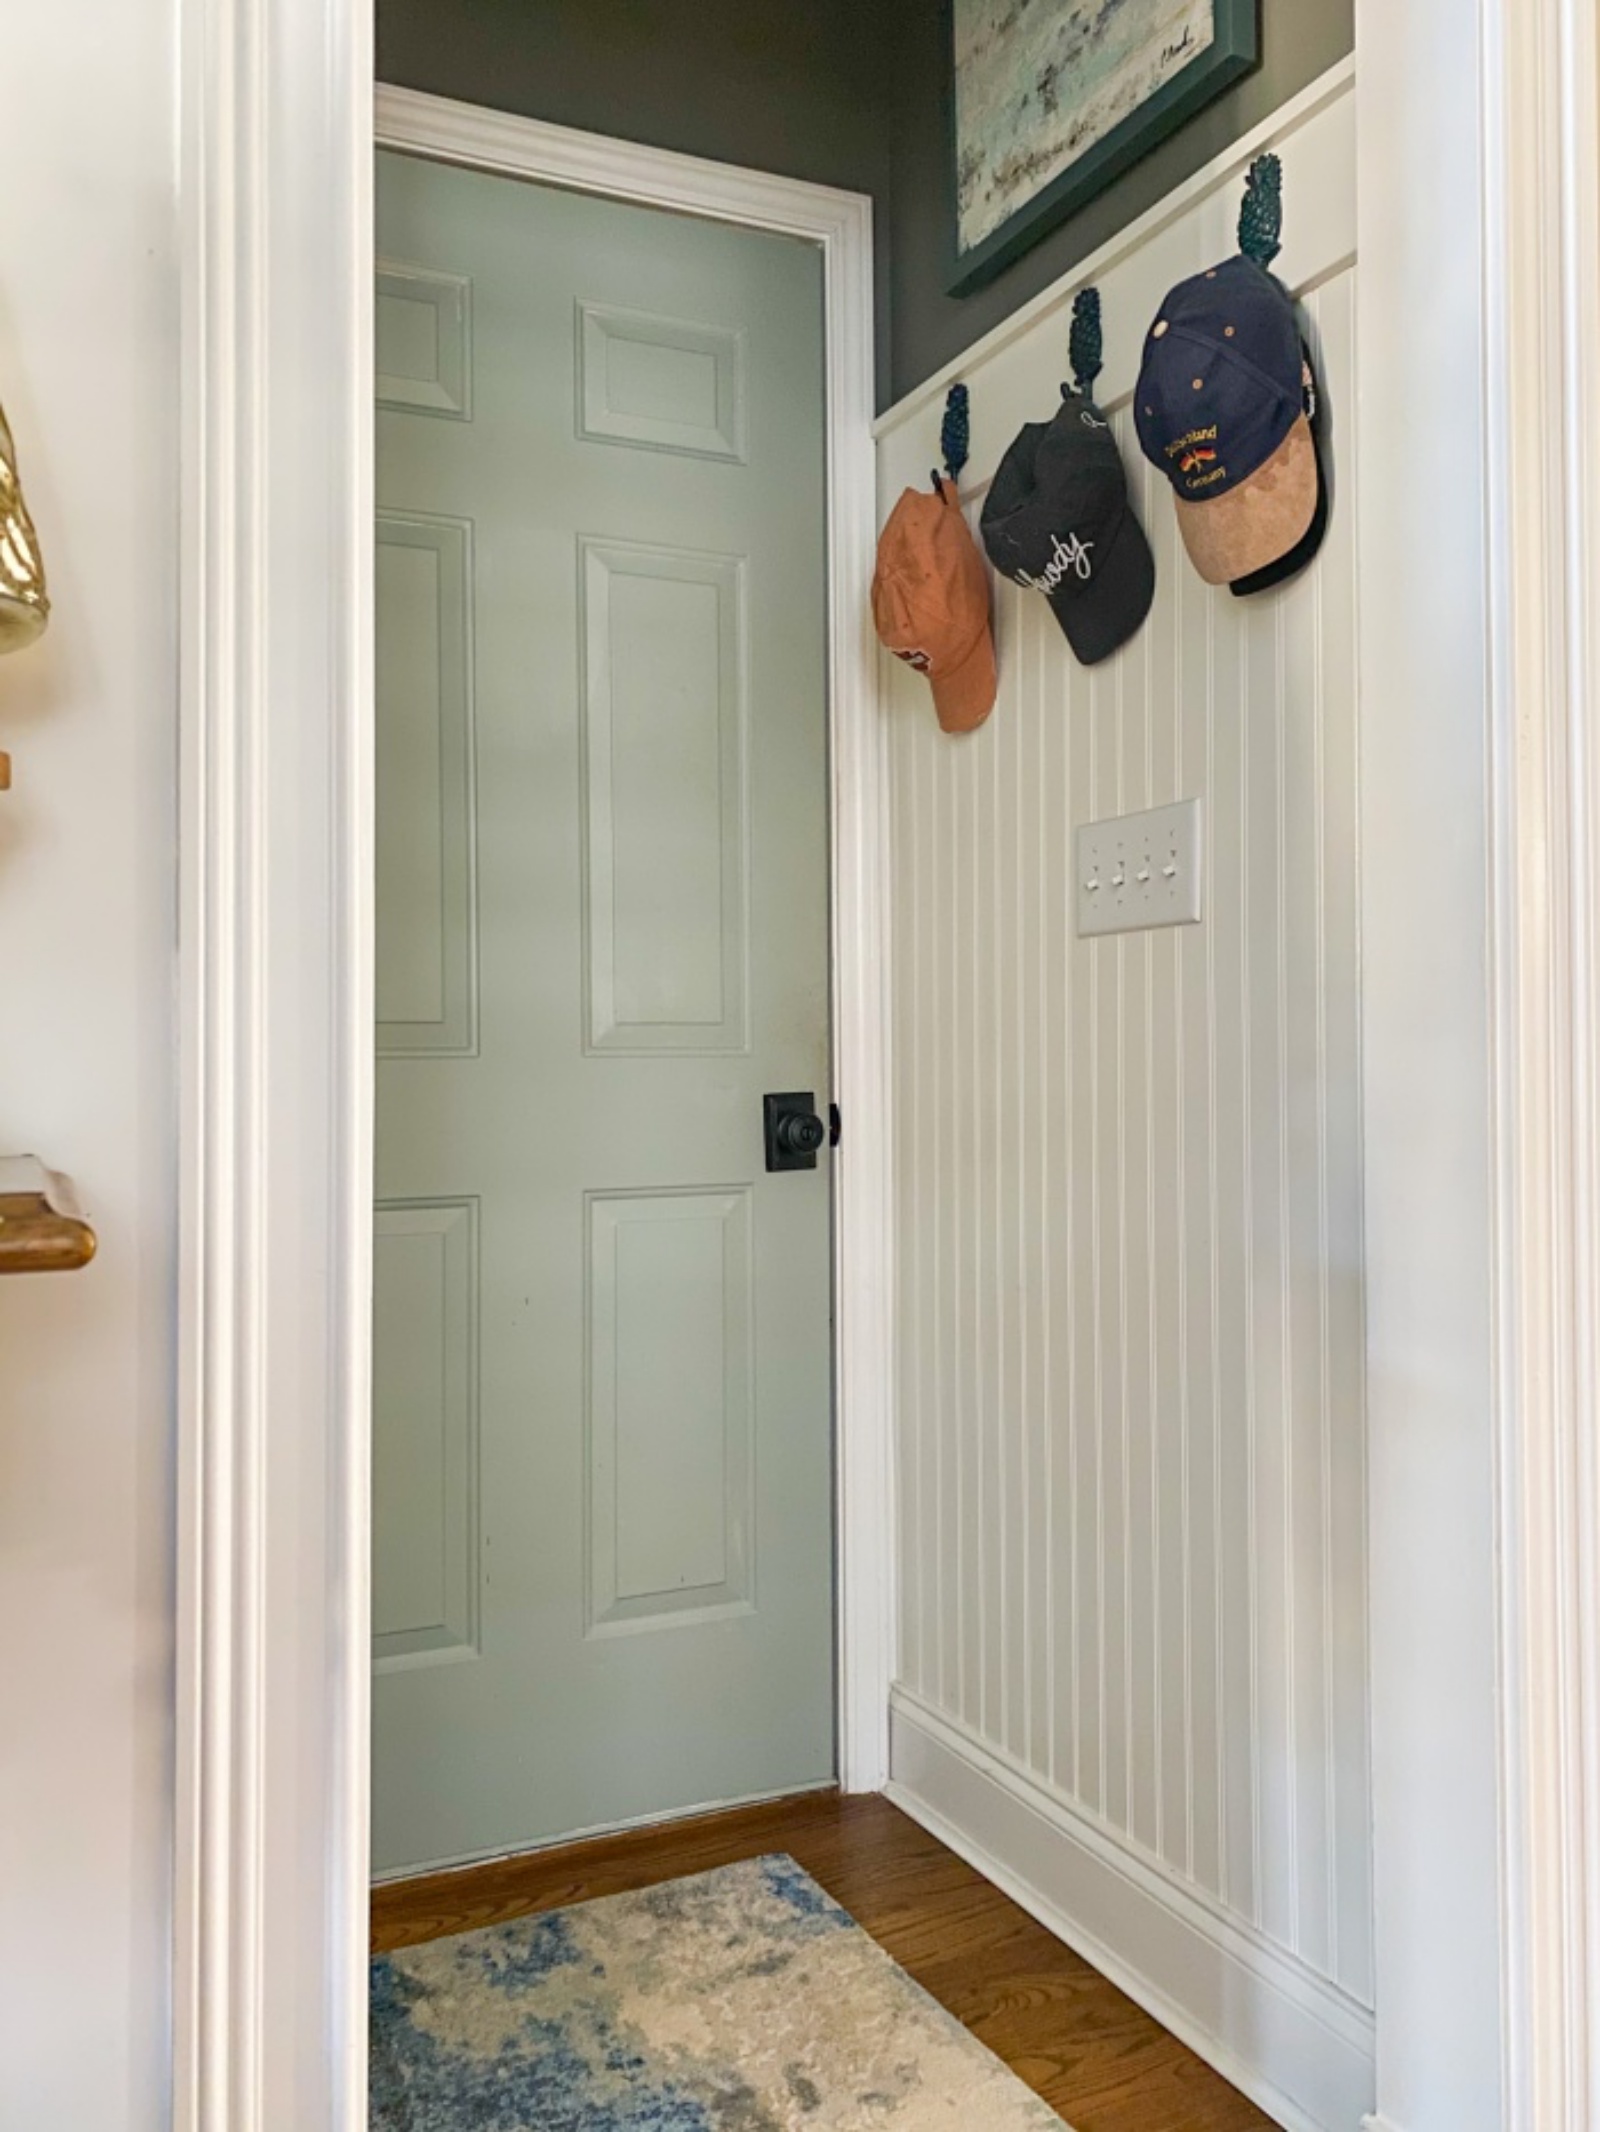
AFTER: I don’t have a great Before shot of this little nook, but this is the After. This door comes in from the garage and the basement door is to the left, you can’t see it. Mark added this cute beadboard trim molding in here and I painted it a darker color. Added hooks and original art for a little more interest.
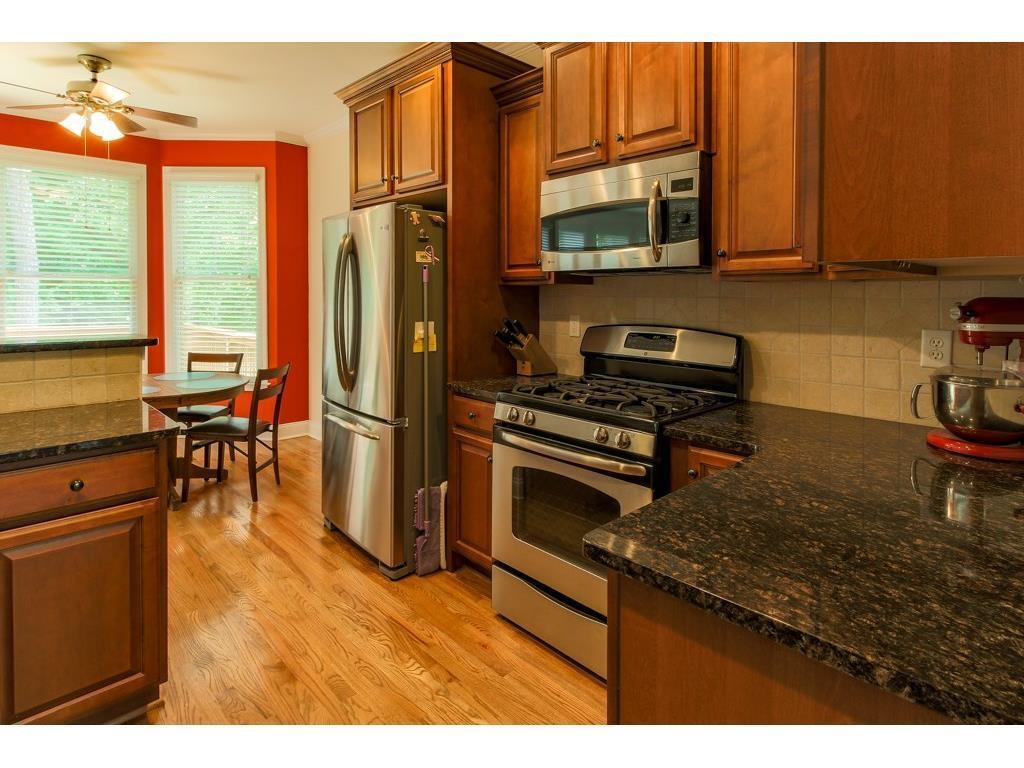
BEFORE: Kitchen, real estate pics of a builder-grade kitchen. It was nice enough with cherry cabinets and granite countertops but we wanted to personalize it even more.
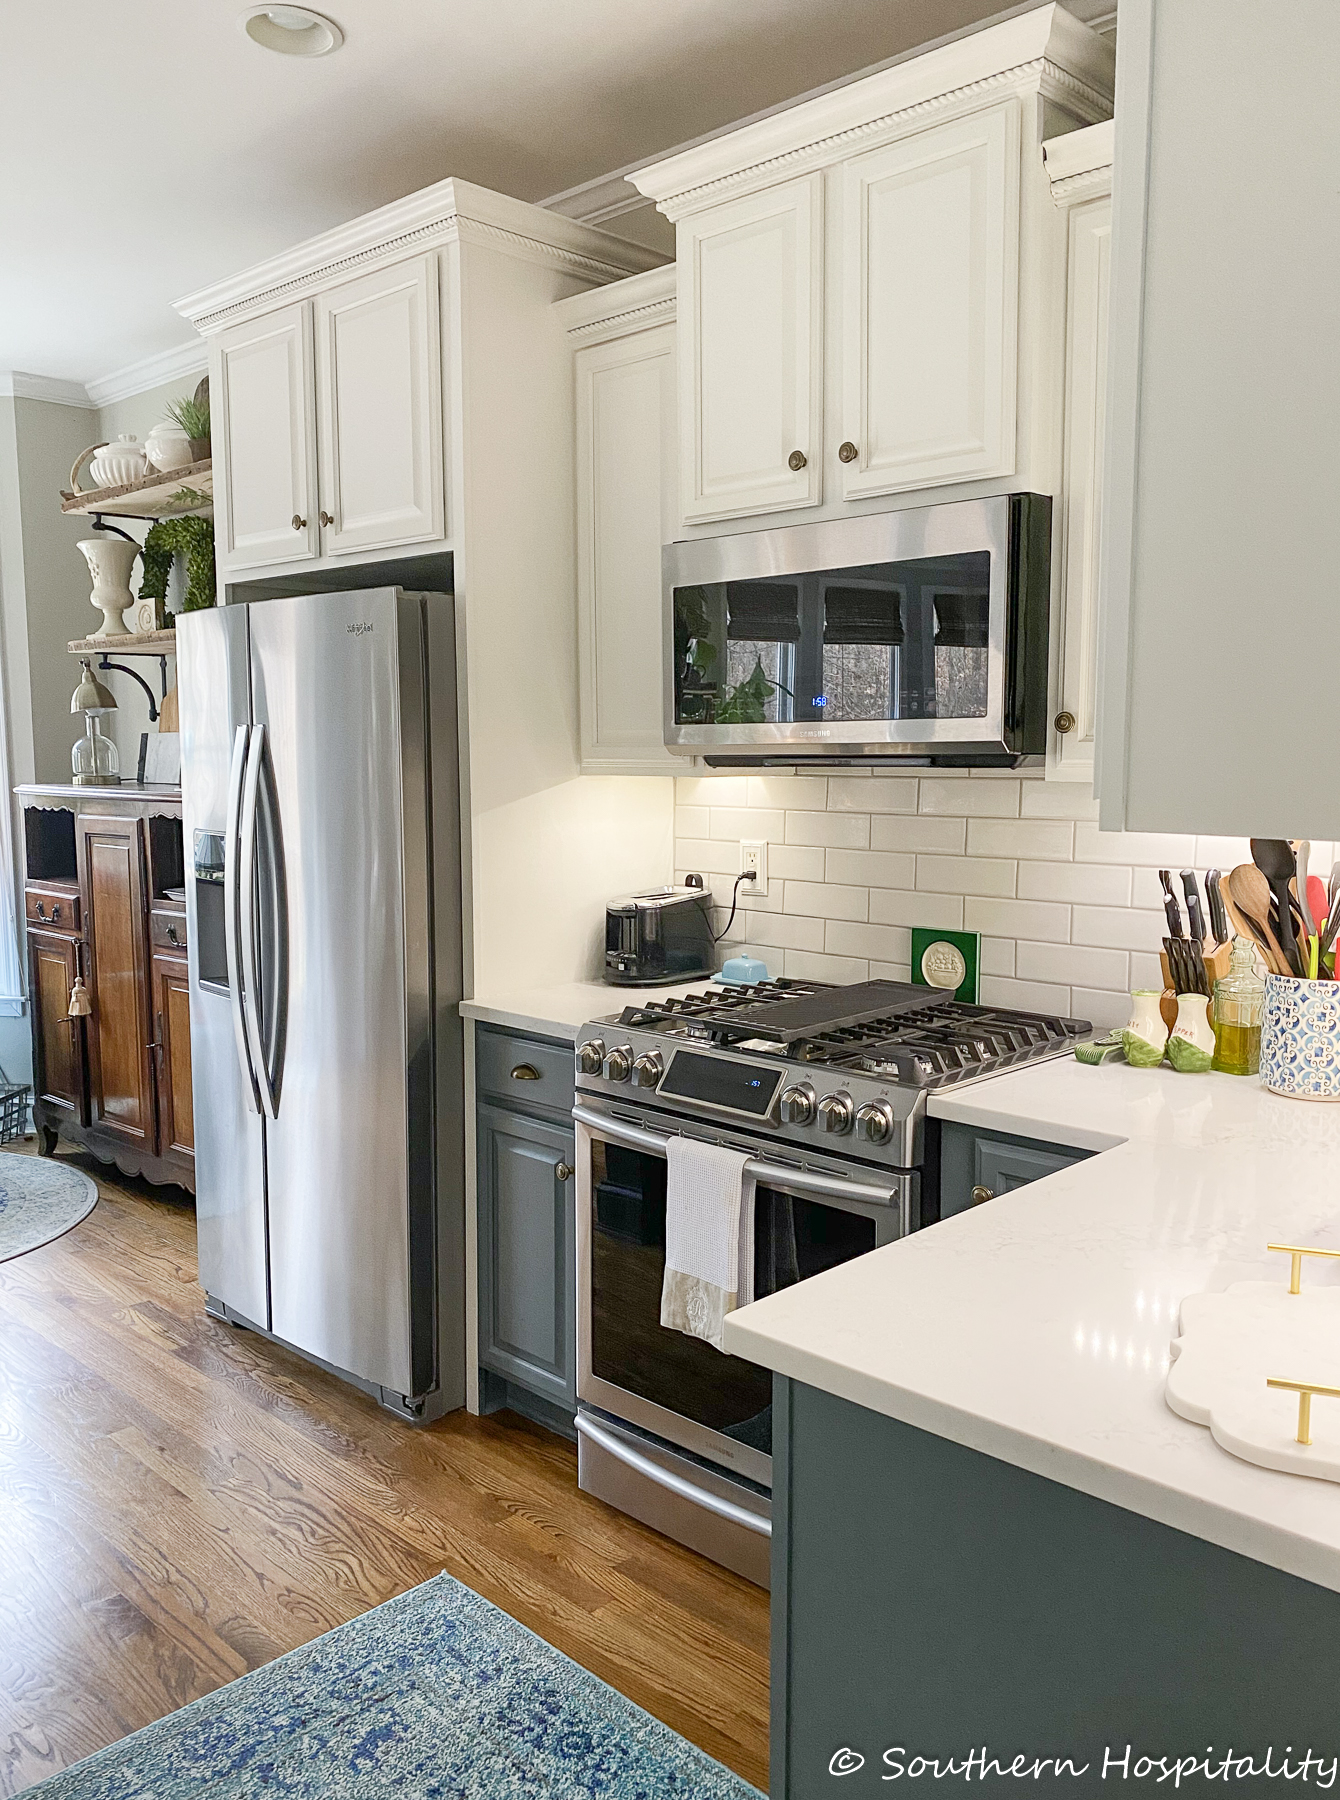
AFTER: We had the cabinets sprayed by our painter, replaced all 3 appliances over time (refrigerator, microwave and stove). Old fridge went to garage and we love this counter depth much better. Old microwave quit working, so got a new one and we wanted a stove that slides in instead of the old one with the controls on the back. Love the new one! Here’s the whole kitchen reveal.
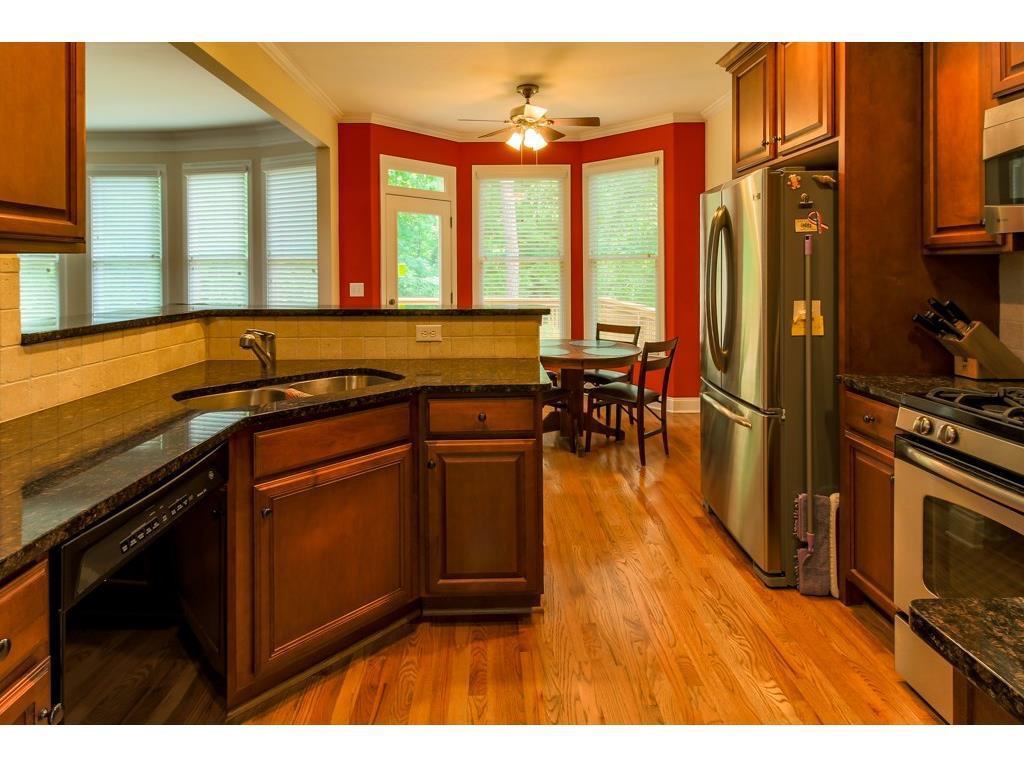
BEFORE
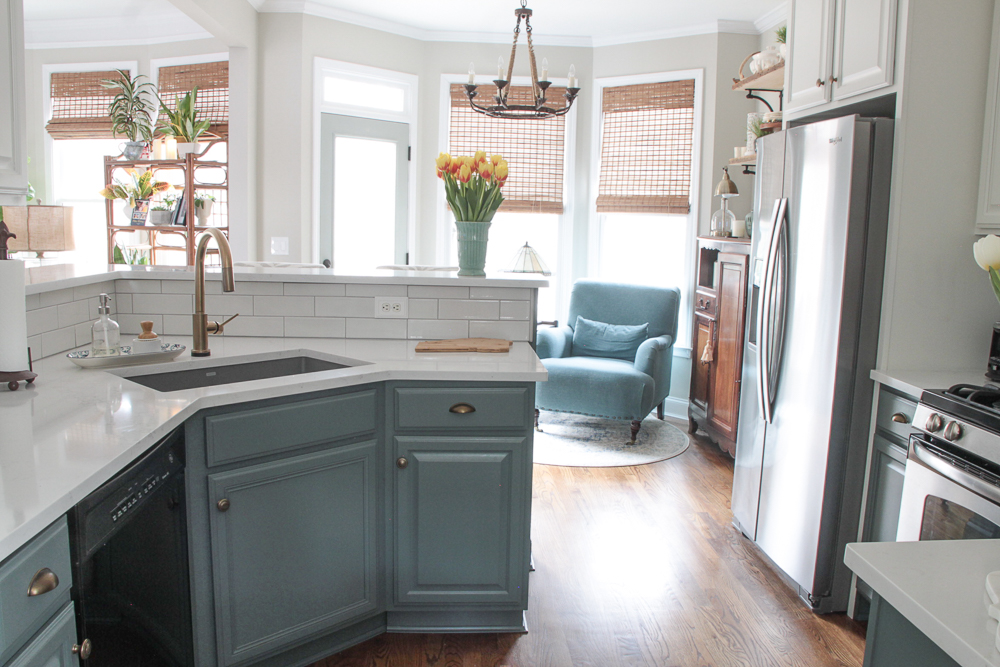
AFTER
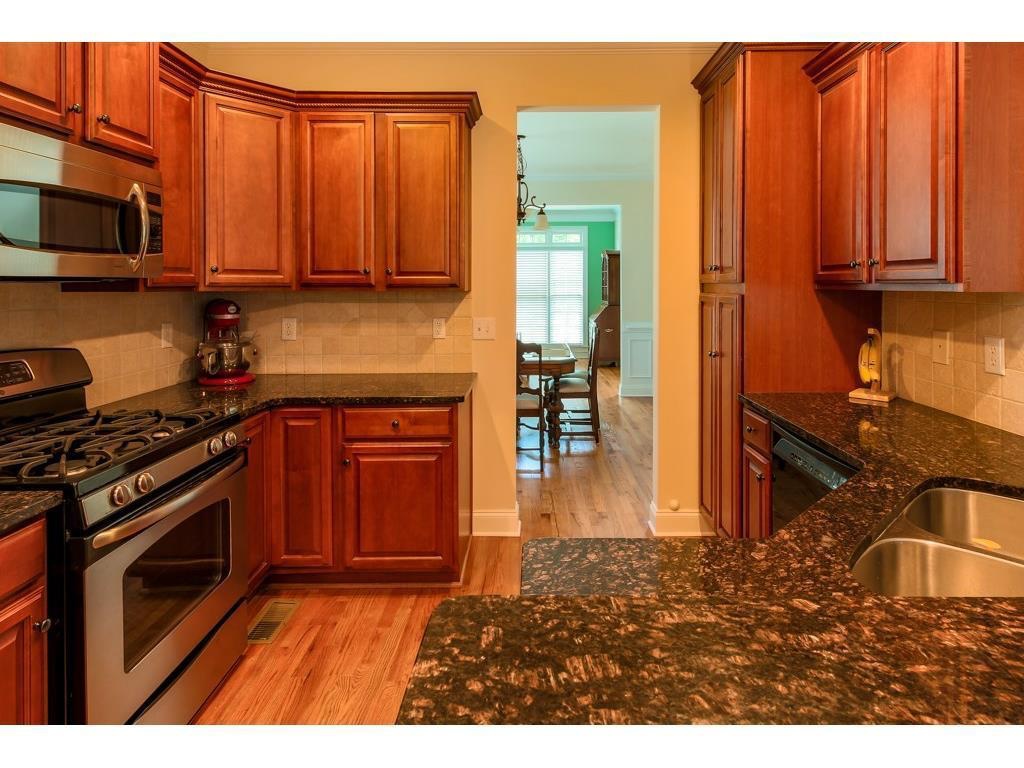
BEFORE
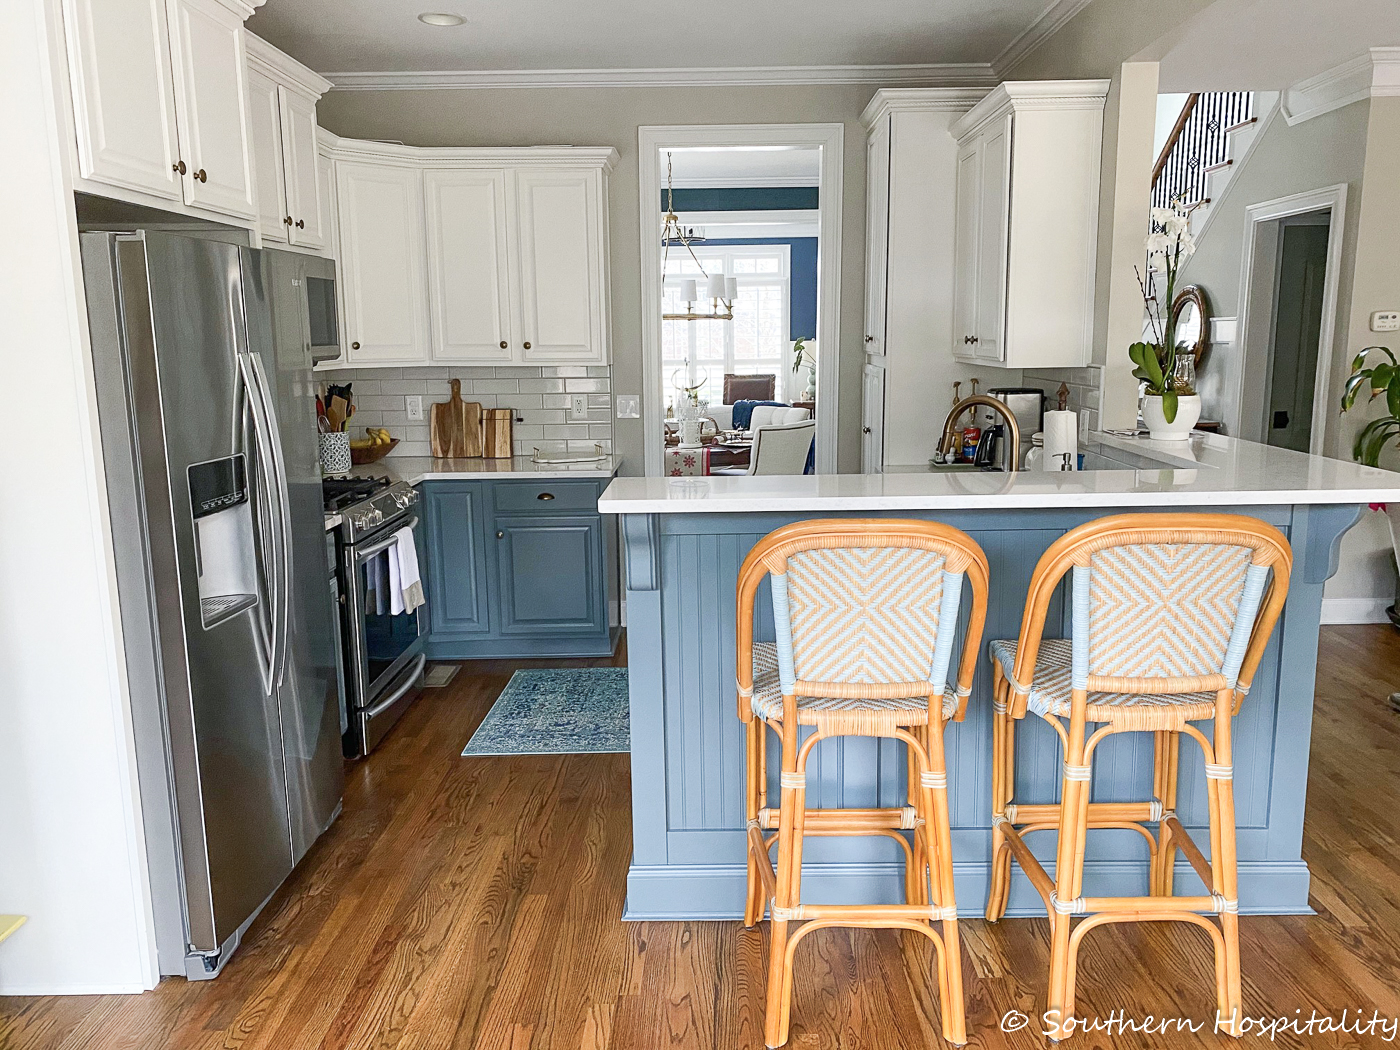
AFTER: Phase two brought in new quartz countertops, backsplash (Mark and I DIY’d that), Blanco one bowl sink and gold Delta faucet. We love how much brighter the kitchen is now. Added undercounter lighting as well after we moved in.
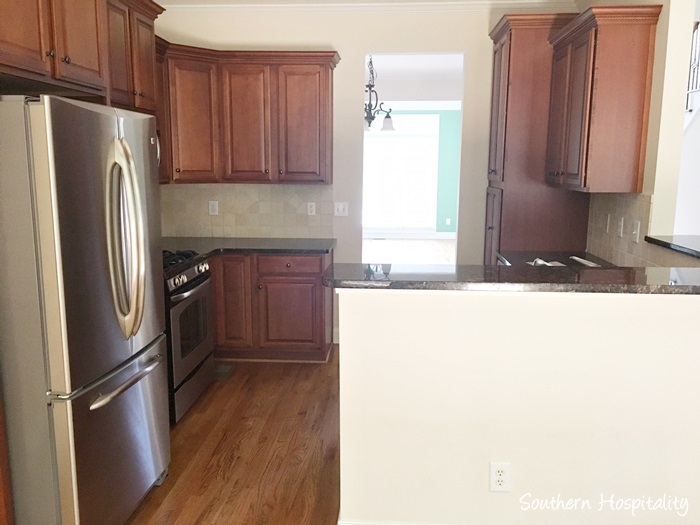
BEFORE
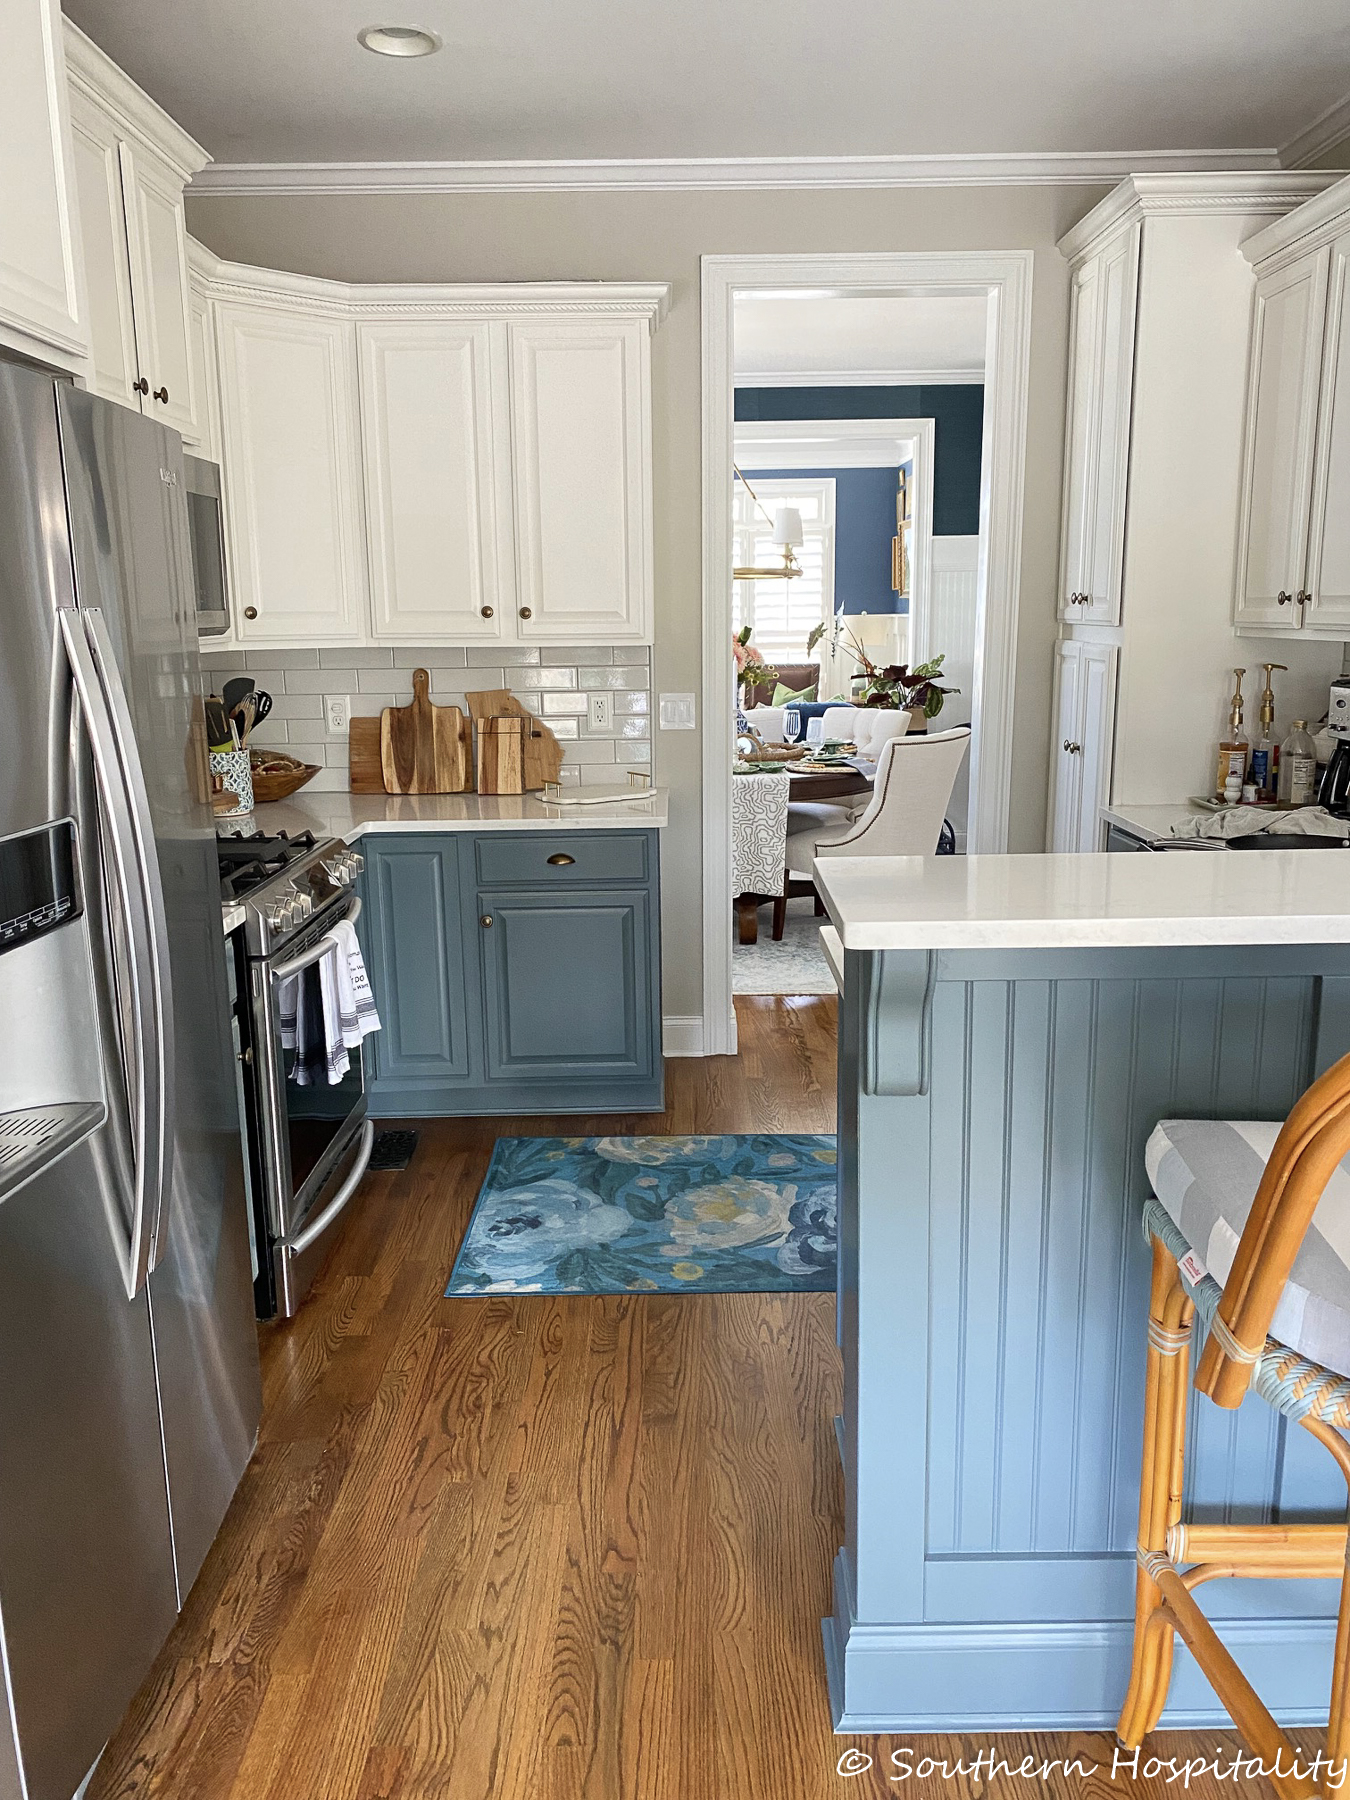
AFTER: New barstools from Ballard Designs
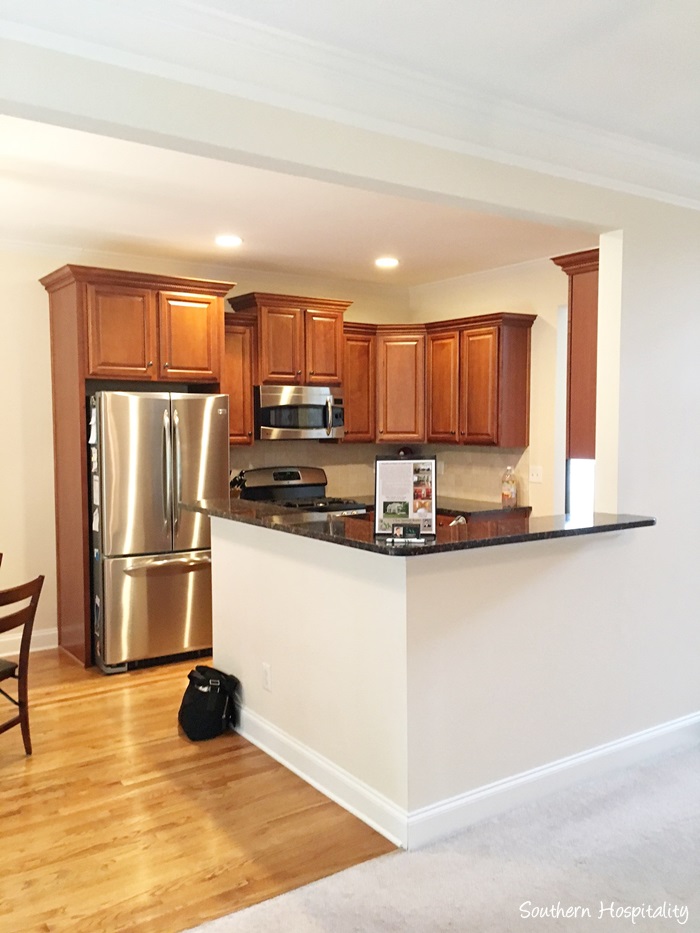
BEFORE: Note the plain drywall surrounding the bar.
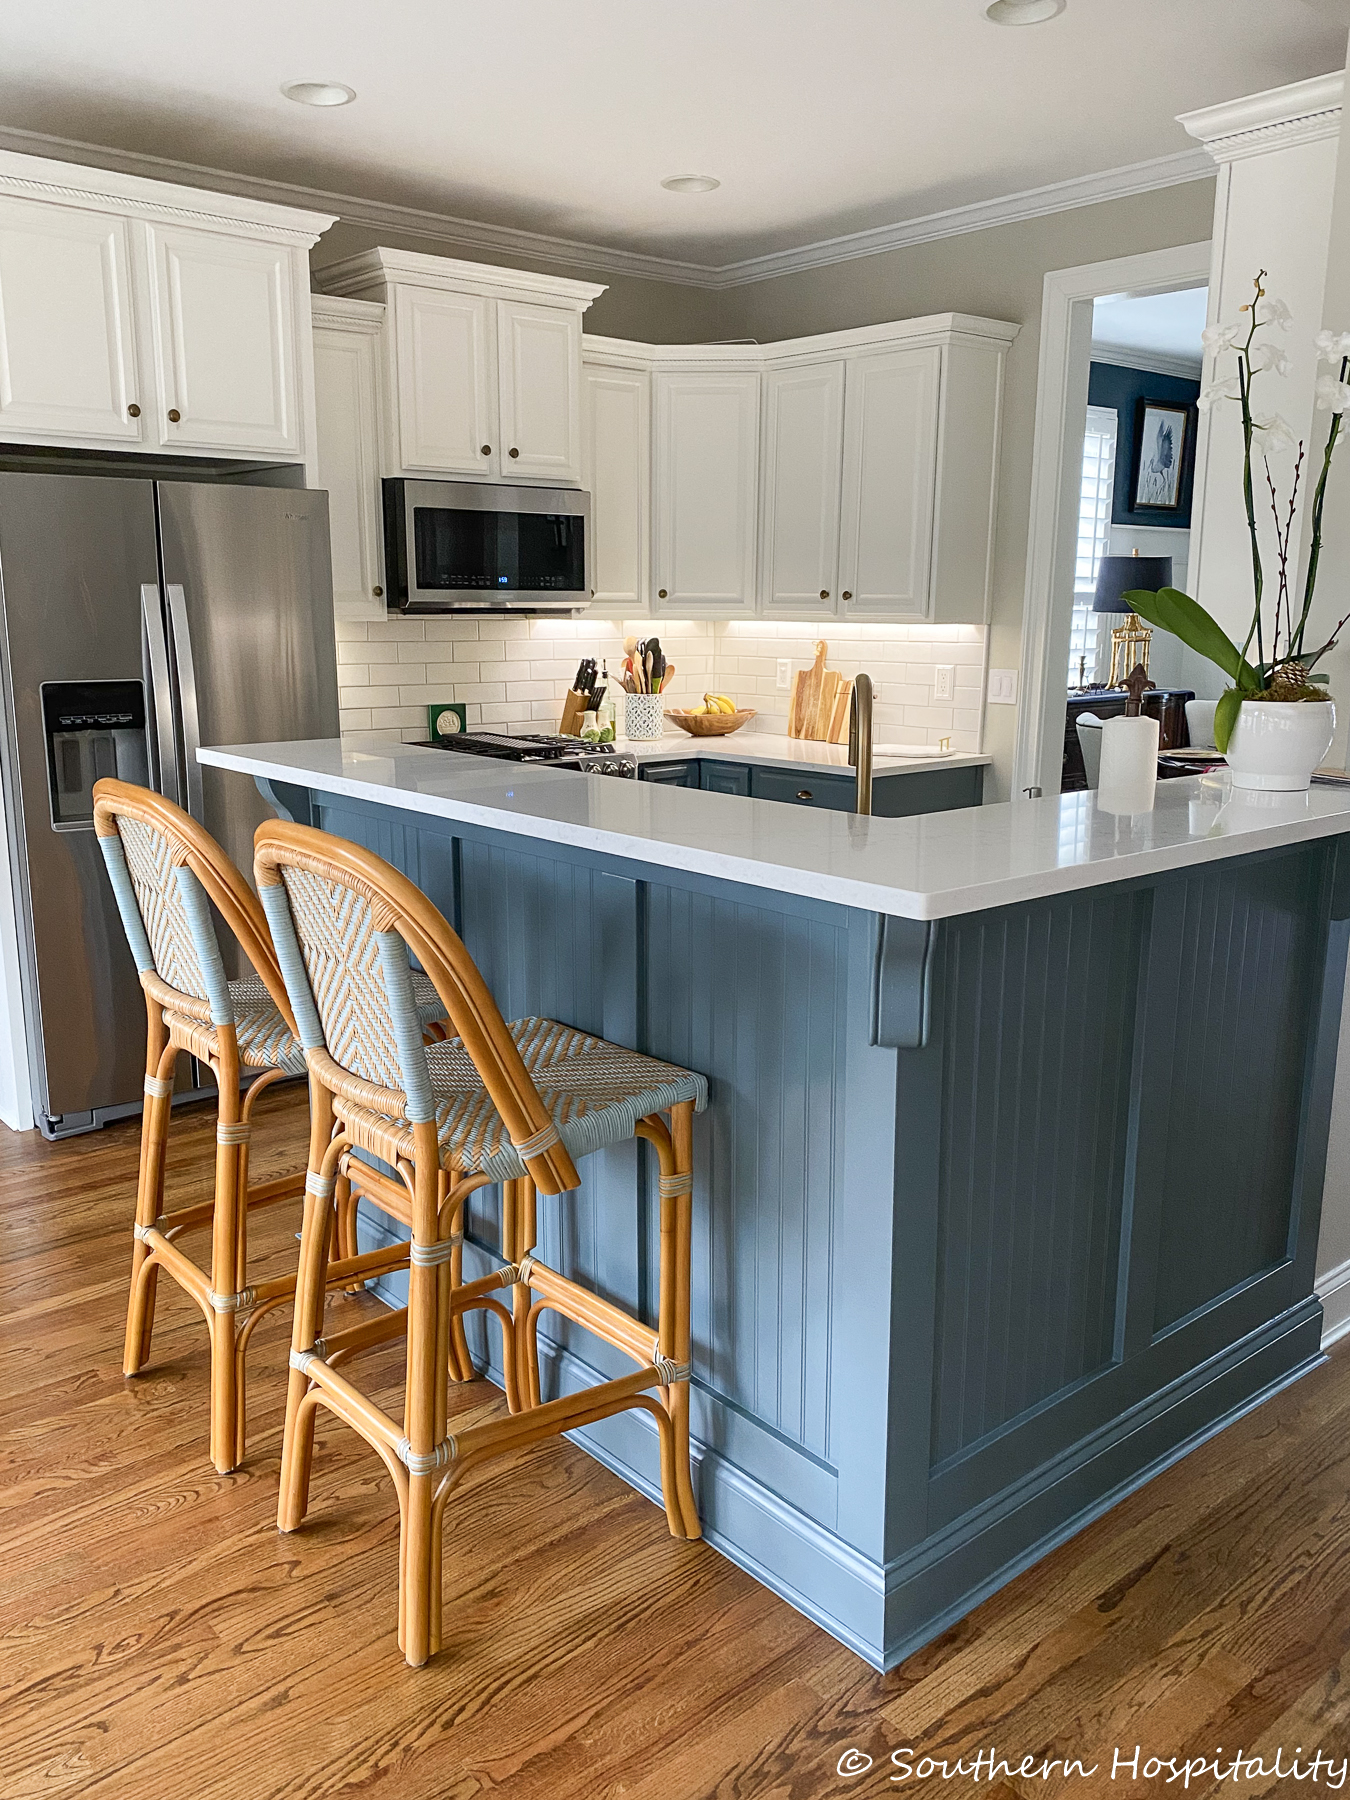
AFTER: This was Mark’s first big project in the house before we moved in. He trimmed out this bar in beadboard and we had it spray painted when the cabinets were done. It looks so good, what a difference that made.
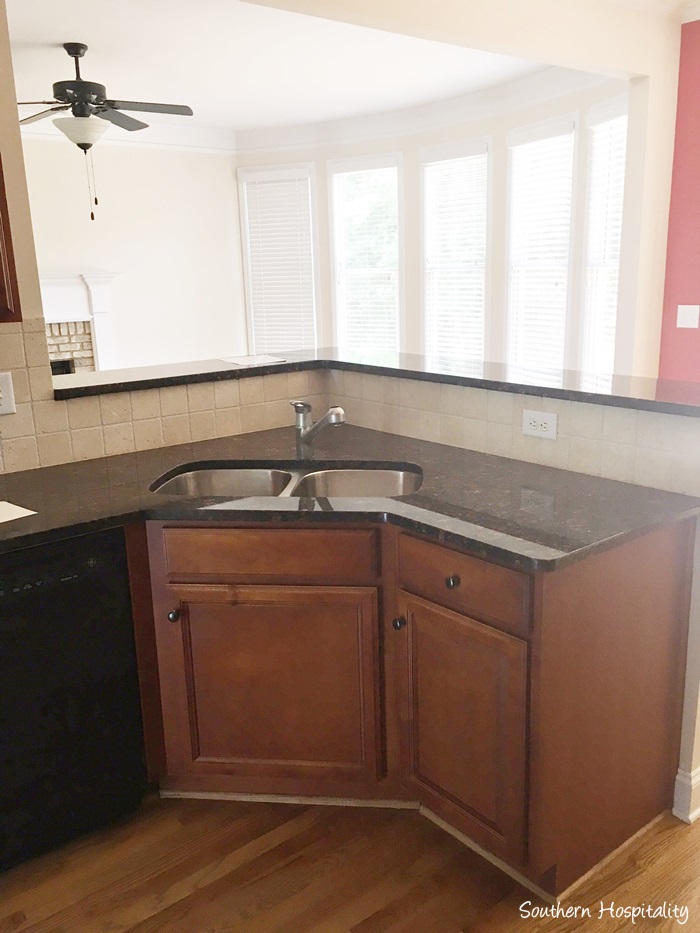
BEFORE: Kitchen Sink
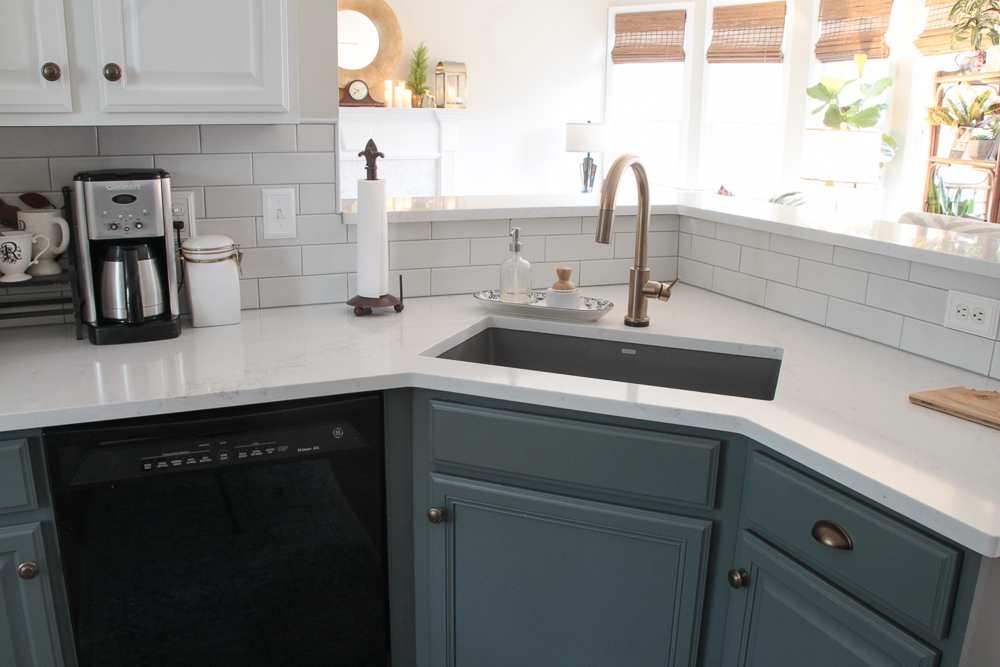
AFTER
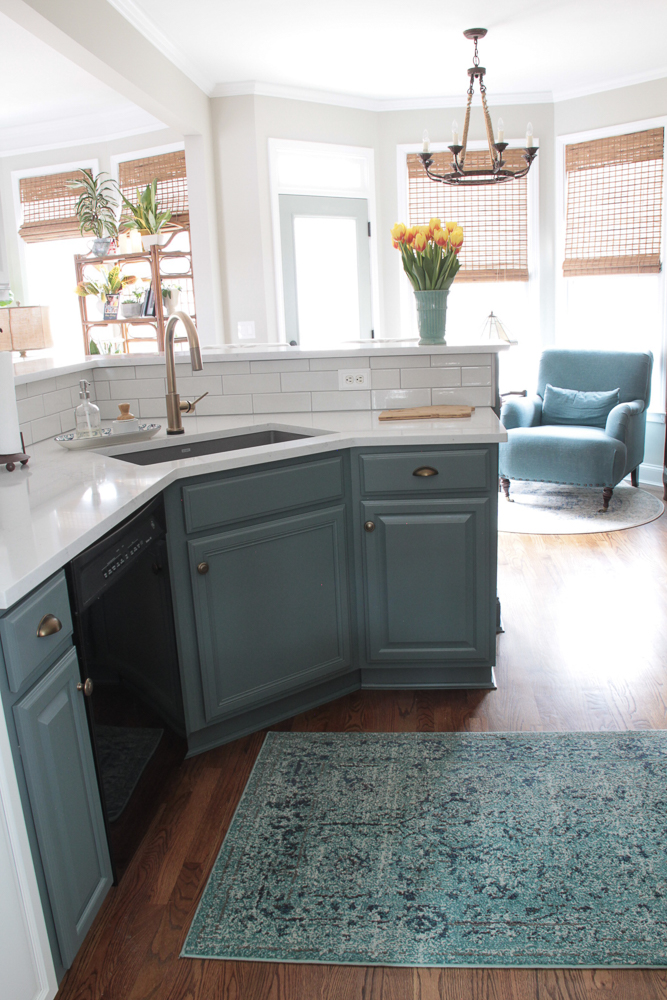
AFTER
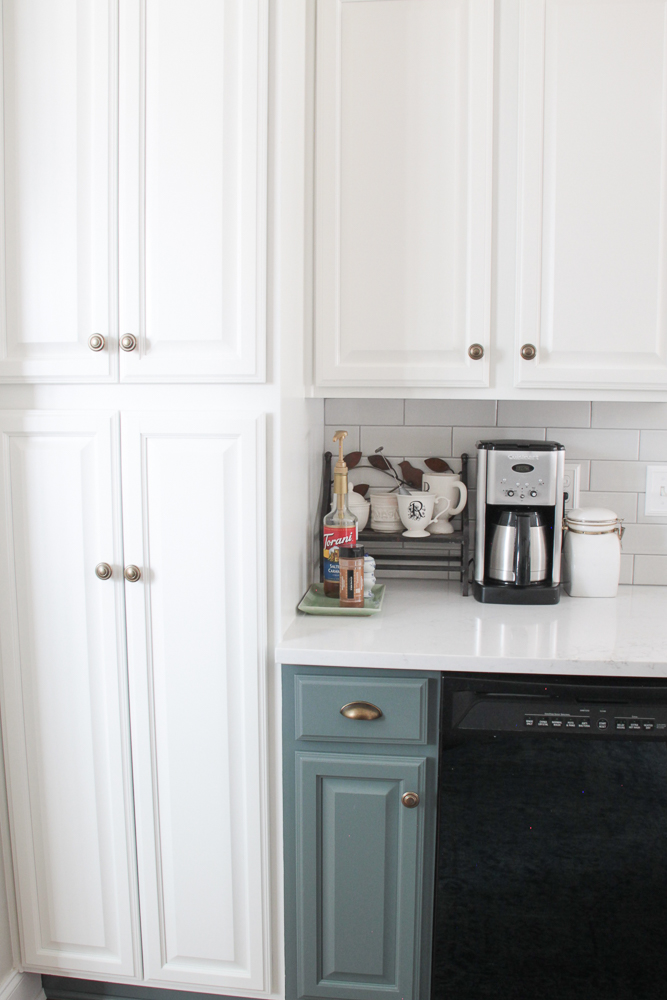
AFTER: Pantry
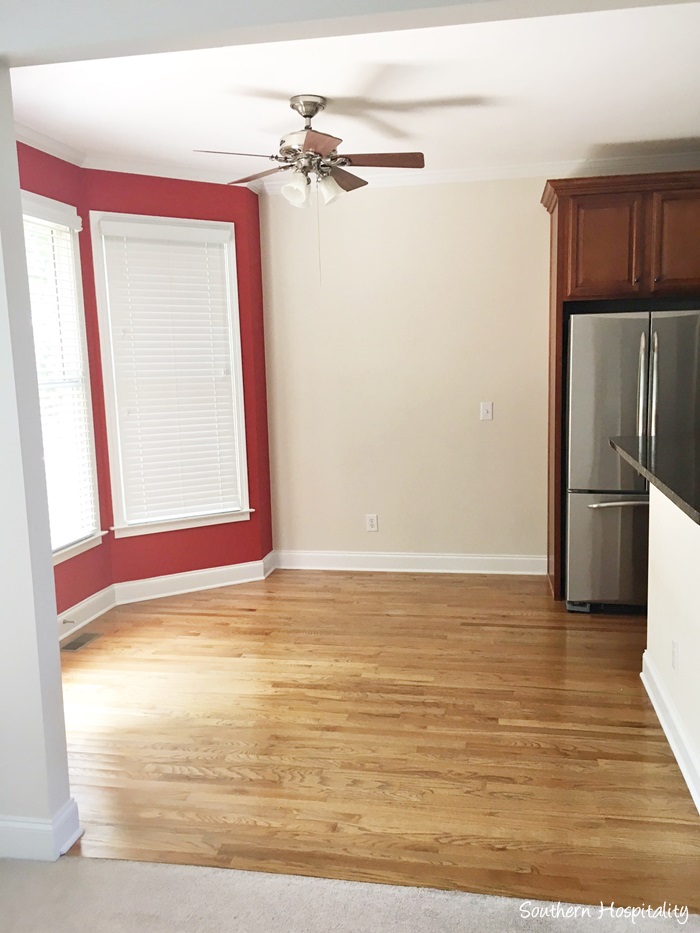
BEFORE: Kitchen nook
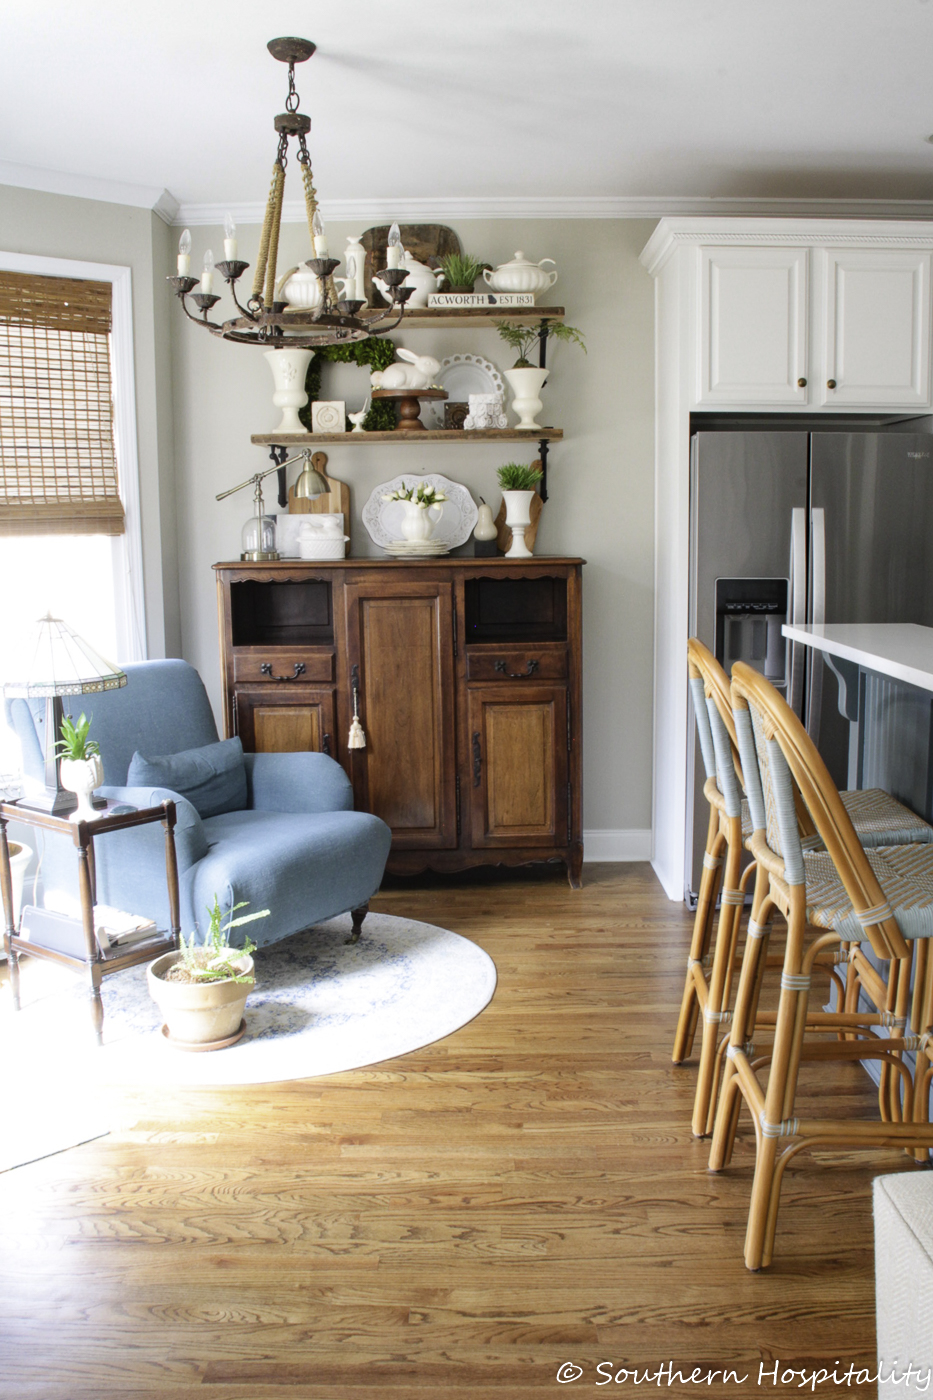
AFTER: I decided to make it a sitting area with my antique cupboard and a comfy chair. No regrets on that decision. Added open shelving with pretty brackets and reclaimed wood for lots of interest.
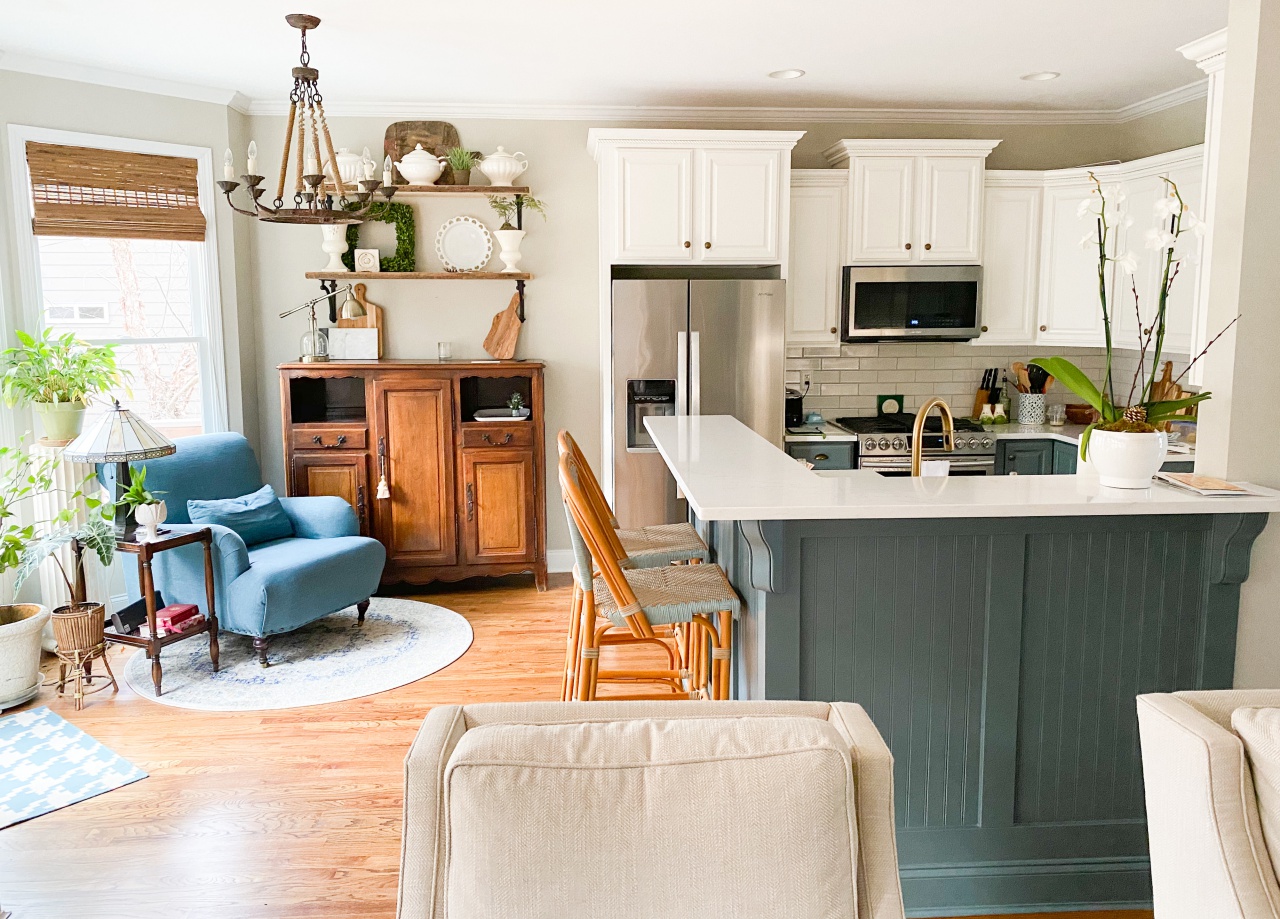
AFTER: Current view from family room to kitchen. This is an accurate look at the Knoxville Gray paint. It’s darker than it usually looks in pics.
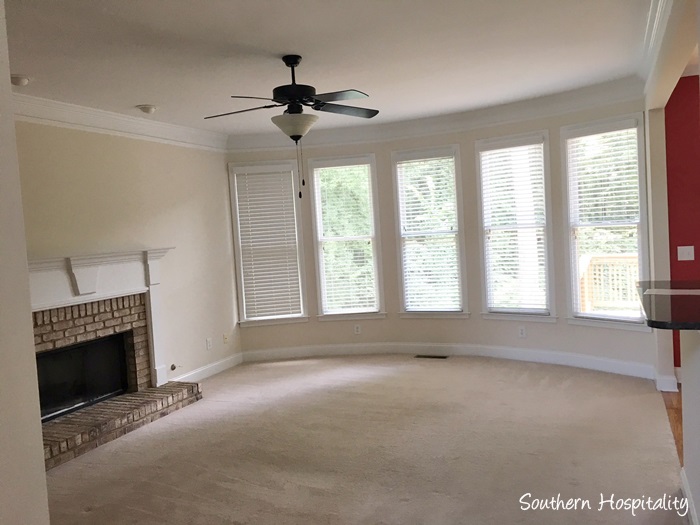
BEFORE: Family room with carpet
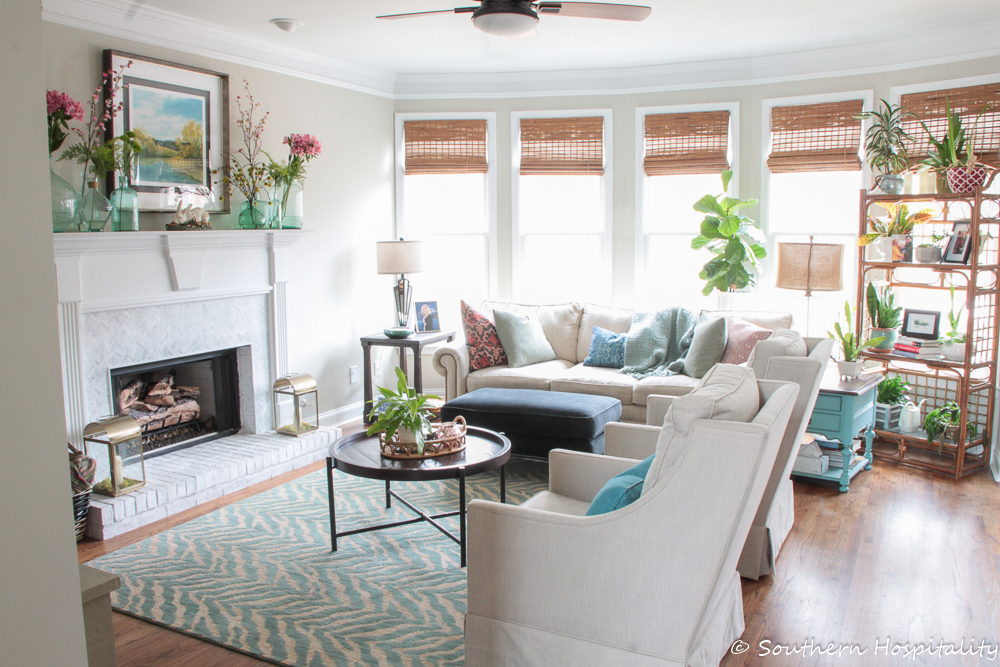
AFTER: Family room with new wood floors and fireplace makeover. Here’s info on the bamboo blinds we have throughout the house.
When we bought the house, we had the carpet in here removed as well as the guest room and had more red oak site finished hardwoods installed. We are so glad we did that before we moved in!
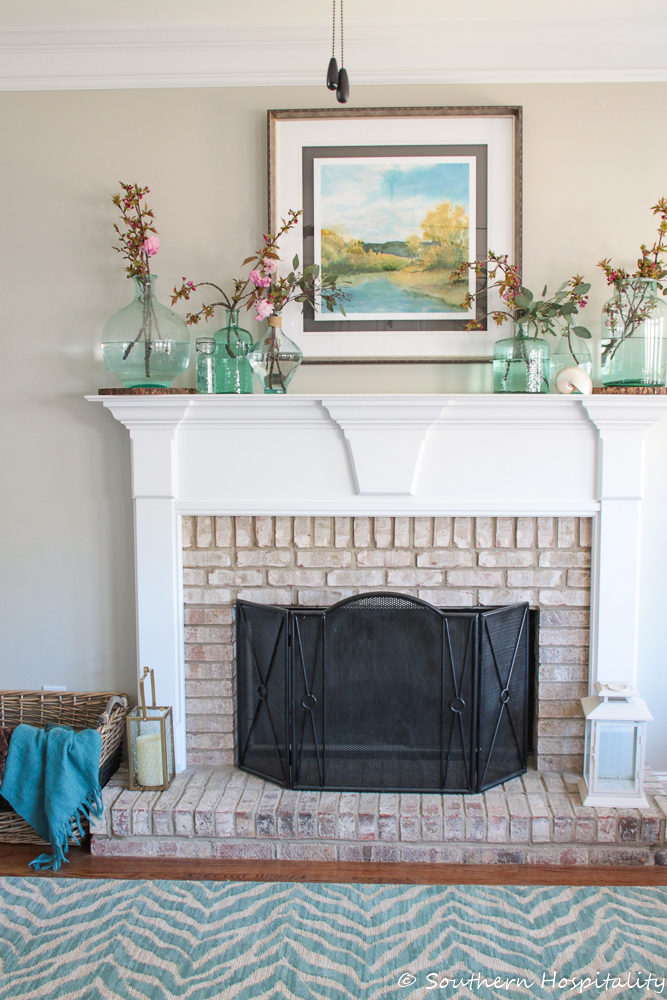
BEFORE: Fireplace
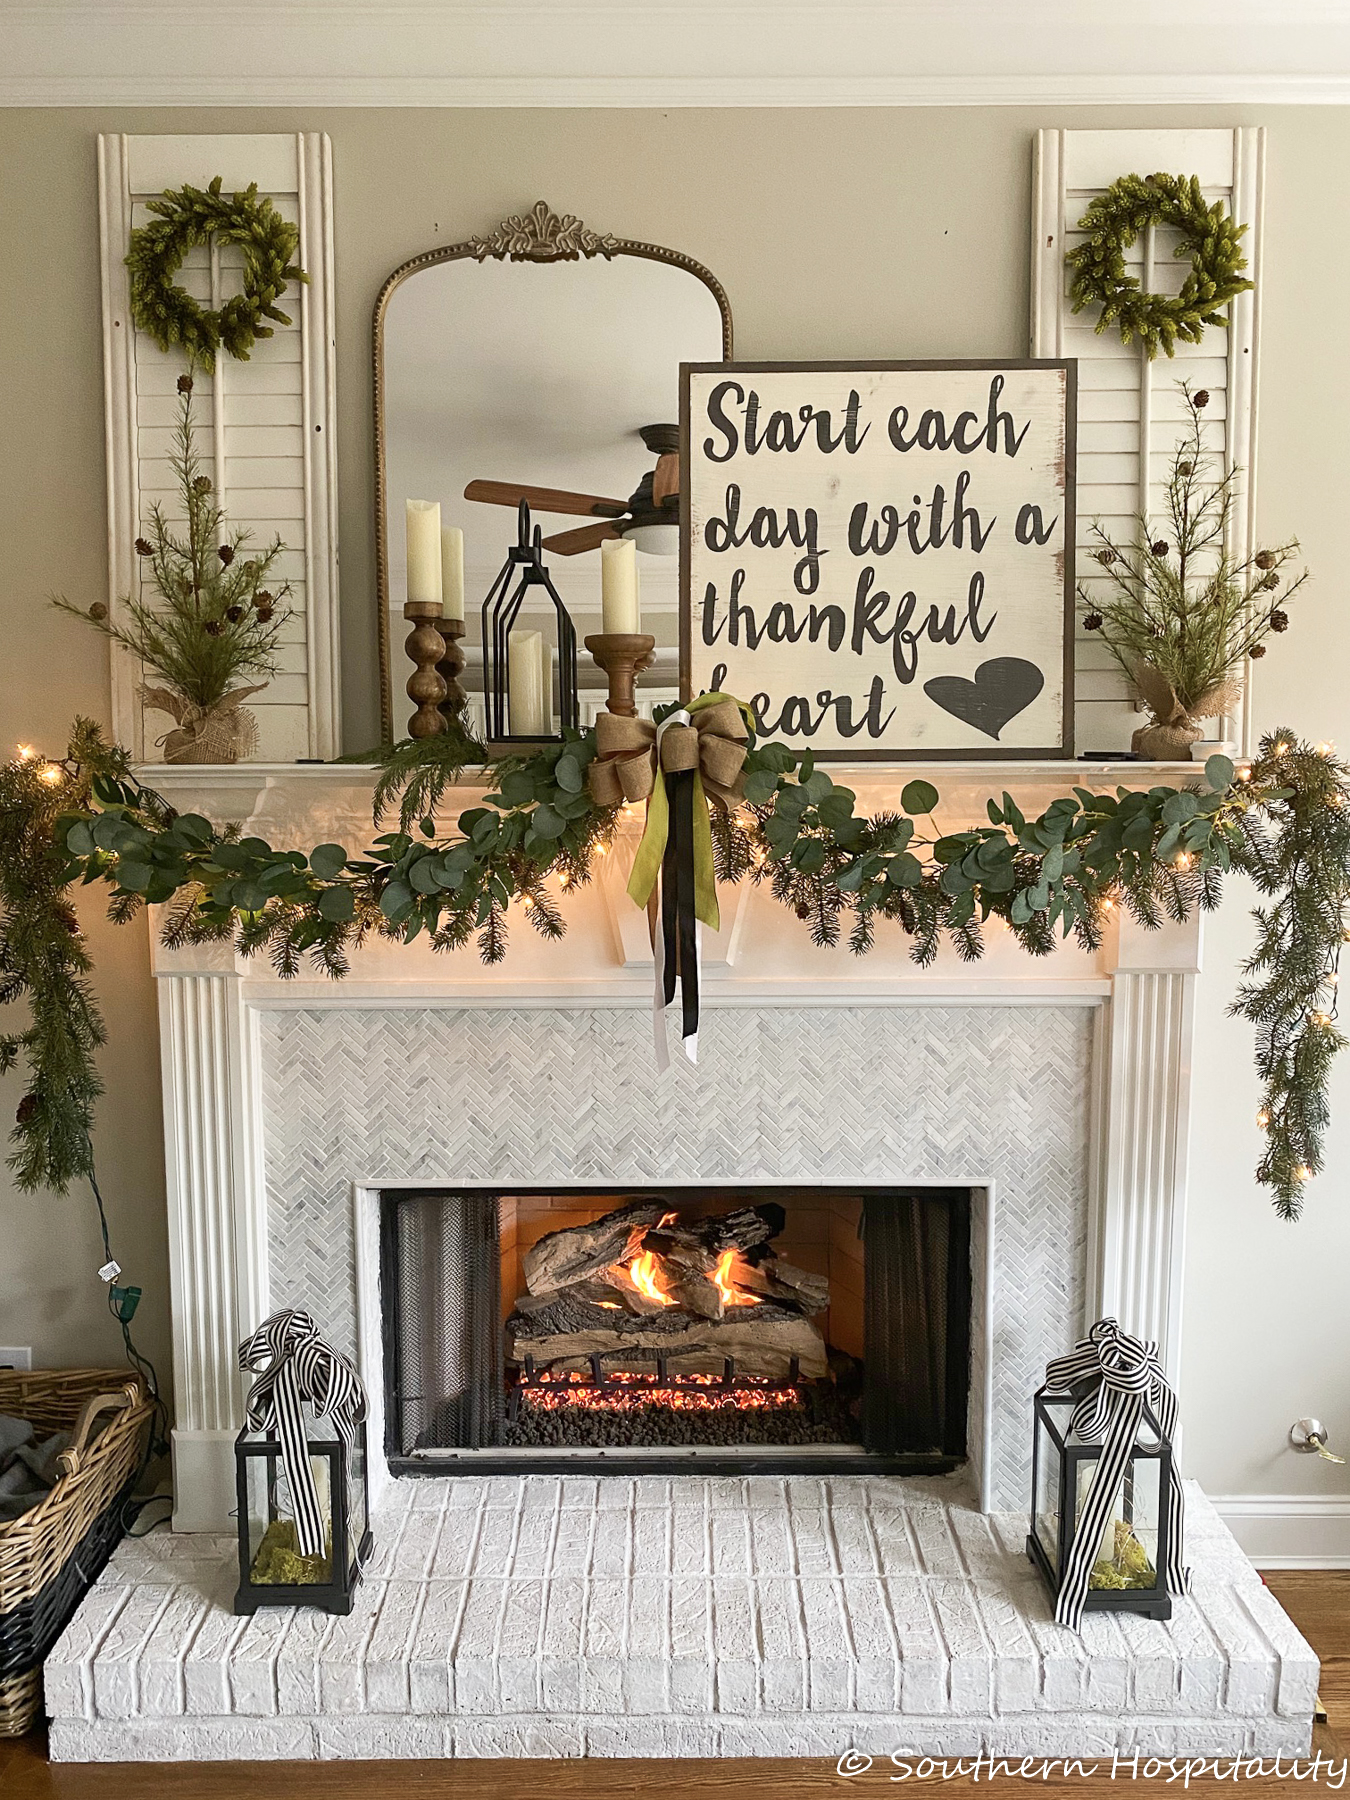
AFTER: Fireplace makeover with Romabio limewash and marble herringbone tile (another DIY Mark and I did).
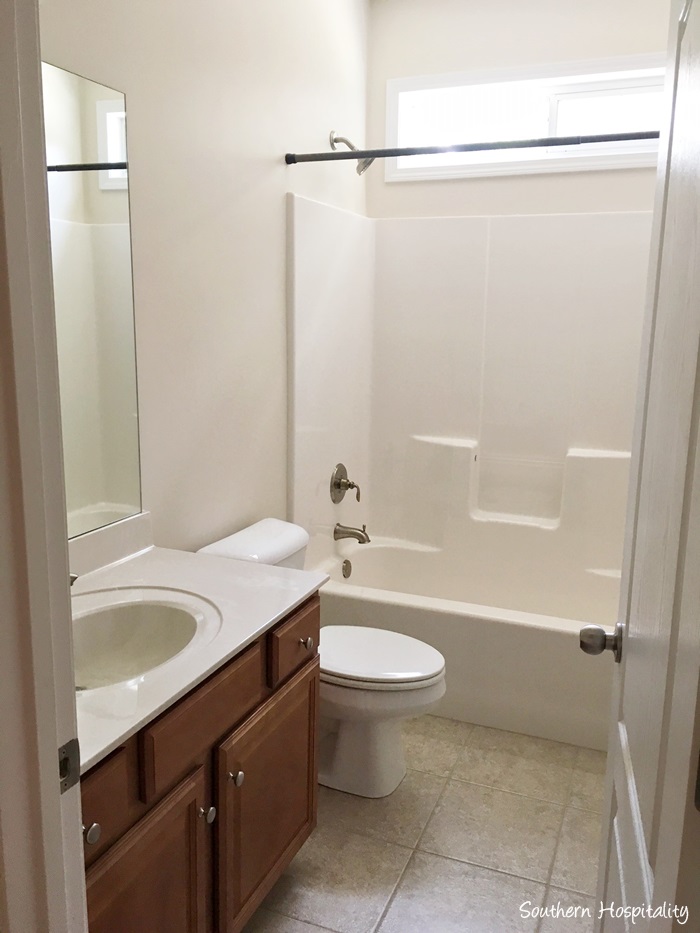
BEFORE: Guest bath
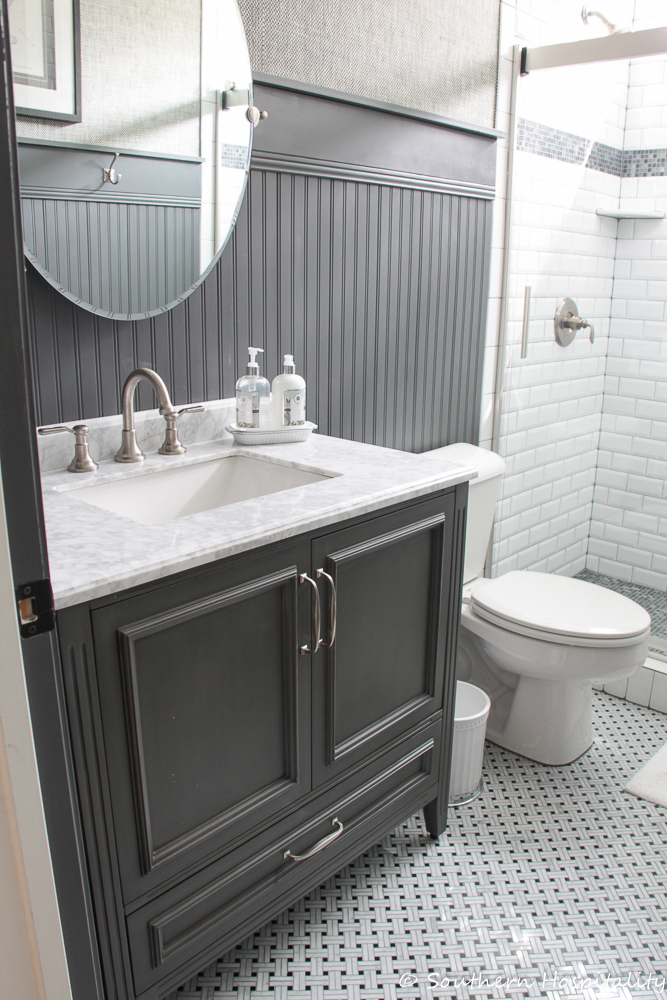
AFTER: We know our limitations on tiling, so we hired this guest bath tile project out, except Mark did do the beadboard wainscot in here and I painted it all. New mirrors in a bathroom can really elevate the look too.
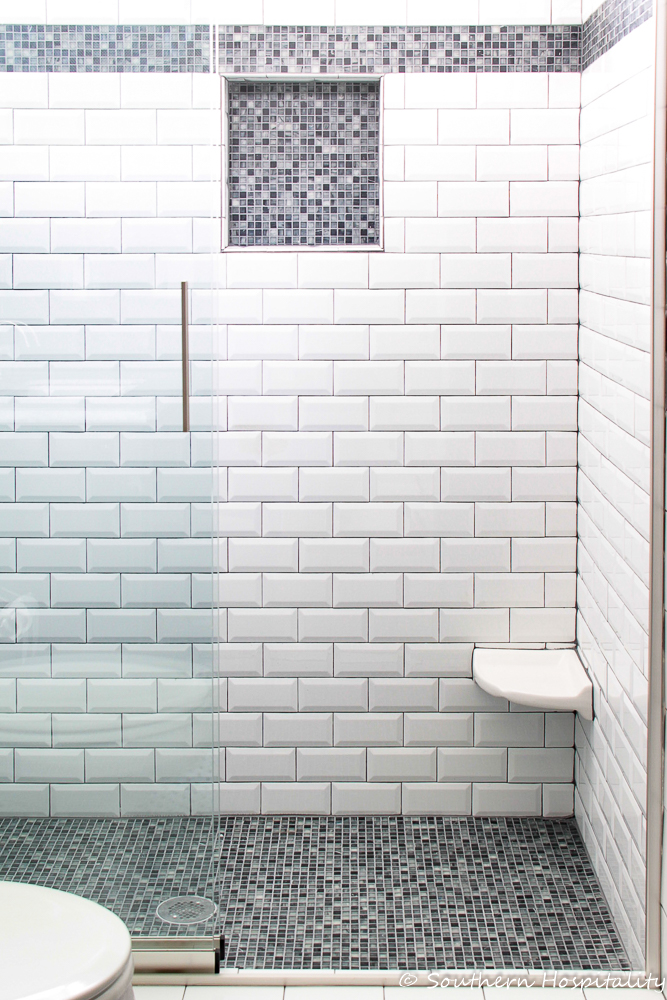
AFTER
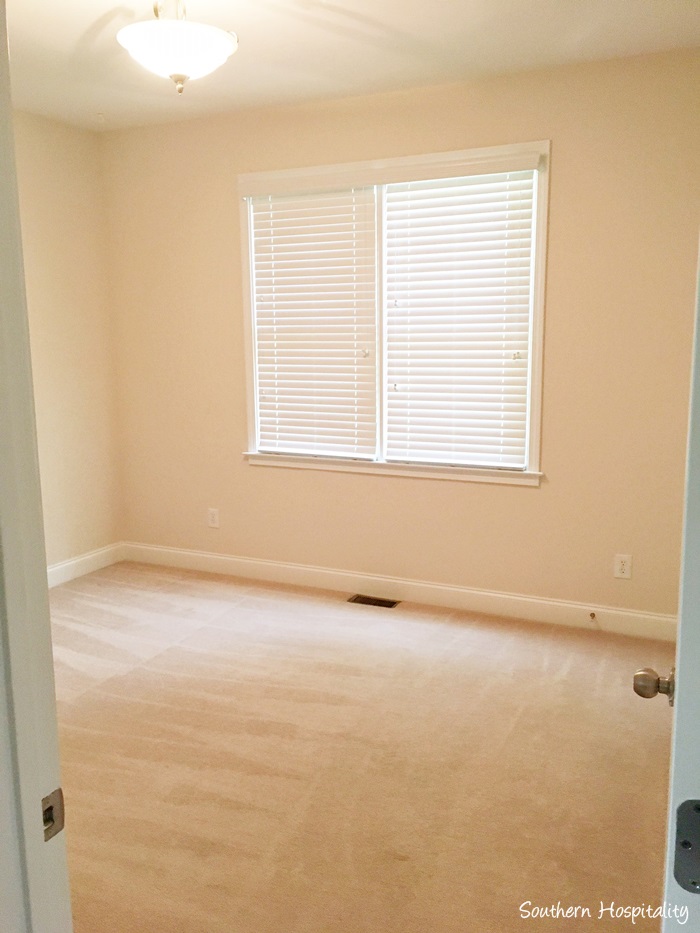
BEFORE: Guest room main floor
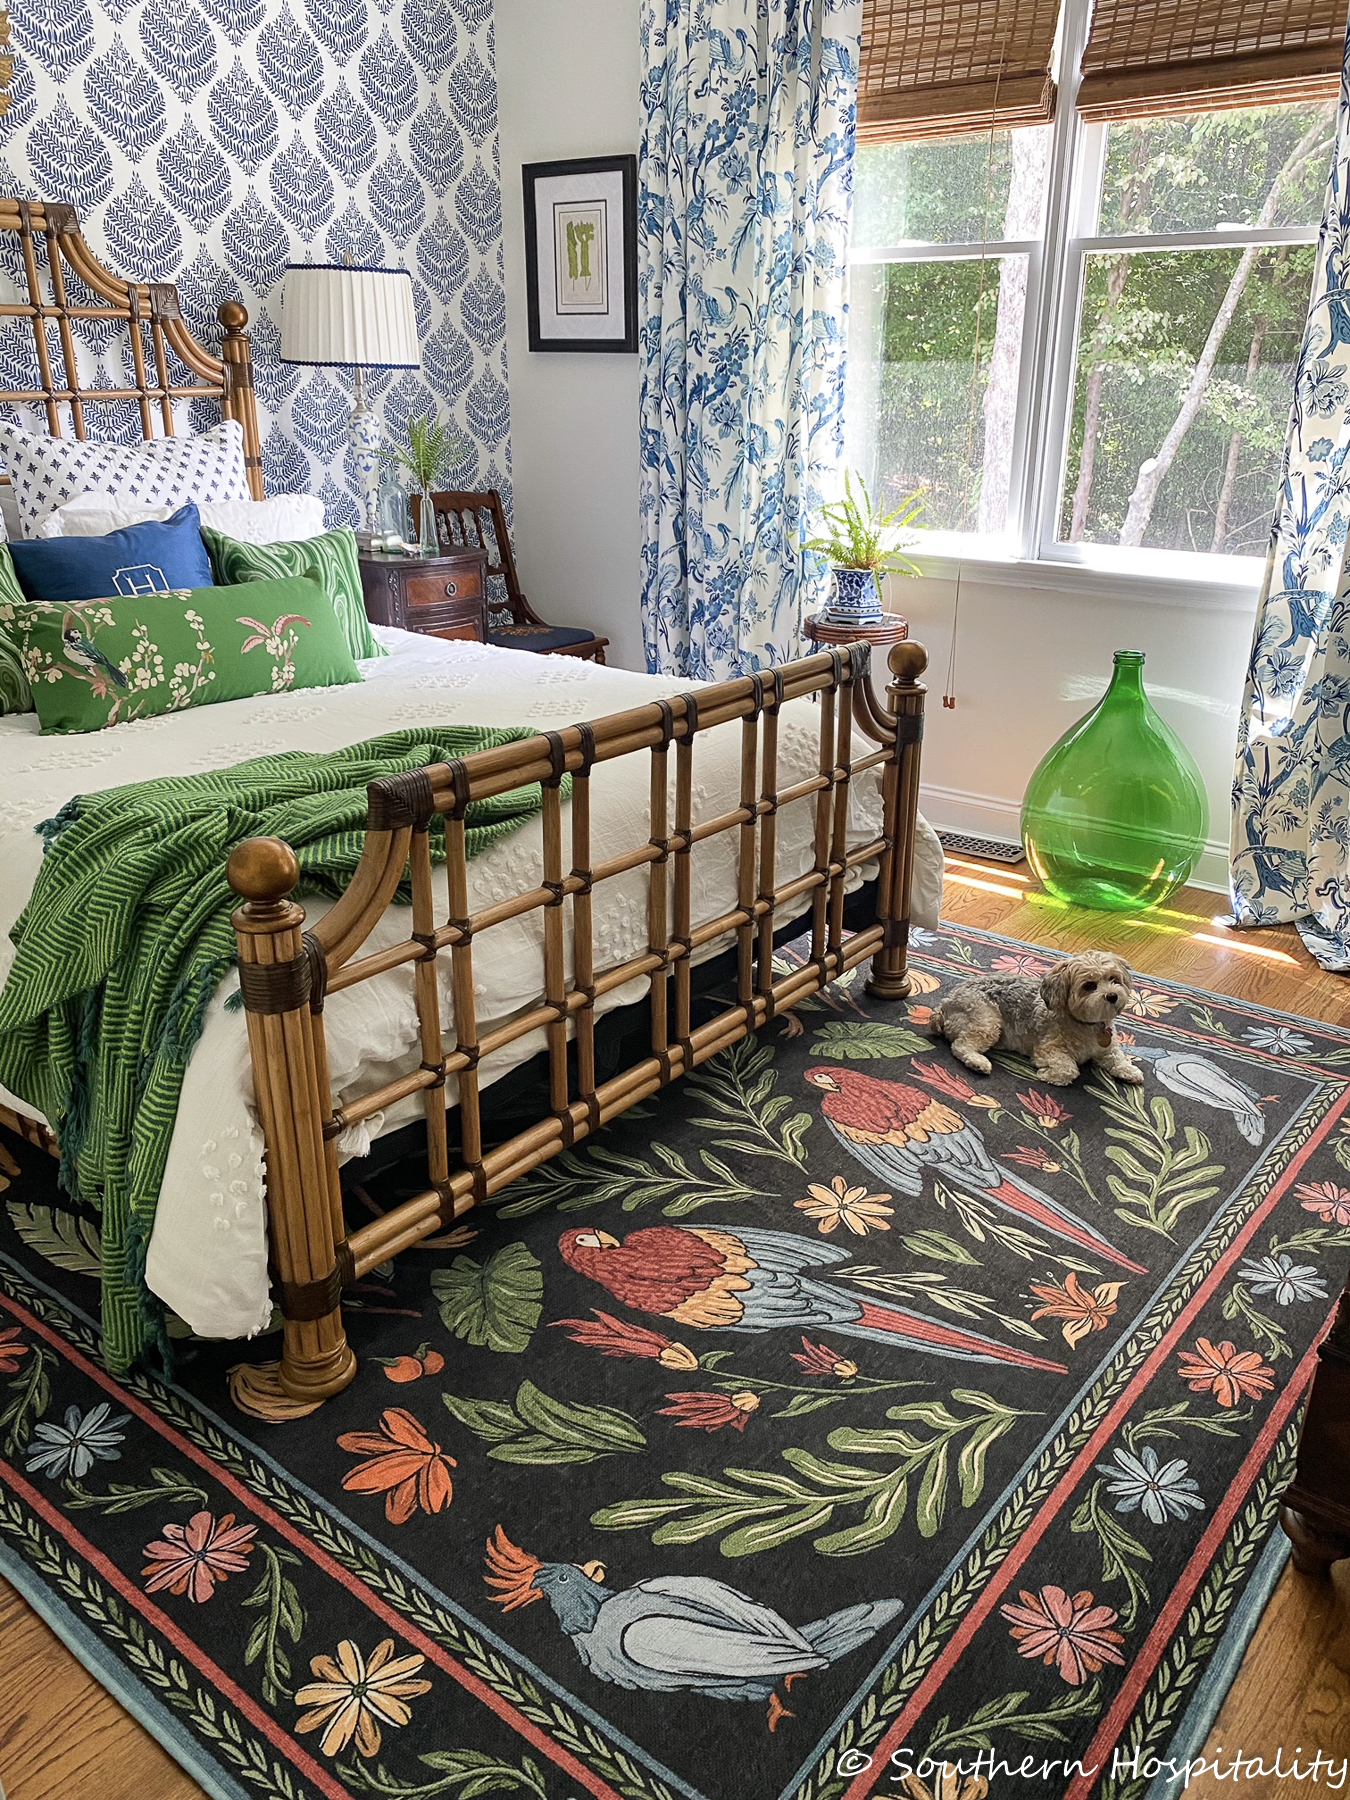
AFTER: Again, carpet removed and I used my old furniture in here. I did a makeover in here in the Grandmillenial style and really love it now. After that post, I added new drapes and recently, I did a refresh on the rug in the guest room, you can see that as well. It sure is a happy space now!
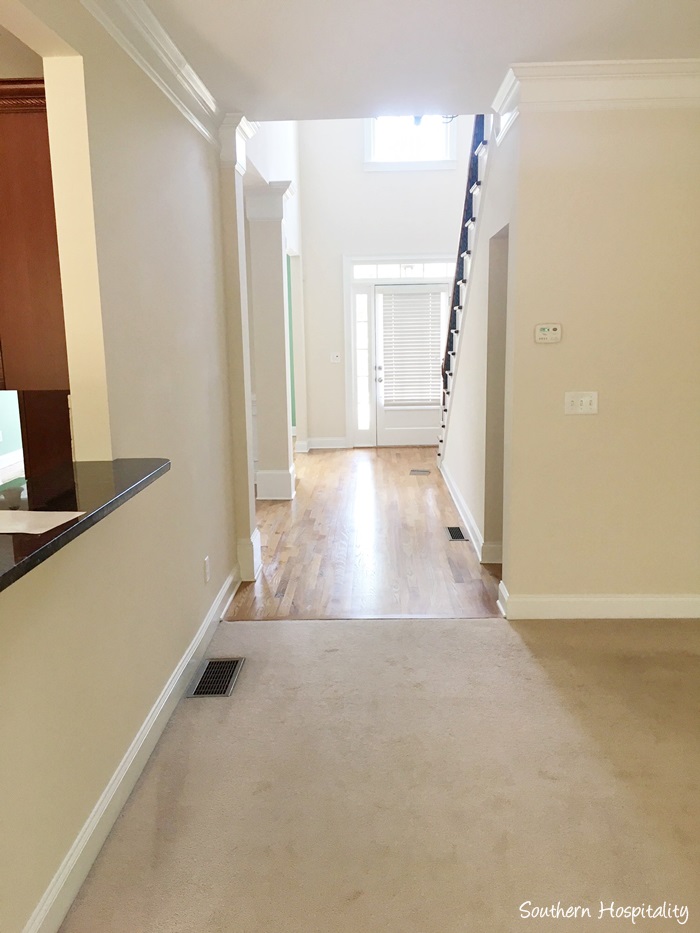
BEFORE: Foyer hallway
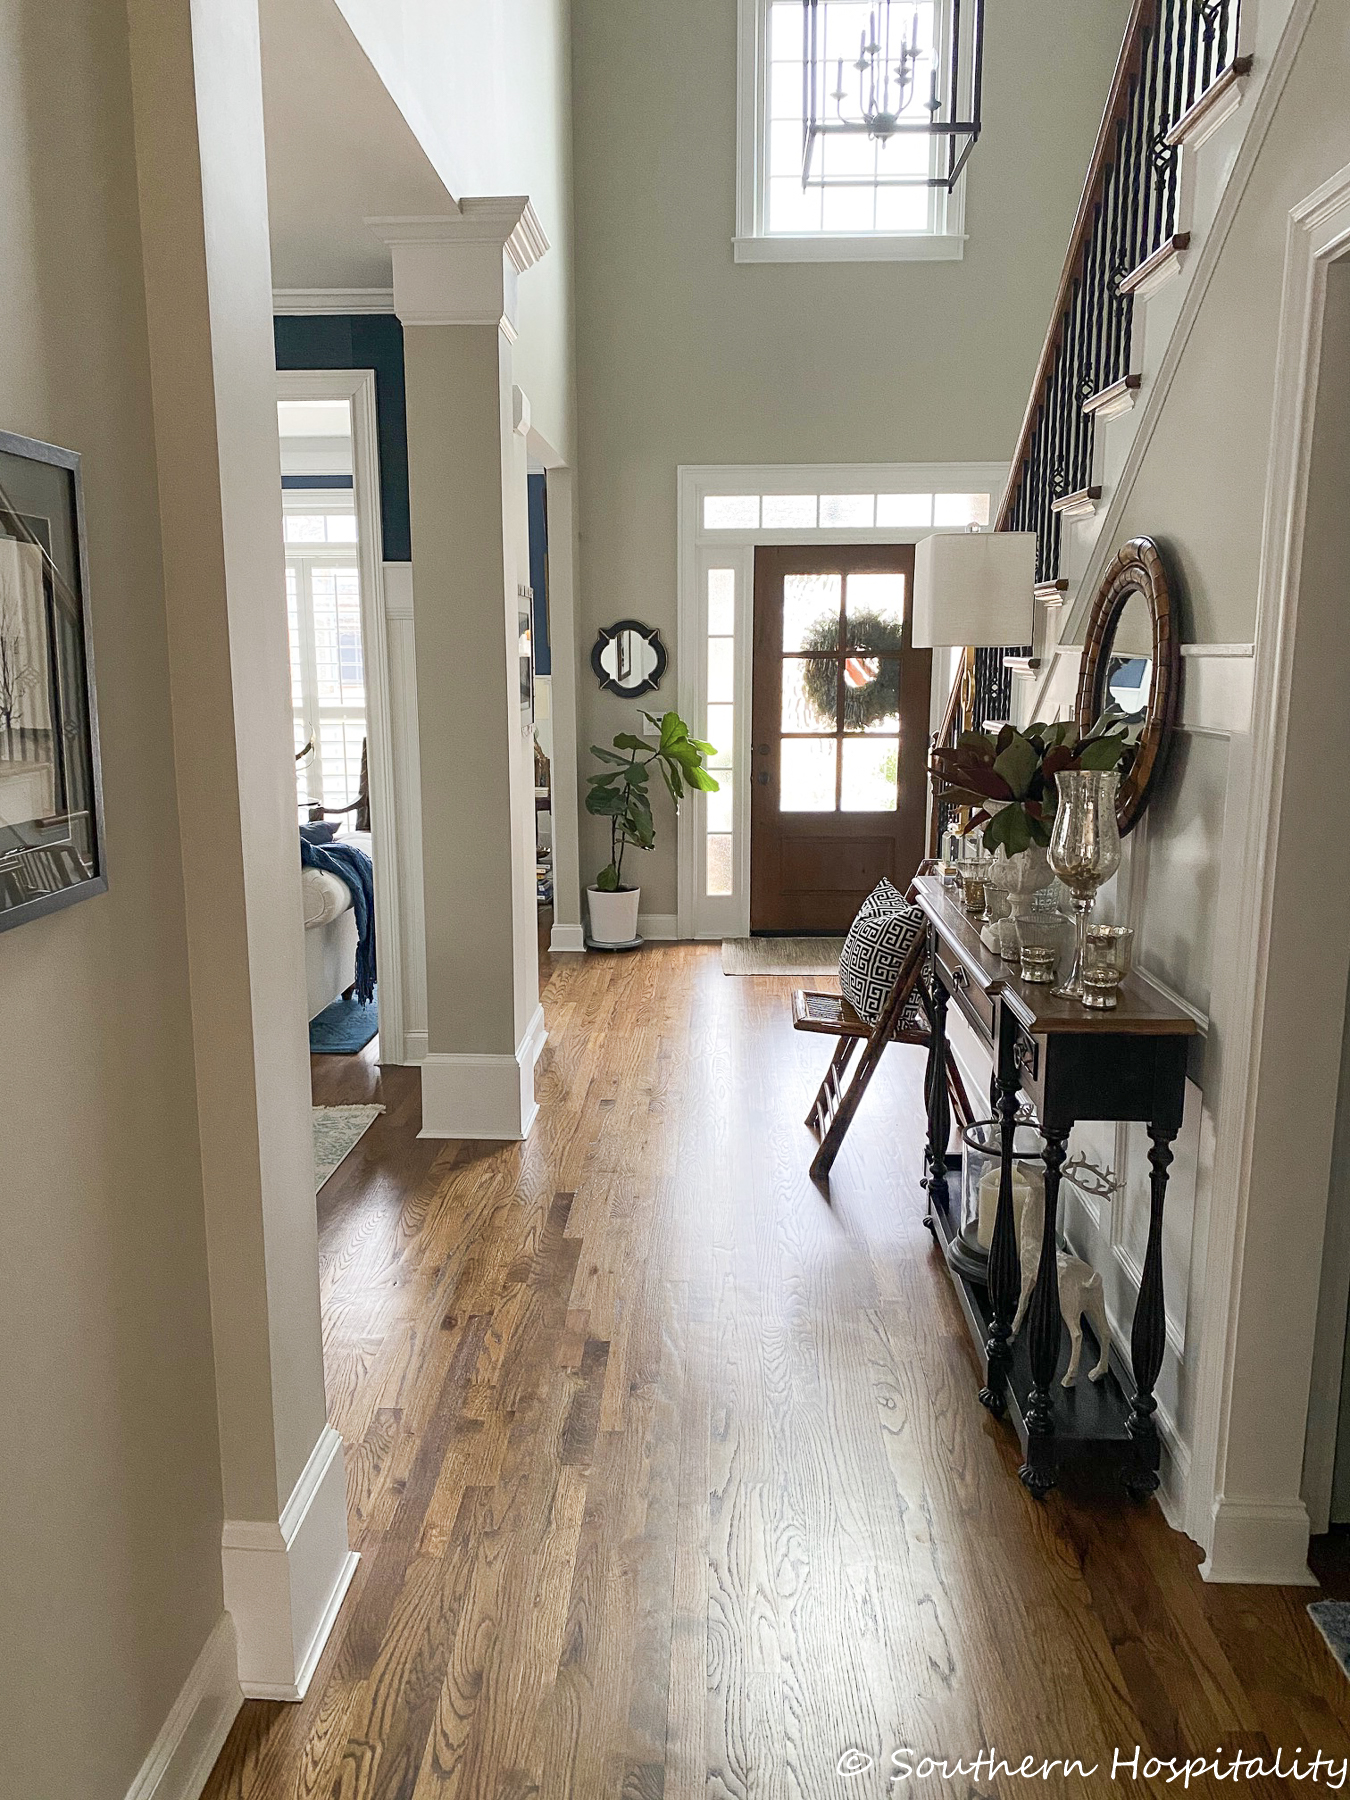
AFTER: No more carpet! Yay!
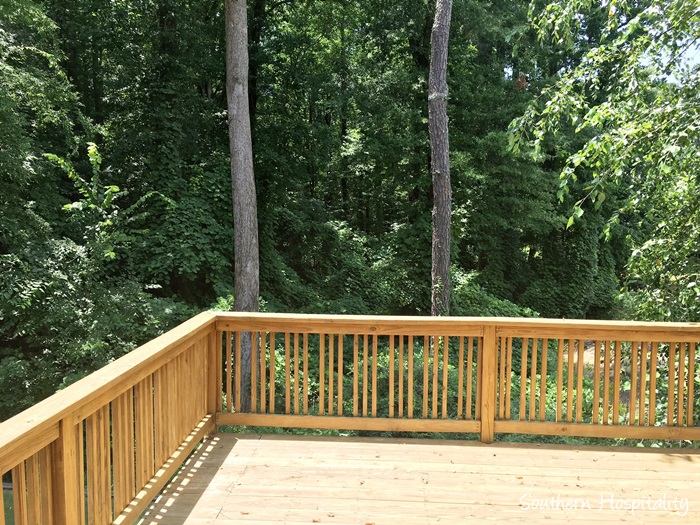
BEFORE: Open deck off kitchen
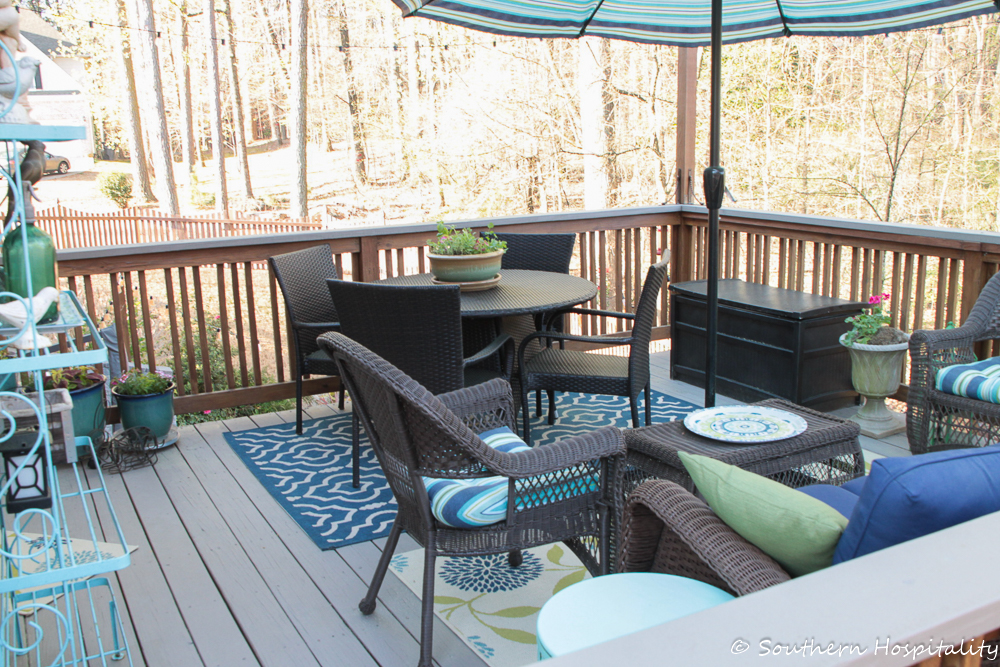
AFTER: We added deck stairs first thing, then stained the entire deck and added my furniture for a cozy seating area.
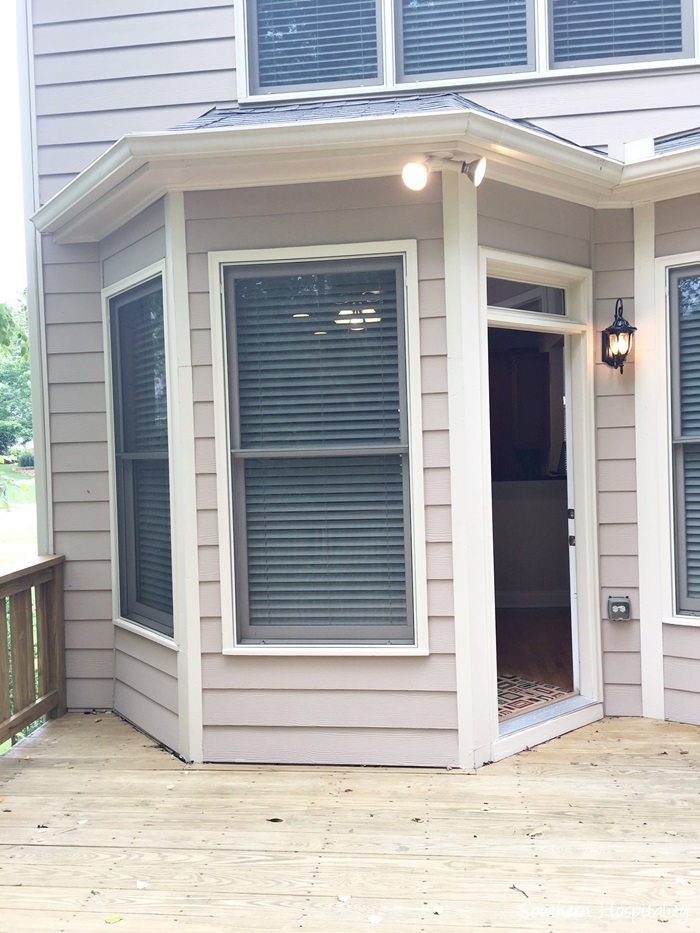
BEFORE
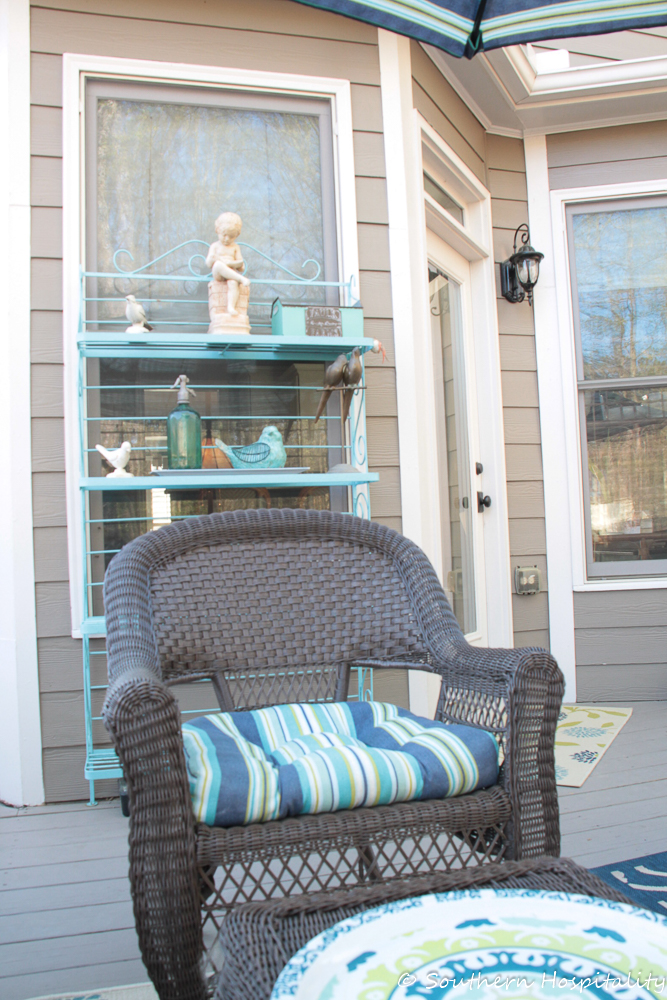
AFTER: Deck space . We also added string lights outside, which was great.
Upstairs hallway:
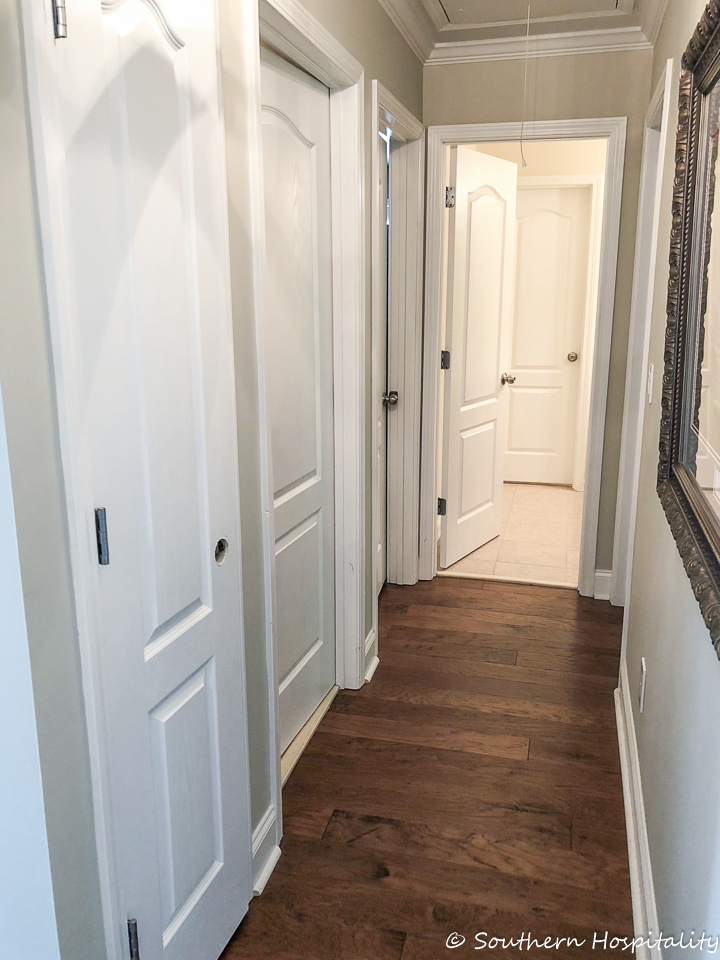
Before: The actual before had carpet which we ripped up immediately and put down these engineered hardwoods.
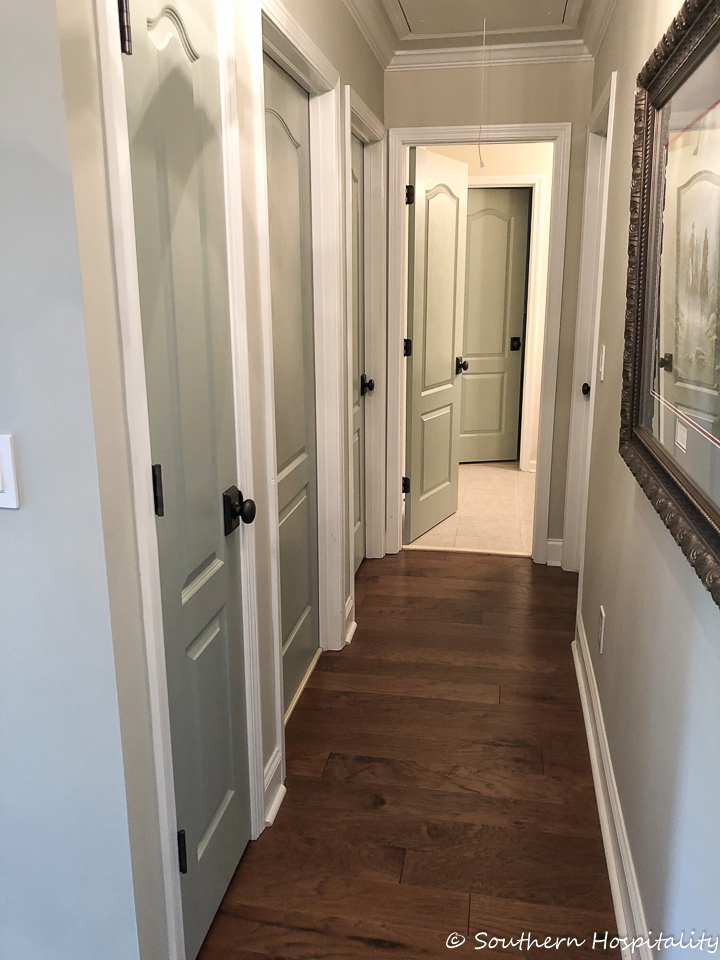
FIRST AFTER: Painted doors in Oyster Bay.
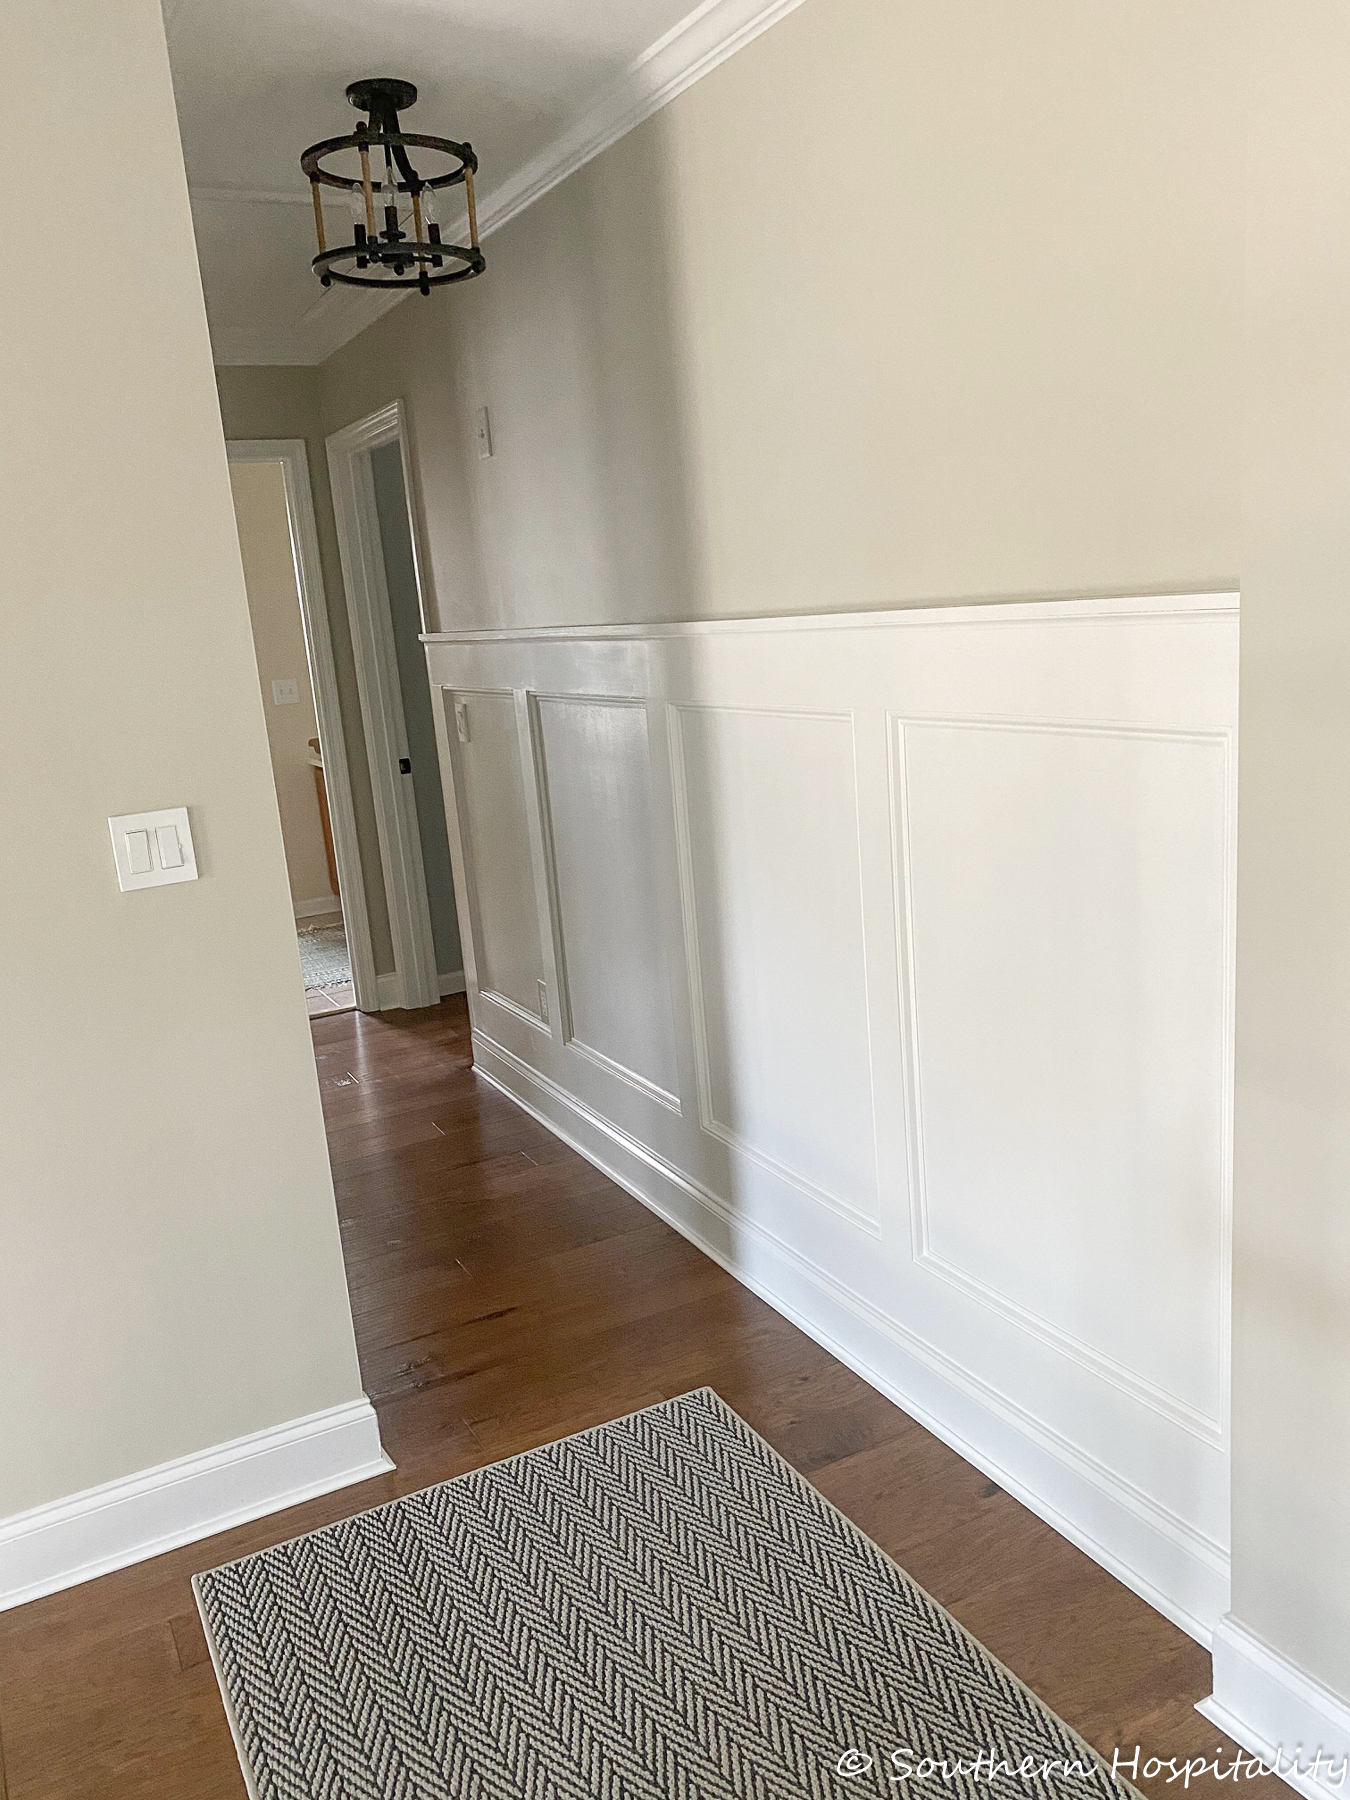
Next After: New board and batten installed.
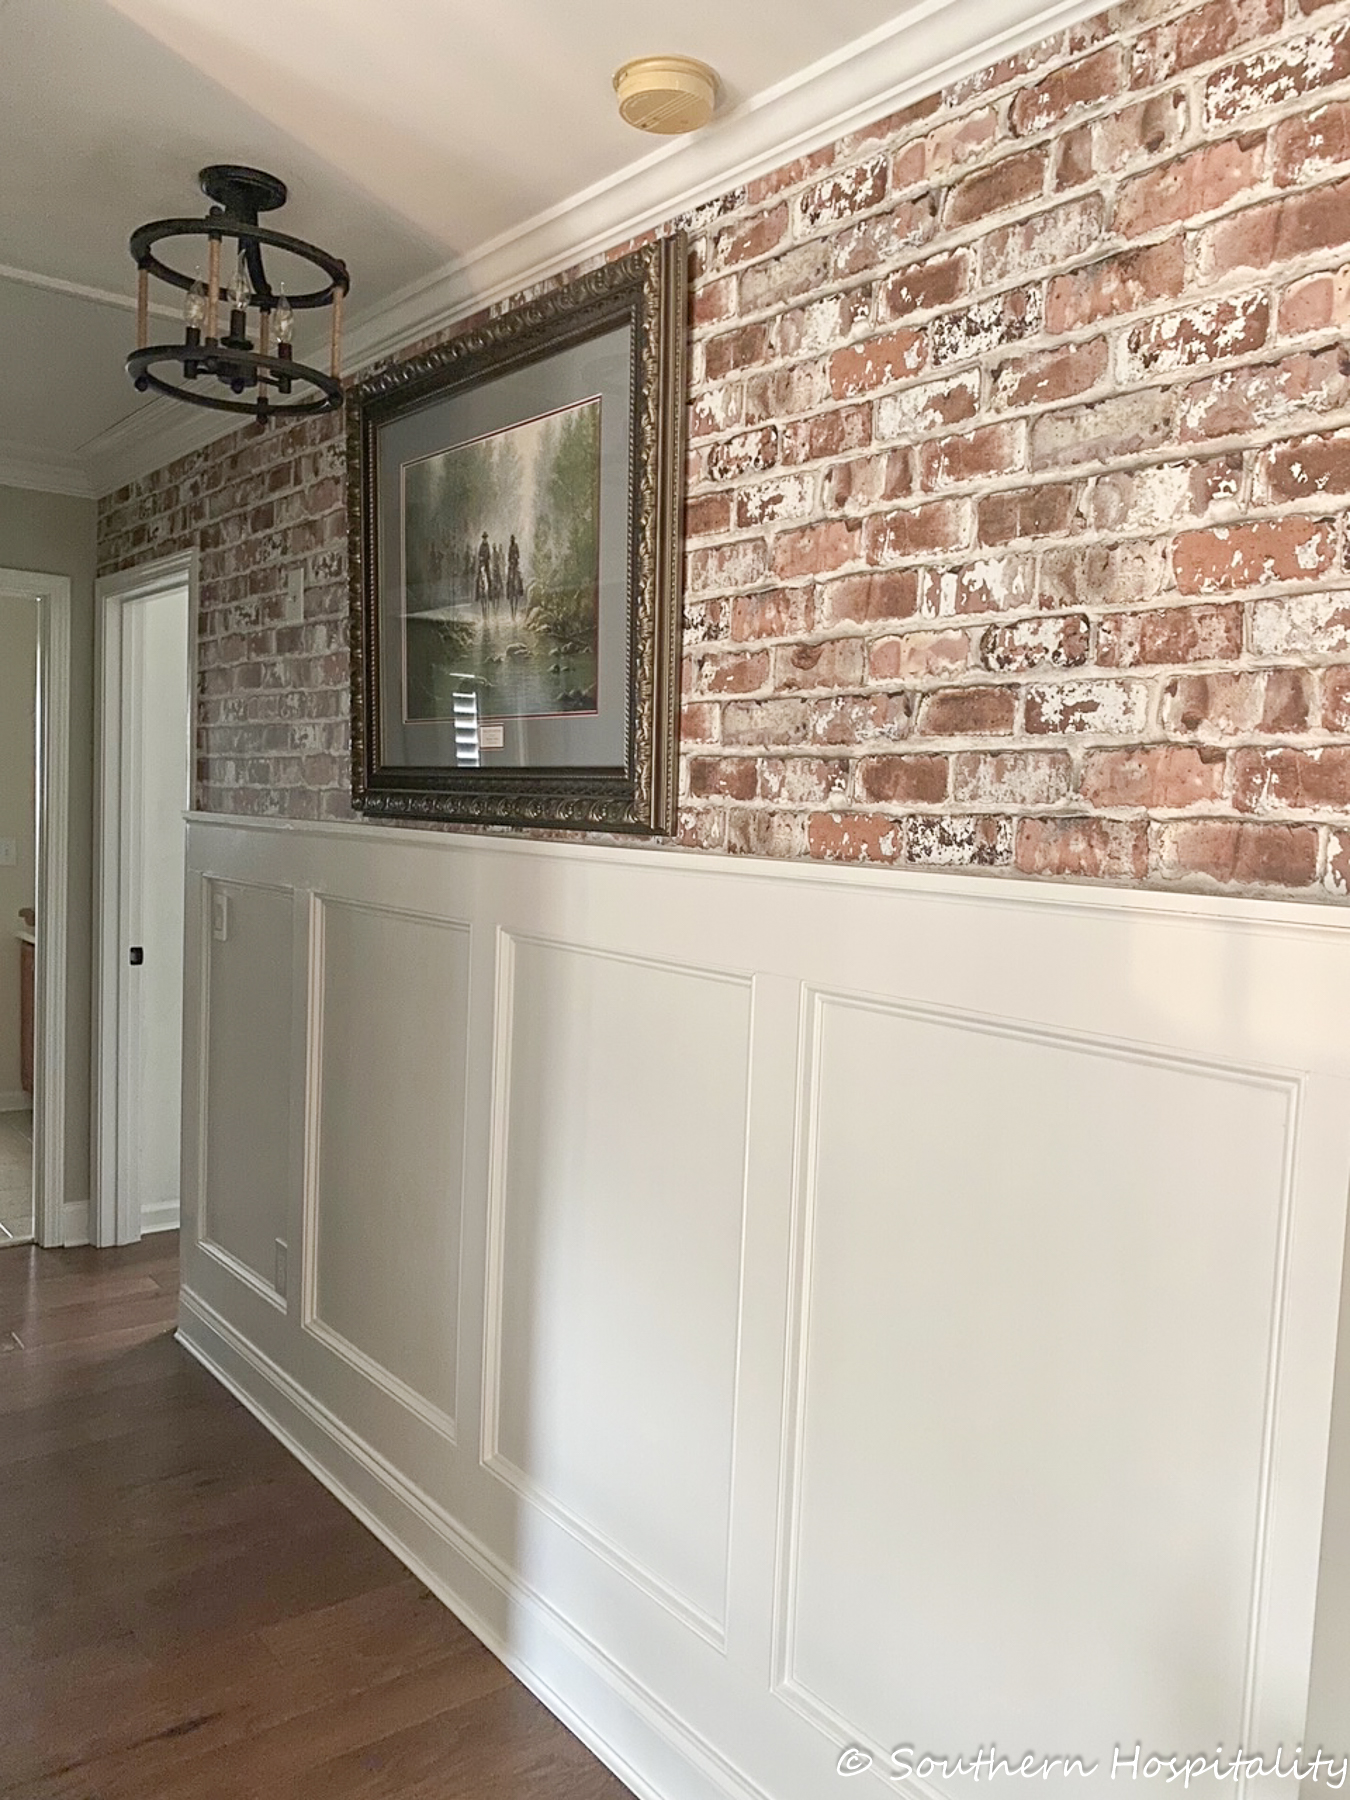
FINAL AFTER: We added brick wallpaper in this hallway for some added texture and warmth.
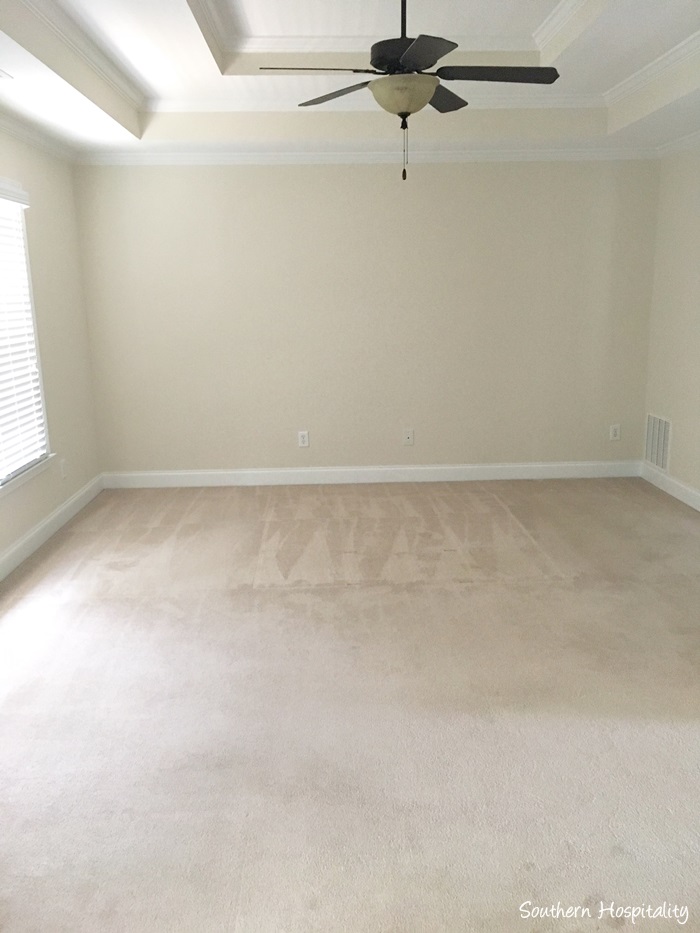
BEFORE: Master bedroom. We had all the carpet removed on the upper level and new engineered wood floors installed with Shaw Floors. That was such a blessing!
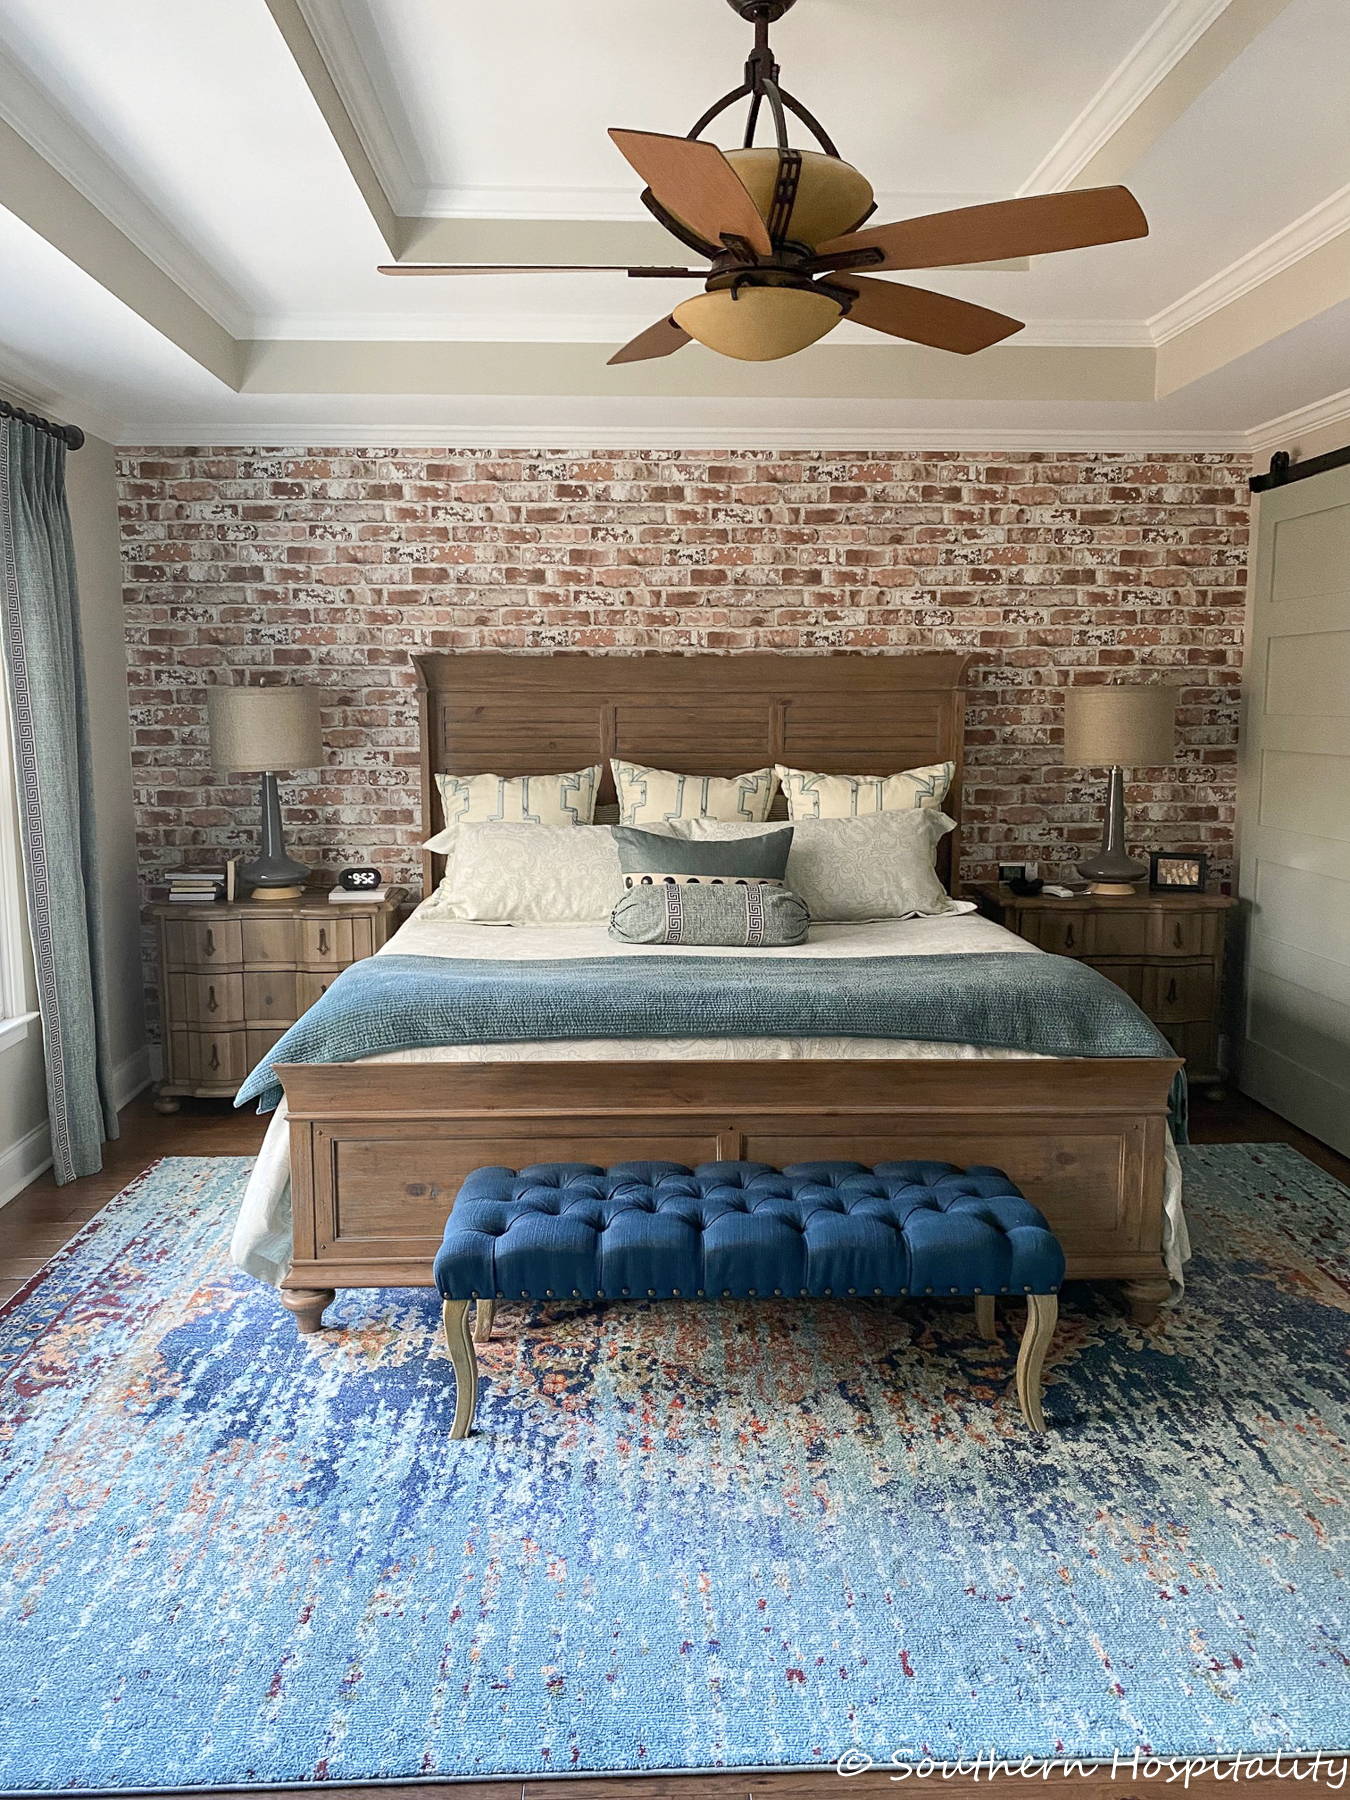
AFTER: Here’s the Master bedroom after moving in. We always wanted to do something on the headboard wall and settled on brick wallpaper here too. We love how it all turned out.
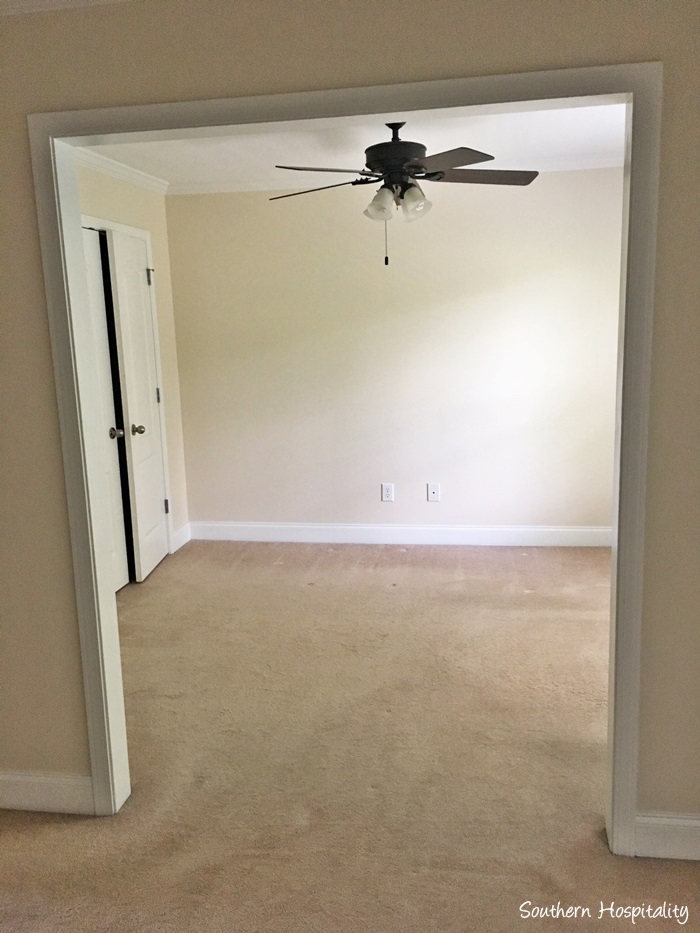
BEFORE: Master Sitting Room
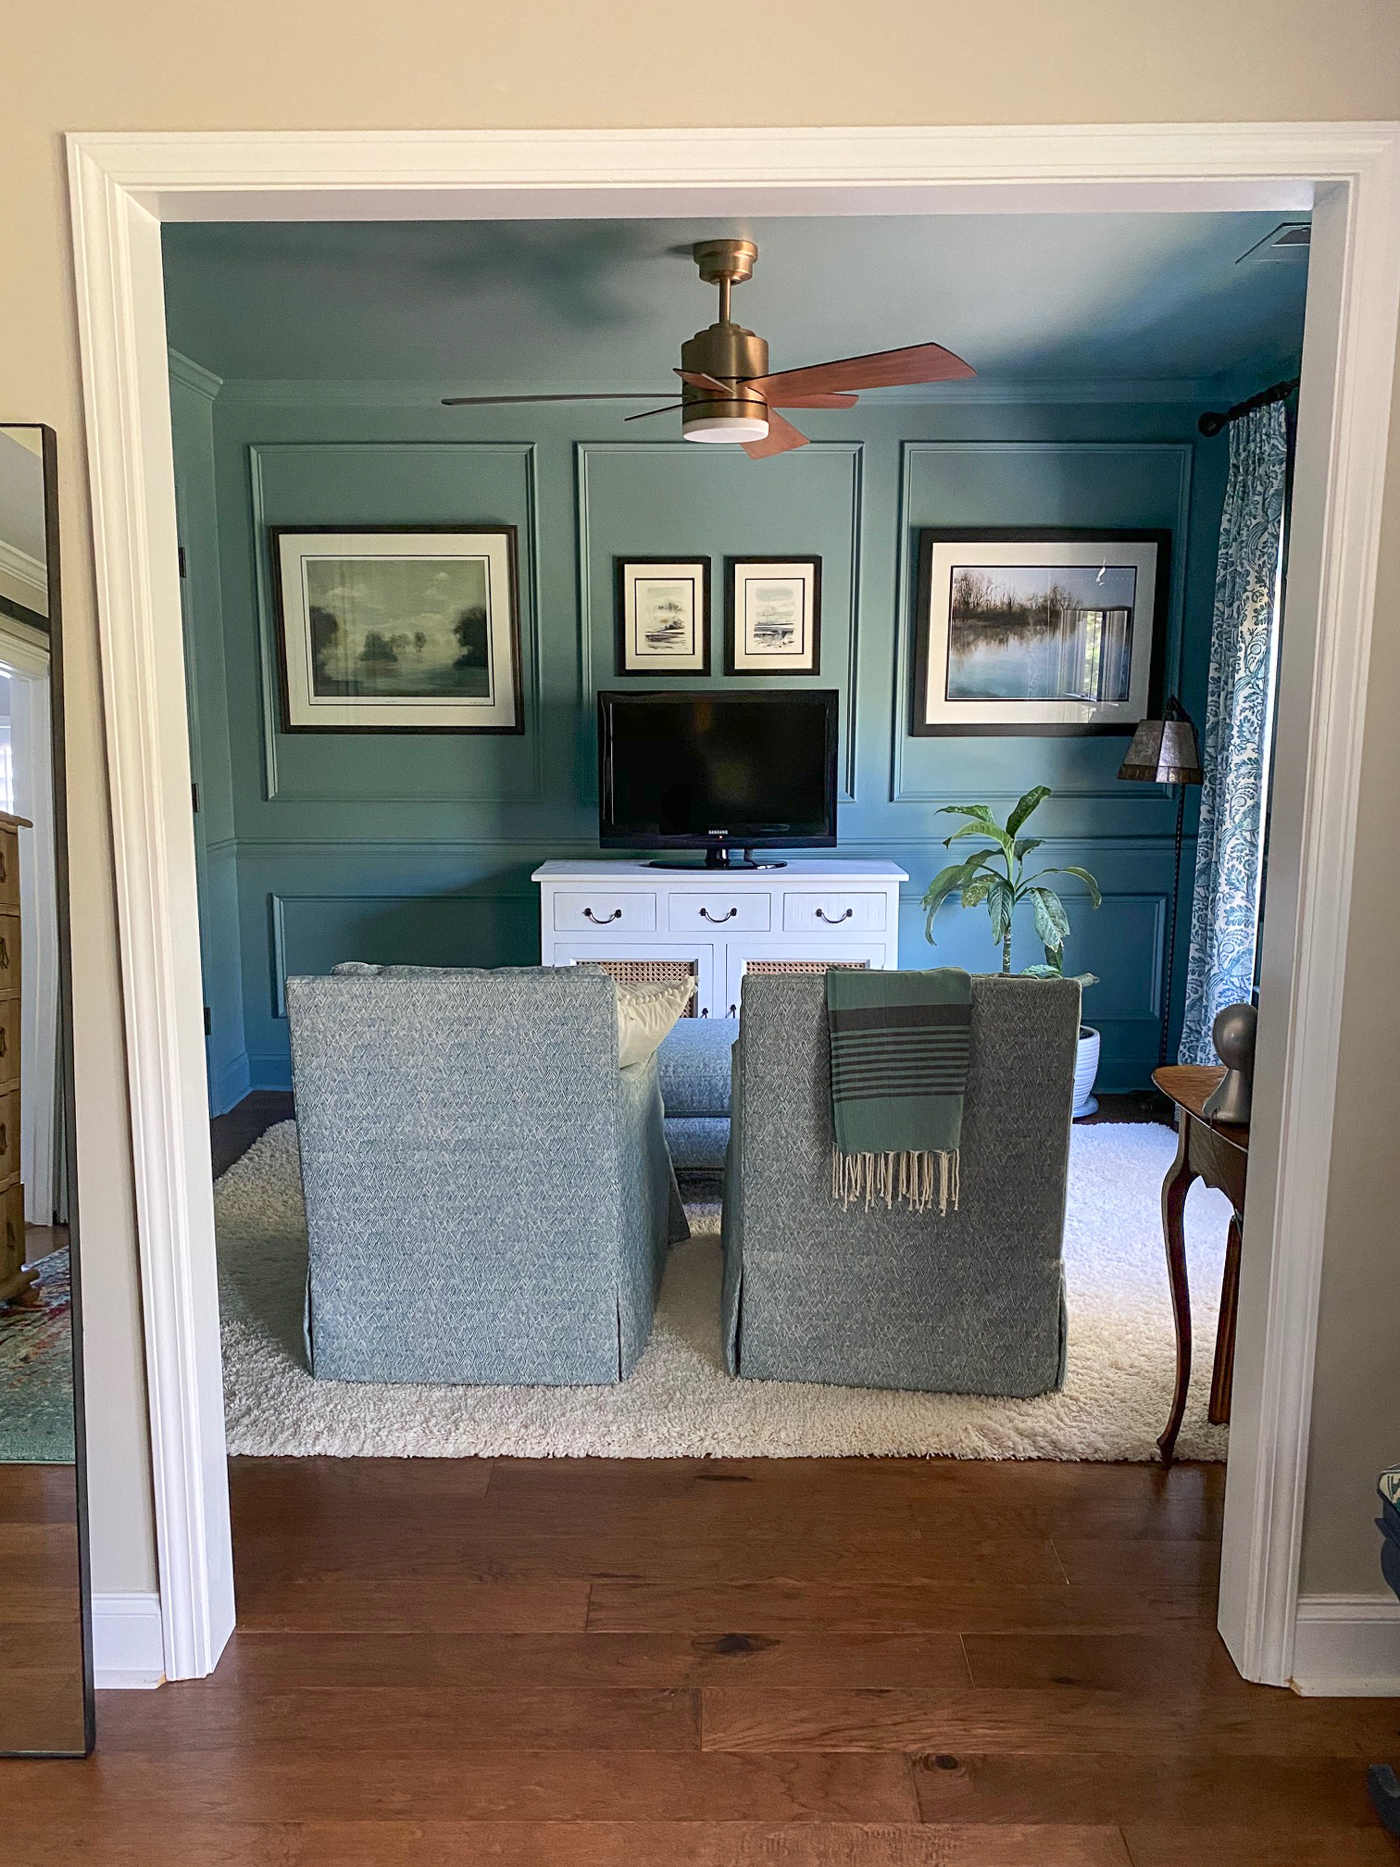
AFTER: Master Sitting room with picture frame molding
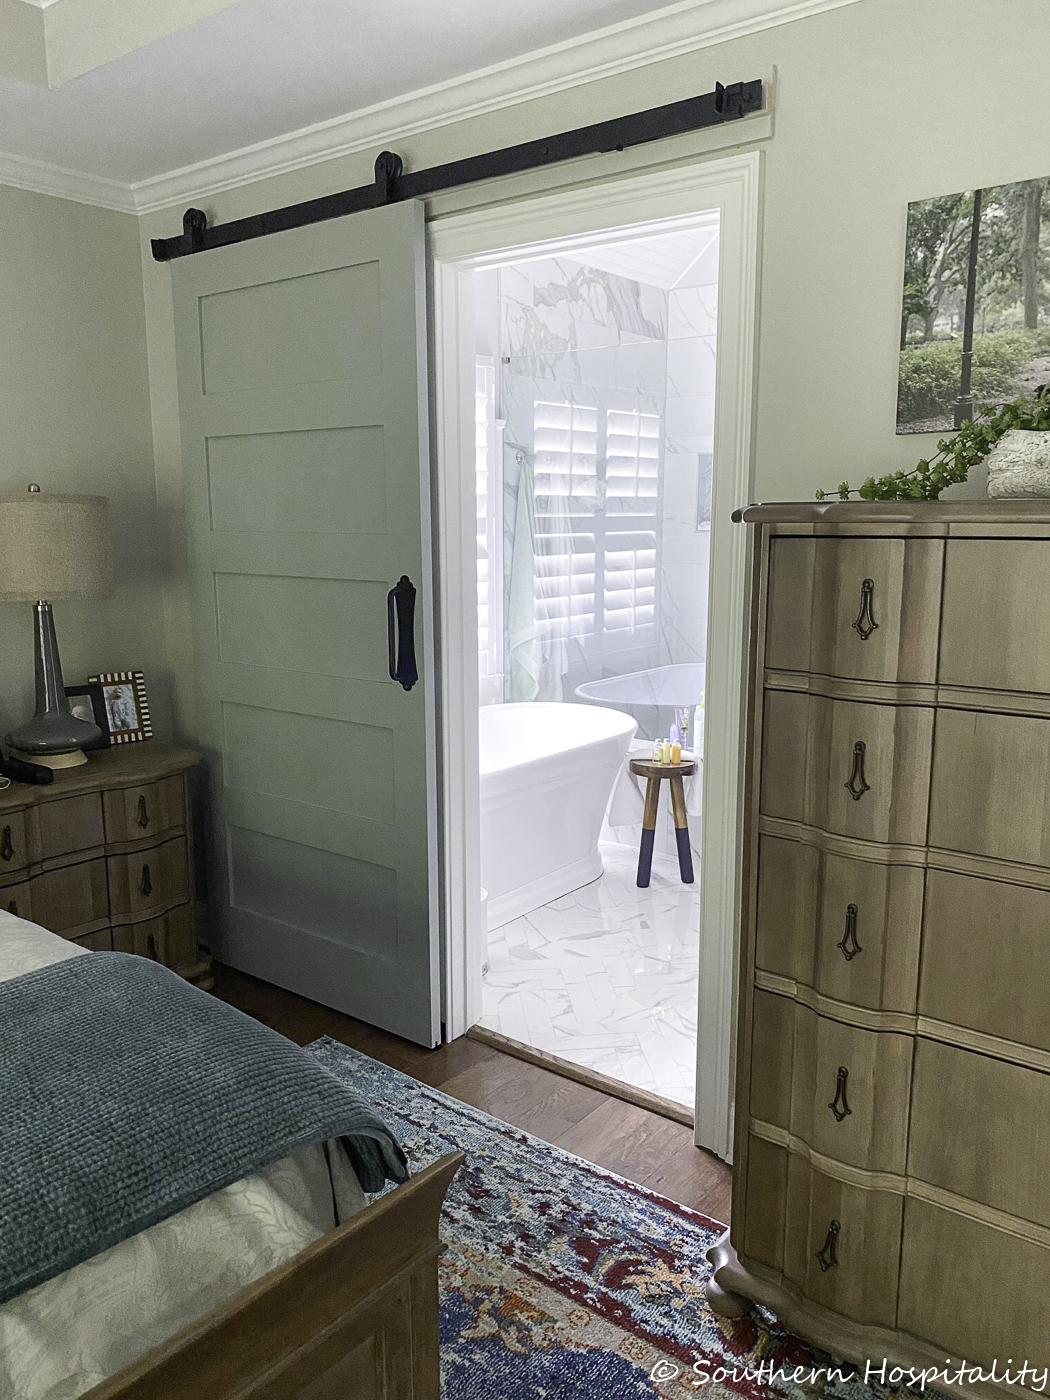
We added a sliding barn door to our master bathroom.
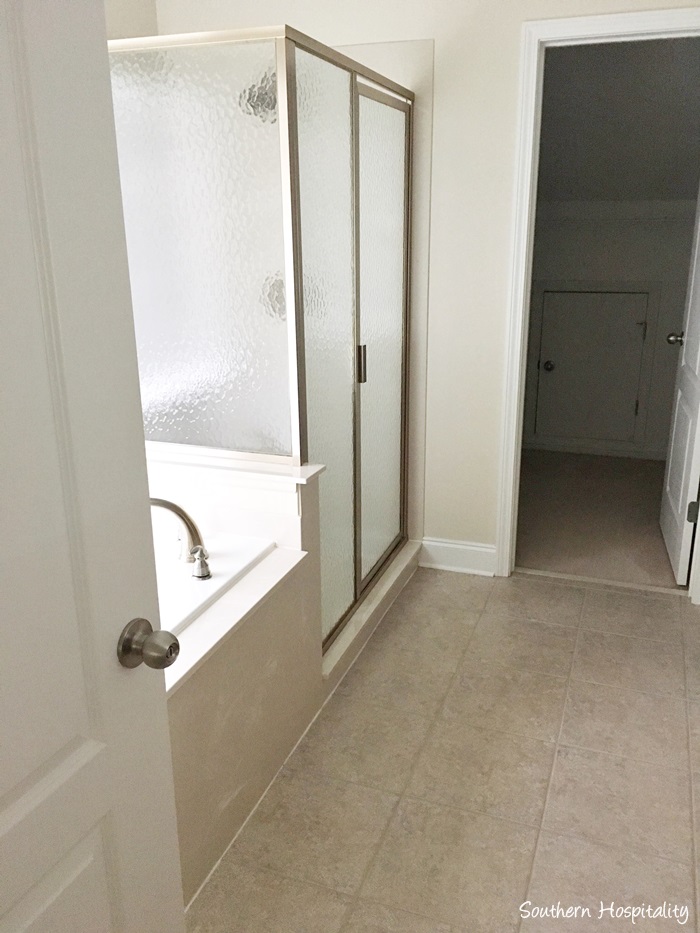
BEFORE: Master Bath
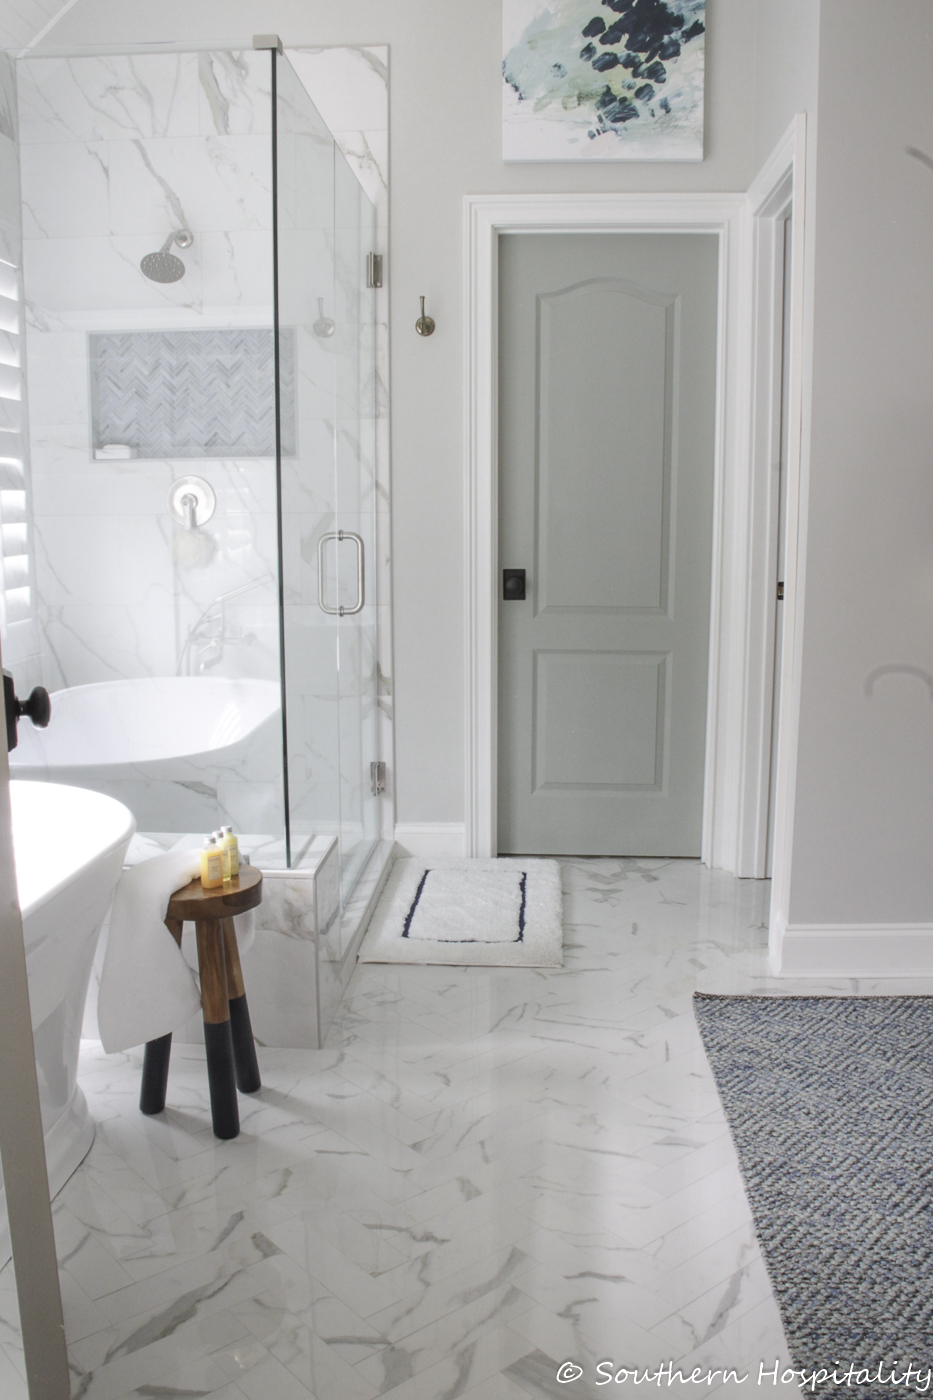
AFTER: Master Bath. This was a big project we hired out last year. Mark again did the board and batten in here. We love it!
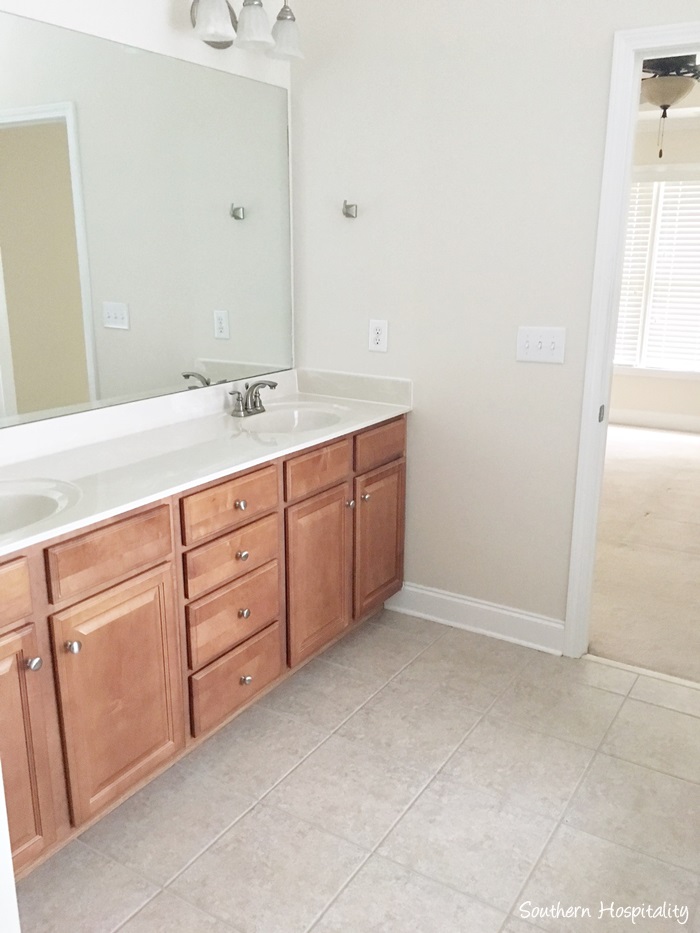
BEFORE: Master Bath vanity
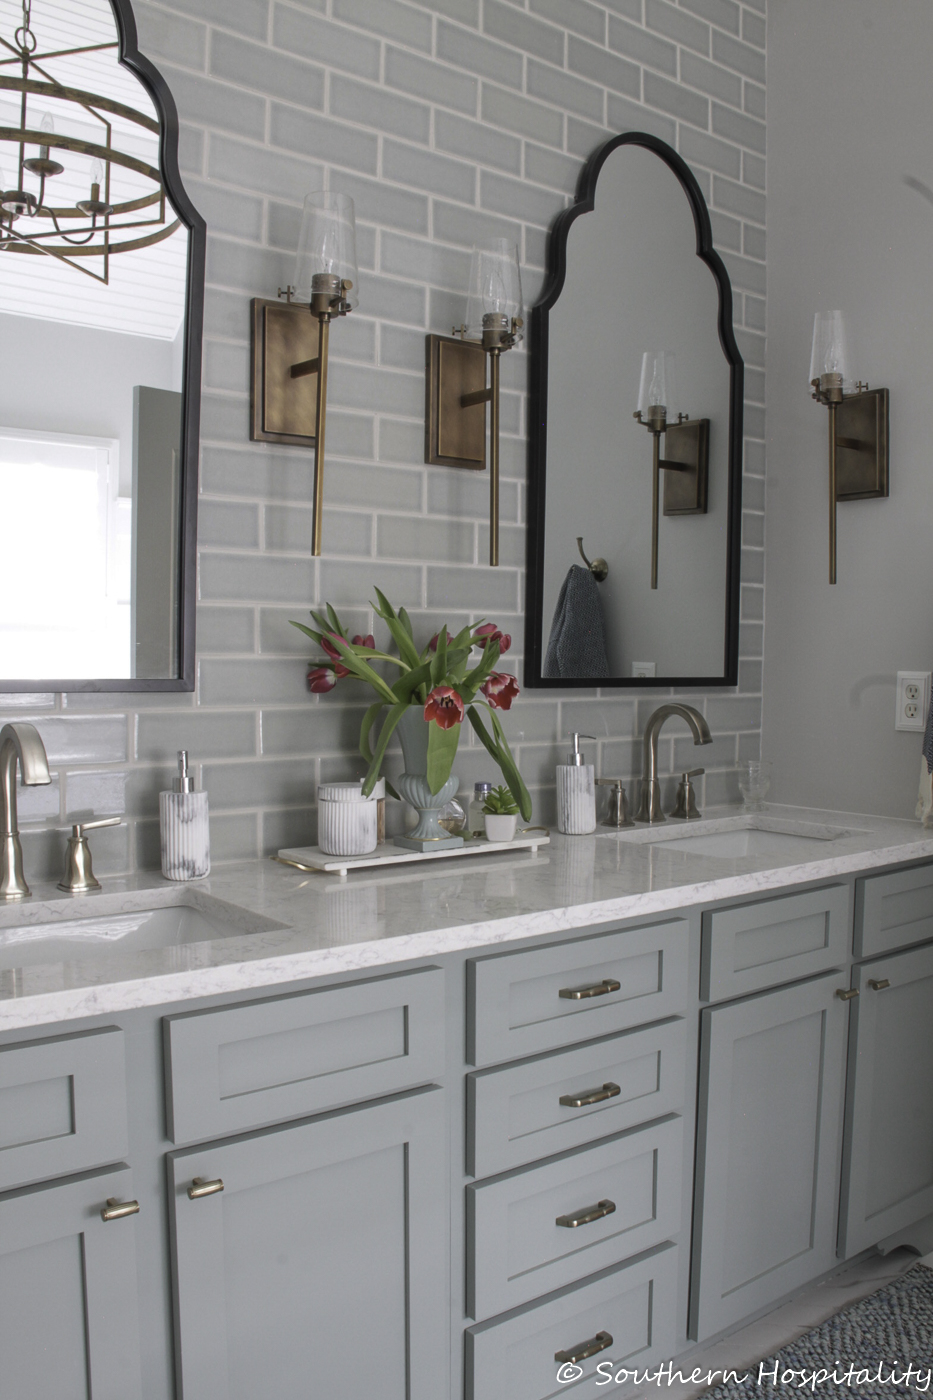
AFTER: Master Bath vanity. Here’s the painting the vanity post, that was a DIY project I did as well as added new drawers and doors.
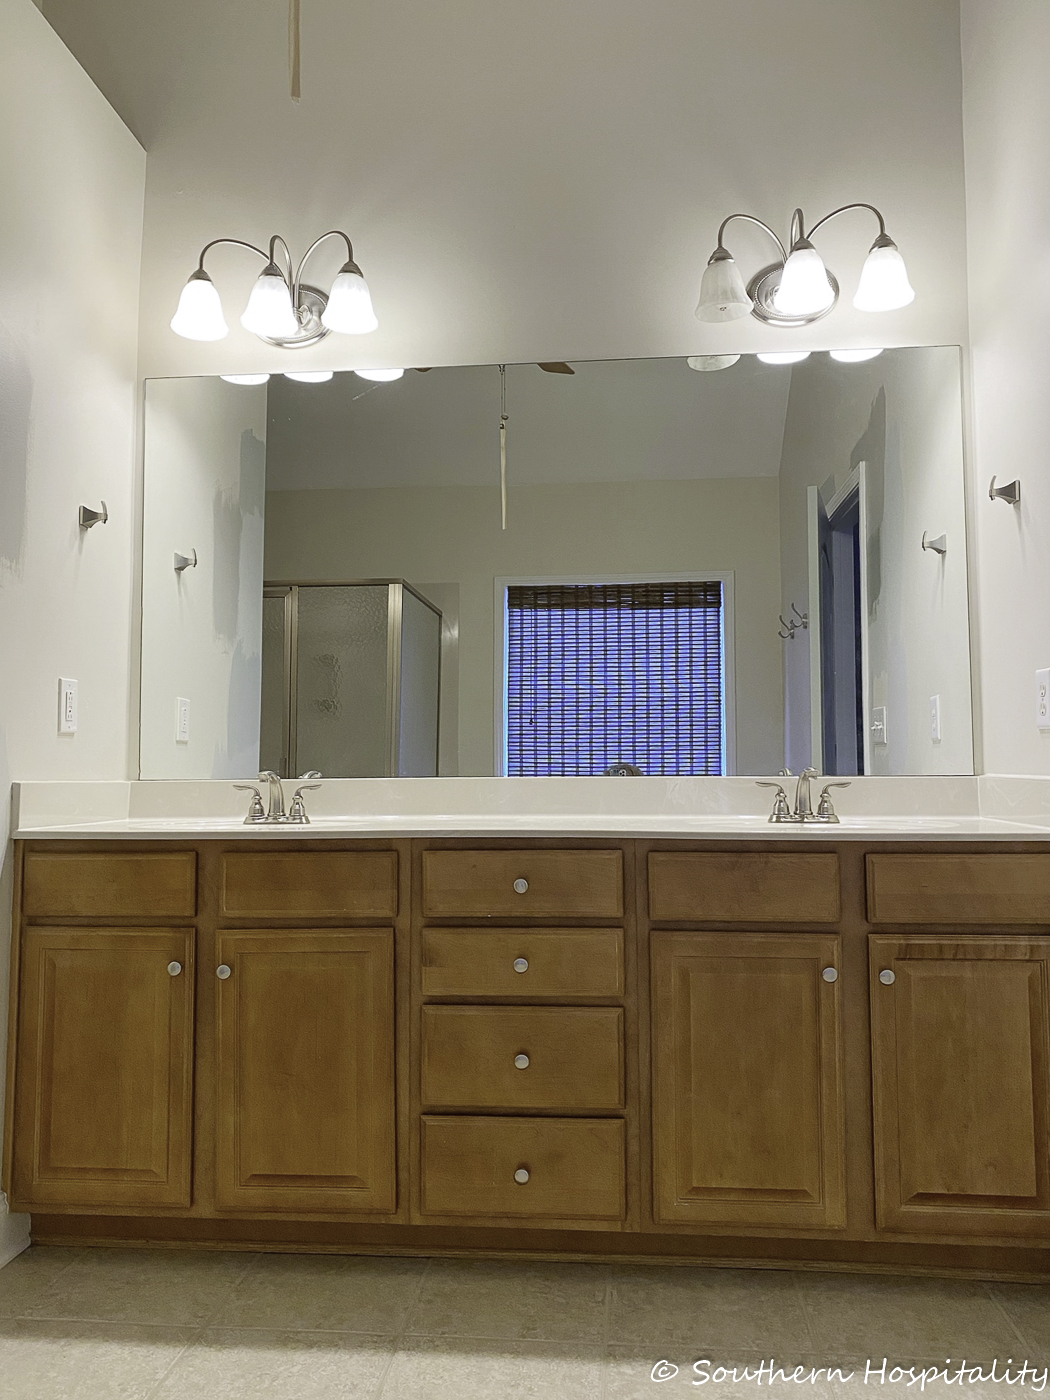
BEFORE
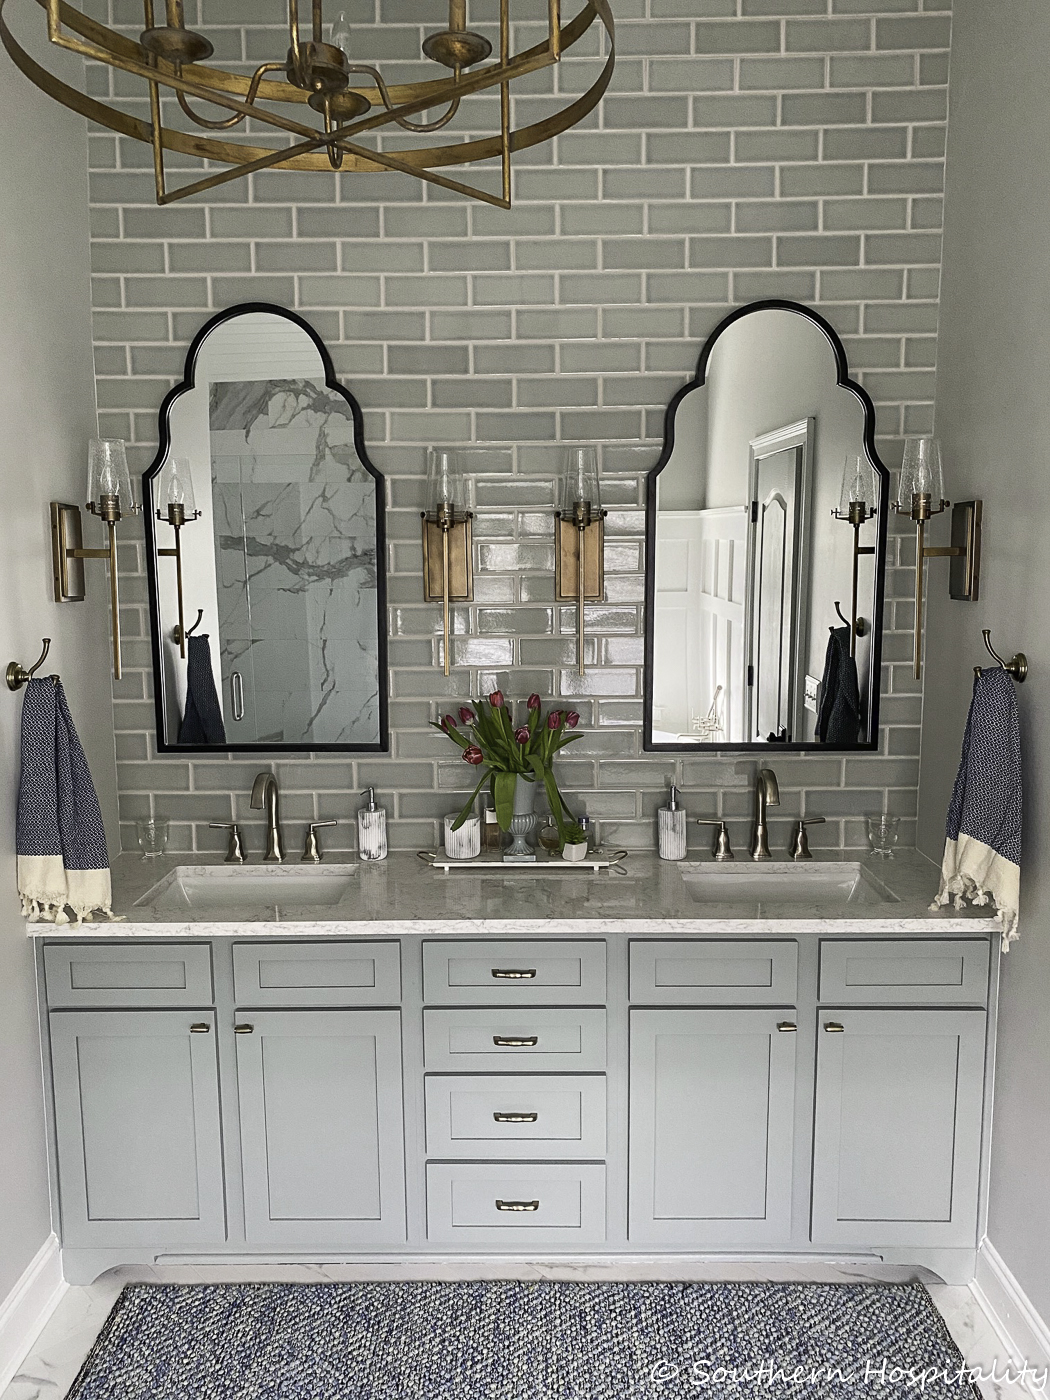
AFTER: We love this too!
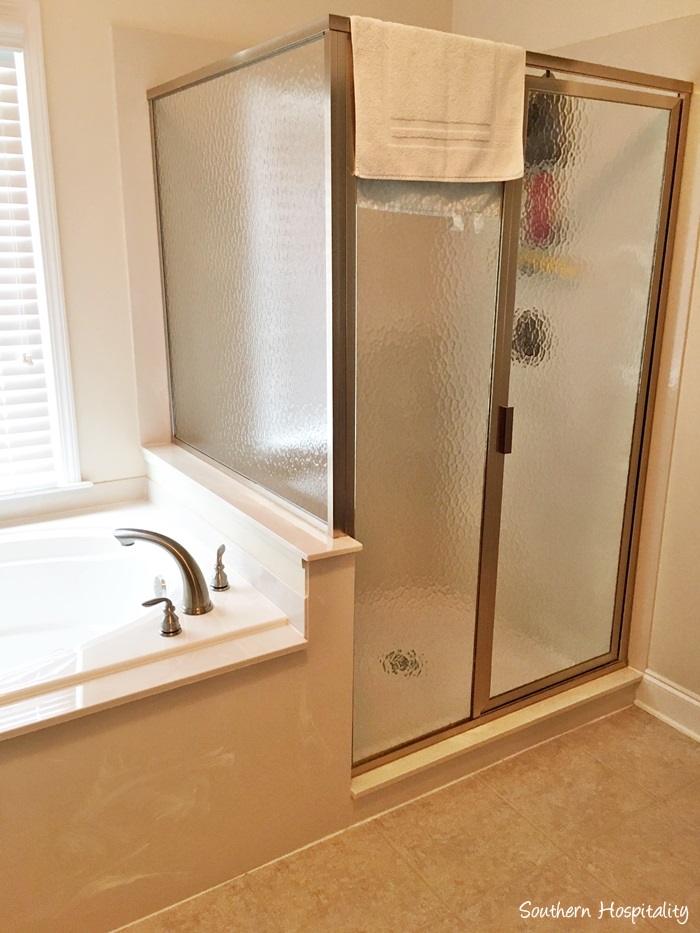
BEFORE: Old shower
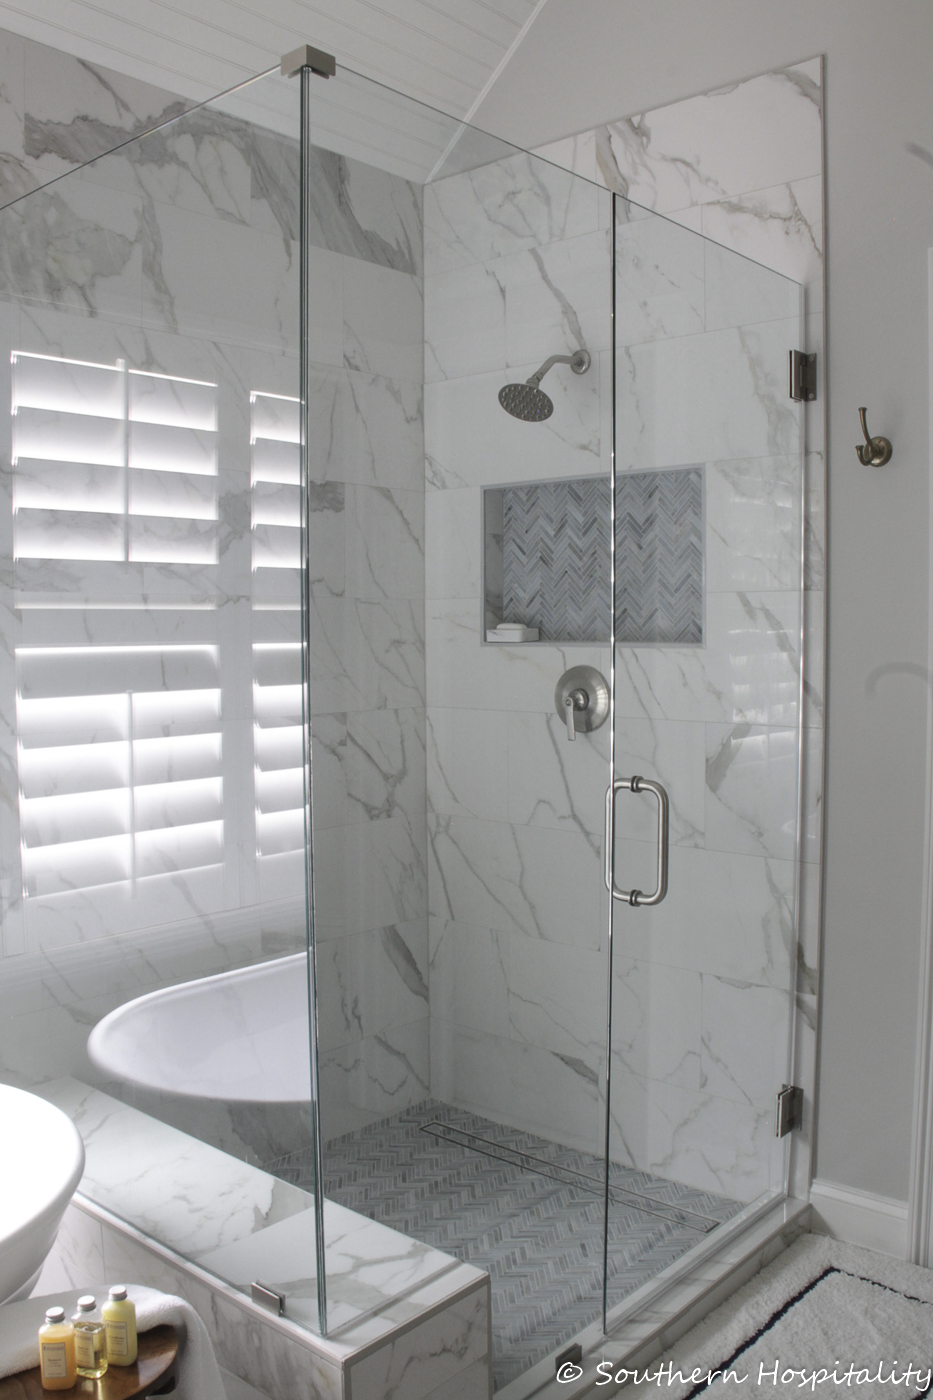
AFTER: New shower with Walker Zanger tile. That link above will tell you all about the materials and cost breakdown.
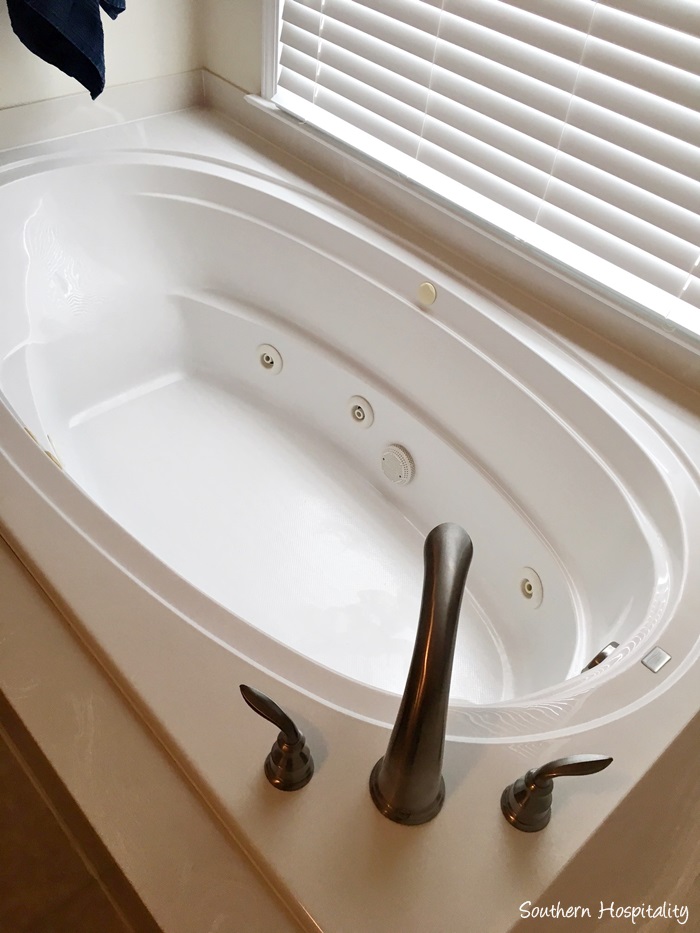
BEFORE: Old tub
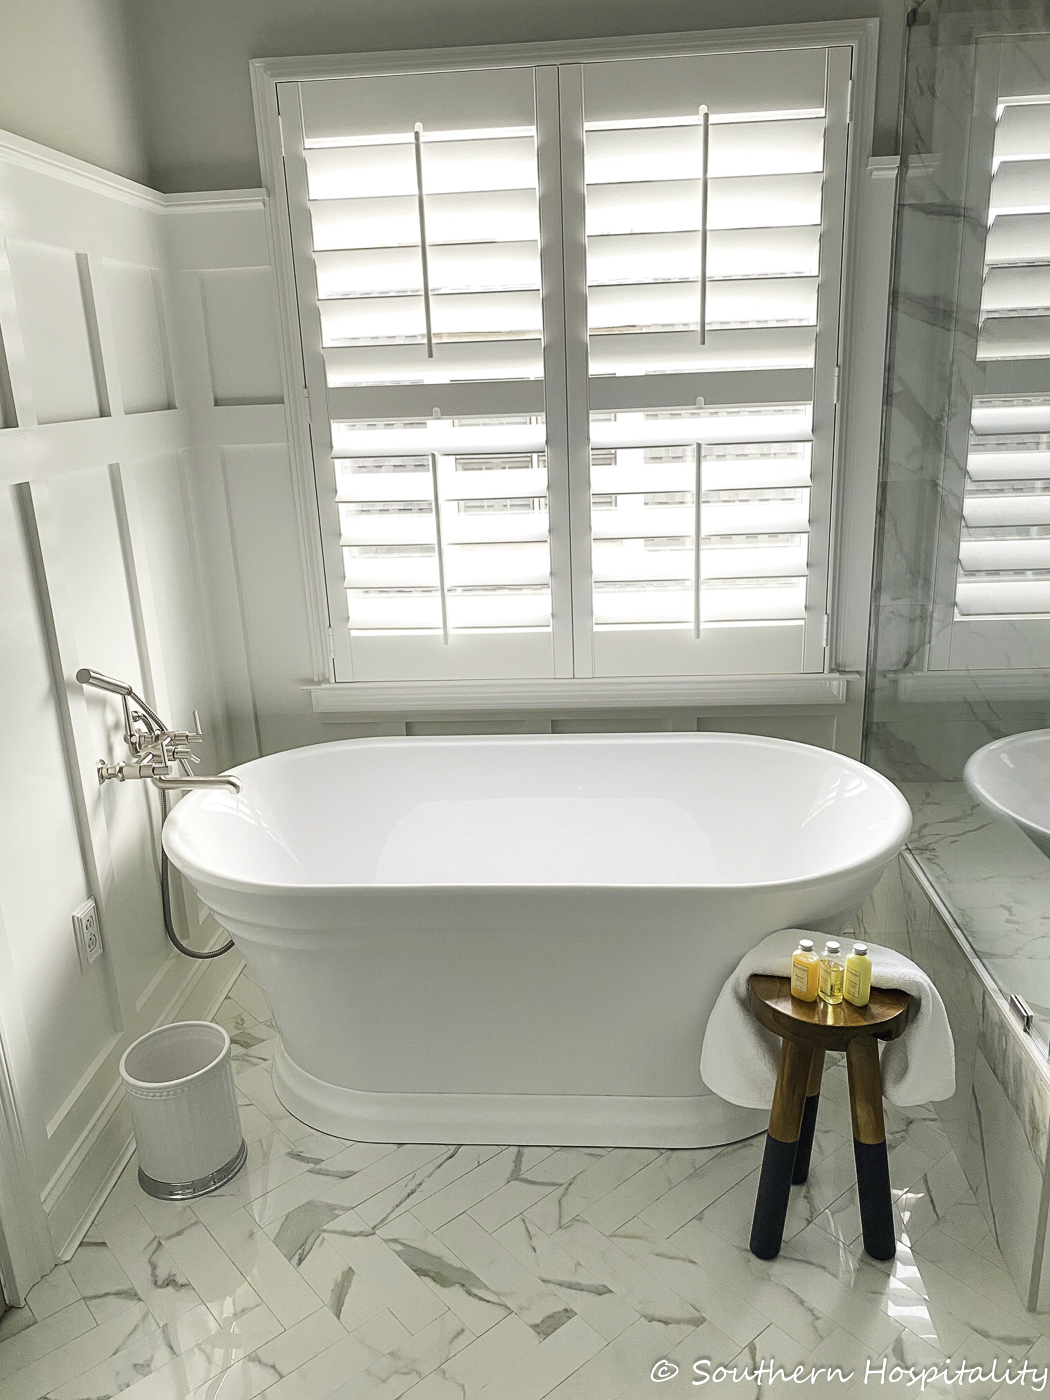
AFTER: New Tub, with all the hardware details too.
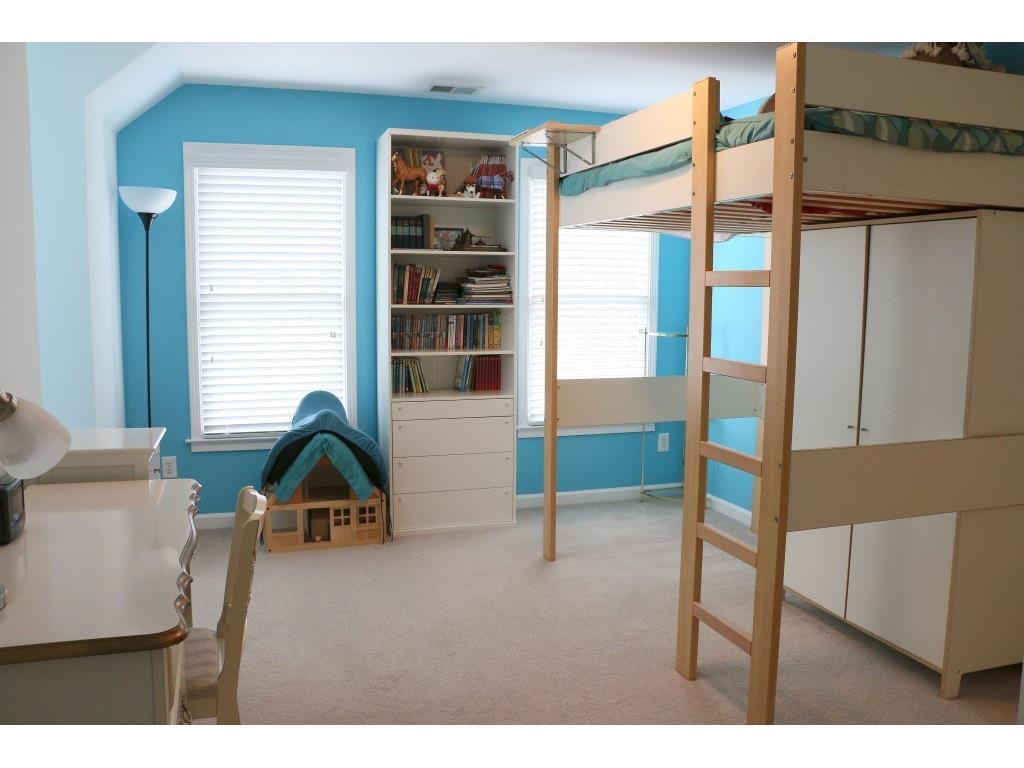
BEFORE: Mark’s man cave, real estate pics. This is a dramatic before and after since it was a little girl’s room.
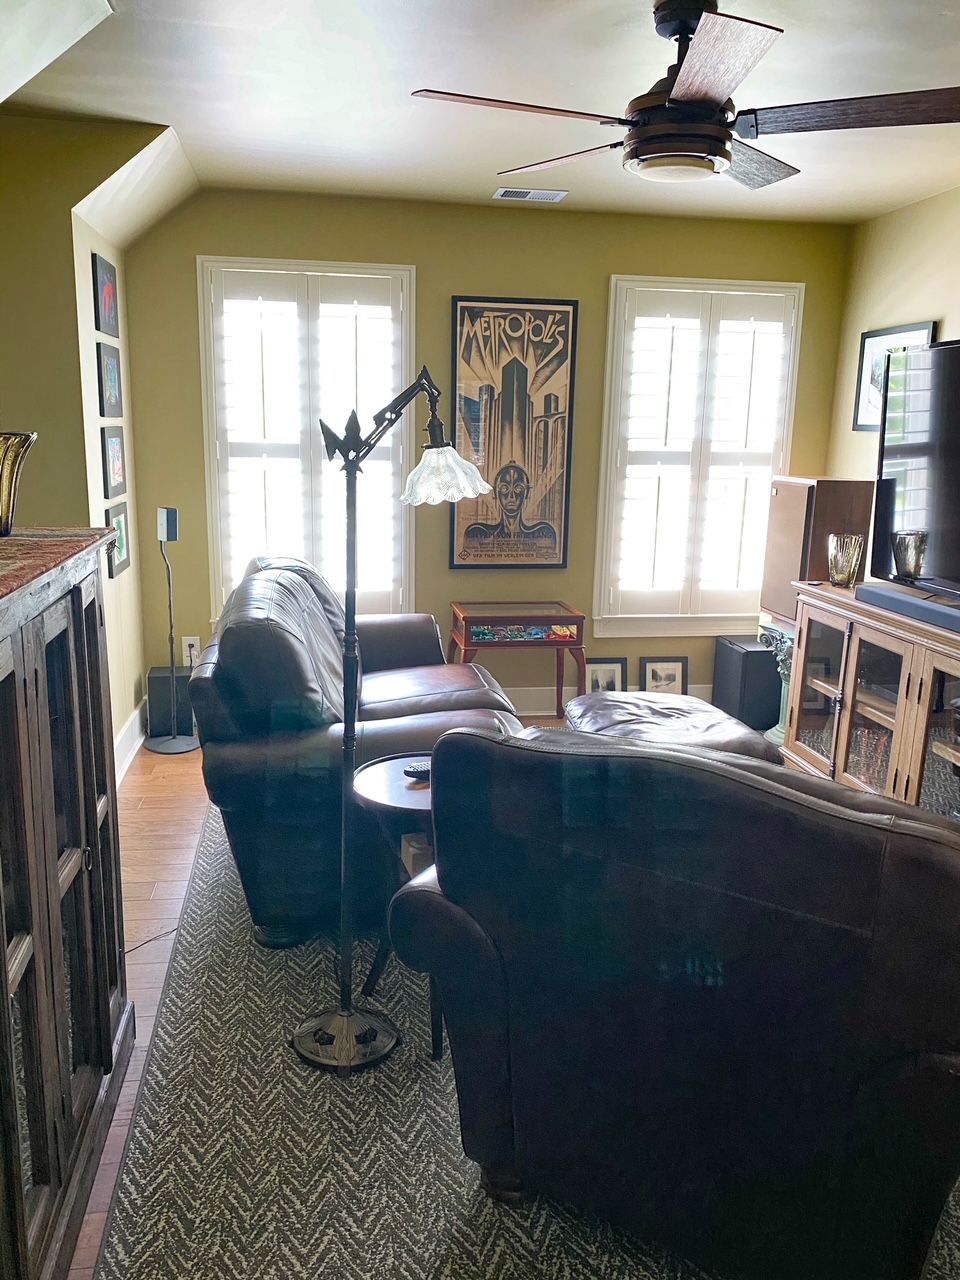
AFTER: Man Cave. This color isn’t quite accurate, but Mark added lots of new moldings in his man cave and painted it all a gold/khaki color along with Plantation shutters. I call it the brown room.
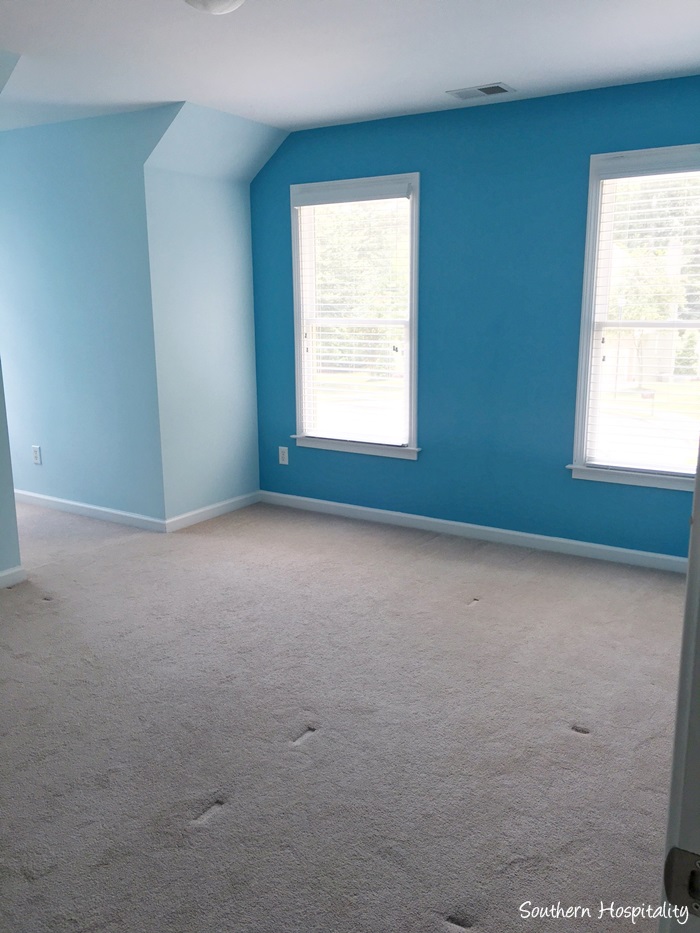
BEFORE
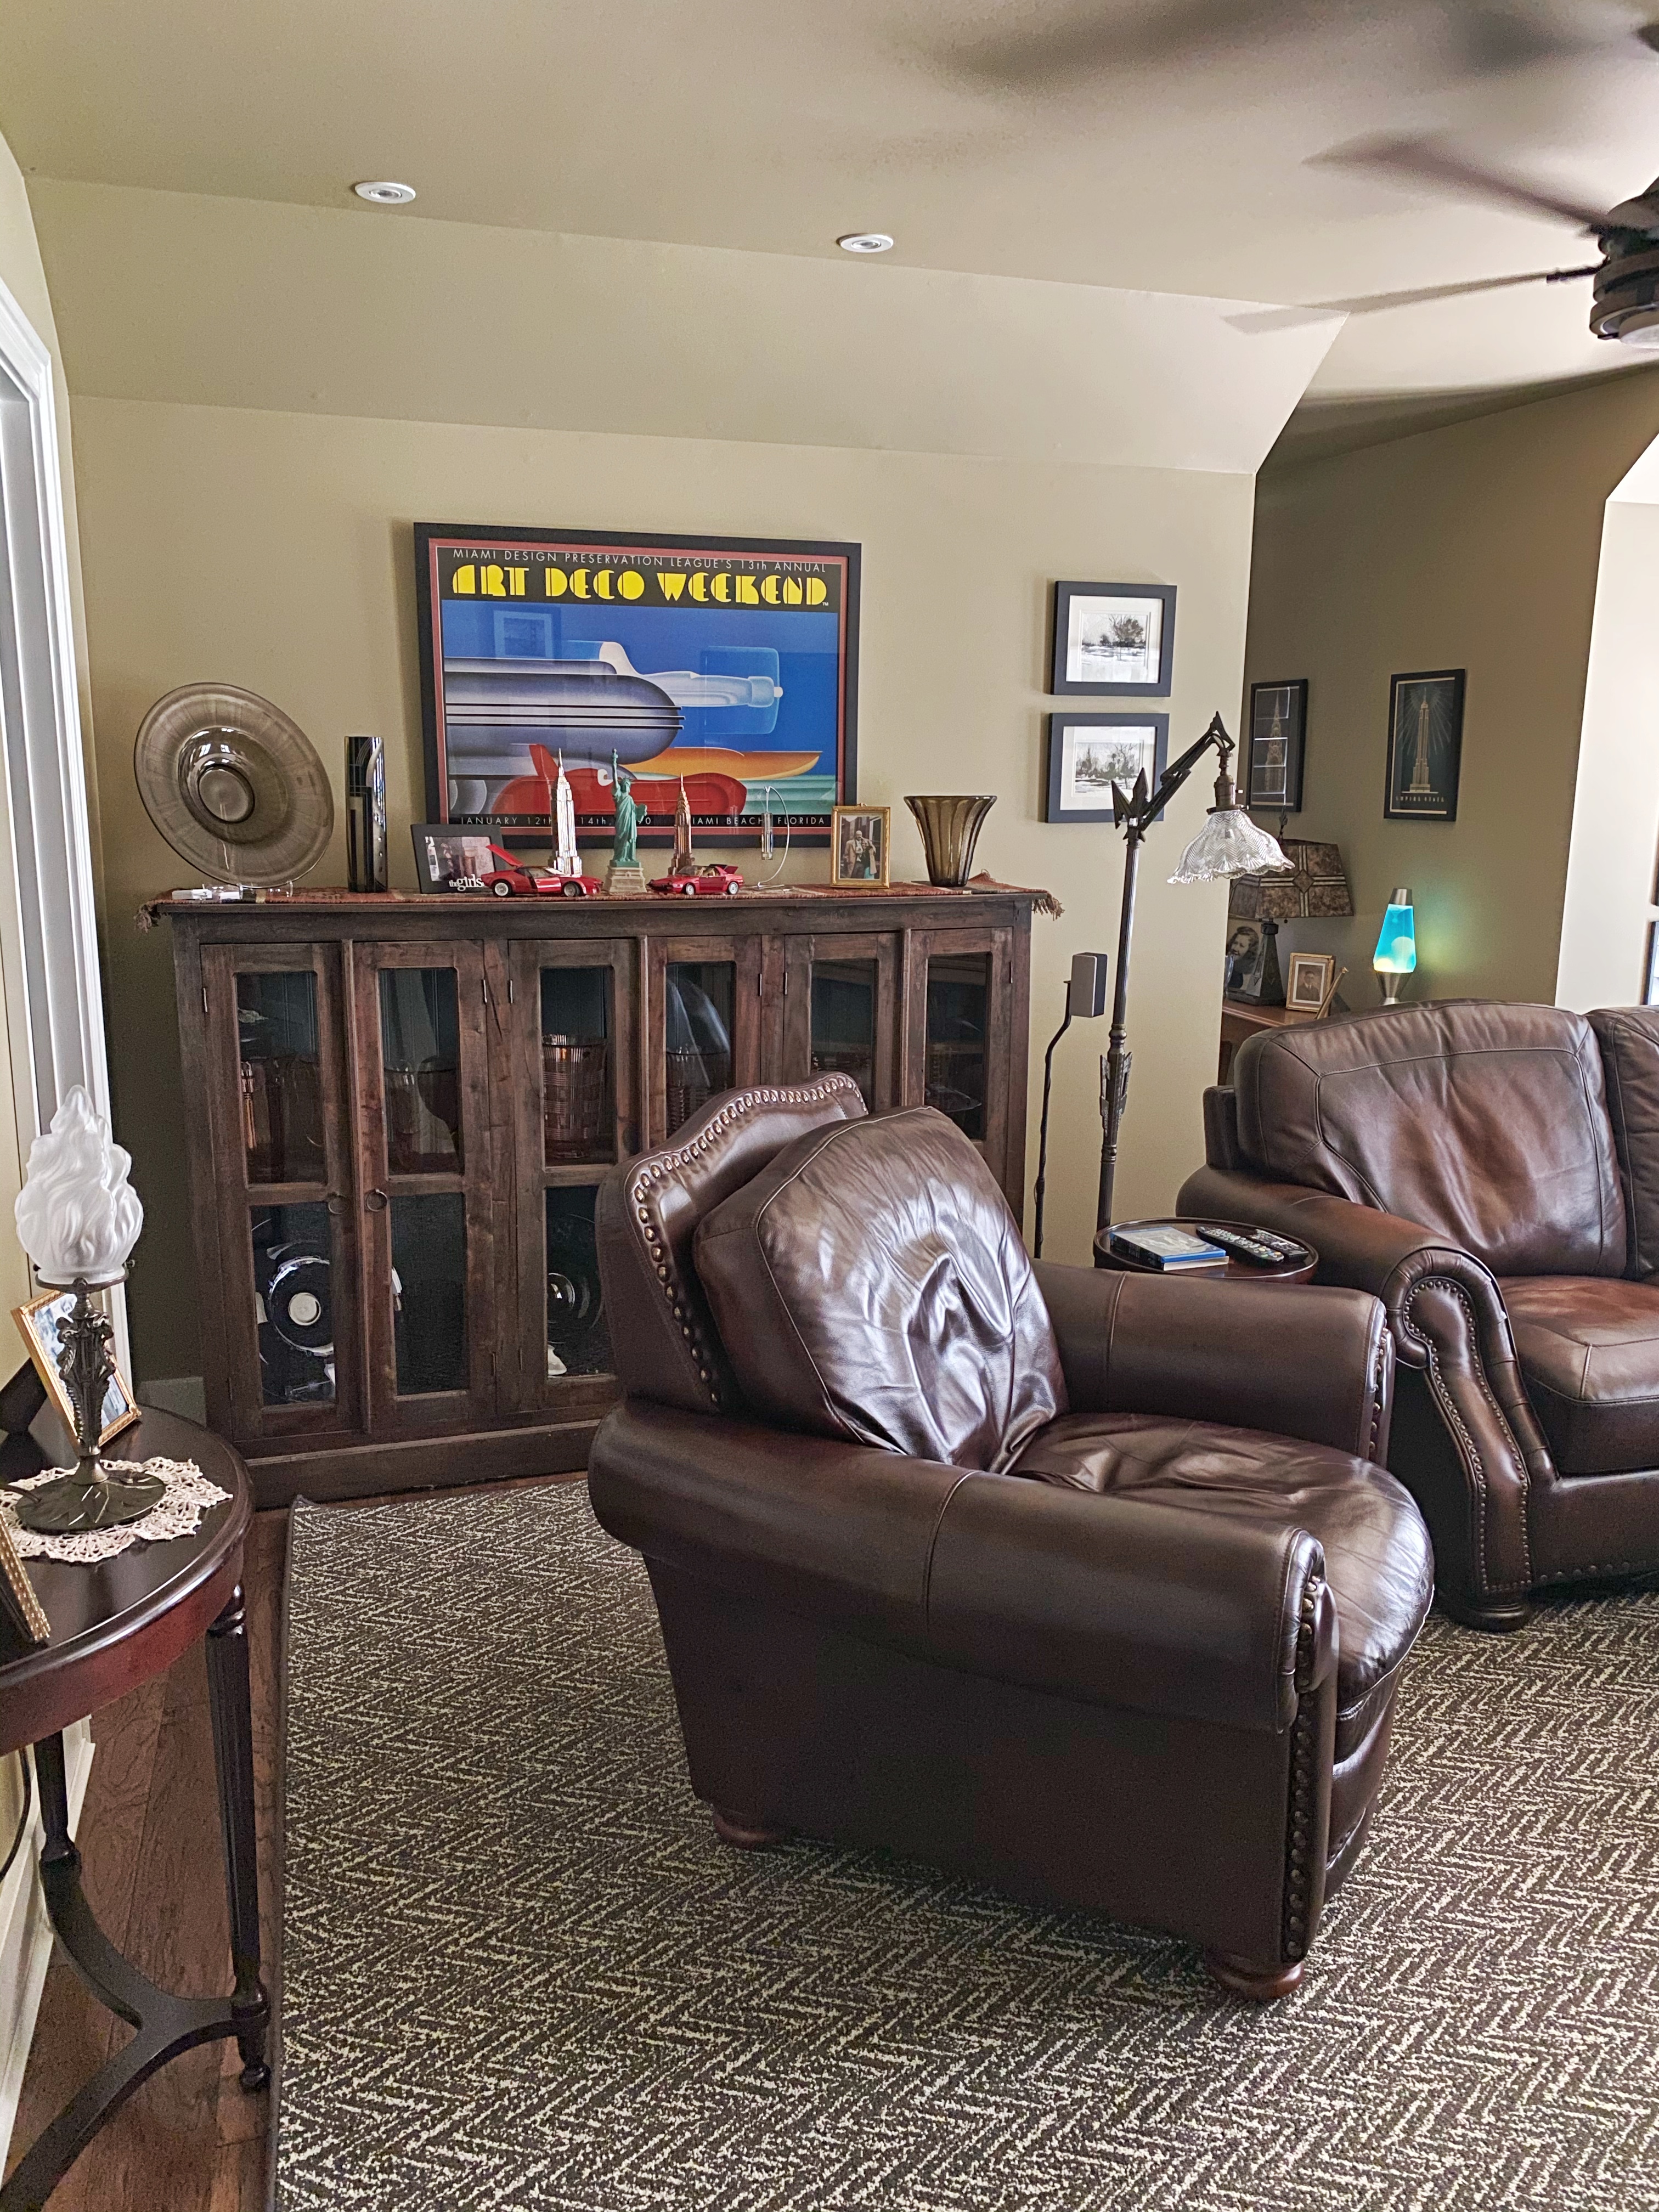
AFTER: Man Cave
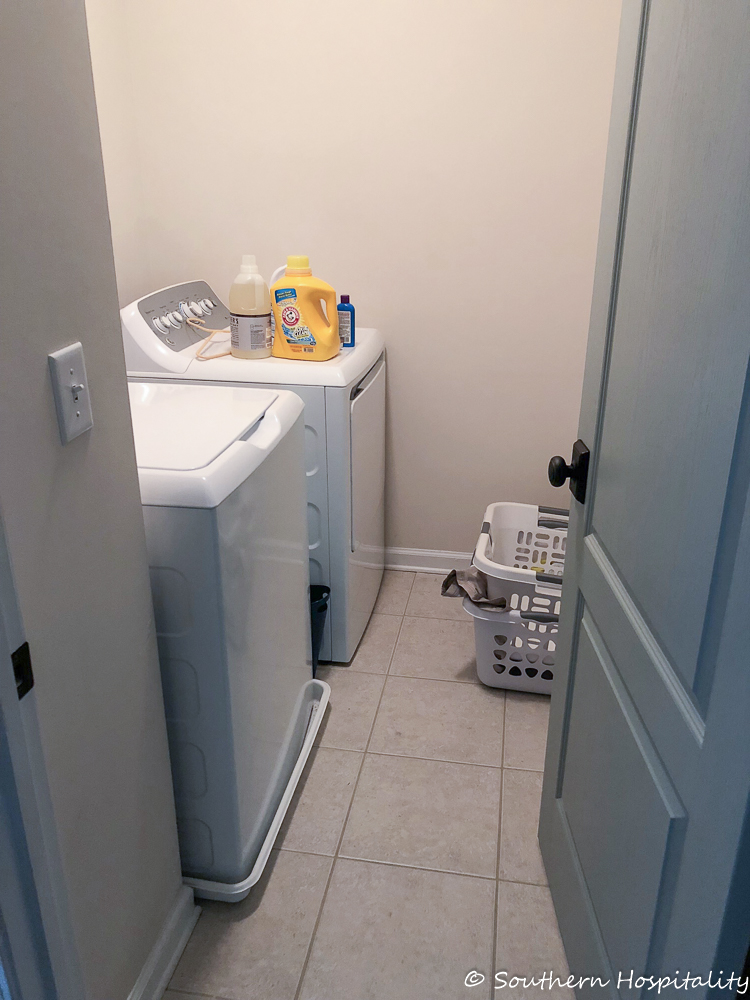
BEFORE: Laundry Room
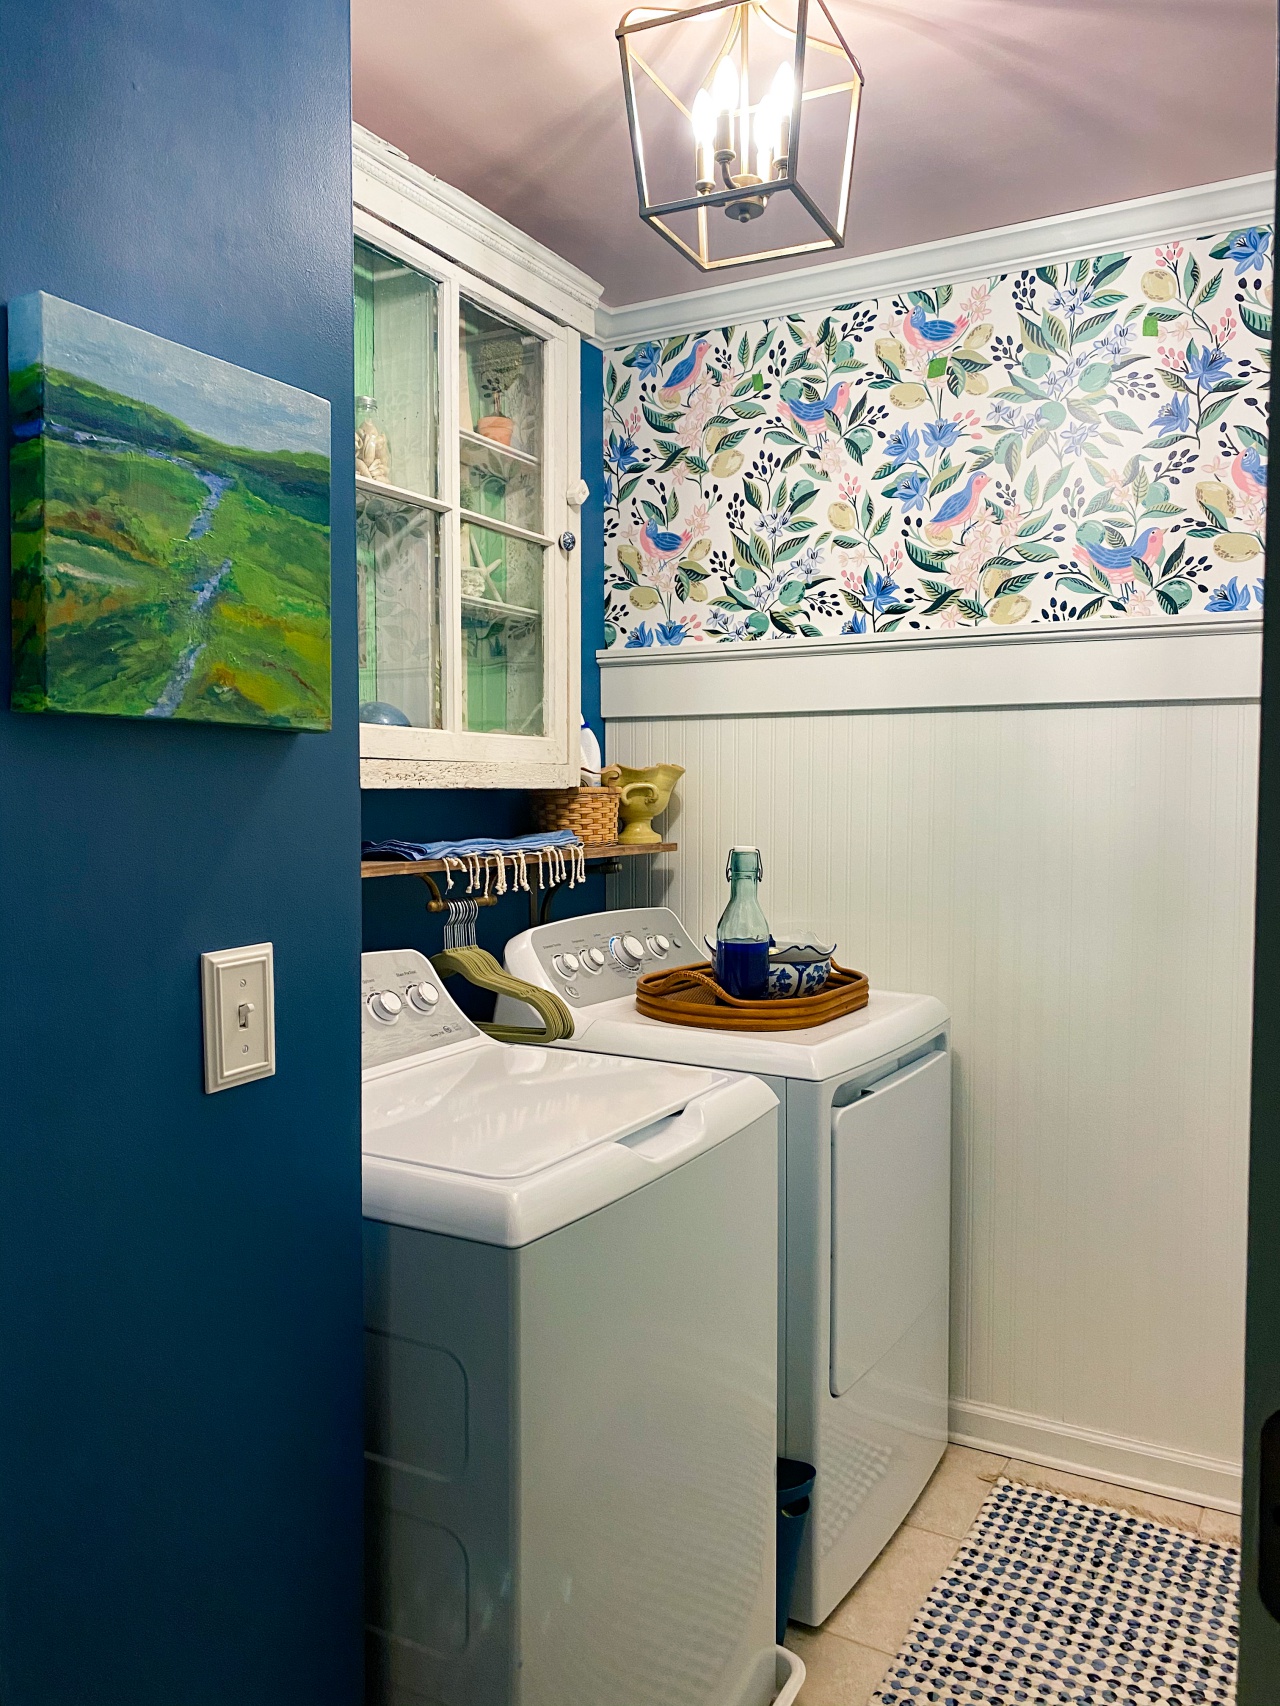
AFTER: Laundry Room. I did this room with beadboard wallpaper wainscot and added the wallpaper above, painted it all as well as the ceiling and Mark added crown molding recently. I still love this space so much.
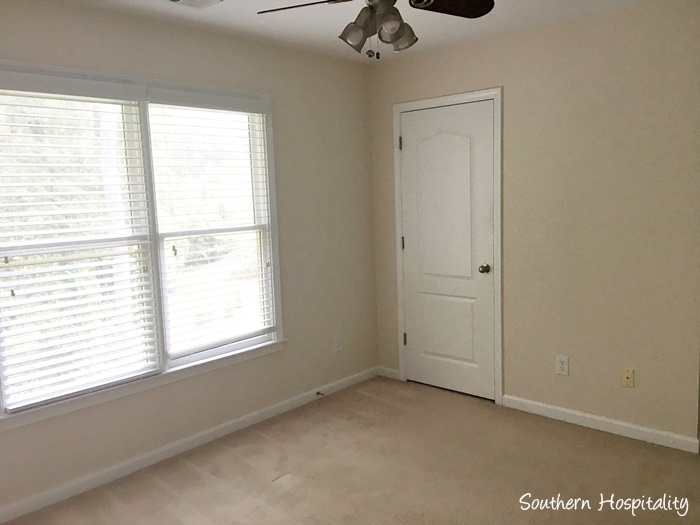
BEFORE: My Office
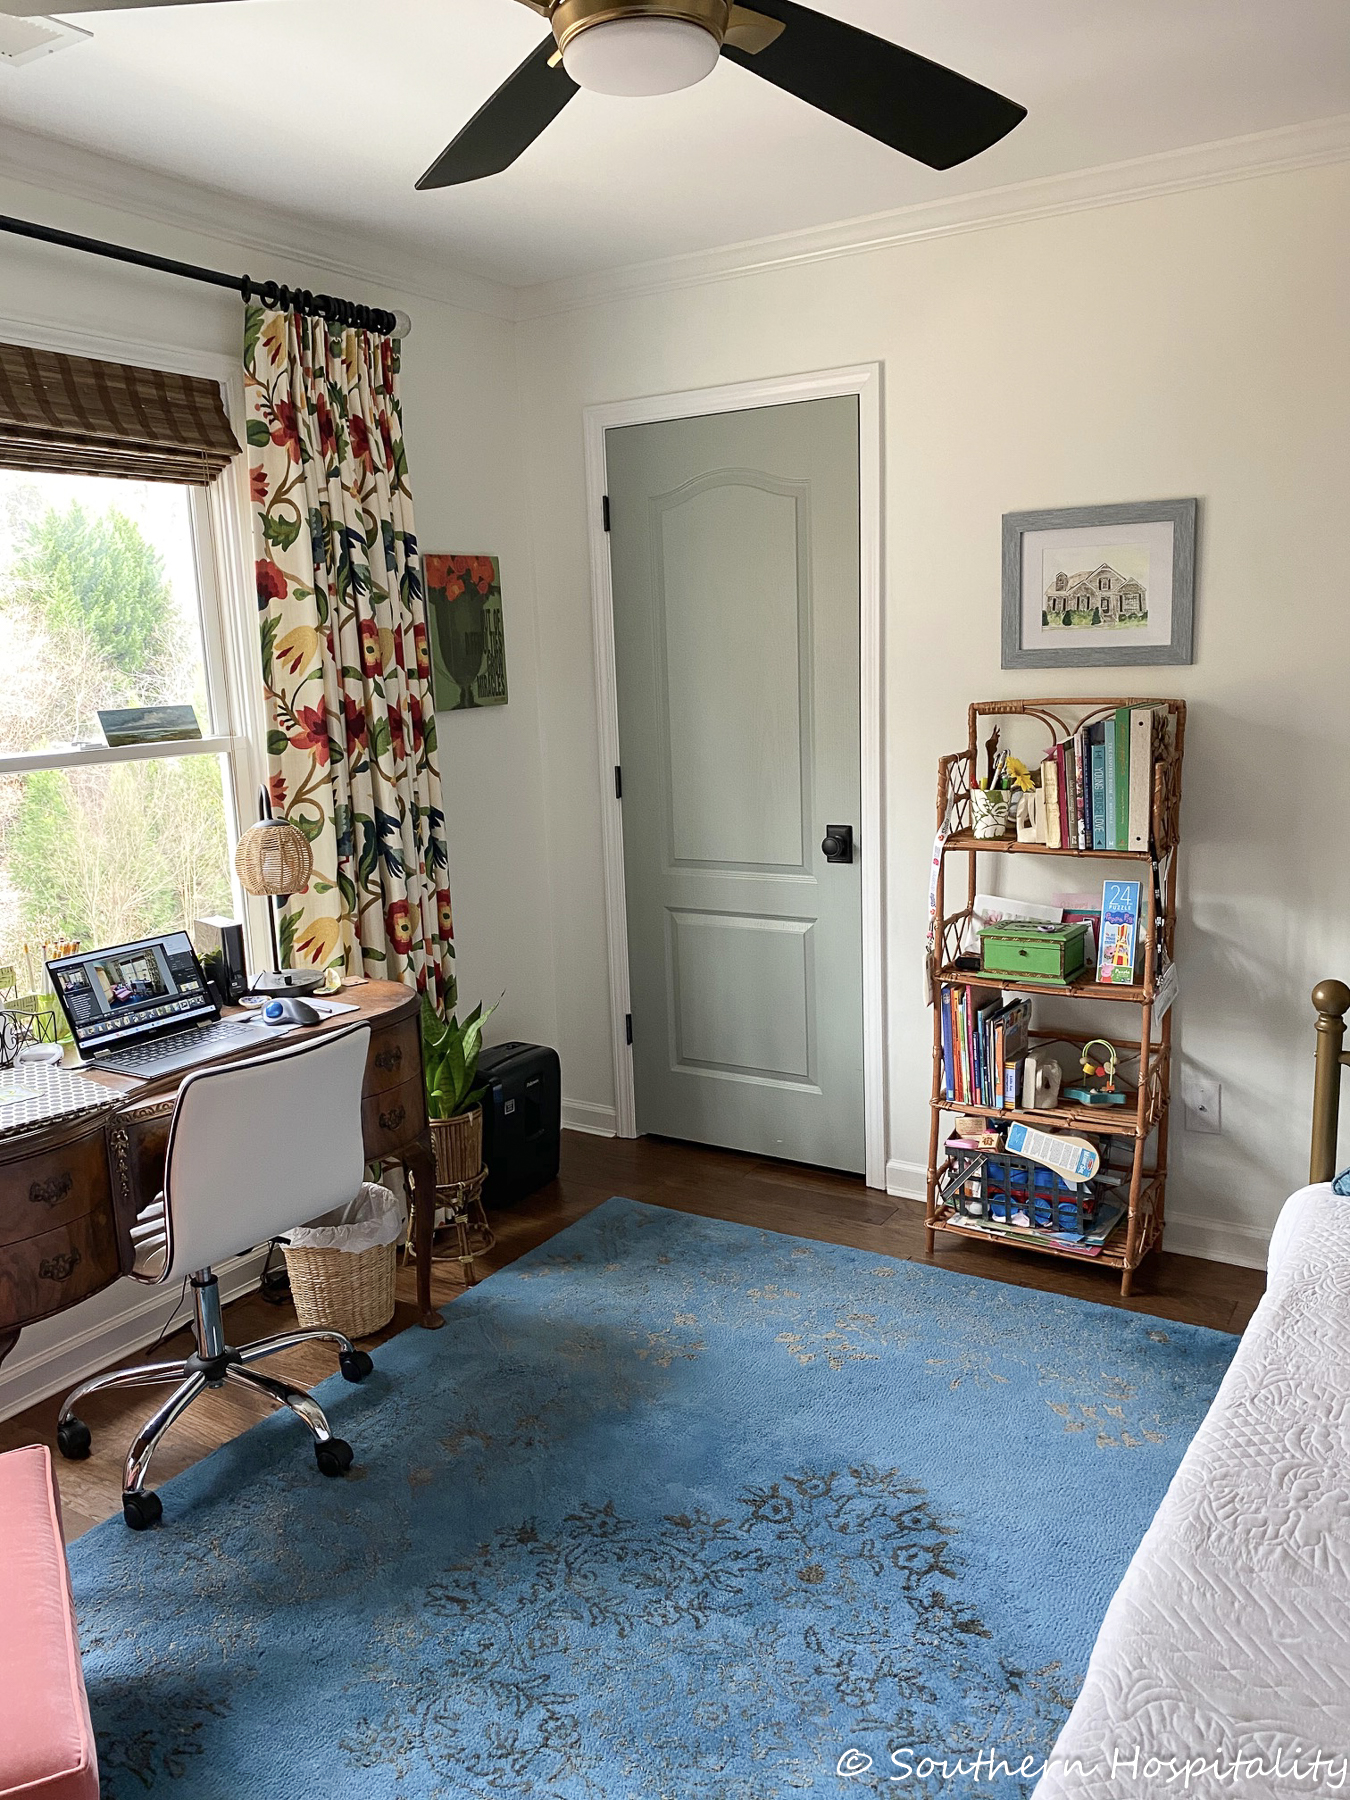
AFTER: This room has gone through several changes since we moved it. I originally set it up as just my office with all office furniture in here. I then sold most of that furniture and decided to make this room an office/guestroom/playroom to fit the needs of our family. That link shows the black and white wallpaper I put in here originally, but it never felt completely right, so see below on the finale.
Now I have space for kids to spend the night with the daybed with trundle. I have a desk in here and also the big armoire holds toys, my printer and a small TV screen. A wonderful multi-purpose space. Don’t be afraid to personalize your spaces just for your own needs!
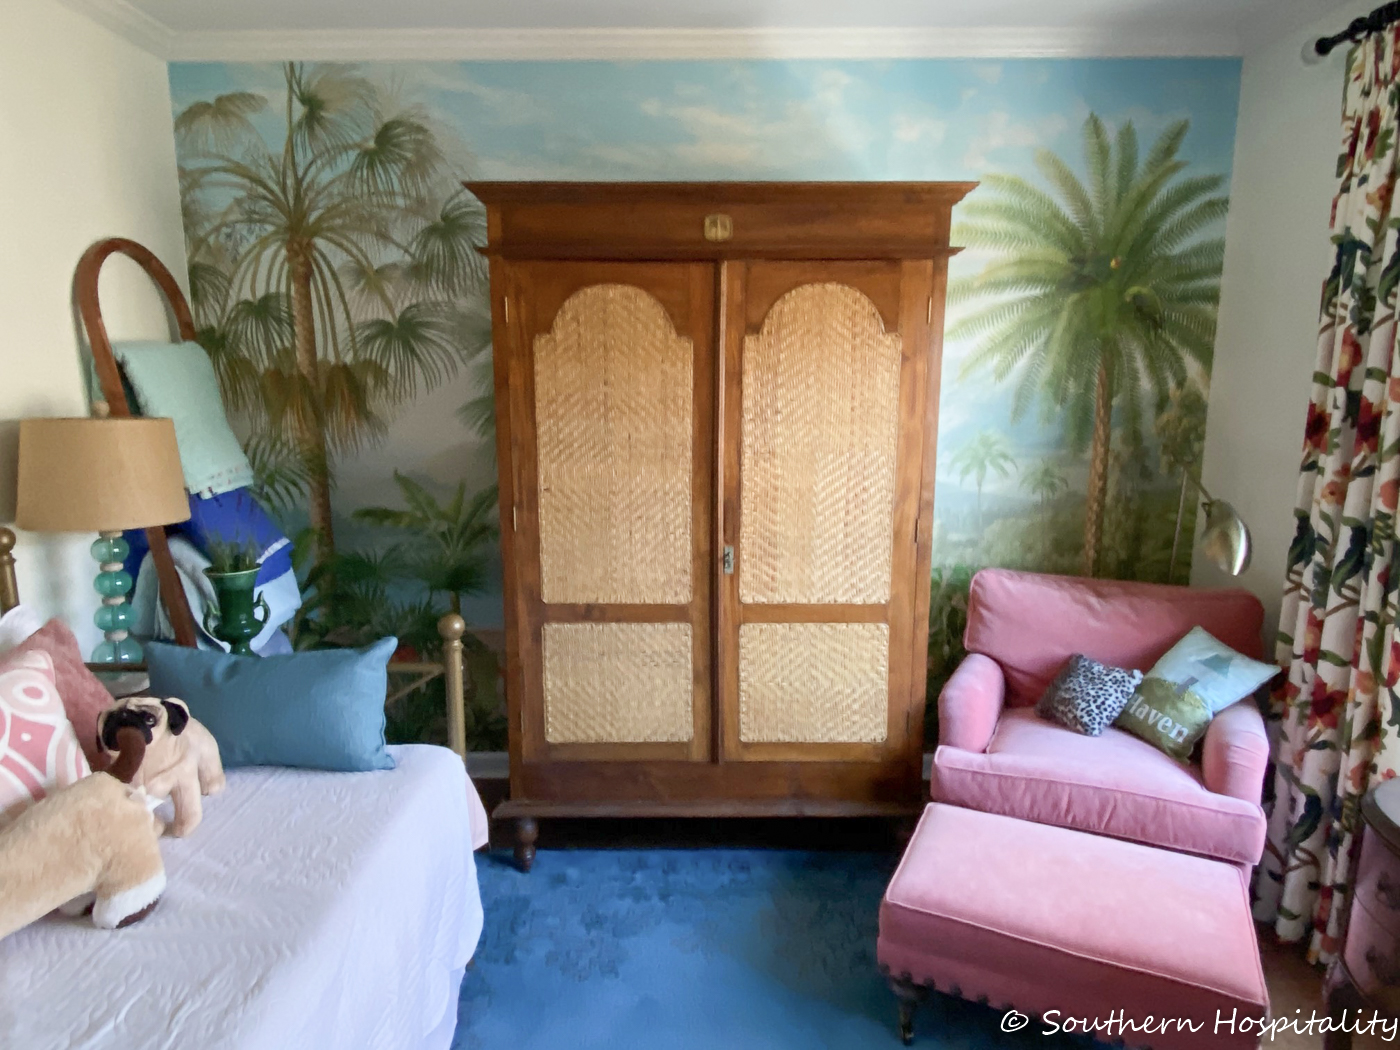
AFTER: New tropical mural added recently. This is a wonderful space to love.
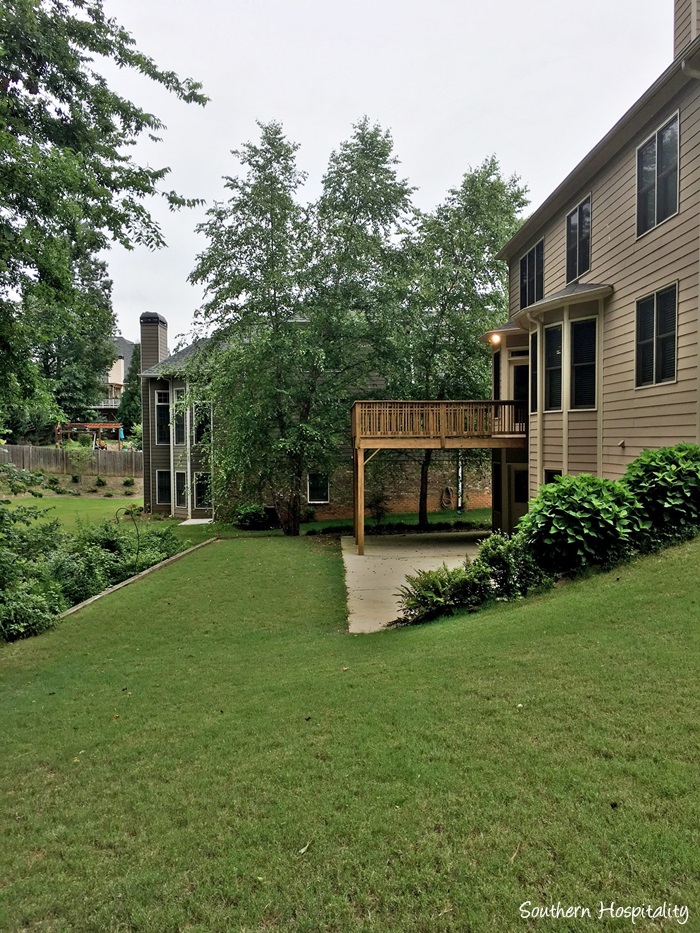
BEFORE: Backyard and exterior
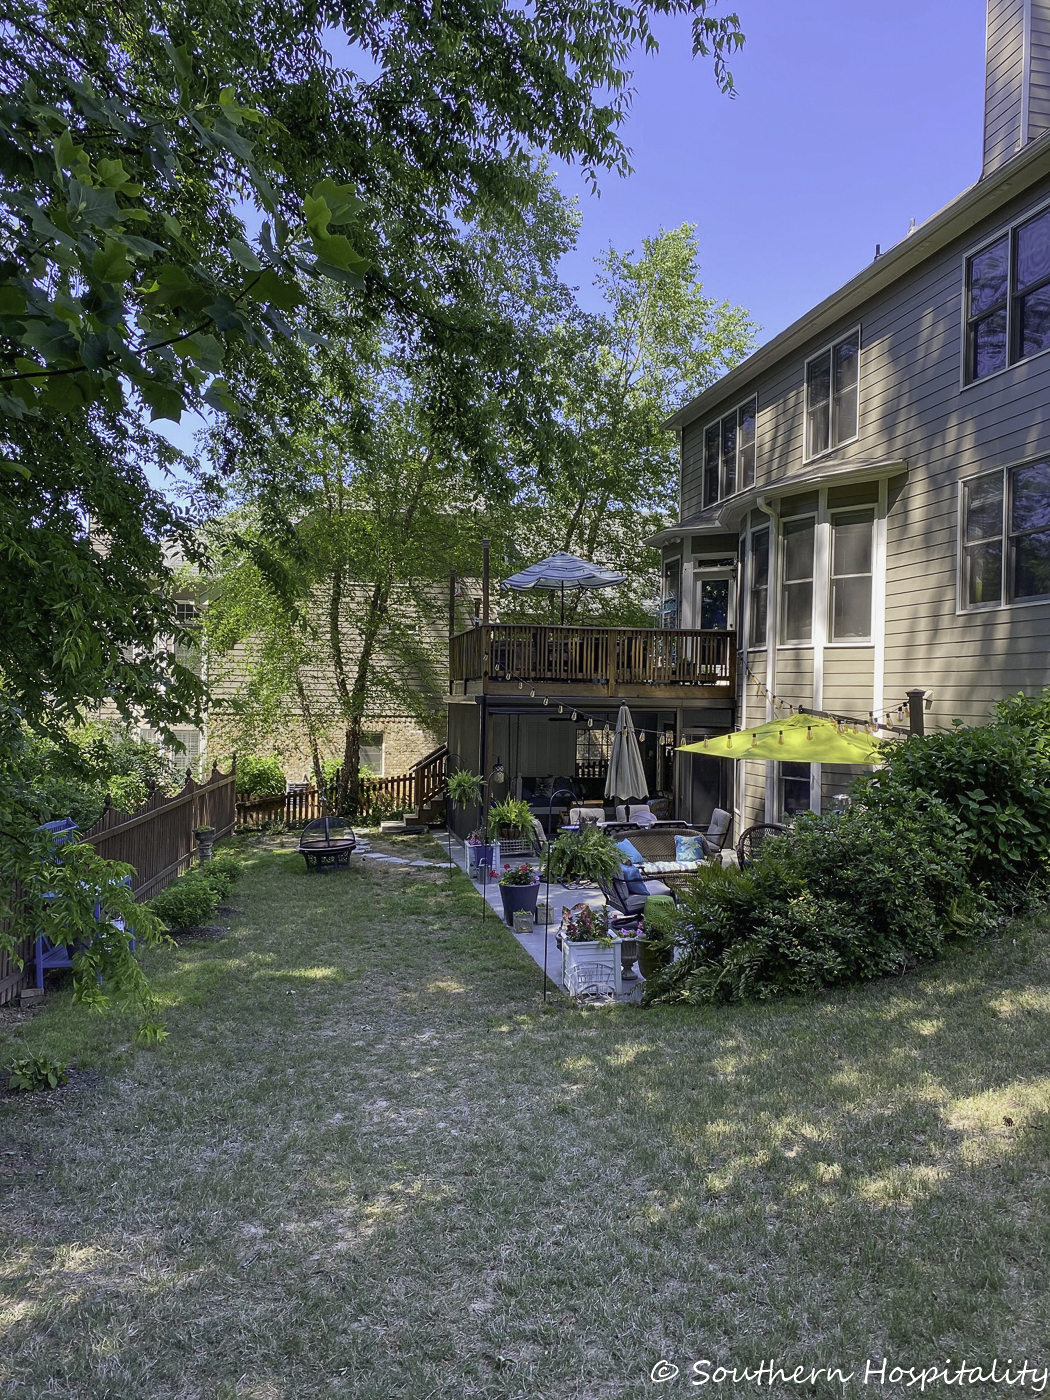
AFTER: We added the fence right away and then slowly worked on the rest of the yard.
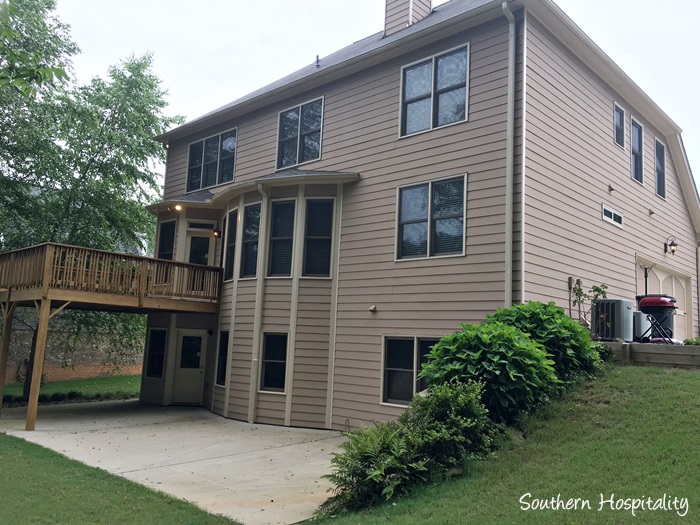
BEFORE: Backyard patio. We knew when we moved in this backyard would be a great space to work on. We were so happy to have that concrete patio and it’s so big which is nice.
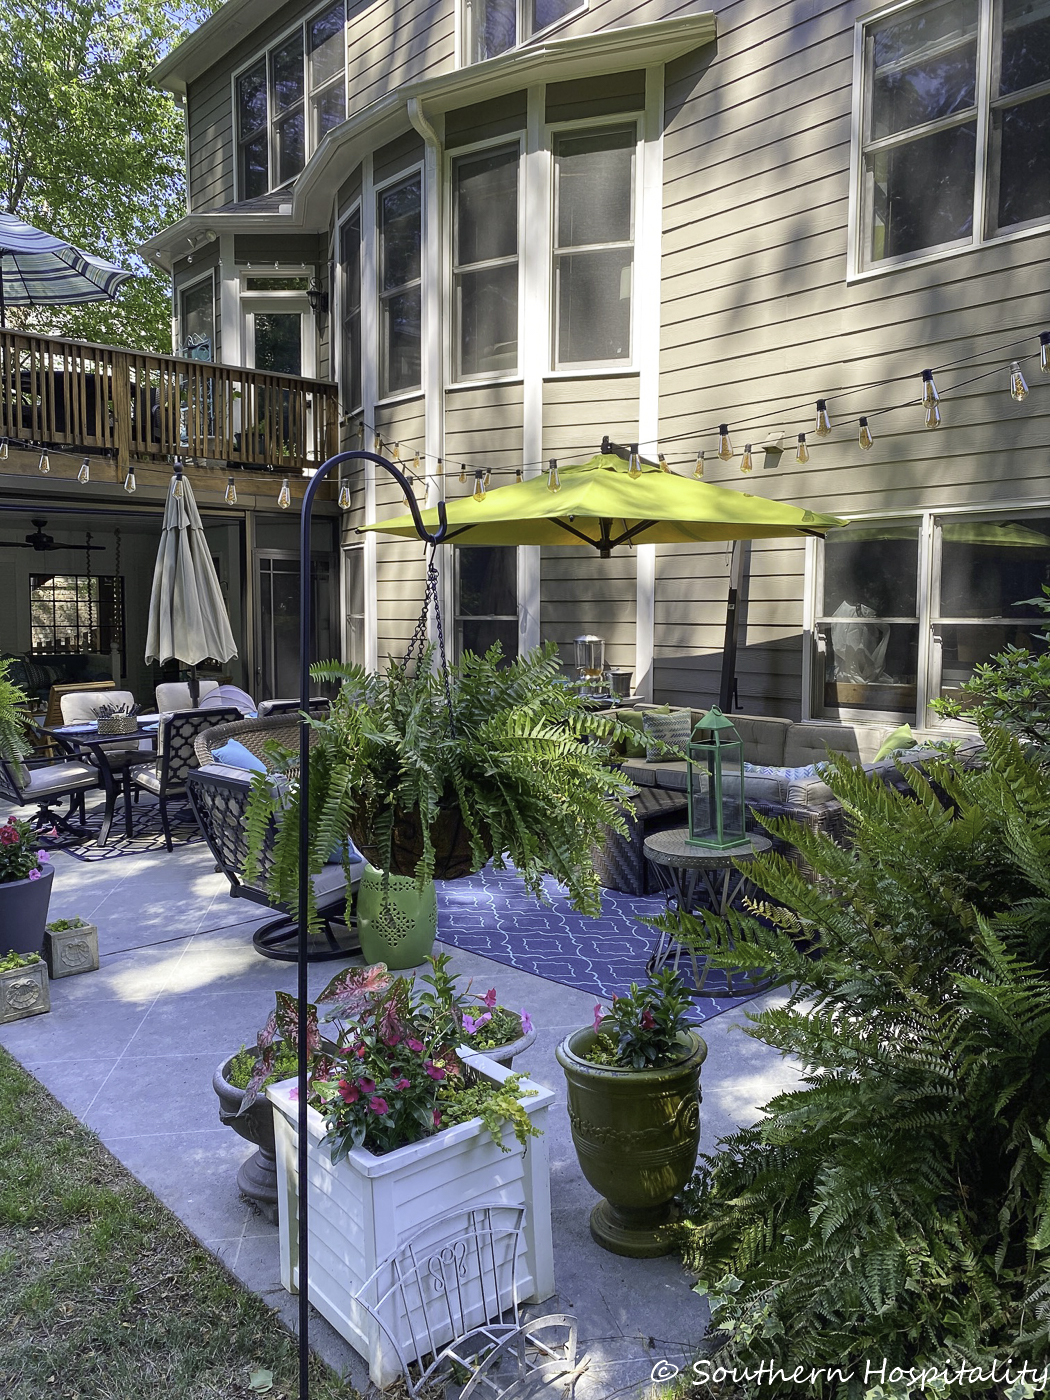
AFTER: It looks like this now, with the completion of 5 big projects out here. See the big reveal on this post.
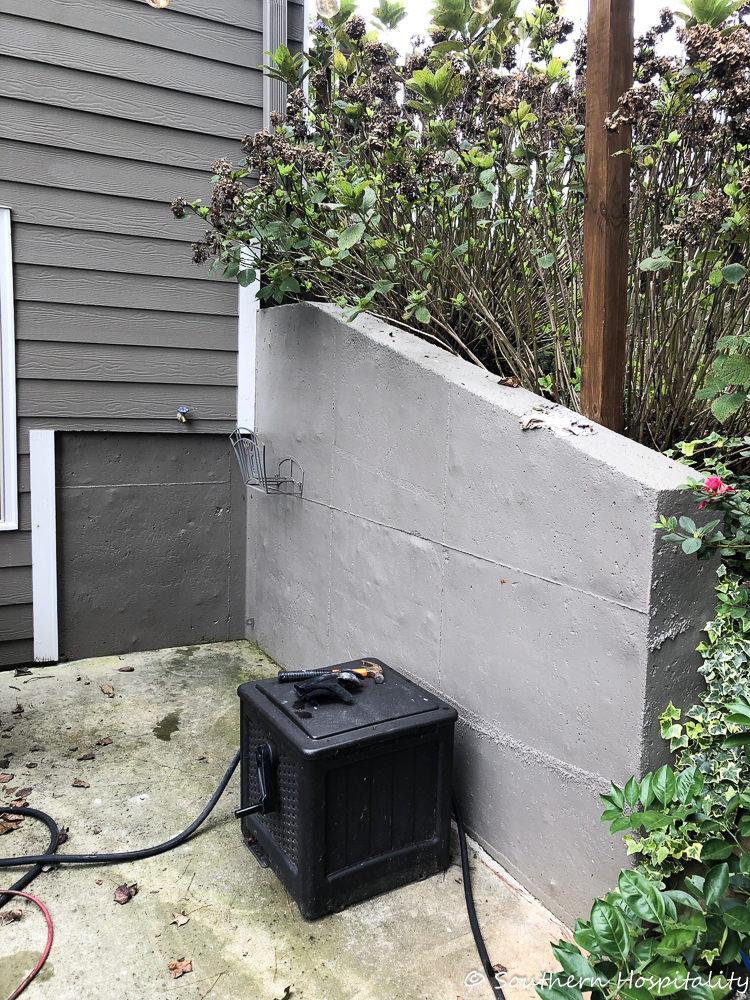
BEFORE: Concrete wall on patio
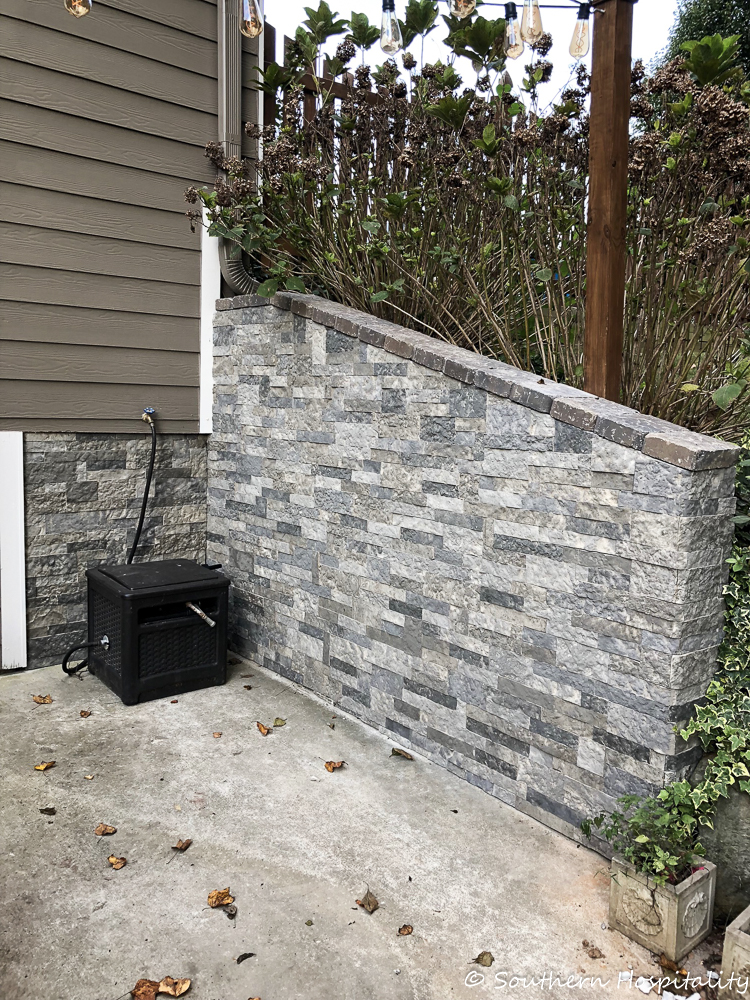
AFTER: With the Airstone faux stones, what a difference it made. Mark and I DIY’d this one.
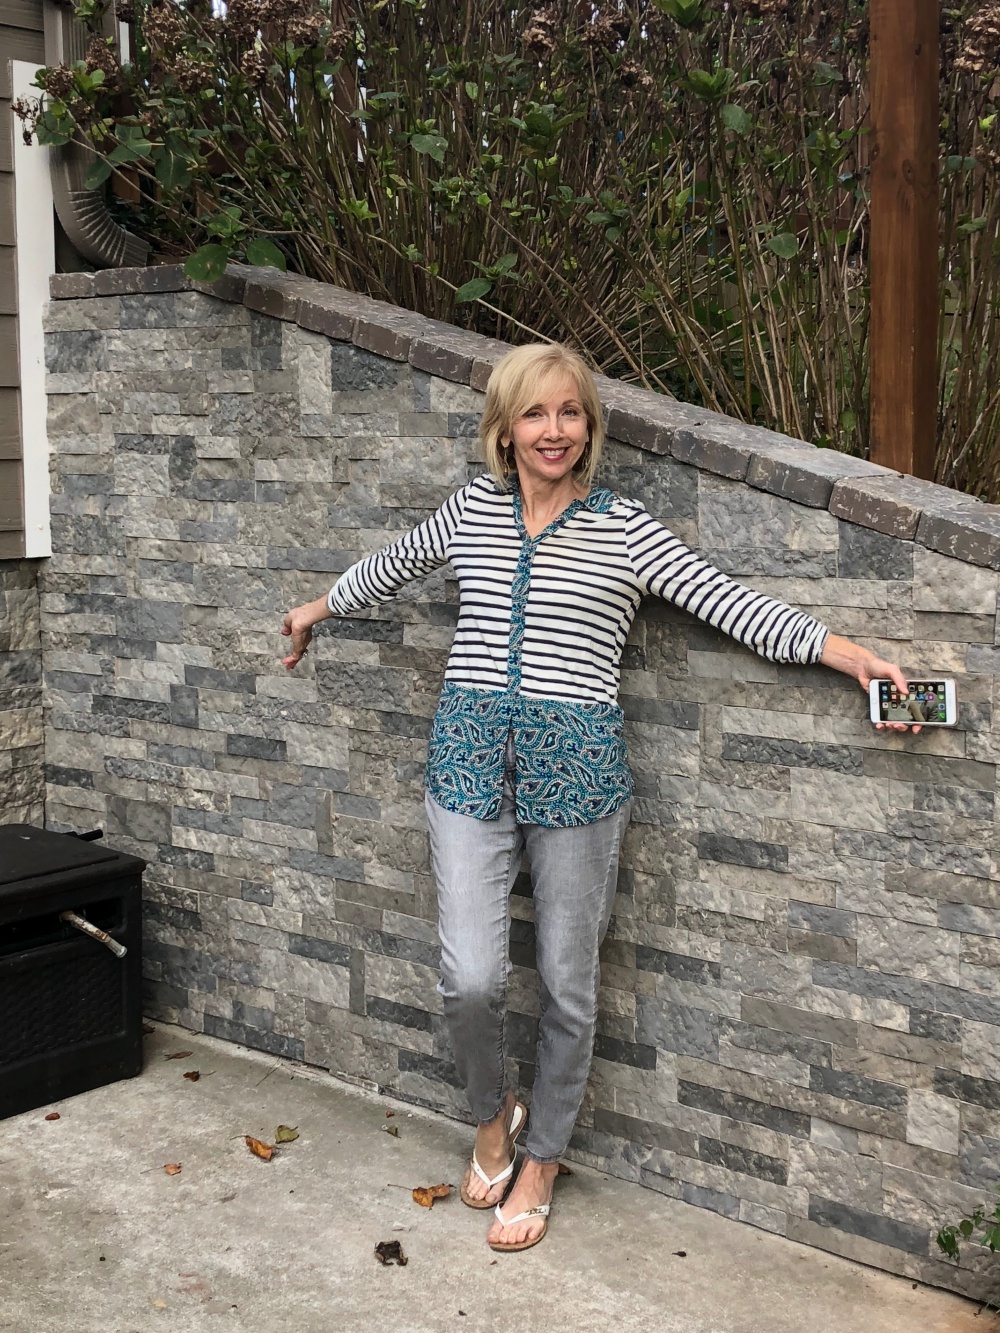
Proud of this one!
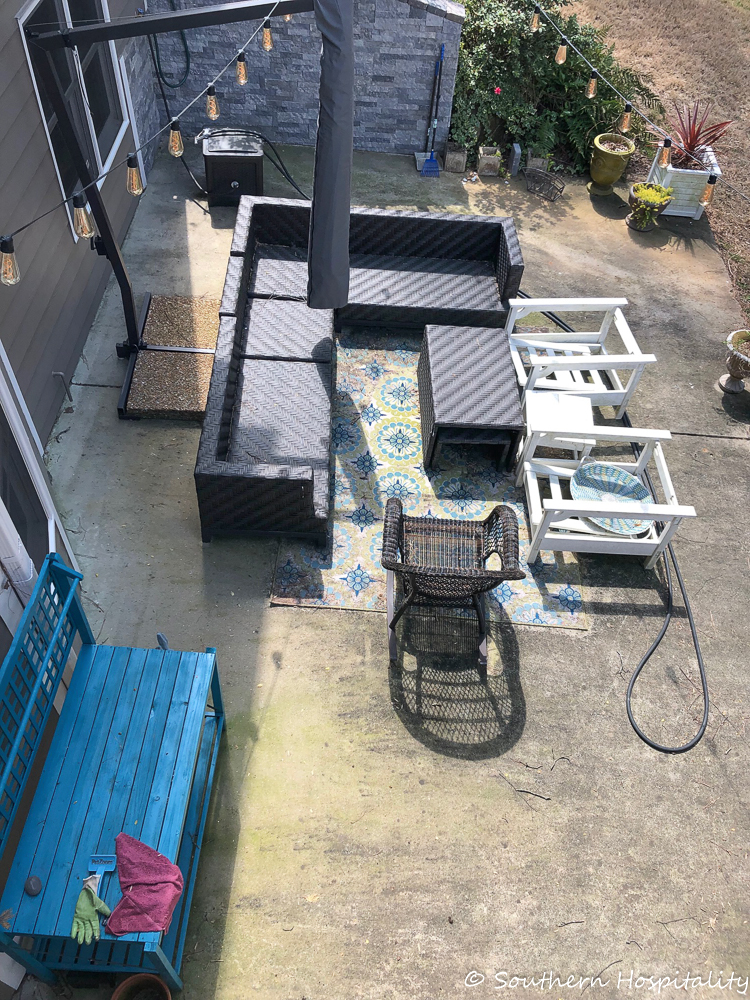
BEFORE: Patio after lots of rain, turned green with mildew. It was awful to keep clean, isn’t that a depressing sight?
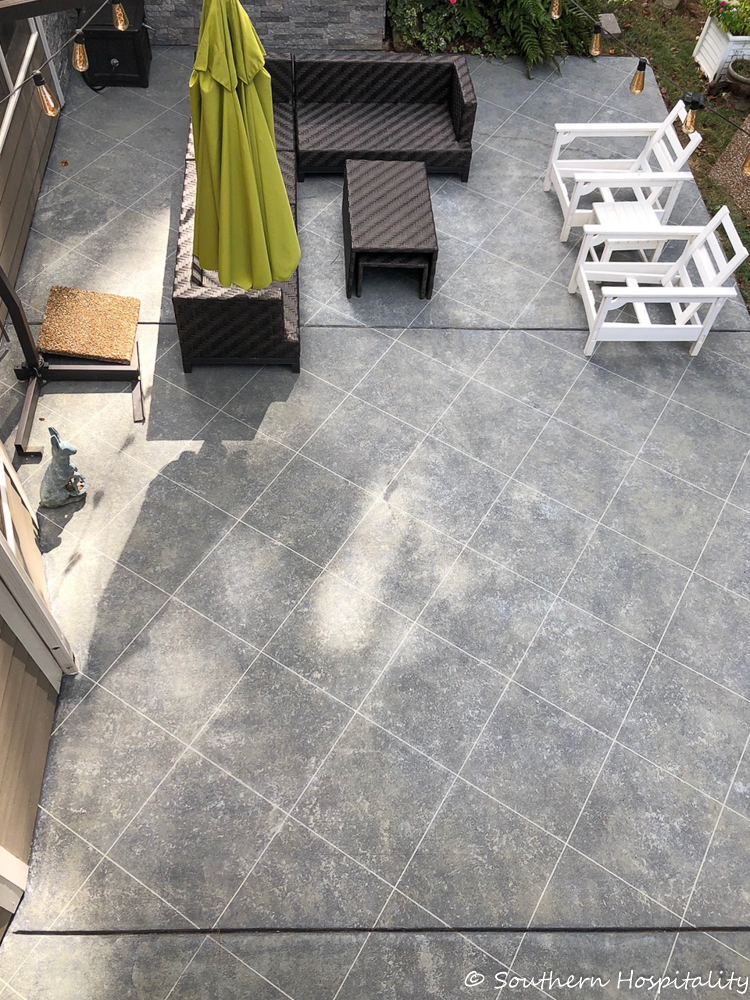
AFTER: New faux tile paint project with Daich Coatings. This one I DIY’d and it was hard work but so worth it. The patio now stays much cleaner. It has a sealer on it and when it gets a little green on it, I can spray it with a cleaner and scrub it off easy, plus it doesn’t get nearly as dirty as it did before.
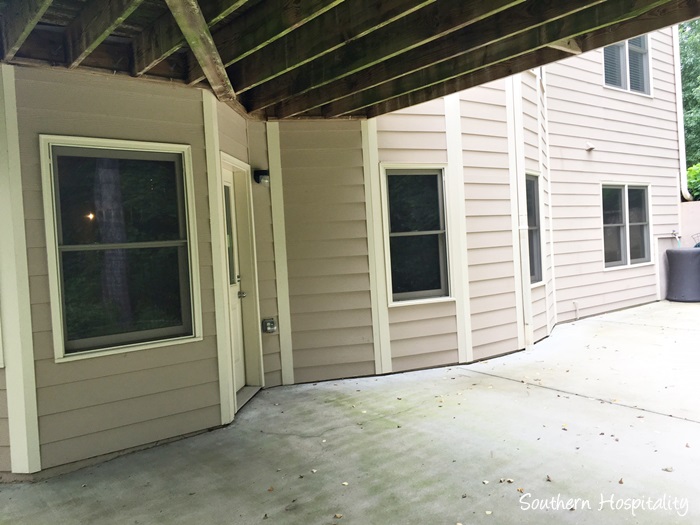
BEFORE: Under deck patio
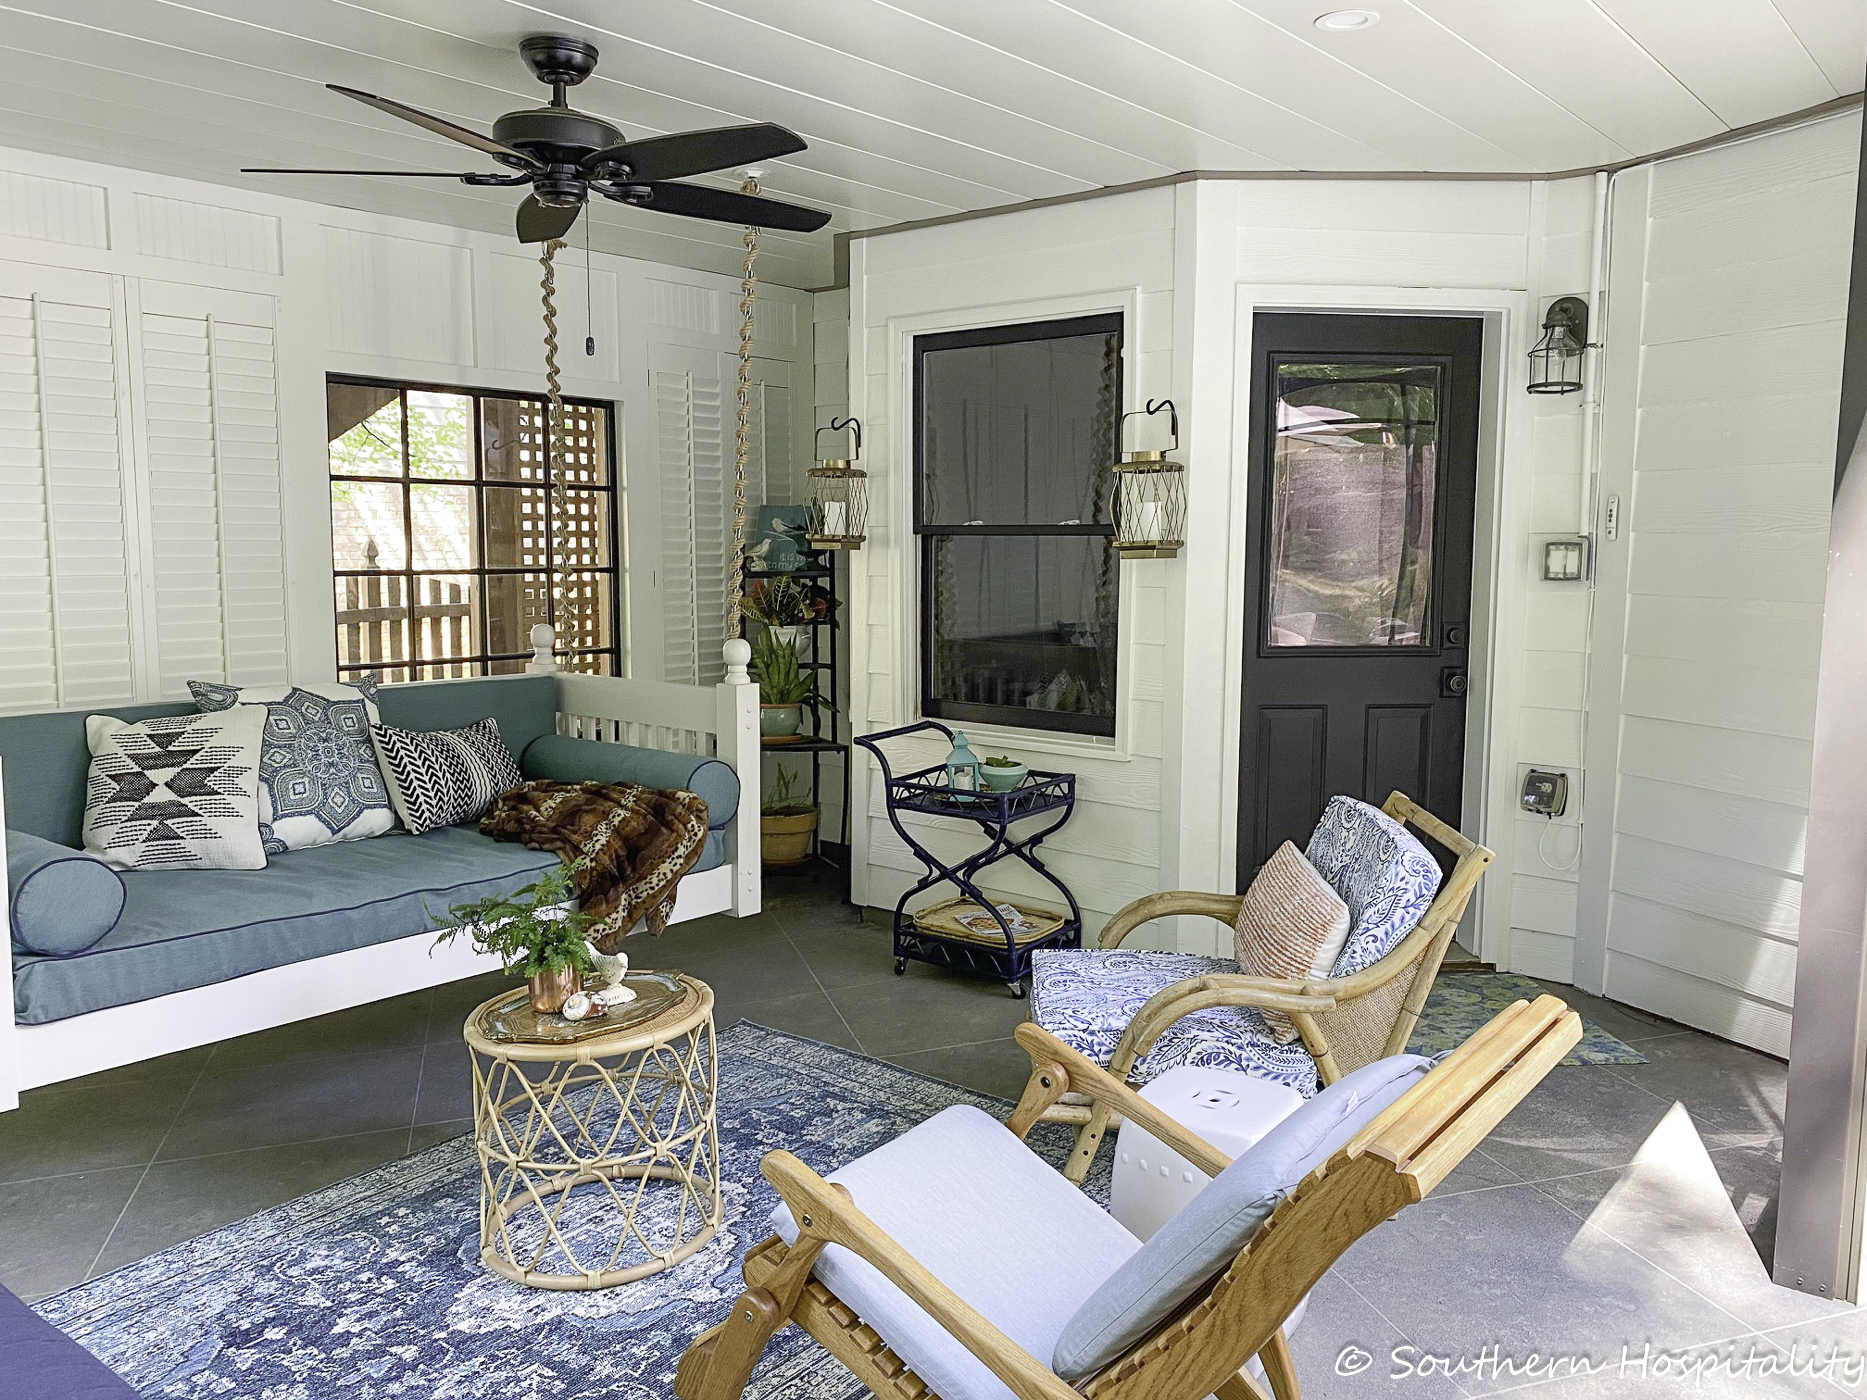
AFTER: This was a culmination of several more projects with the under deck ceiling system we had installed, as well as the new Phantom Screens that I was fortunate to get. What a difference this has all made to our outdoor patio living space.
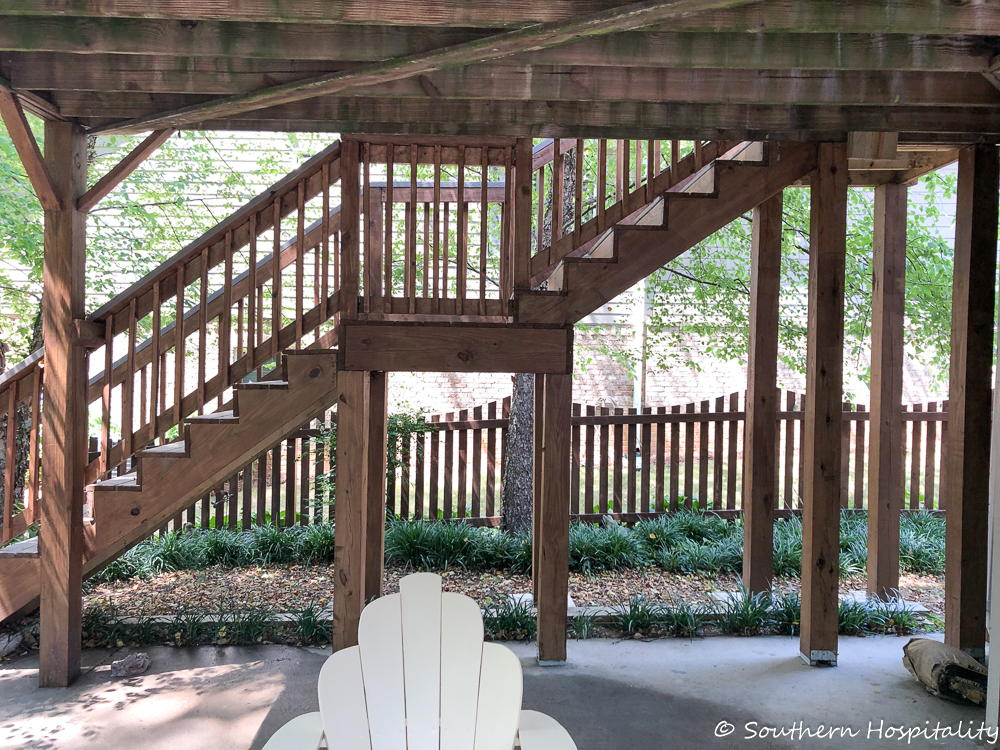
BEFORE: Stair wall
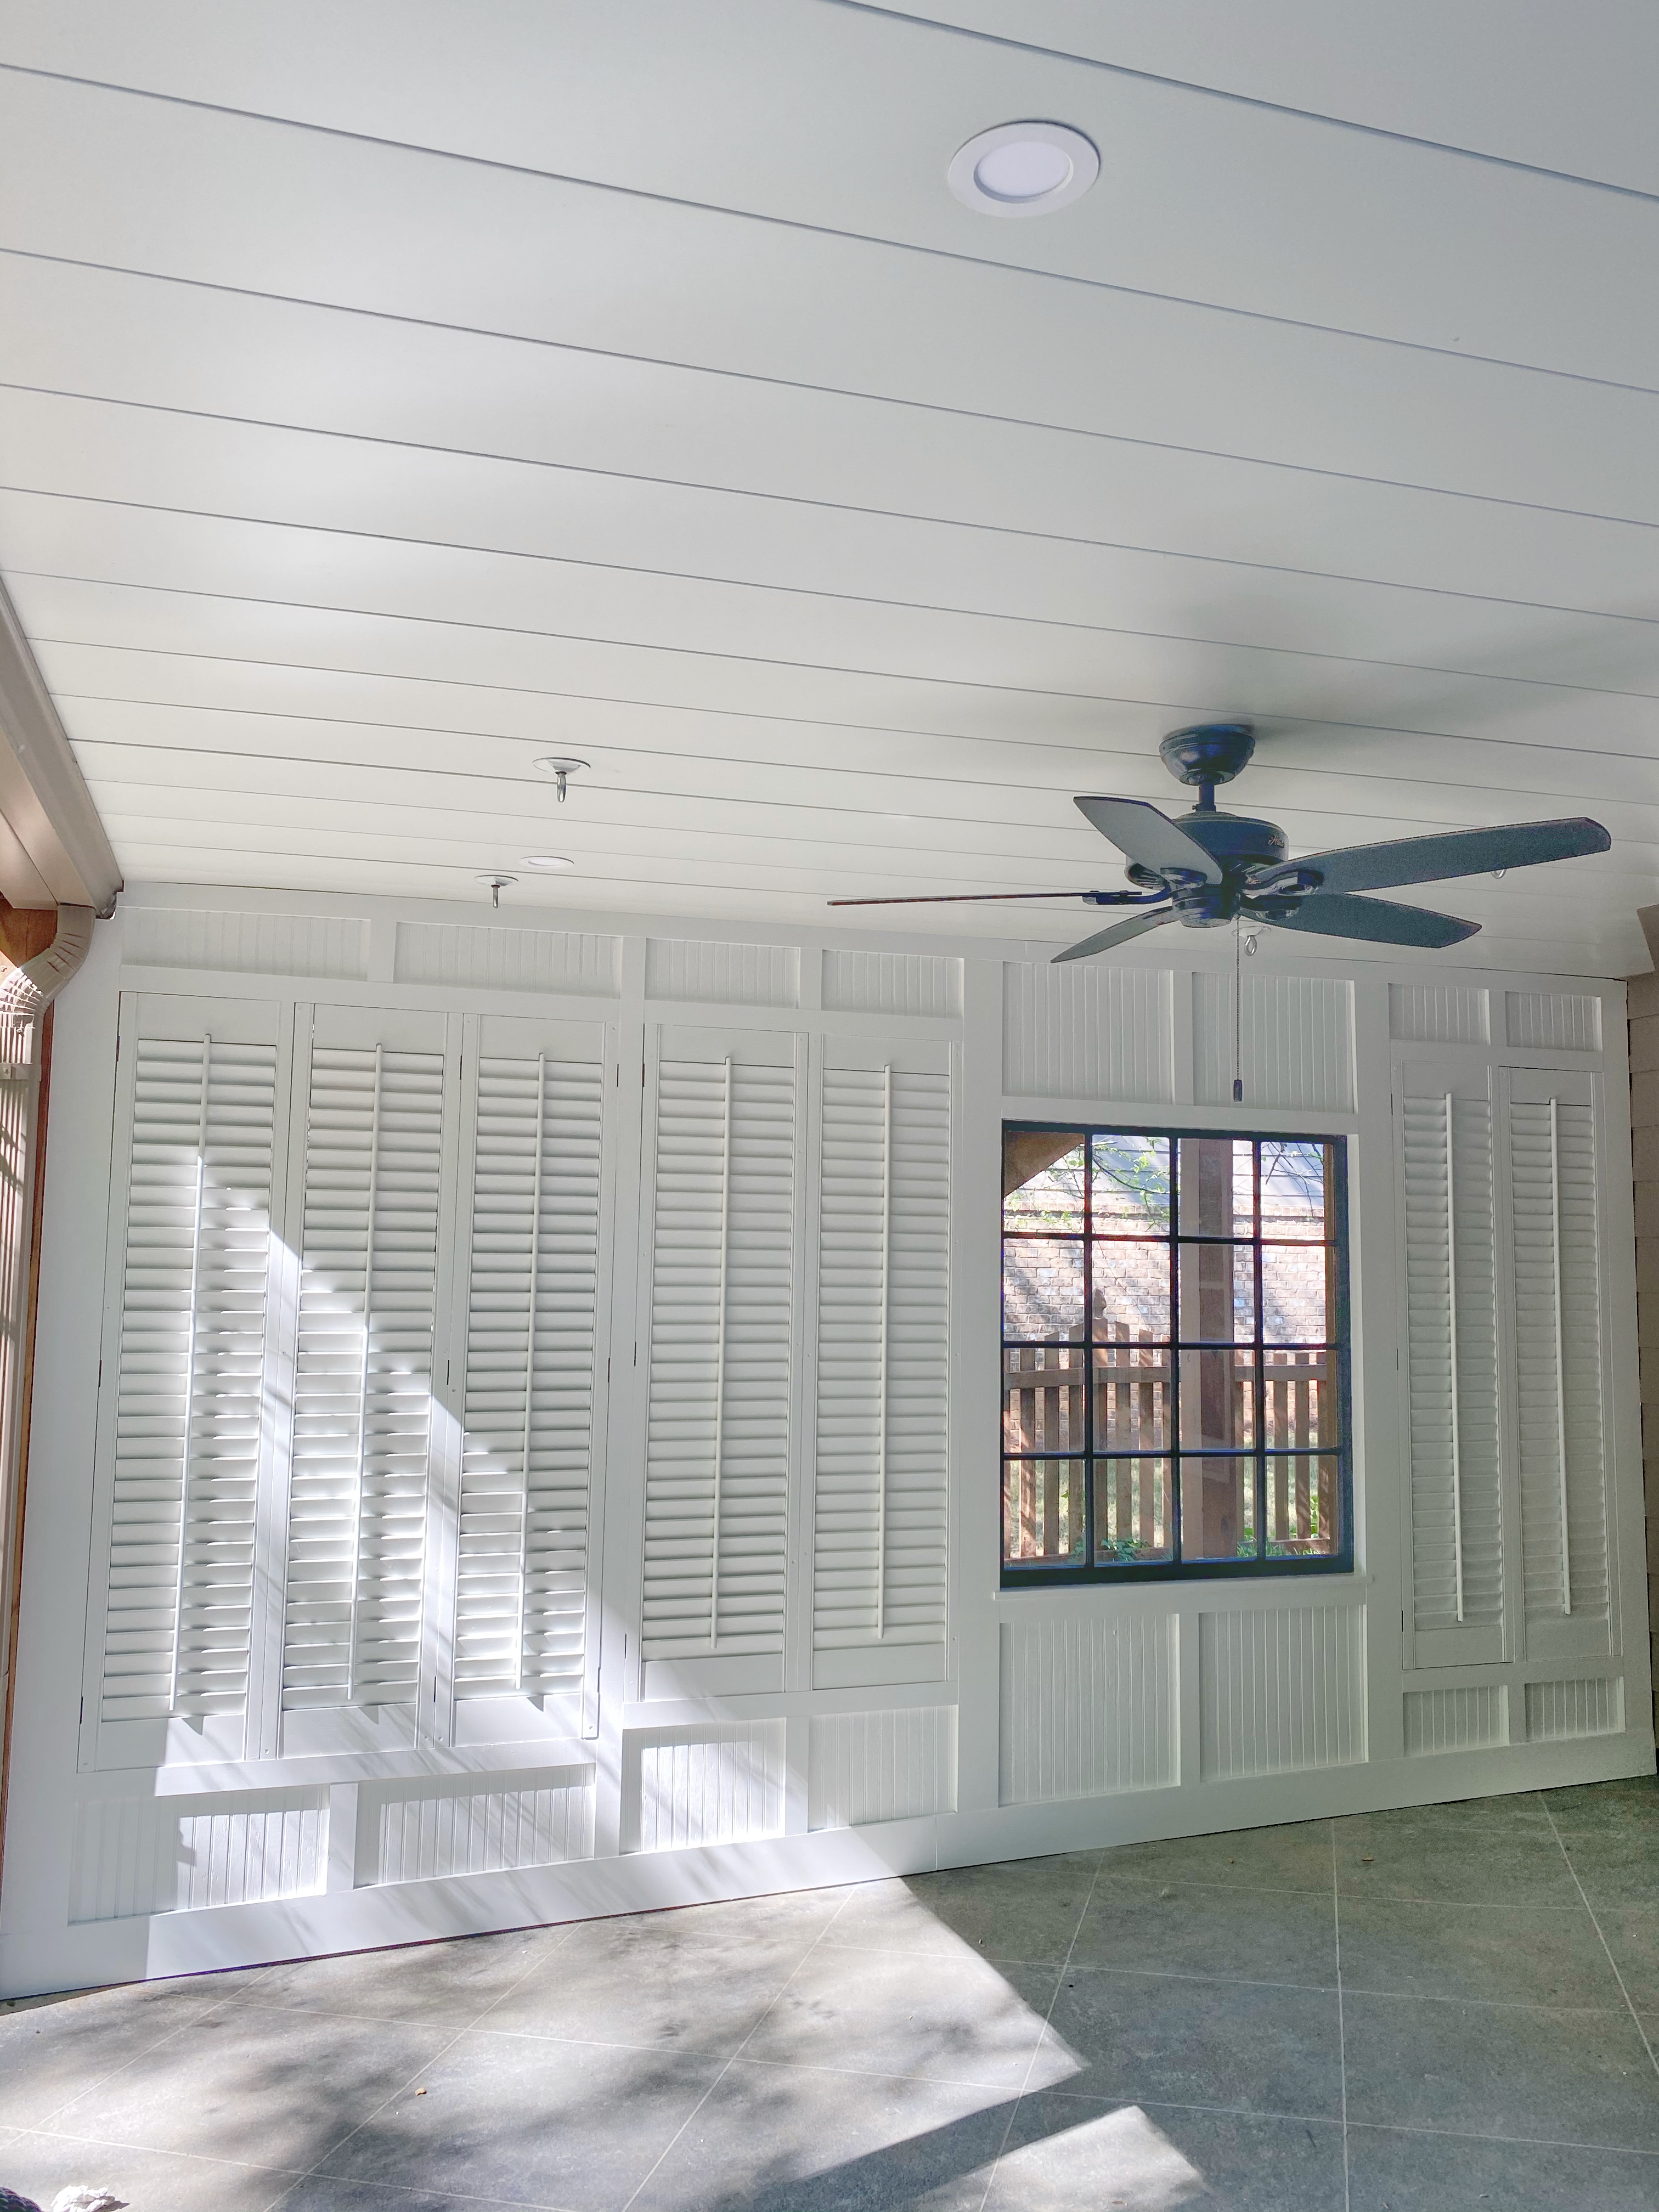
AFTER: Shutter Wall. Mark completed this projectvand that was the finale of our under deck screen porch and we so love and enjoy. What a lot of projects it was to get here!
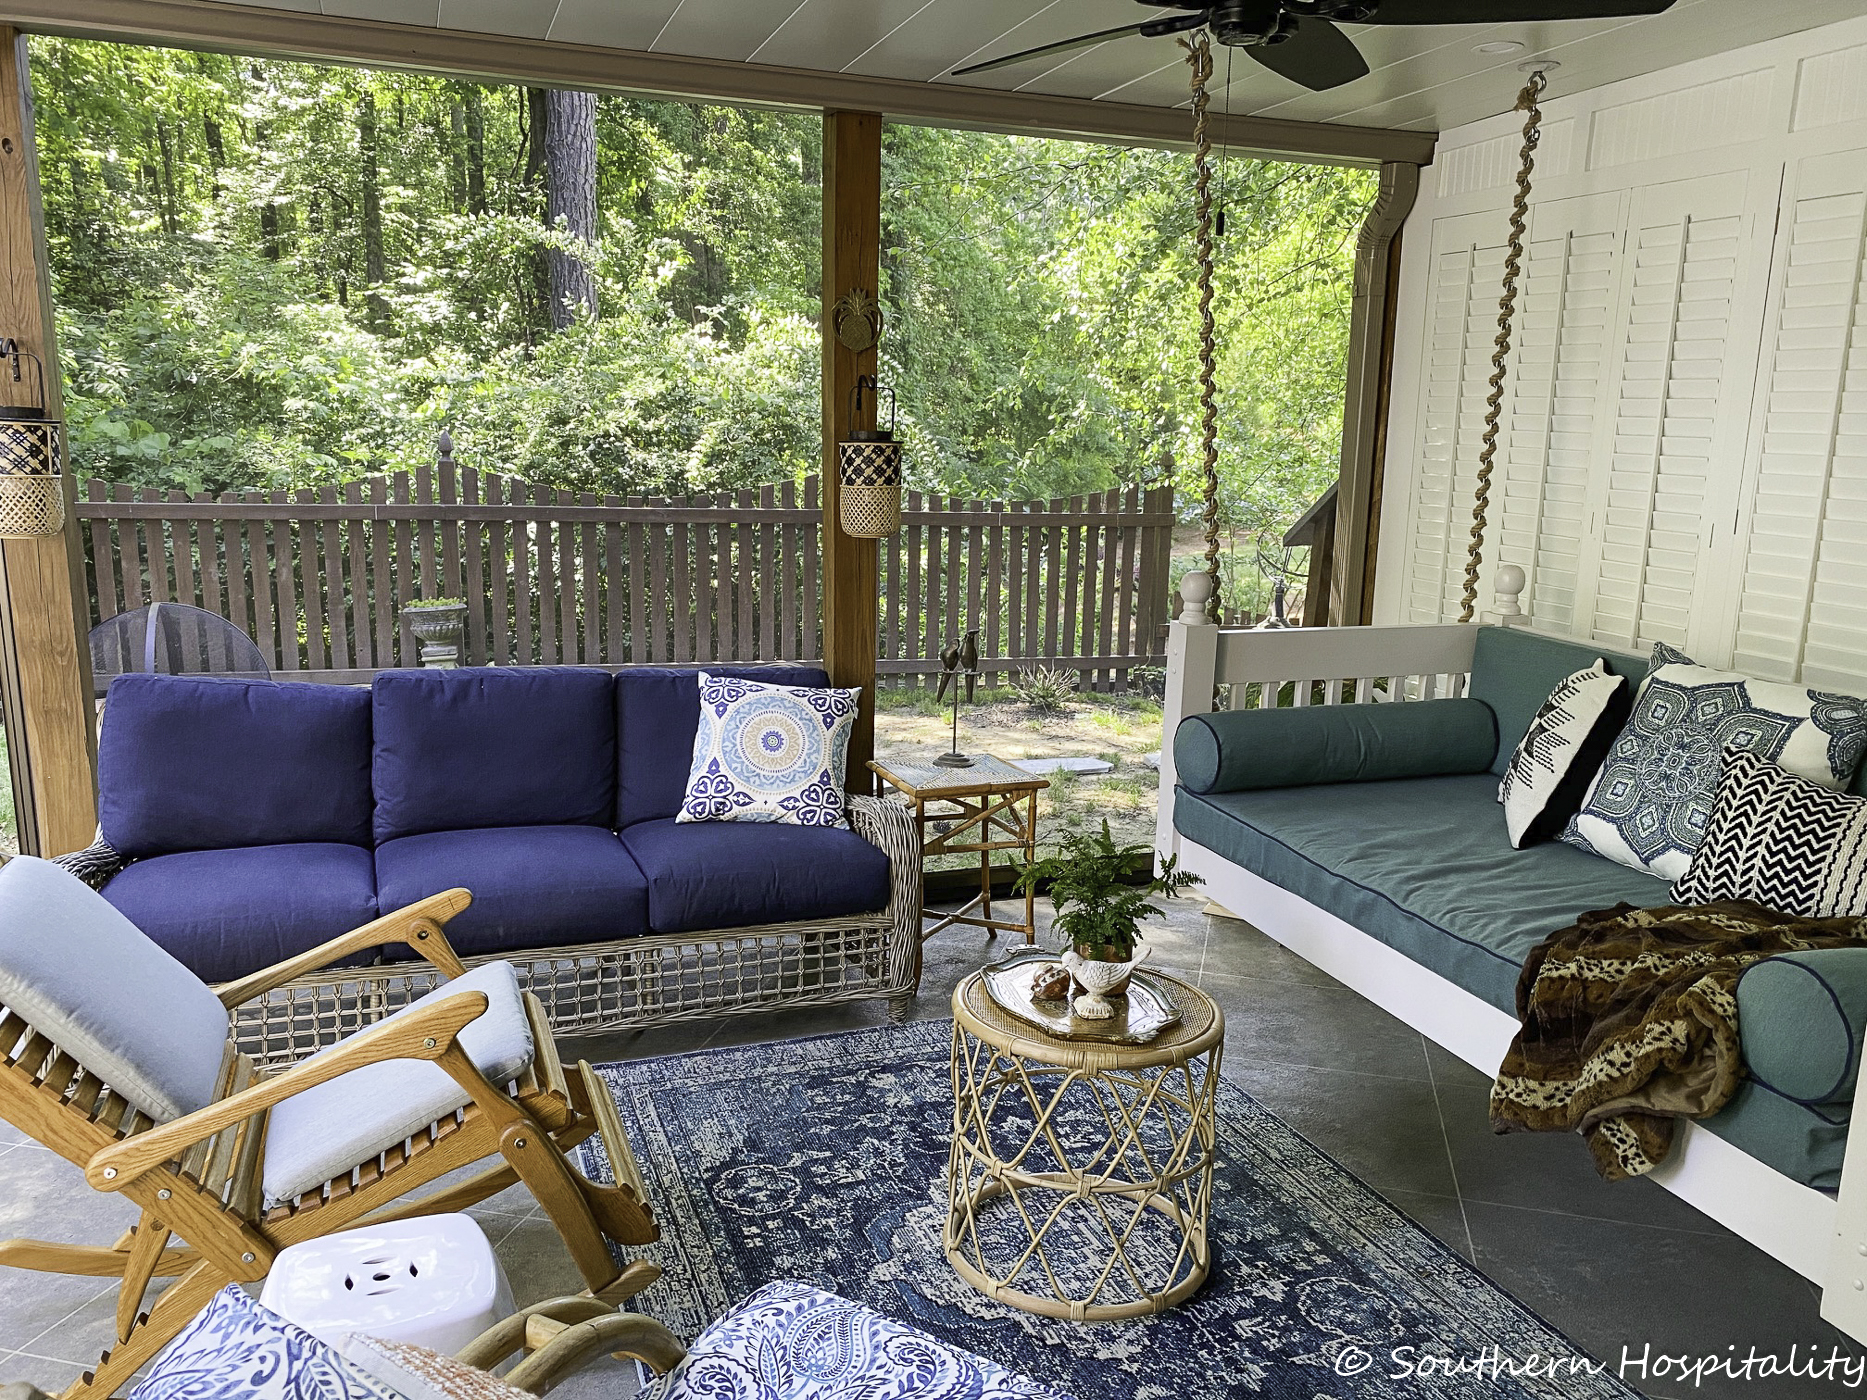
AFTER: We are so enjoying our outdoor patio and screened porch. It has been a dream come true to get all this finished last year.
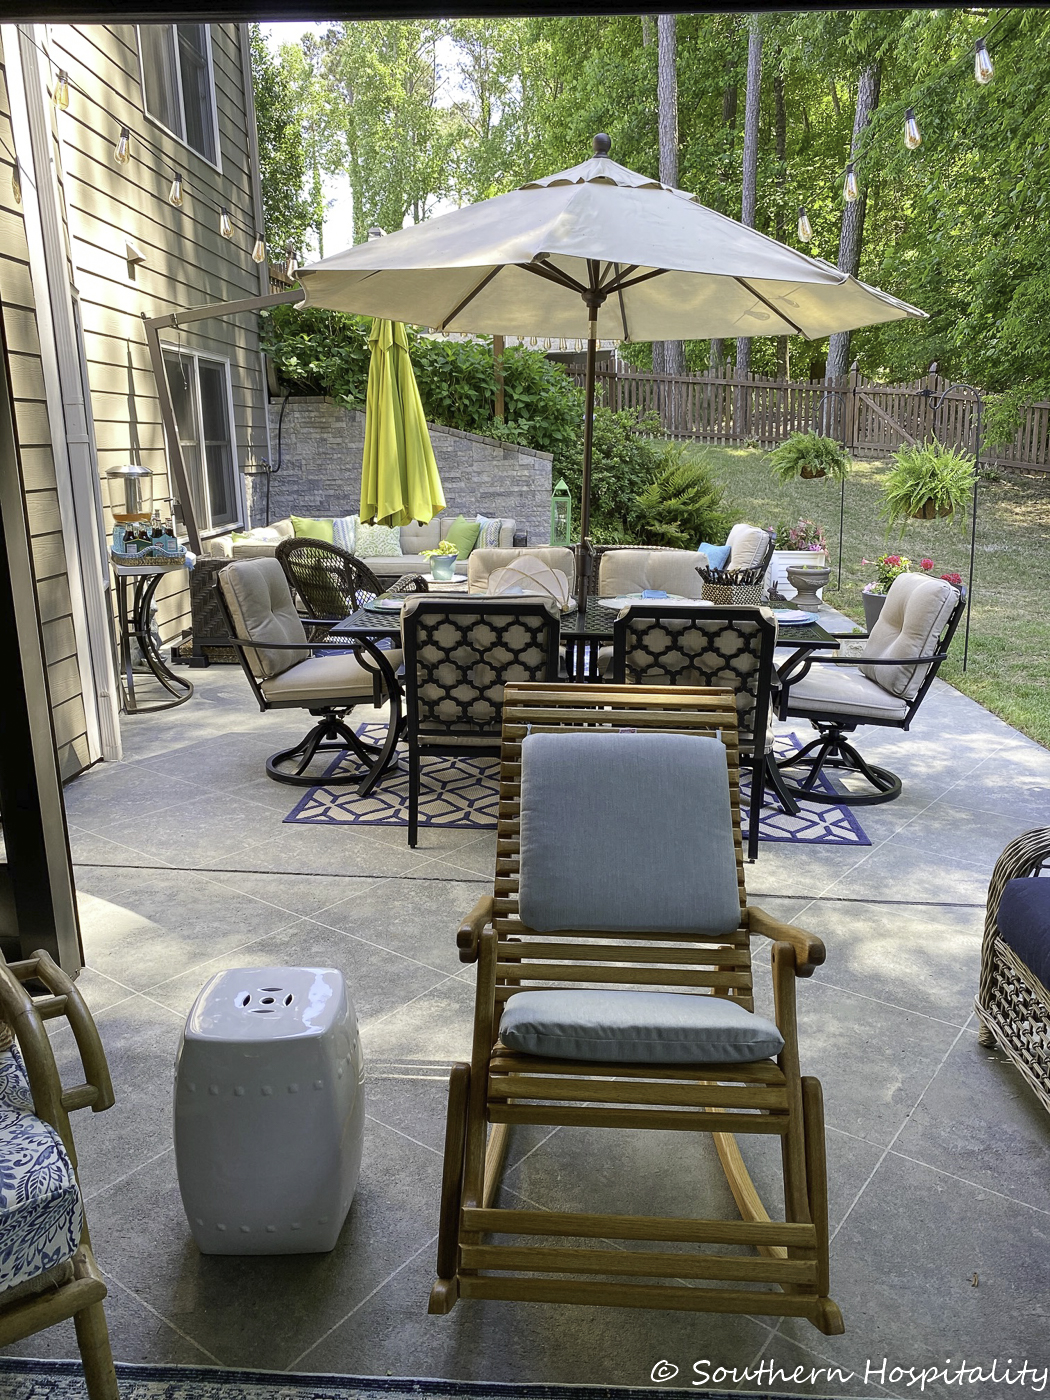
I was so fortunate to get to work with Furniture of Dalton and completed the rest of the furnishings out here and what a difference it all makes. We have a huge seating area on the patio, as well as a dining area now.
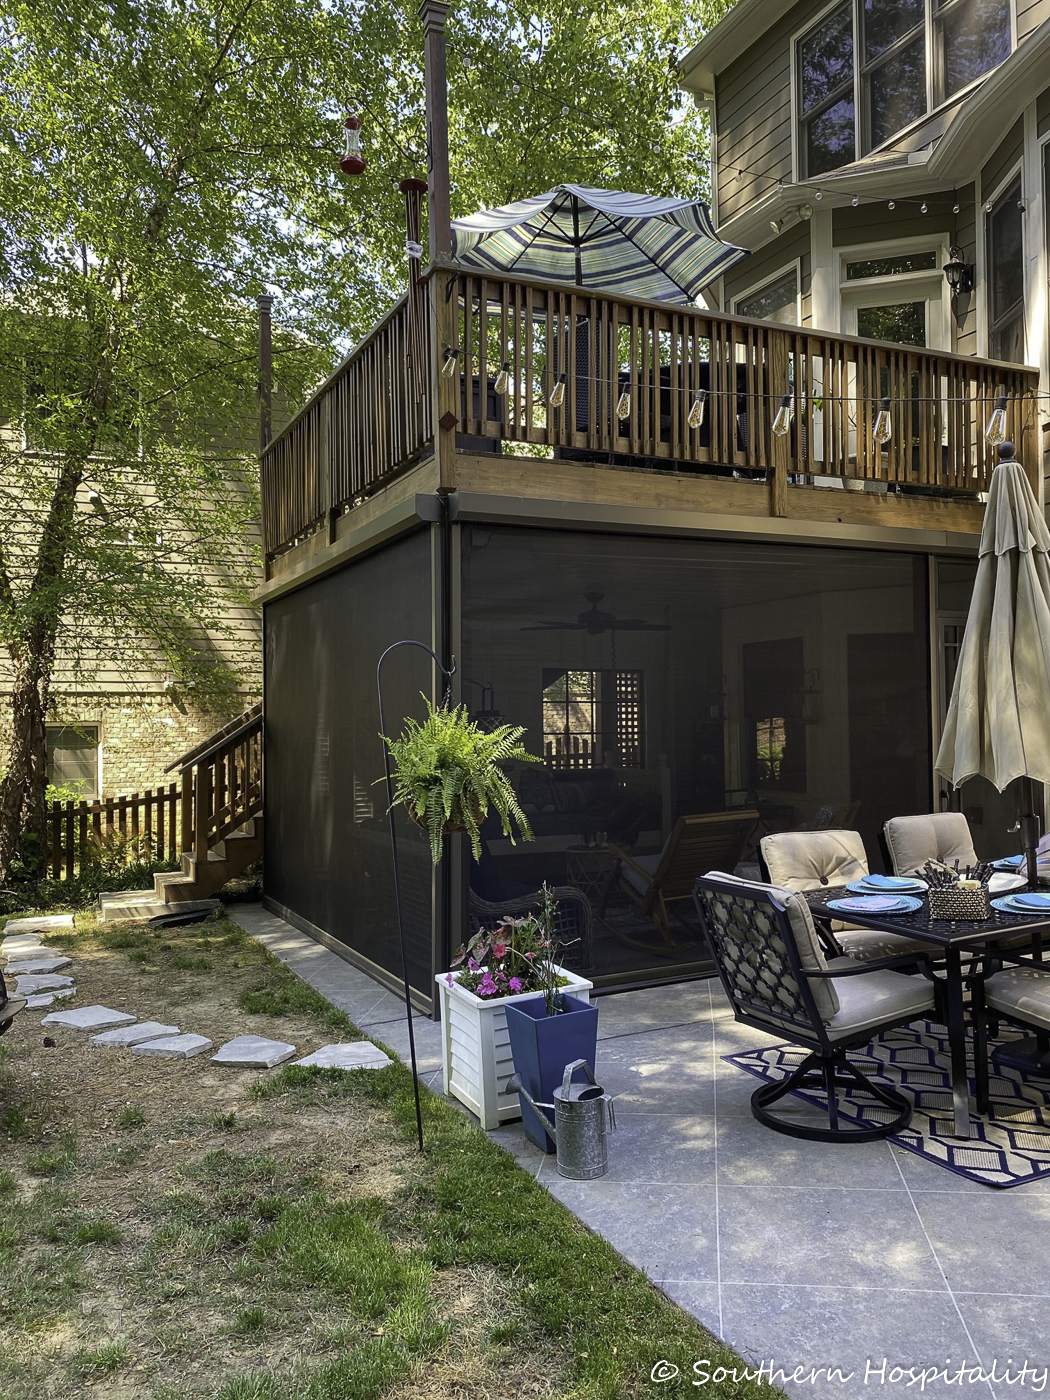
AFTER: Phantom Screens
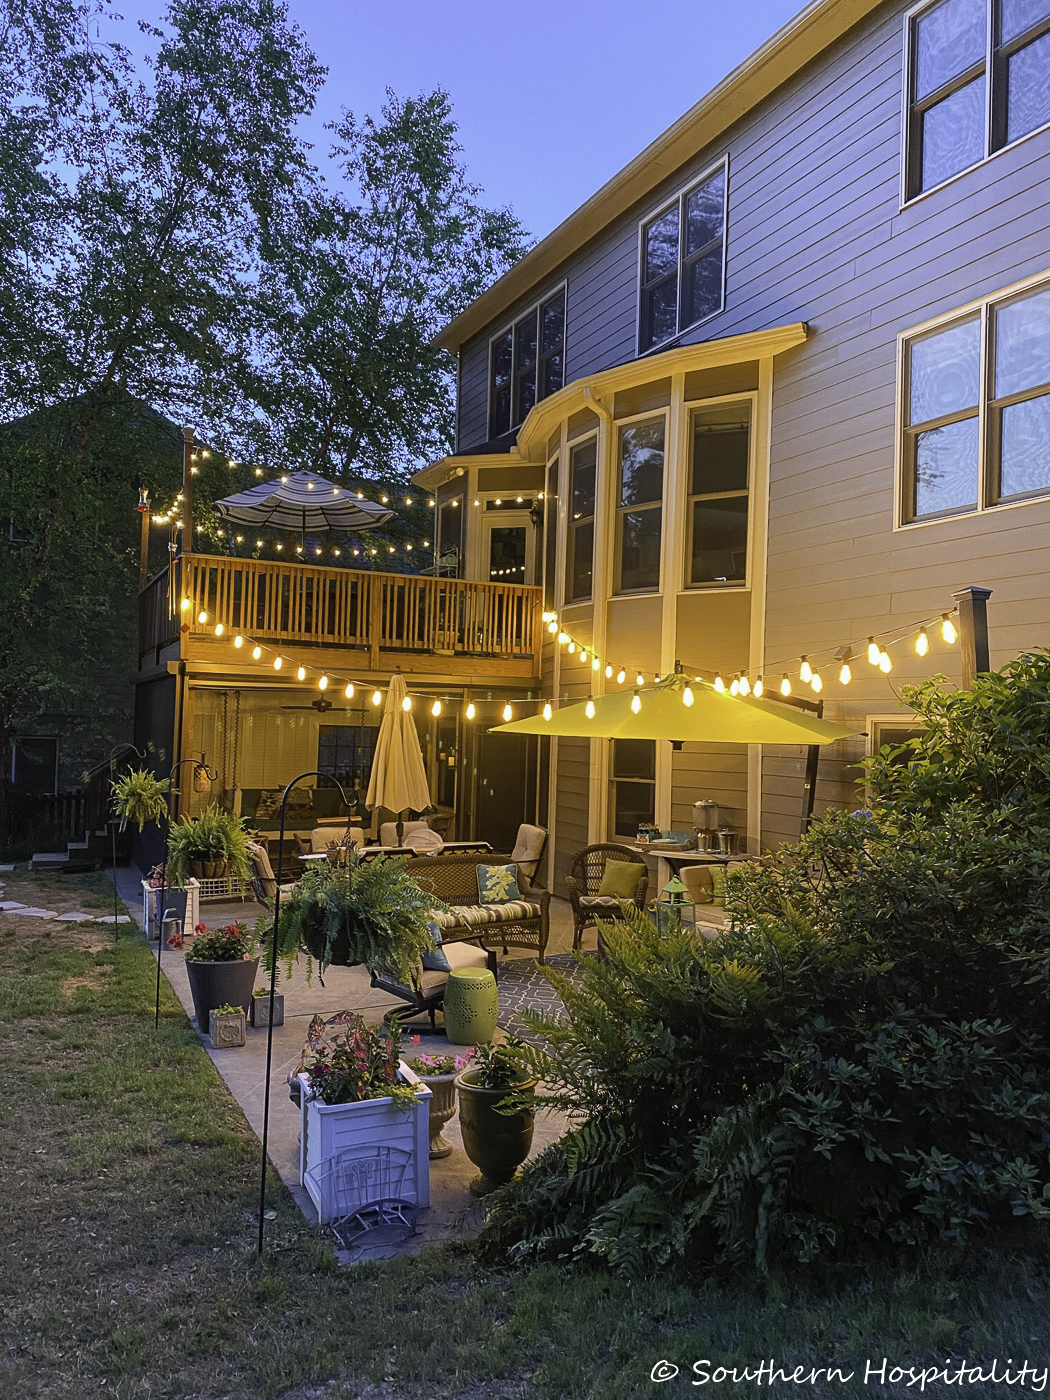
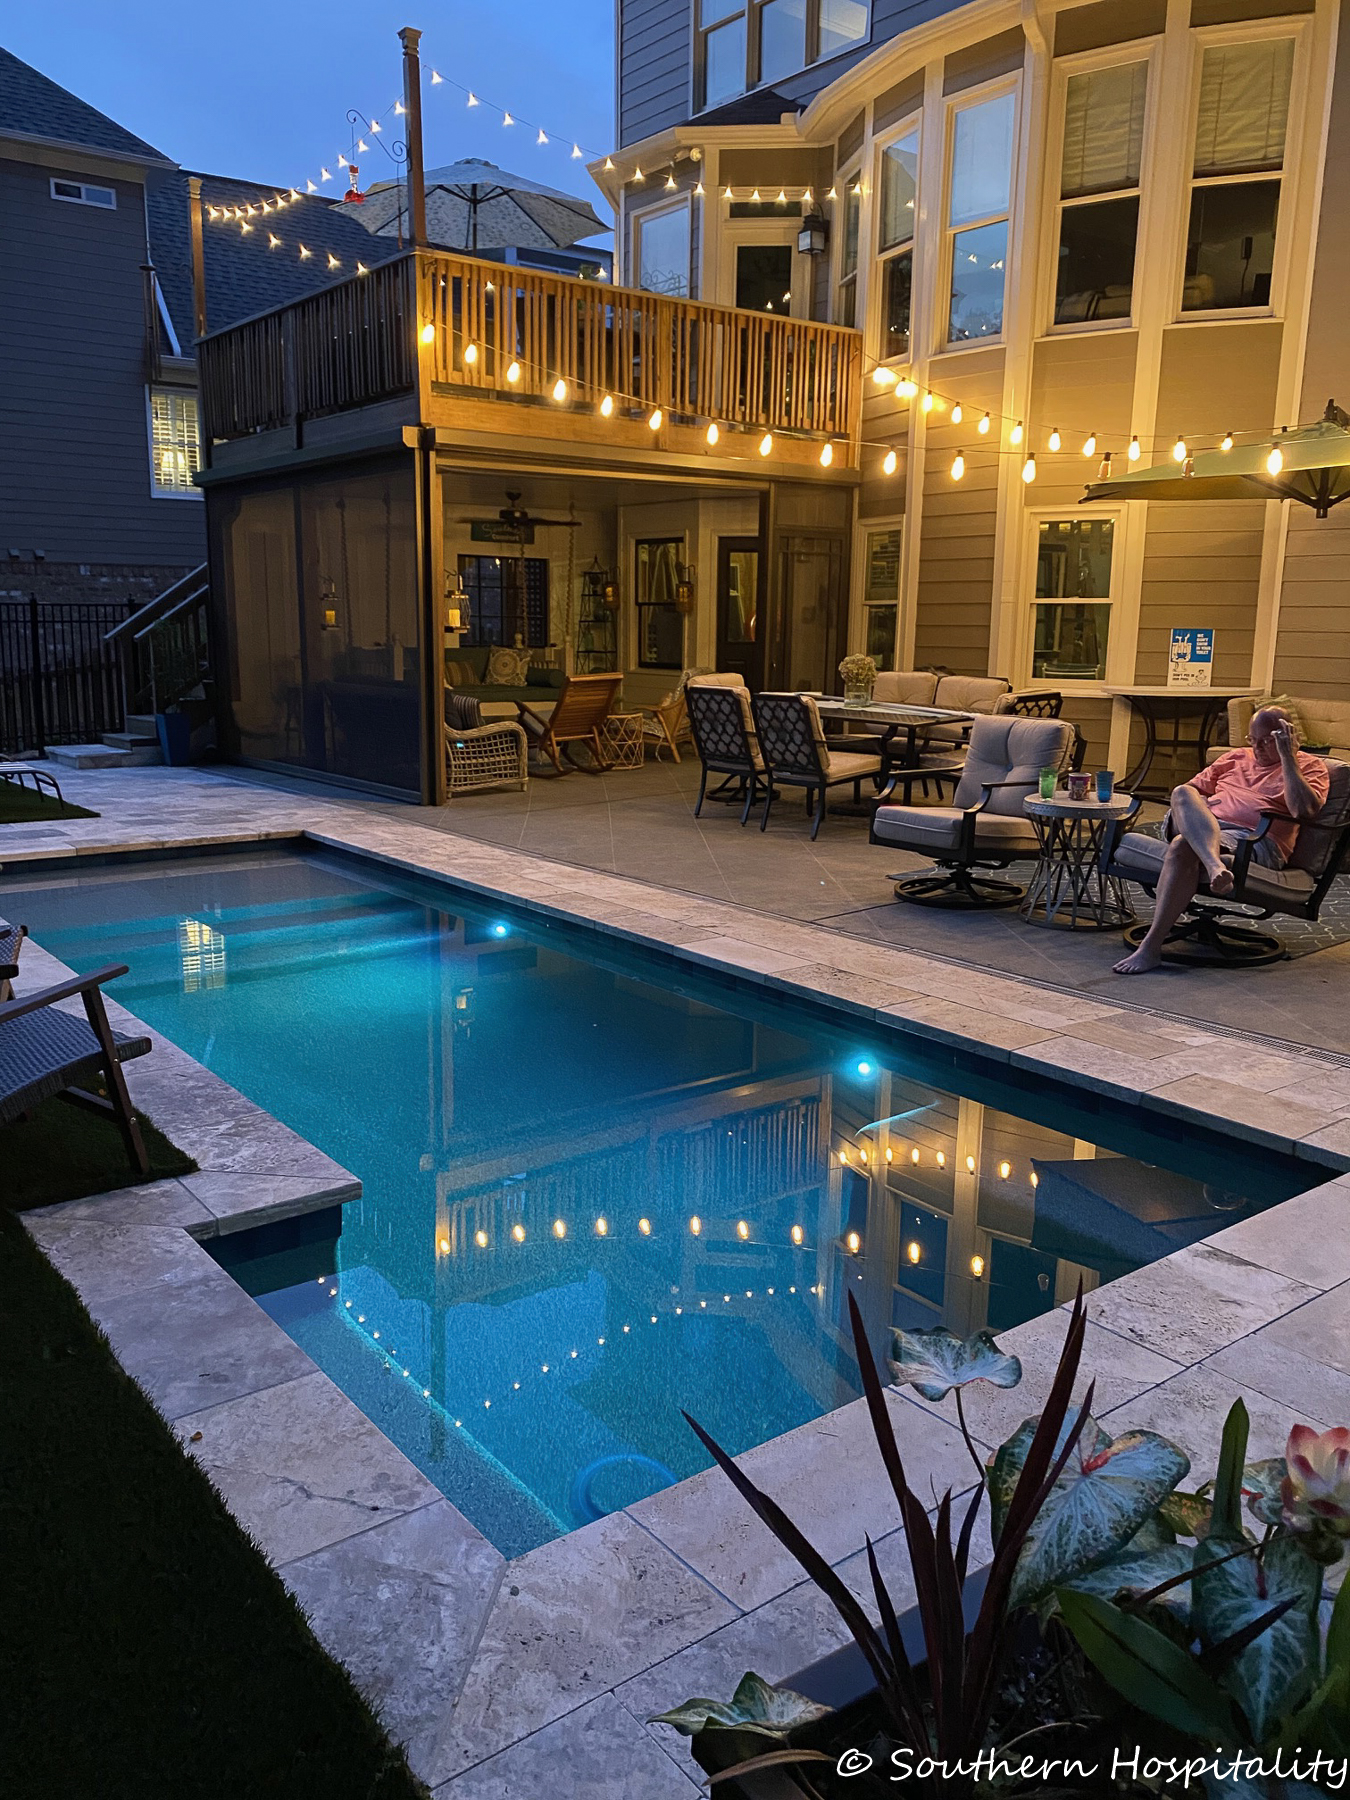
One more project was completed last year in the backyard!
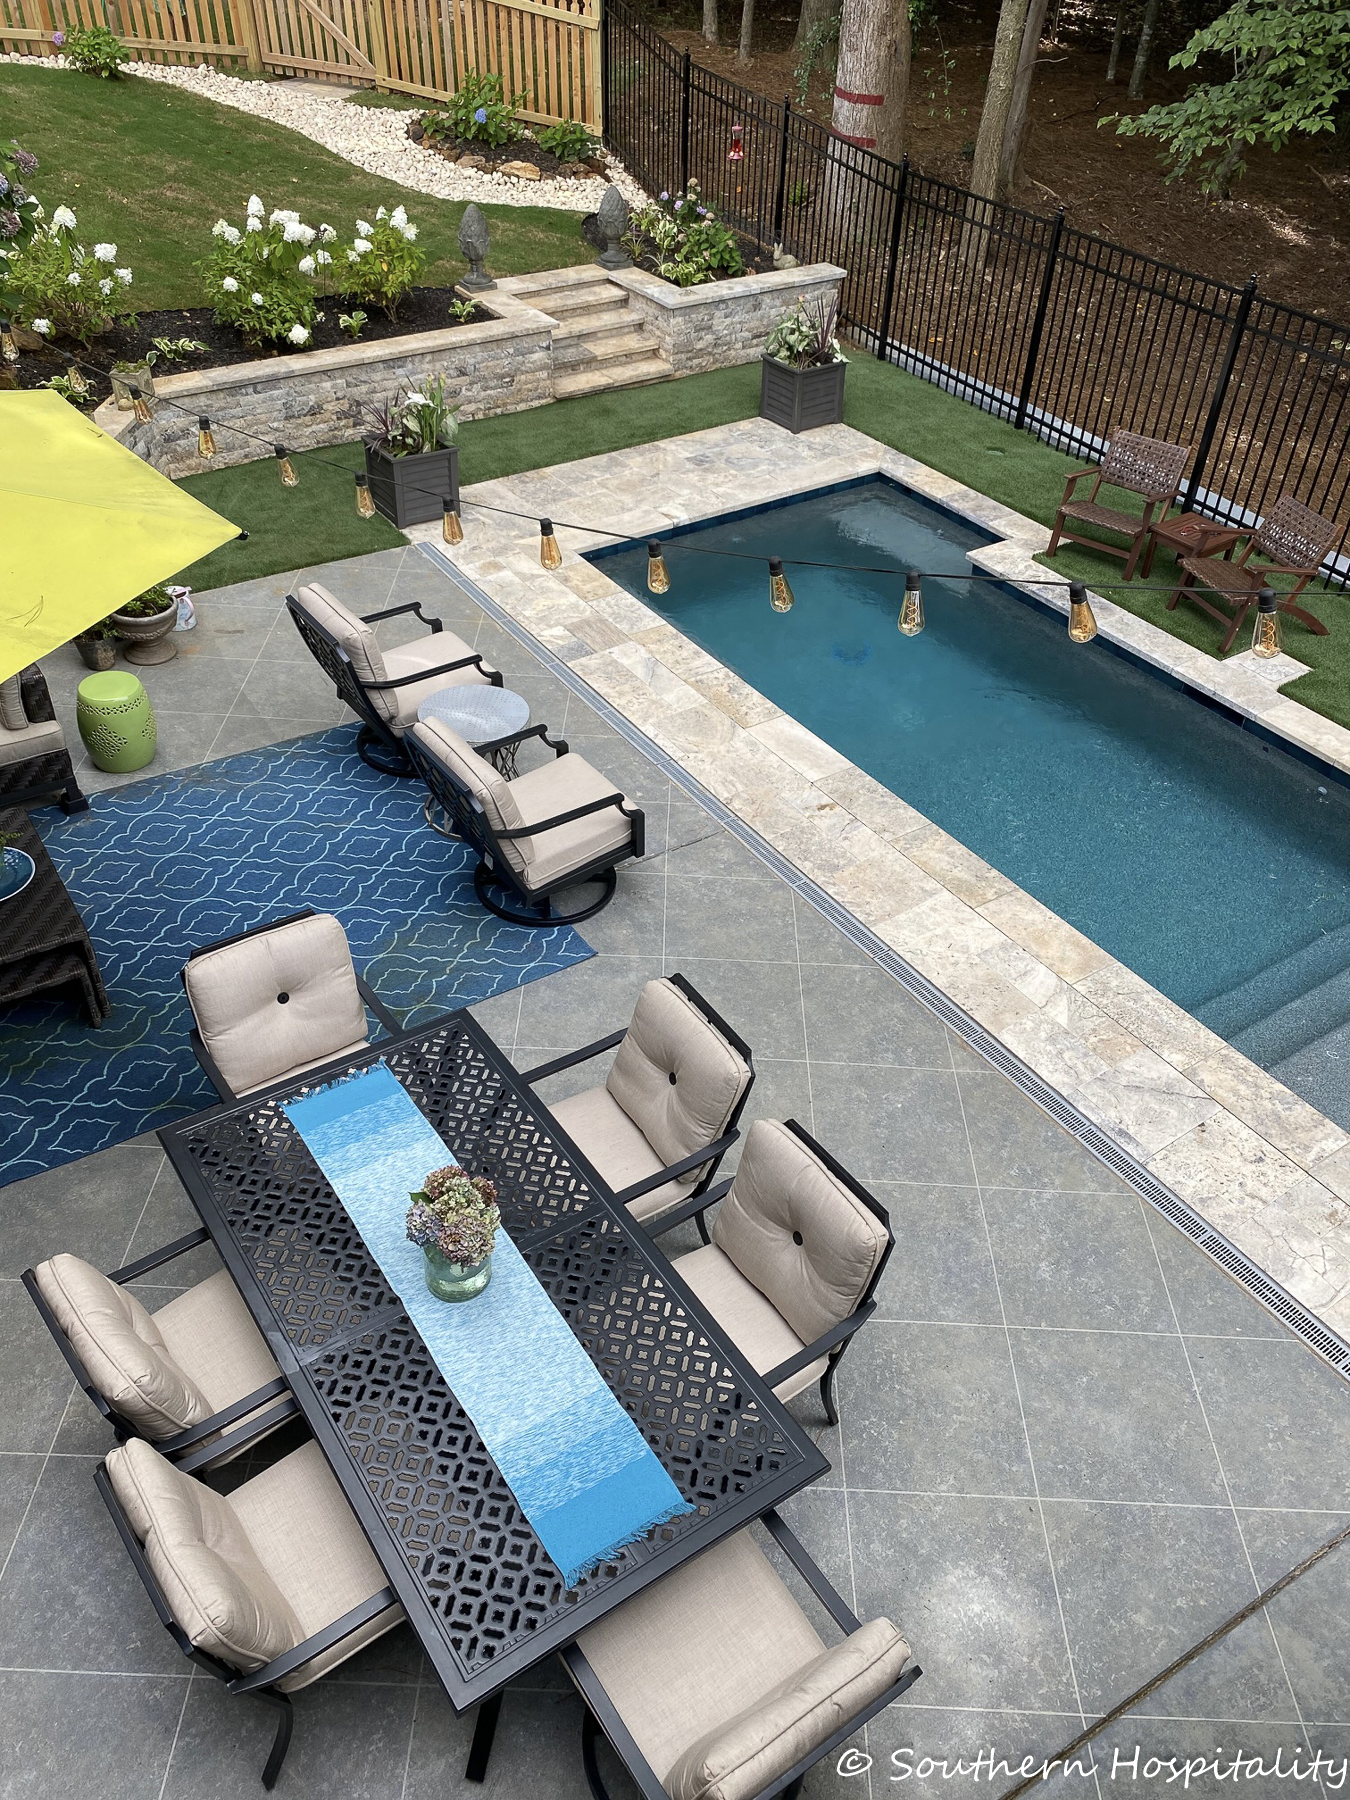
Last year was a dream come true and we finished the backyard off with an inground gunite pool. I shared all the details in that post.
It’s truly been a dream to get all of these projects completed at our house. I was so very fortunate to get to work with so many sponsors with the materials provided. We were also able to DIY a good bit of this ourselves, so that helped a lot. It’s amazing to look back on these Before pics and really see how far we have come. The years have flown by and we have a few more projects up our sleeves, although not nearly as many as we did when we moved in.
It’s been so fun to tweak this house to our tastes and I’m so lucky that Mark enjoys doing woodworking as well. We both love home improvements and making our house the best it can be. We’re so proud of it and so happy we ended up here after looking for months for the right house. We often think back to when we were so disappointed that other houses didn’t work out and how glad we are that God saved this house for us. It’s just perfect for us and we couldn’t be happier with where we are! I hope you all enjoyed this long and laborious post about our home improvements. It really shows in the pics when you see them all together, what a difference home projects can make to a home to create the home of your dreams. One project at a time!
Pin this to save for later!


You know I’m a huge fan of your home renovation, Rhoda! It’s amazing how much you and Mark have been able to accomplish in a relatively short period of time. And I’m in awe of the many projects you’ve tackled yourselves. My favorite transformations are your bathroom and laundry room. The smallest rooms in the house somehow turnout to be my special favorites … in my house too! xo
I love what you have done with your home and especially that you’ve done most of it yourselves. Thankyou for sharing and inspiring me. My husband and I have recently retired and are trying to do some upgrades to our home. Can you tell me how you did your stair wall?
Please keep sharing your projects. We live in Byron, Ga.
HI, Peggy thanks so much, we have done a lot to our house. Here’s a how-to on how we did the stair wall. https://southernhospitalityblog.com/how-to-add-box-molding-to-a-stair-wall/
Absolutely spectacular what you and Mark have accomplished. I love your style – so elegant but yet so welcoming and cozy. I also love how you manage to incorporate your favorite things you’ve accumulated over the years and yet make them look so current and stylish. Please keep sharing.
Thanks so much, we sure have enjoyed personalizing this home to our style.
Love it! Everything looks beautiful!
Will you please share the source for your master bedroom rug? It’s so cheerful and fresh!
Thank you! Here’s the master bedroom rug link:https://rstyle.me/+ym_ExS3qm9p2R6Hp_80Prg
WOW AWESOME. I love everything you did with your home. It is just beautiful and relaxing.
Enjoy
Just absolutely beautiful. Your home is warm and charming.
Rhoda, I have followed your blog since nearly the beginning, and have loved every post that you share! I remember being so happy for you when you met Mark! 🙂 A match made in heaven! You both are so creative and talented and, the transformation of your home is incredible and amazing!! Thanks for sharing all of your ideas with us. Hope your sweet parents are doing well, and I love the family posts also. They remind me of my parents….. Have a continued happy life and keep blogging!
Everything looks great. I remember your other house too. I wish I had your eye and sense of adventure.
Your house just shows what one can do to a builder house when you have talent and a vision!
You and Mark together are so talented and your house shows it. It’s gorgeous and elegant now and I love it all! Not boring and blah at all and I hope that person follows you! lol
So many others said it best, your home is elegant, charming, cozy! Just so lovely.
I just bought the Ruggable Iris Apfel rug in a runner after admiring yours.
Hi Nancy, I hope you enjoy it, it’s really a pretty design!